
ssm整合
SSM项目搭建
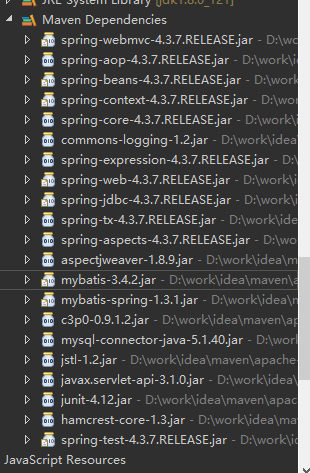
1 整合夹包:maven构建 pom.xml如下
<dependencies>

  	<dependency>
    <groupId>commons-fileupload</groupId>
    <artifactId>commons-fileupload</artifactId>
    <version>1.3.3</version>
</dependency>
<!-- https://mvnrepository.com/artifact/commons-io/commons-io -->
<dependency>
    <groupId>commons-io</groupId>
    <artifactId>commons-io</artifactId>
    <version>2.1</version>
</dependency>


  	<!-- https://mvnrepository.com/artifact/org.springframework/spring-test -->
	<dependency>
	    <groupId>org.springframework</groupId>
	    <artifactId>spring-test</artifactId>
	    <version>3.2.4.RELEASE</version>
	    <scope>test</scope>
	</dependency>

    <!-- springMVC -->
        <dependency>
            <groupId>org.springframework</groupId>
            <artifactId>spring-webmvc</artifactId>
            <version>4.3.7.RELEASE</version>
        </dependency>

        <!-- spring jdbc -->
        <dependency>
            <groupId>org.springframework</groupId>
            <artifactId>spring-jdbc</artifactId>
            <version>4.3.7.RELEASE</version>
        </dependency>

        <!-- spring aop  -->
        <dependency>
            <groupId>org.springframework</groupId>
            <artifactId>spring-aspects</artifactId>
            <version>4.3.7.RELEASE</version>
        </dependency>

        <!-- mybatis -->
        <dependency>
            <groupId>org.mybatis</groupId>
            <artifactId>mybatis</artifactId>
            <version>3.4.2</version>
        </dependency>

        <!-- mybatis与spring整合 -->
        <dependency>
            <groupId>org.mybatis</groupId>
            <artifactId>mybatis-spring</artifactId>
            <version>1.3.1</version>
        </dependency>
        <!-- 数据库连接池 和驱动-->
        <dependency>
        <groupId>c3p0</groupId>
        <artifactId>c3p0</artifactId>
        <version>0.9.1.2</version>
        </dependency>

        <dependency>
            <groupId>mysql</groupId>
            <artifactId>mysql-connector-java</artifactId>
            <version>5.1.40</version>
        </dependency>

        <!-- jstl junit servlet-api -->
        <dependency>
            <groupId>javax.servlet</groupId>
            <artifactId>jstl</artifactId>
            <version>1.2</version>
        </dependency>
            <dependency>
            <groupId>javax.servlet</groupId>
            <artifactId>javax.servlet-api</artifactId>
            <version>3.1.0</version>
            <scope>provided</scope>
            </dependency>
        <dependency>
            <groupId>junit</groupId>
            <artifactId>junit</artifactId>
            <version>4.12</version>
            <scope>test</scope>
        </dependency>

        <!-- spring单元测试 -->
        <dependency>
            <groupId>org.springframework</groupId>
            <artifactId>spring-test</artifactId>
            <version>4.3.7.RELEASE</version>
            <scope>test</scope>
        </dependency>

  </dependencies>
生成夹包结构如图:
2 spring-mybatis.xml配置
<?xml version="1.0" encoding="UTF-8"?>
<beans xmlns="http://www.springframework.org/schema/beans"
	xmlns:xsi="http://www.w3.org/2001/XMLSchema-instance"
	xmlns:context="http://www.springframework.org/schema/context"
	xmlns:tx="http://www.springframework.org/schema/tx"
	xmlns:aop="http://www.springframework.org/schema/aop"
	xsi:schemaLocation="http://www.springframework.org/schema/aop http://www.springframework.org/schema/aop/spring-aop-4.0.xsd
		http://www.springframework.org/schema/beans http://www.springframework.org/schema/beans/spring-beans.xsd
		http://www.springframework.org/schema/tx http://www.springframework.org/schema/tx/spring-tx-4.0.xsd
		http://www.springframework.org/schema/context http://www.springframework.org/schema/context/spring-context-4.0.xsd">


	<!-- 注解扫描包 -->
	<context:component-scan base-package="com.login.**.mapper"></context:component-scan>
	<context:component-scan base-package="com.login.**.services"></context:component-scan>
	<context:component-scan base-package="com.login.**.servicesimpl"></context:component-scan>


	<!-- 导入资源文件 -->
	<context:property-placeholder location="classpath:db.properties"/>

	<!-- 配置 C3P0 数据源 -->
	<bean id="dataSource"
		class="com.mchange.v2.c3p0.ComboPooledDataSource">
		<property name="user" value="${test.username}"></property>
		<property name="password" value="${test.password}"></property>
		<property name="jdbcUrl" value="${test.url}"></property>
		<property name="driverClass" value="${test.driver}"></property>

		<!-- <property name="initialPoolSize" value="${jdbc.initPoolSize}"></property>
		<property name="maxPoolSize" value="${jdbc.maxPoolSize}"></property> -->
	</bean>

	<!-- 整合mybatis -->
	<!--第1步: 创建sqlSessionFactory工厂 -->
	<bean id="sqlSessionFactory"  class="org.mybatis.spring.SqlSessionFactoryBean">
		<property name="dataSource" ref="dataSource"></property>
		<property name="configLocation" value="classpath:SqlConfig.xml"></property>
	</bean>
	<!-- 配置mybatis的代理接口开发 * 接口类名和映射文件必须同名 * 接口类和映射文件必须在同一个目     录下 * 接口的映射文件的namespace名称必须是接口的全限定名
        * 接口的方法名必须和映射的statement的id一致 -->
    <bean class="org.mybatis.spring.mapper.MapperScannerConfigurer">
        <!-- 扫描所有dao接口的实现,加入到ioc容器中  -->
        <property name="basePackage" value="com.login.mapper"></property>
        <property name="SqlSessionFactoryBeanName" value="sqlSessionFactory"></property>
    </bean>


	<!-- 配置事务 -->

	<!-- 1. 配置事务管理器 -->
	<bean id="transactionManager" class="org.springframework.jdbc.datasource.DataSourceTransactionManager">
		<property name="dataSource" ref="dataSource"></property>

	</bean>


	<!-- 2. 配置事务切入点, 以及把事务切入点和事务属性关联起来 -->
	<aop:config>
		<aop:pointcut expression="execution(* com.atguigu.spring.tx.xml.service.*.*(..))"
			id="txPointCut"/>
		<aop:advisor advice-ref="txAdvice" pointcut-ref="txPointCut"/>
	</aop:config>

	<!-- 3. 配置事务属性 -->
	<tx:advice id="txAdvice" transaction-manager="transactionManager">
		<tx:attributes>
			<!-- 根据方法名指定事务的属性 -->
			<tx:method name="purchase" propagation="REQUIRES_NEW"/>
			<tx:method name="get*" read-only="true"/>
			<tx:method name="find*" read-only="true"/>
			<tx:method name="*"/>
		</tx:attributes>
	</tx:advice>


</beans>
3 mybatis.xml配置
<?xml version="1.0" encoding="UTF-8" ?>
<!DOCTYPE configuration
  PUBLIC "-//mybatis.org//DTD Config 3.0//EN"
  "http://mybatis.org/dtd/mybatis-3-config.dtd">
<configuration>

    <!-- 别名设置 -->
  <!--   <typeAliases>
        <package name="com.ssm.model" />
    </typeAliases> -->

    <!-- mybatis分页插件 -->
   <!--  <plugins>
        <plugin interceptor="com.github.pagehelper.PageHelper"></plugin>
    </plugins> -->

</configuration>
4 spring-mvc.xml配置
<?xml version="1.0" encoding="UTF-8"?>
<beans xmlns="http://www.springframework.org/schema/beans"
	xmlns:xsi="http://www.w3.org/2001/XMLSchema-instance" xmlns:p="http://www.springframework.org/schema/p"
	xmlns:context="http://www.springframework.org/schema/context"
	xmlns:mvc="http://www.springframework.org/schema/mvc"
	xsi:schemaLocation="http://www.springframework.org/schema/beans http://www.springframework.org/schema/beans/spring-beans.xsd
        http://www.springframework.org/schema/mvc http://www.springframework.org/schema/mvc/spring-mvc-4.0.xsd
        http://www.springframework.org/schema/context http://www.springframework.org/schema/context/spring-context.xsd">

	<!-- 配置扫描包 -->

	<!-- 组件扫描 -->


	<context:component-scan base-package="com.login.web">
	</context:component-scan>

	<!-- 让处理器适配器支持json数据解 -->
	 <mvc:annotation-driven/>
		<!-- <mvc:message-converters>
			<bean
				class="org.springframework.http.converter.json.MappingJackson2HttpMessageConverter">
				<property name="supportedMediaTypes">
					<list>
						<value>application/json;charset=UTF-8</value>避免IE出现下载JSON文件的情况
					</list>
				</property>
			</bean>
		</mvc:message-converters> -->
	<!-- </mvc:annotation-driven>  -->

	<!-- 试图解析器 -->
	<bean
		class="org.springframework.web.servlet.view.InternalResourceViewResolver">
		<property name="prefix" value="/WEB-INF/jsp/" />
		<property name="suffix" value=".jsp" />
	</bean>

	<!-- 配置文件上传 -->
	<bean id="multipartResolver"
		class="org.springframework.web.multipart.commons.CommonsMultipartResolver">
		<!-- 指定文件中文名的编码 -->
		<property name="defaultEncoding" value="UTF-8" />
		<!-- 指定所上传文件的总大小,单位字节。注意maxUploadSize属性的限制不是针对单个文件,而是所有文件的容量之和 -->
		<property name="maxUploadSize" value="3145728" />
	</bean>


	<!-- 资源映射 不拦截 的 静态资源 -->
	<mvc:resources location="/" mapping="/**/*.html" />
	<mvc:resources location="/" mapping="/**/*.js" />
	<mvc:resources location="/" mapping="/**/*.css" />
	<mvc:resources location="/" mapping="/**/*.png" />
	<mvc:resources location="/" mapping="/**/*.jpg" />
	<mvc:resources location="/" mapping="/**/*.gif" />
	<mvc:resources location="/" mapping="/**/*.eot" />
	<mvc:resources location="/" mapping="/**/*.svg" />
	<mvc:resources location="/" mapping="/**/*.ttf" />
	<mvc:resources location="/" mapping="/**/*.woff" />


</beans>
5 web.xml配置
<!DOCTYPE web-app PUBLIC
 "-//Sun Microsystems, Inc.//DTD Web Application 2.3//EN"
 "http://java.sun.com/dtd/web-app_2_3.dtd" >

<web-app>
    <!-- 加载spring容器 -->
    <context-param>
        <param-name>contextConfigLocation</param-name>
        <param-value>classpath:spring-mybatis.xml</param-value>
    </context-param>

    <listener>
        <listener-class>org.springframework.web.context.ContextLoaderListener</listener-class>
    </listener>


    <!-- 字符编码过滤器 -->
    <filter>
        <filter-name>CharacterEncodingFilter</filter-name>
        <filter-class>org.springframework.web.filter.CharacterEncodingFilter</filter-class>
        <init-param>
            <param-name>encoding</param-name>
            <param-value>utf-8</param-value>
        </init-param>
    </filter>
    <filter-mapping>
        <filter-name>CharacterEncodingFilter</filter-name>
        <url-pattern>/*</url-pattern>
    </filter-mapping>


    <!-- 配置SpringMVC核心控制器 -->
    <servlet>
        <servlet-name>springDispatcherServlet</servlet-name>
        <servlet-class>org.springframework.web.servlet.DispatcherServlet</servlet-class>
        <init-param>
            <param-name>contextConfigLocation</param-name>
            <param-value>classpath:spring-mvc.xml</param-value>
        </init-param>
        <load-on-startup>1</load-on-startup>
    </servlet>


    <servlet-mapping>
        <servlet-name>springDispatcherServlet</servlet-name>
        <url-pattern>/</url-pattern>
    </servlet-mapping>


  <display-name>Archetype Created Web Application</display-name>
</web-app>
通过上面的配置 项目答题上已经配置完成 接下来就是具体逻辑的书写:
mapper层中应该定义一个接口写要用的方法, 在mappeer.xml中写相应的sql语句:
接口:
package com.login.mapper;

import java.util.List;

import org.apache.ibatis.annotations.Param;

import com.login.entity.User;

public interface UserMapper {
	/*根据id查单个用户*/
	public User findUserById(int id);

	/*查询所有的用户*/
	public List<User> findAllUsers();

	/*新增单个用户用户*/
	public void inserUser(User user);

	/*修改用户信息  传入多个参数*/
	public void updateUser(@Param("user") User user,@Param("id")int id);
	/*根据用户id 删除用户*/
	public void deleteUser(int id);

}
mapper.xml:
<?xml version="1.0" encoding="UTF-8" ?>
<!DOCTYPE mapper
PUBLIC "-//mybatis.org//DTD Mapper 3.0//EN"
"http://mybatis.org/dtd/mybatis-3-mapper.dtd">
<!-- namespace 表示命名空间 必须和 该mapper对应的接口的全路径 -->
<mapper namespace="com.login.mapper.UserMapper">

	 <resultMap type="com.login.entity.User" id="userResult">
	 	<id property="userid" column="user_id"/>
		<result property="username" column="user_name" />
		<result property="userpwd" column="user_pwd"/>

		<result property="userphone"  column="user_phone"/>

	</resultMap>


	<!-- 根据id查出User类    public User findUserById(int id); -->
	<select id="findUserById" parameterType="int" resultMap="userResult">
		SELECT 	* from   user  where user_id=#{id}
	</select>


	<!--查询所有的用户  public List<User> findAllUsers();  -->

	<select id="findAllUsers" resultMap="userResult">
		select user_id, user_name,user_pwd,user_phone from user
	</select>

	<!--  新增单个用户用户   public void inserUser(User user);-->
	<insert id="inserUser" parameterType="com.login.entity.User">
		insert into user(user_id,user_name,user_pwd,user_phone)
			values(null,#{username},#{userpwd},#{userphone})
	</insert>


	 <!-- 修改用户信息 public void updateUser(User user); -->
	 <update id="updateUser">
	 	update user set user_name=#{user.username},
	 	user_pwd=#{user.userpwd},user_phone=#{user.userphone}
				where user_id=#{id}
	 </update>

	 <!-- /*根据用户id 删除用户  public void deleteUser(int id); -->

	 <delete id="deleteUser" parameterType="int">
	 		delete from user where user_id=#{id}
	 </delete>


</mapper>
以上就是具体的dao层写法 service层将dao层注入
web层代码如下:
package com.login.web;

import java.util.List;

import javax.servlet.http.HttpServletRequest;

import org.springframework.beans.factory.annotation.Autowired;
import org.springframework.stereotype.Controller;
import org.springframework.ui.Model;
import org.springframework.web.bind.annotation.RequestMapping;

import com.login.entity.User;
import com.login.services.UserServices;

@Controller
public class UserServlet {
	@Autowired
	private UserServices userServices;

	/*根据id查单个用户*/
	@RequestMapping("/findUserById")
	public User findUserById(int id){
		User user=userServices.findUserById(id);
		return user;
	}


	/*查询所有用户的信息*/
	@RequestMapping("/findAllUsers")
	public String findAllUsers(Model mode) {
		List<User> list=userServices.findAllUsers();
		mode.addAttribute("list",list);
		return "userMessage";
	}

	/*新增单个用户用户*/
	@RequestMapping("/inserUser")
	public String  inserUser(HttpServletRequest request){
		String username=request.getParameter("username");
		String userpwd=request.getParameter("userpwd");
		String userphone=request.getParameter("userphone");
		User user=new User(username, userpwd, userphone);
		userServices.inserUser(user);
		return "start";
	}

	/*修改用户信息*/
	@RequestMapping("/updateUser")
	public void updateUser(User user,int id){
		userServices.updateUser(user, id);
	}
	/*根据用户id 删除用户*/
	@RequestMapping("/deleteUser")
	public String deleteUser(int id){
		userServices.deleteUser(id);
		return "userMessage";
	}

}
前端界面:
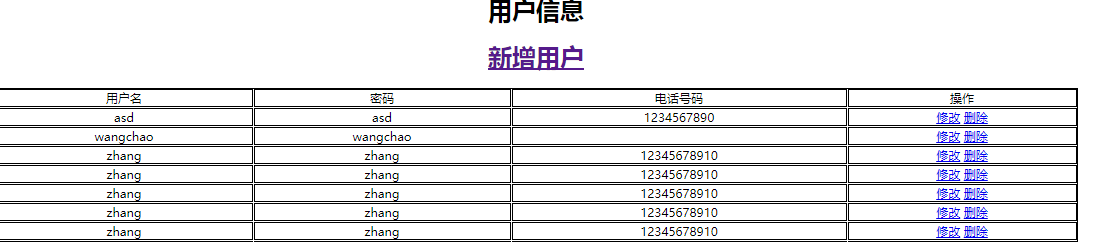
上面只是简单实现了ssm框架的整合,实现了增删改查操作,没有考虑相关的校验。
mybatis分页
1 导入mybatis分页夹包 pagehelper-4.1.5.jar
2 mybatis配置分页
<plugins>
<plugin interceptor="com.github.pagehelper.PageHelper"></plugin>
</plugins>
3 分页控制层编写
4 前台分页jstl方式显示
	@RequestMapping("/userInfo")
    public String getUsers(@RequestParam(value="pn",defaultValue="1")Integer pn,Model model){
        //从第一条开始 每页查询五条数据
        PageHelper.startPage(pn, 5);
        List<User> list=userServices.findAllUsers();
        //将用户信息放入PageInfo对象里
        PageInfo page = new PageInfo(list,5);

        model.addAttribute("pageInfo", page);
        System.out.println(page);
        return "pagelist";
    }
 <c:forEach items="${pageInfo.list }" var="user11">

   <div>${user11.userid }ddd</div>
   <div>${user11.username }name</div>
 </c:forEach>


        <!-- 分页文字信息,其中分页信息都封装在pageInfo中 -->
            <div class="col-md-6">
                当前第:${pageInfo.pageNum}页,总共:${pageInfo.pages}页,总共:${pageInfo.total}条记录
            </div>


            <div class="col-md-6">
                <nav aria-label="Page navigation">
                  <ul class="pagination">
                    <li><a href="${pageContext.request.contextPath}/userInfo?pn=1">首页</a></li>
                    <c:if test="${pageInfo.hasPreviousPage }">
                         <li>
                          <a href="${pageContext.request.contextPath}/userInfo?pn=${pageInfo.pageNum-1}" aria-label="Previous">
                            <span aria-hidden="true">«前一夜</span>
                          </a>
                        </li>
                    </c:if>


                    <c:forEach items="${pageInfo.navigatepageNums }" var="page_Num">

                        <c:if test="${page_Num == pageInfo.pageNum }">
                            <li class="active"><a href="#">${ page_Num}</a></li>
                        </c:if>
                        <c:if test="${page_Num != pageInfo.pageNum }">
                            <li><a href="${pageContext.request.contextPath}/userInfo?pn=${ page_Num}">${ page_Num}</a></li>
                        </c:if>
                    </c:forEach>
                    <c:if test="${pageInfo.hasNextPage }">
                        <li>
                          <a href="${pageContext.request.contextPath}/userInfo?pn=${pageInfo.pageNum+1}" aria-label="Next">
                            <span aria-hidden="true">»后一页</span>
                          </a>
                        </li>
                    </c:if>
                    <li><a href="${pageContext.request.contextPath}/userInfo?pn=${pageInfo.pages}">末页</a></li>
                  </ul>
                </nav>
            </div>
</body>
注意:
1 Autowired注入的(通常)是接口
2 在测试的时候需要先将配置文件加载进来才能实例化对象,才能调用方法 对于spring可以采用下面方式加载配置文件
@RunWith(SpringJUnit4ClassRunner.class)
@ContextConfiguration(locations={"classpath:SqlConfig.xml","classpath:spring-mybatis.xml" })
3 在spring-mvc 配置中 需要有适配器 /应摄器 不然进不了requestMapping 中
4 resultMap的用法 resultType要求数据库字段和属性名相同 不然赋不了值
解决编译问题
  <!-- <plugins>

			java编译插件 jkd1.8
			<plugin>
				<groupId>org.apache.maven.plugins</groupId>
				<artifactId>maven-compiler-plugin</artifactId>
				<version>3.2</version>
				<configuration>
					<source>1.8</source>
					<target>1.8</target>
					<encoding>UTF-8</encoding>
				</configuration>
			</plugin>
		</plugins> -->

 浙公网安备 33010602011771号