nginx模块lnmp架构
目录
一:关于lnmp架构
	l	Linux
	n   Nginx
	m   MySQL
	p   Python/PHP
二:目录索引模块
1.目录索引模块内容
		 开启目录索引(默认启用)
		autoindex on;
		格式化文件大小
		autoindex_exact_size off;
		输出的格式
		autoindex_format html;
		使用时区
		autoindex_localtime on;
1.开启目录索引(创建模块文件)
[root@web01 ~]# cd /etc/nginx/conf.d/
创建模块配置文件
[root@web01 conf.d]# vim autoindex.conf
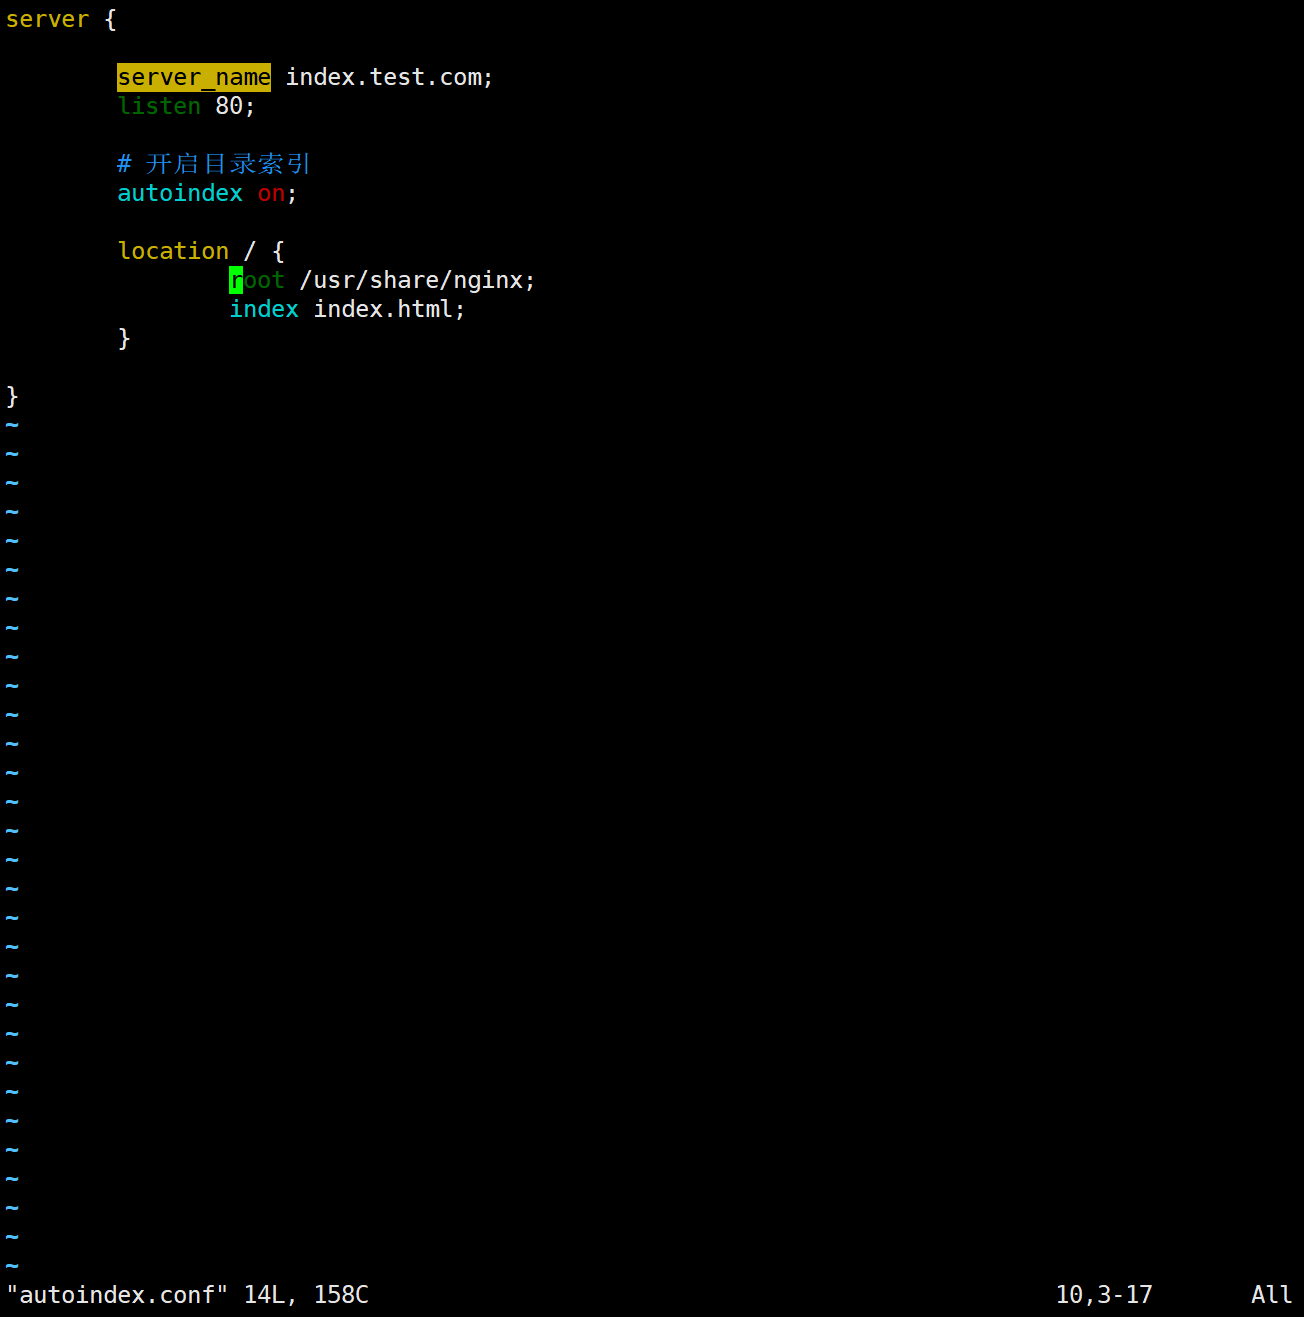
server {


	server_name index.test.com;
	listen 80;
	# 开启目录索引
	autoindex on;


	location / {
		root /usr/share/nginx;
		index index.html;
	}

}
2.测试
nginx -t
3.重启nginx
[root@web01 conf.d]# systemctl restart nginx
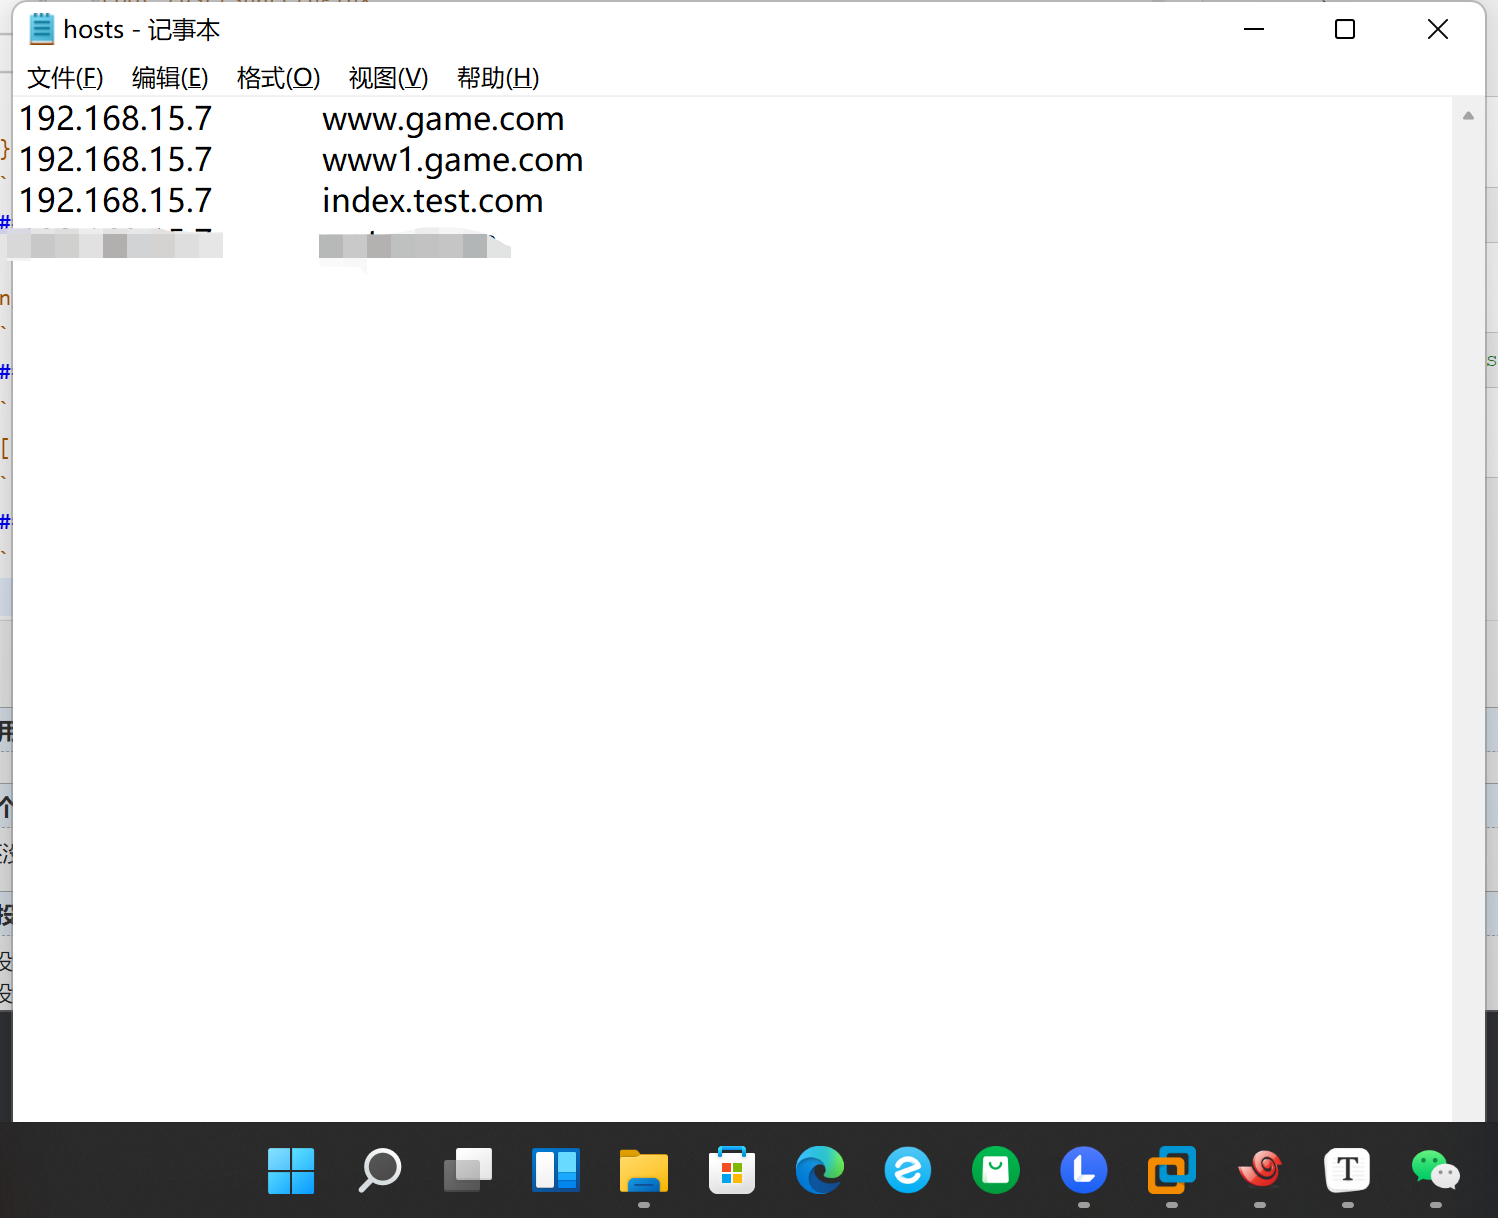
4.配置域名解析DNS
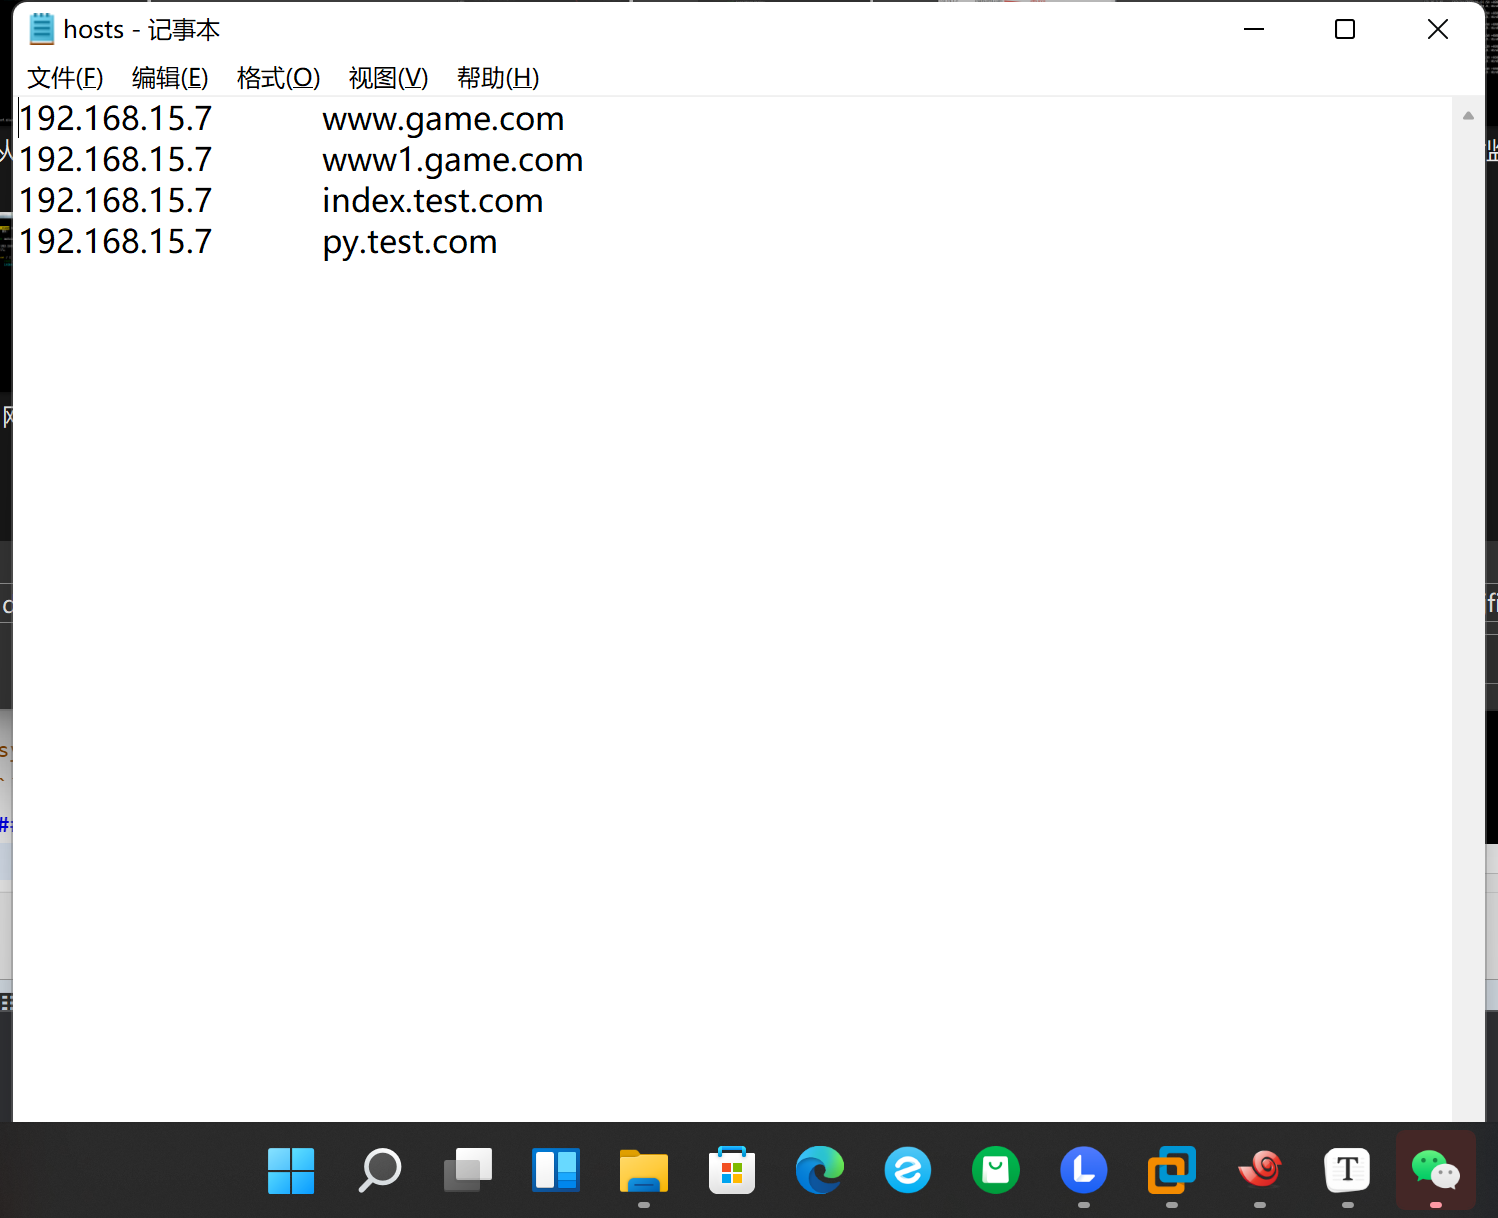
192.168.15.7 index.test.com
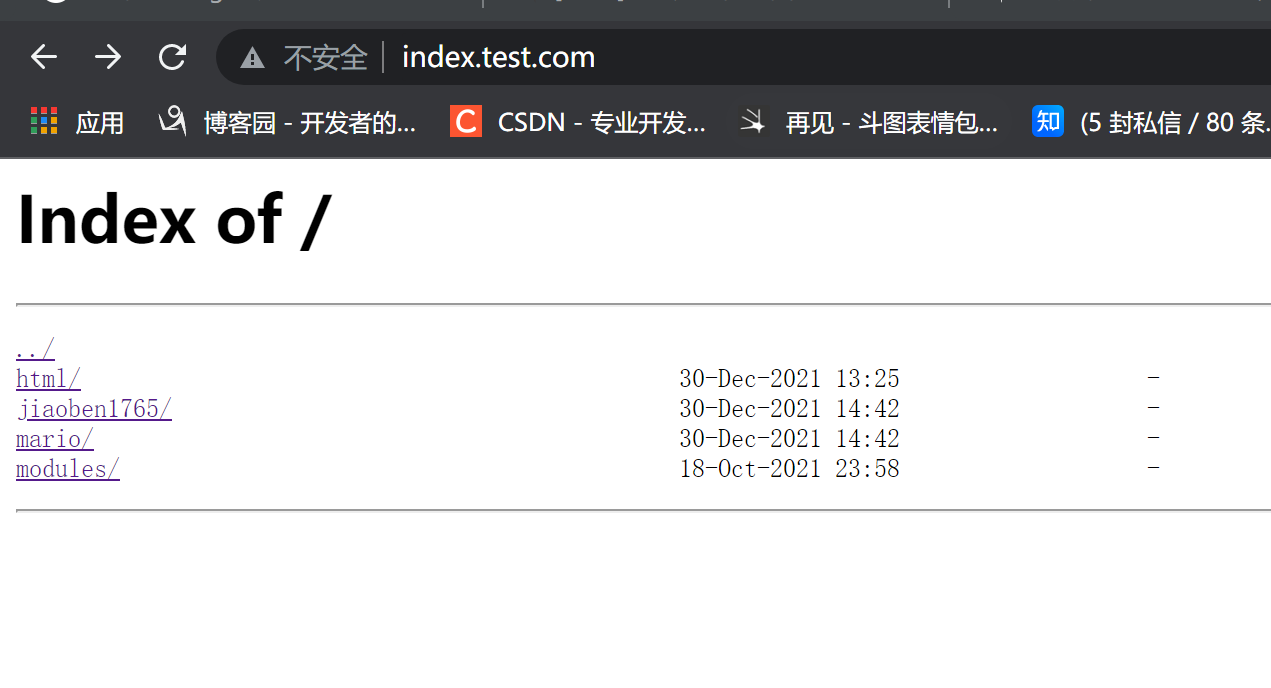
5.网址测试
index.test.com

二:目录索引(格式化文件大小)
1.家路径下<游戏压缩包>移动到指定网址路径
[root@web01 ~]# cp *.zip /usr/share/nginx/
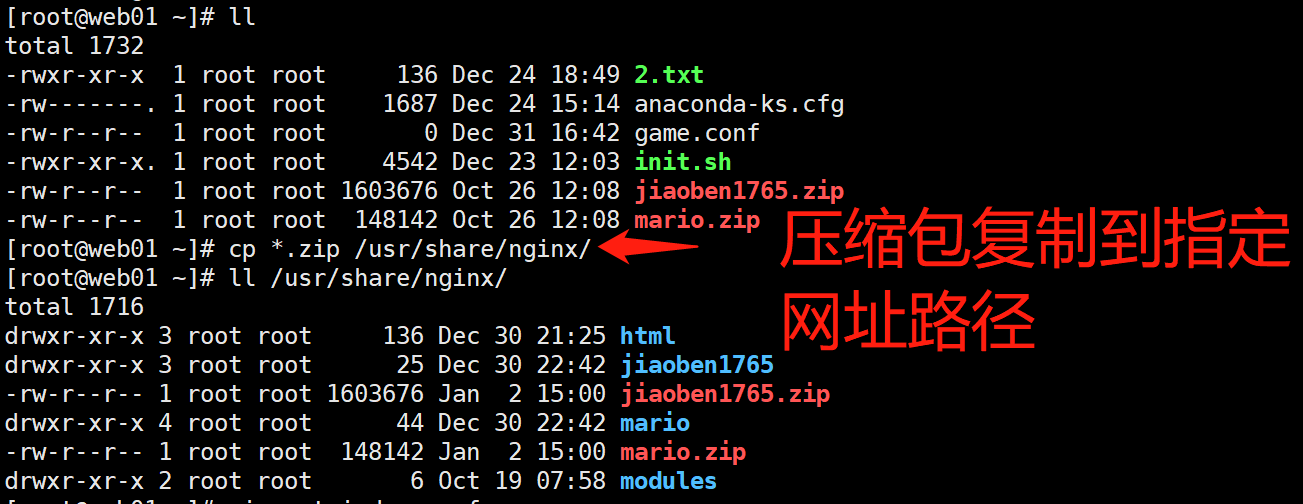
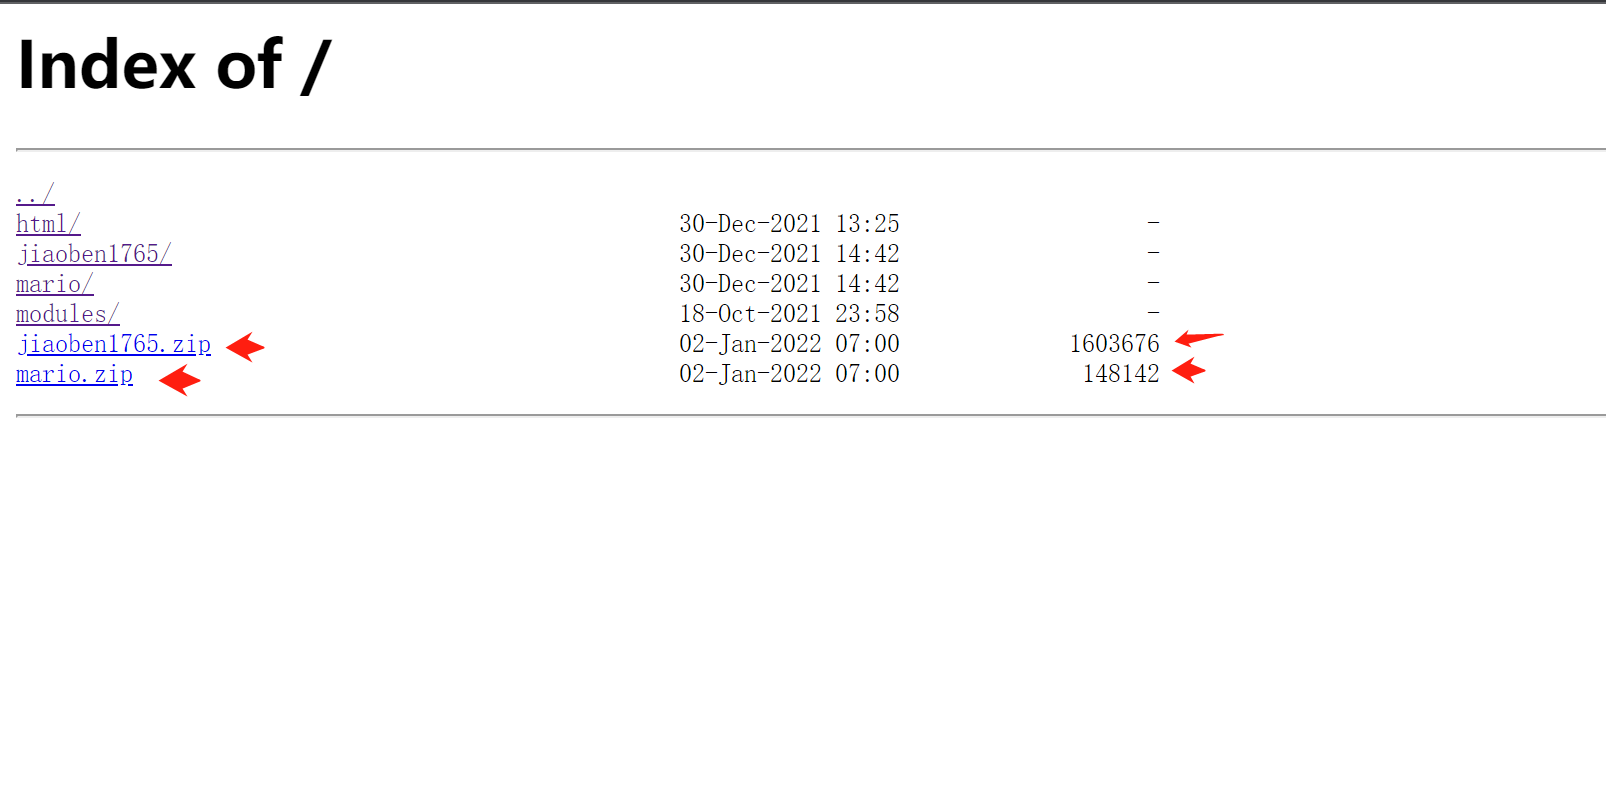
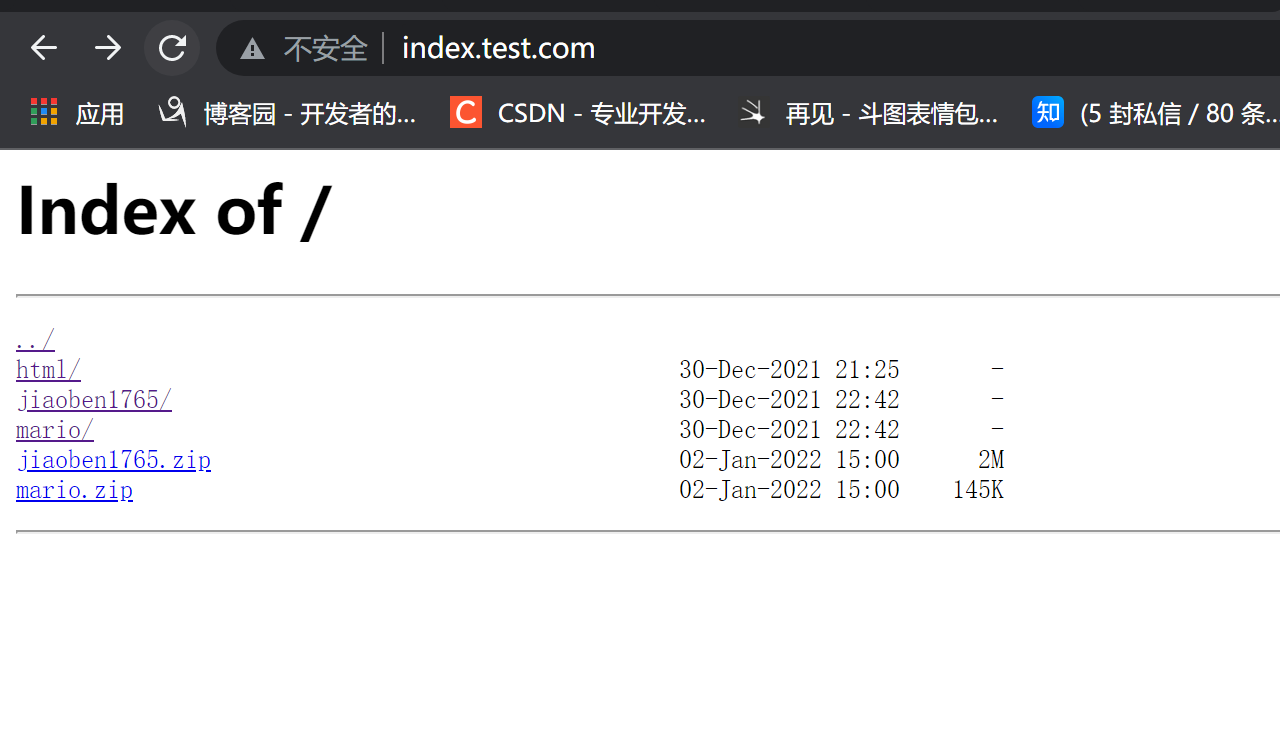
2.查看网址
http://index.test.com/
3.修改配置文件
[root@web01 ~]# vim /etc/nginx/conf.d/autoindex.conf
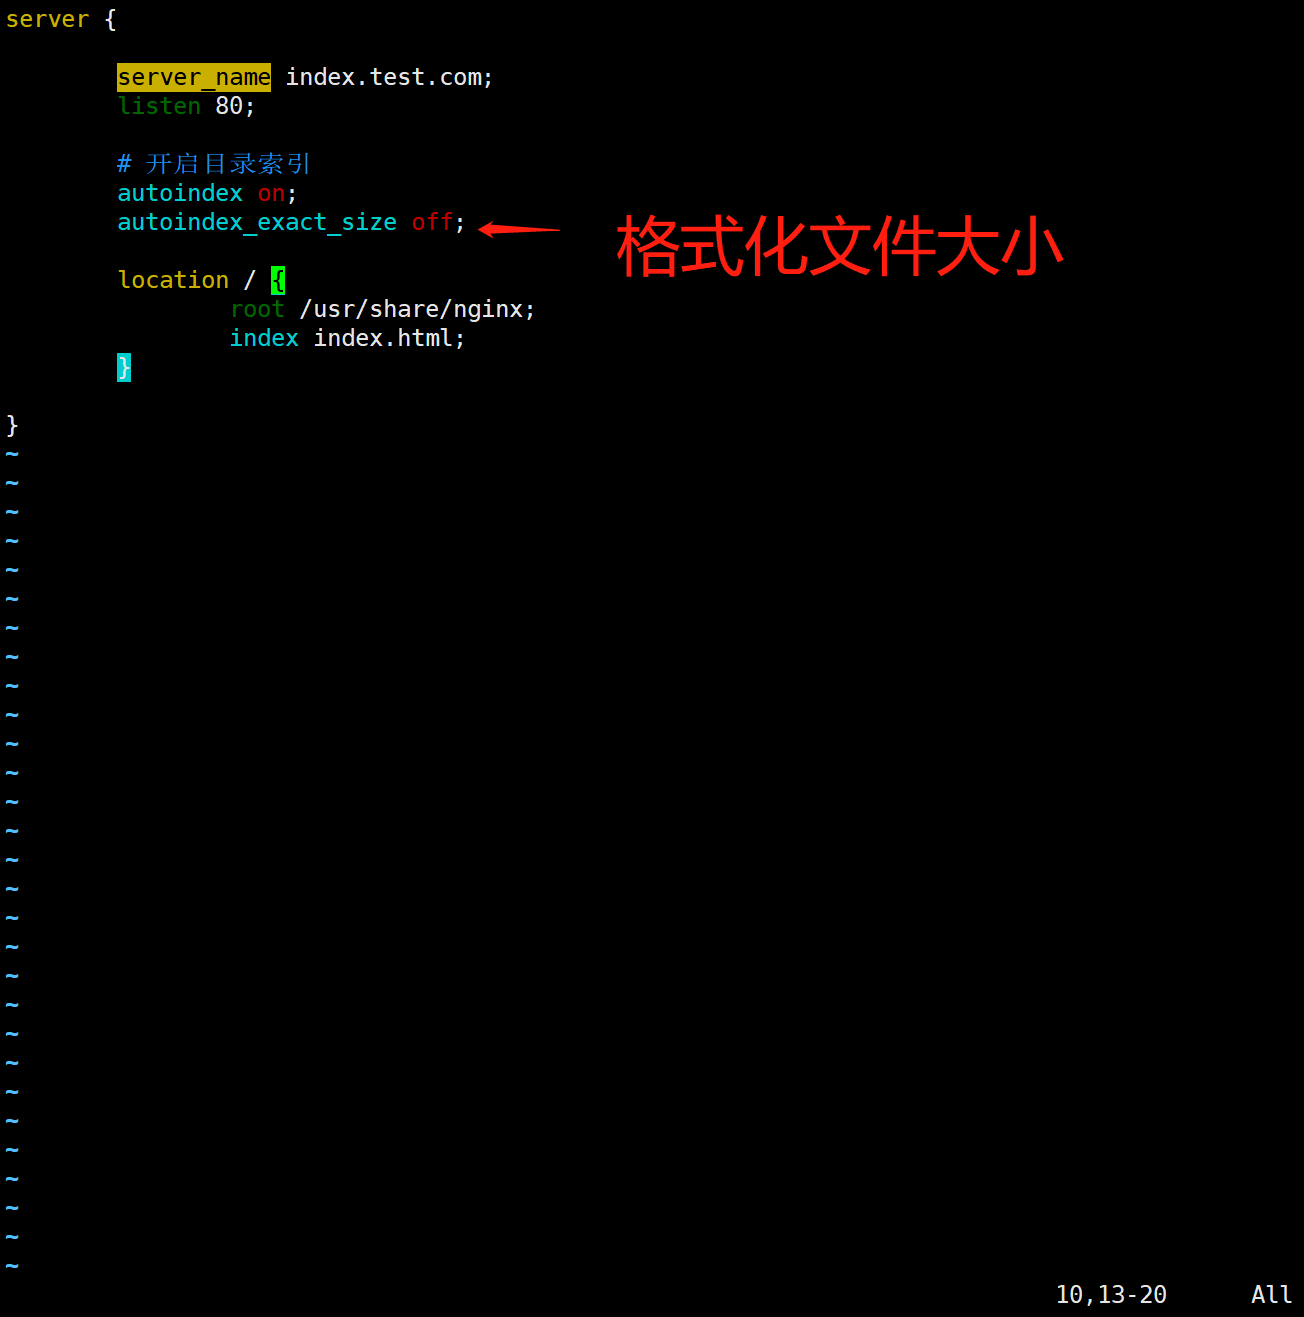
autoindex_exact_size off;
4.测试
nginx -t
5.重启
systemctl restart nginx
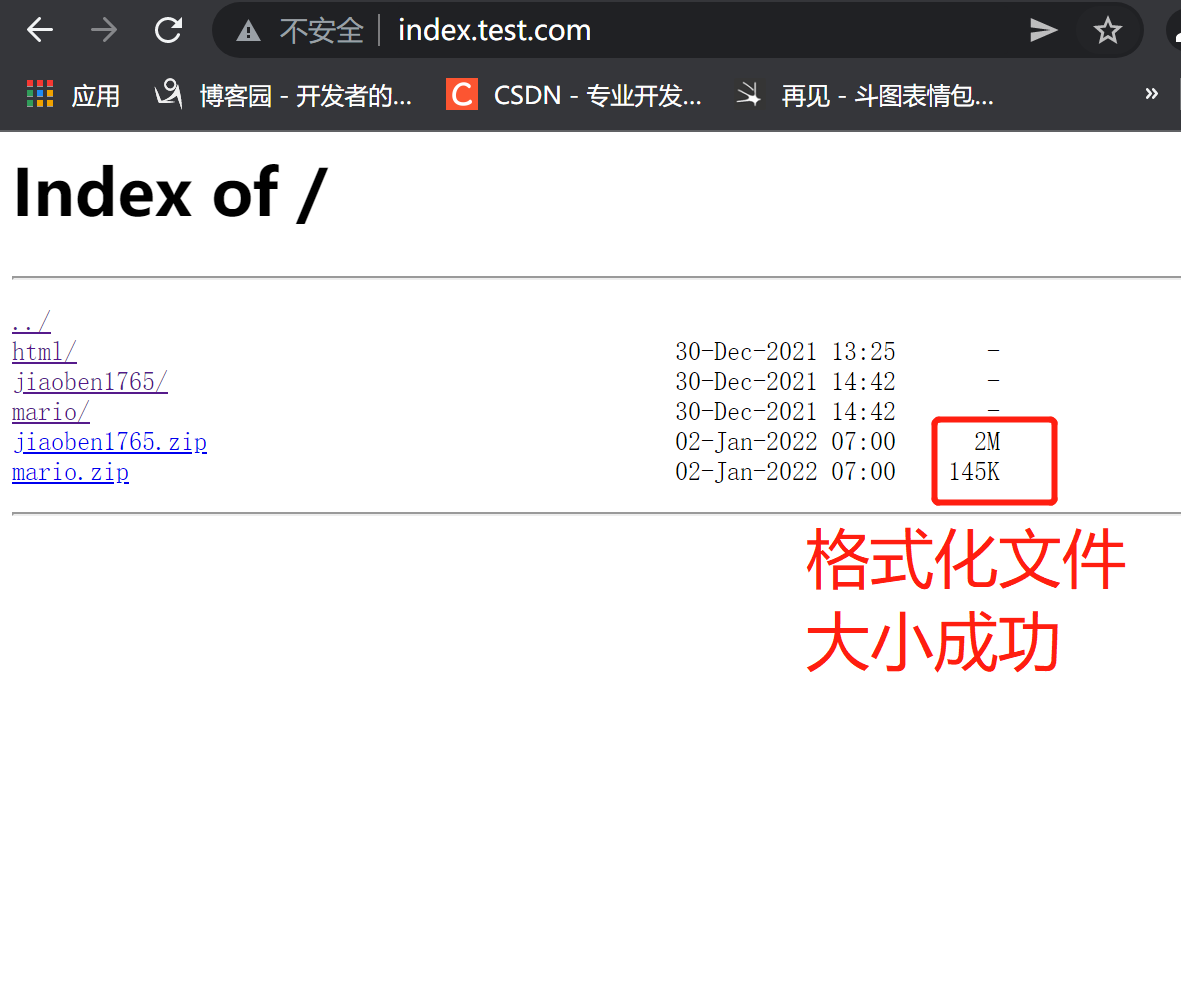
6.网址测试
http://index.test.com/
三:目录索引(格式化输出)
- 简介
1.模块
autoindex_format html;

默认html; 格式

可自定制格式

2.格式选择
html | xml | json | jsonp;
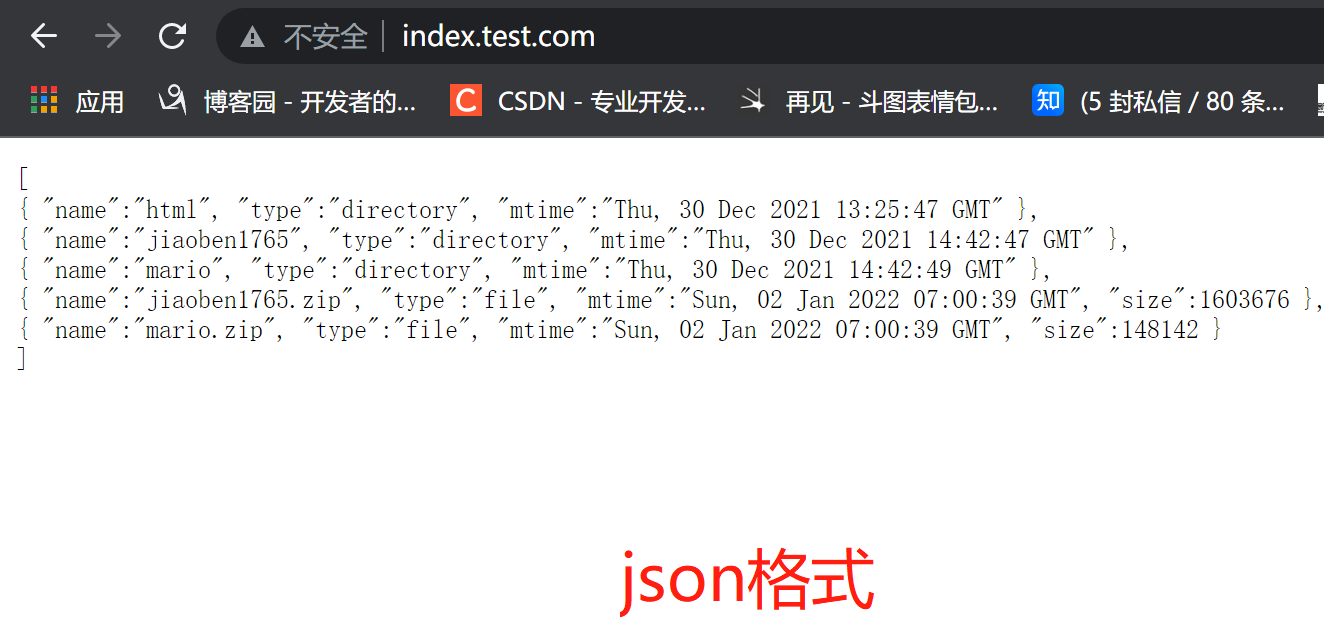
1.设置格式(json)
[root@web01 ~]# vim /etc/nginx/conf.d/autoindex.conf
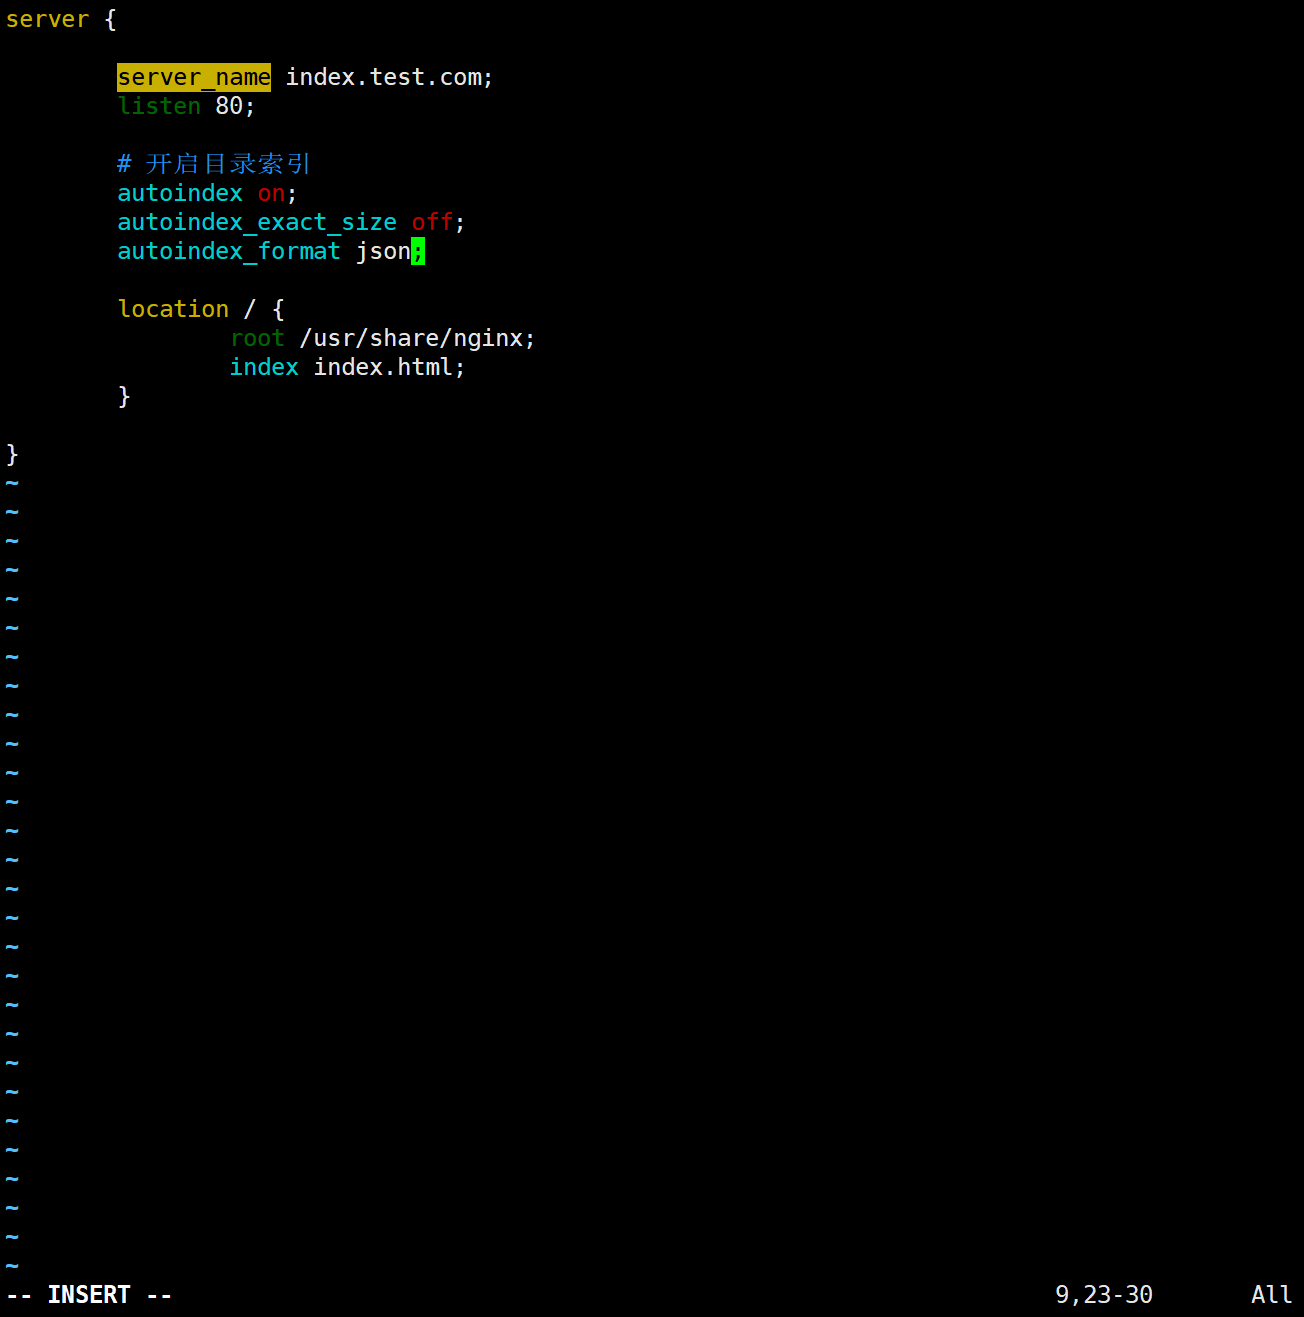
autoindex_format json;
2.测试
nginx -t
3.重启
systemctl restart nginx
4.测试网址
http://index.test.com/
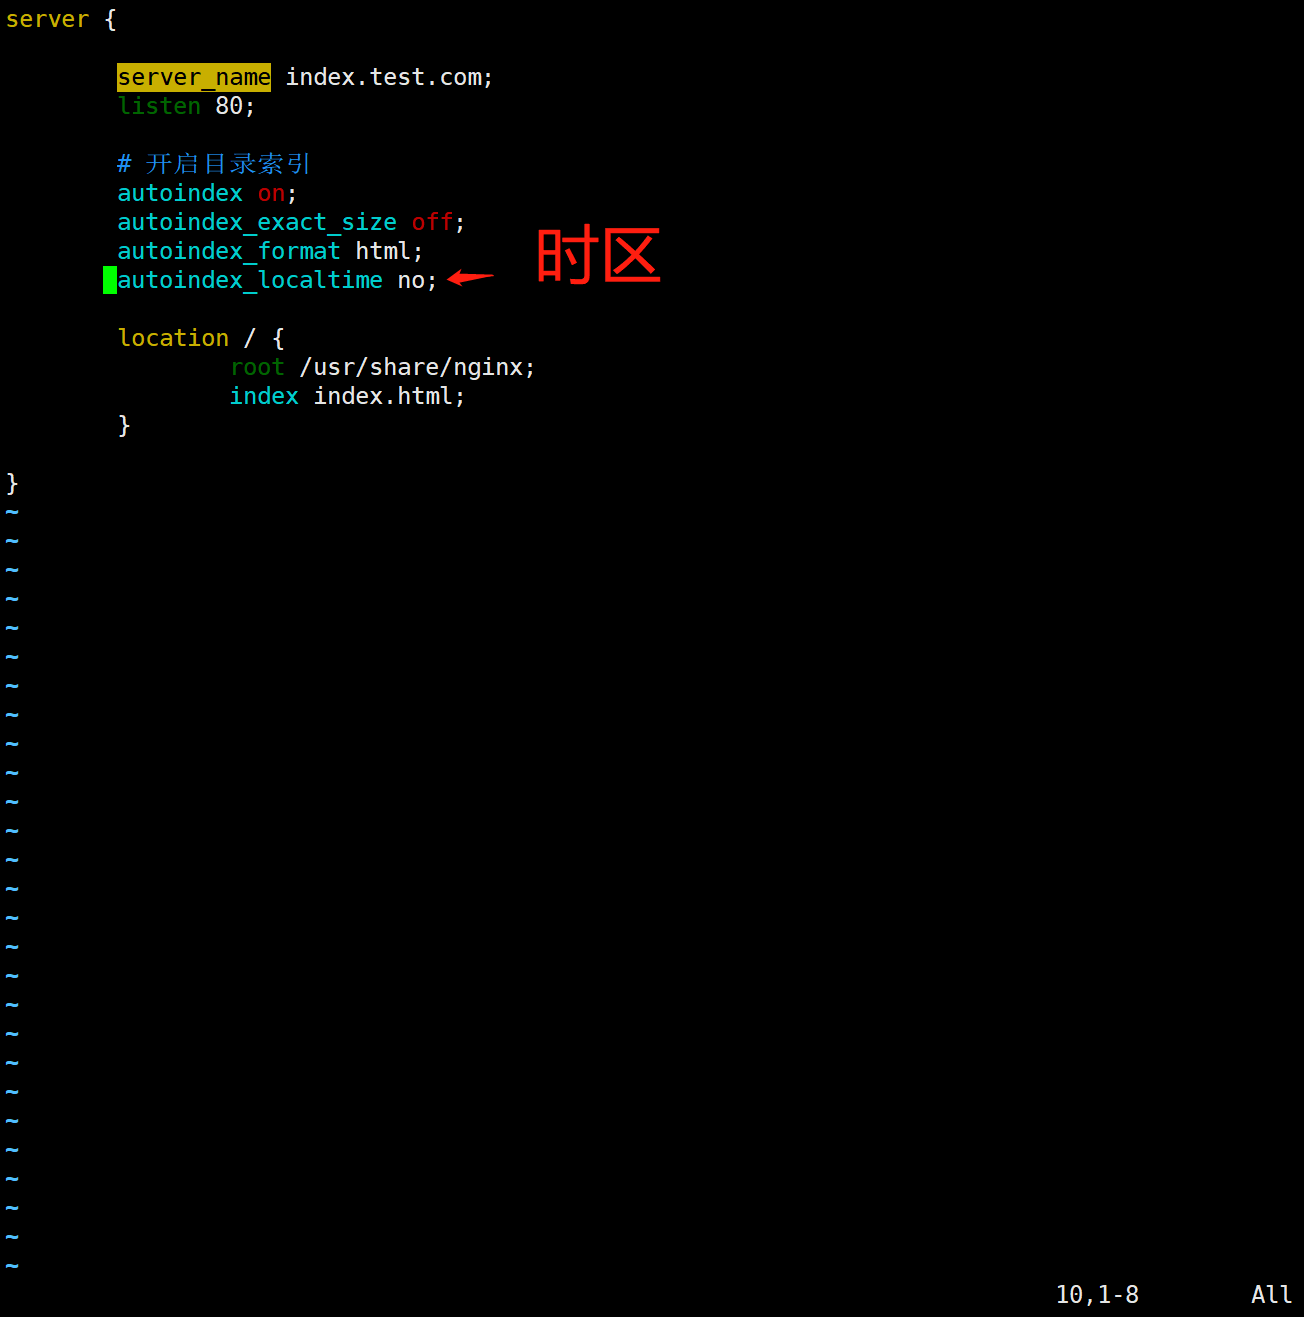
四:目录索引(时区模块)
- 简介
 使用时区
autoindex_localtime on | off
默认是UTC时区 网址时间慢8小时 所以需要使用时区改成北京时间
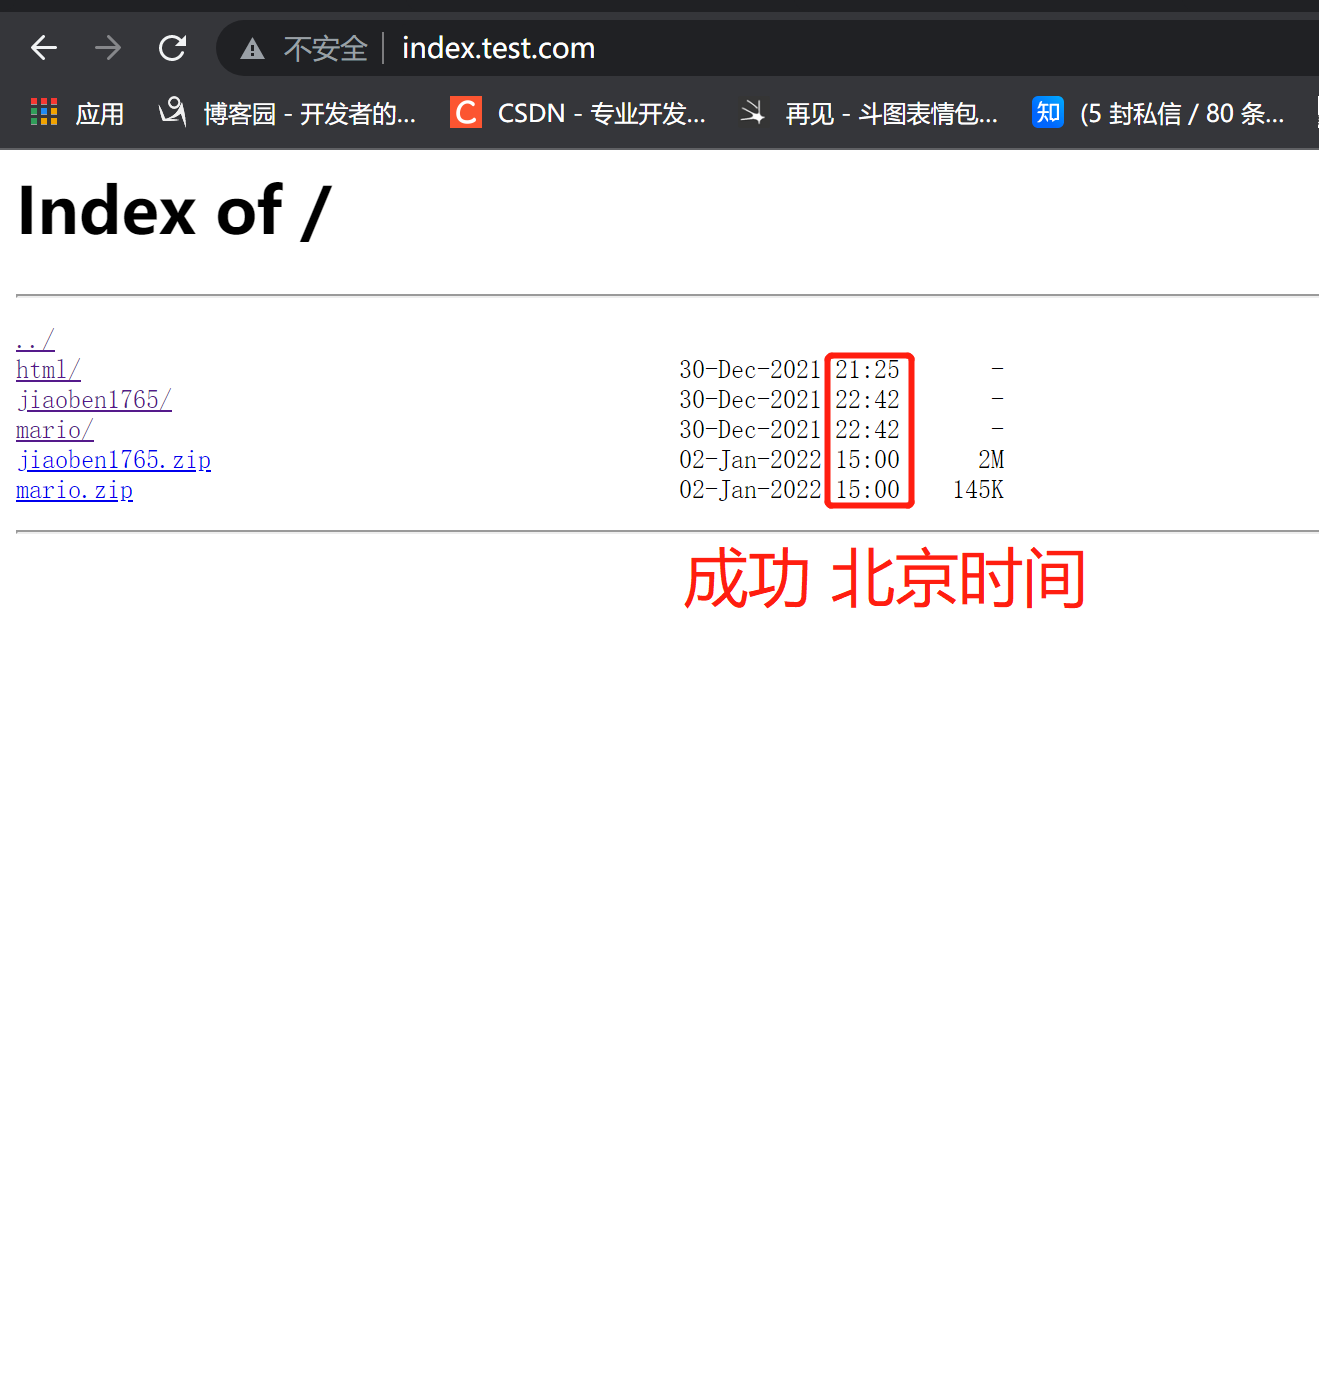
1.修改模块配置文件
[root@web01 ~]# vim /etc/nginx/conf.d/autoindex.conf
autoindex_localtime on;
2.测试
nginx -t
3.重启
systemctl restart nginx
4.测试网址
http://index.test.com/
五:讲目录索引模块(模块全面定义到全局)
定义模块到全局配置 这样可以全局有效
不用每次都填写
1.创建目录
[root@web01 ~]# cd /etc/nginx

创建目录
[root@web01 nginx]# vim autoindex_params
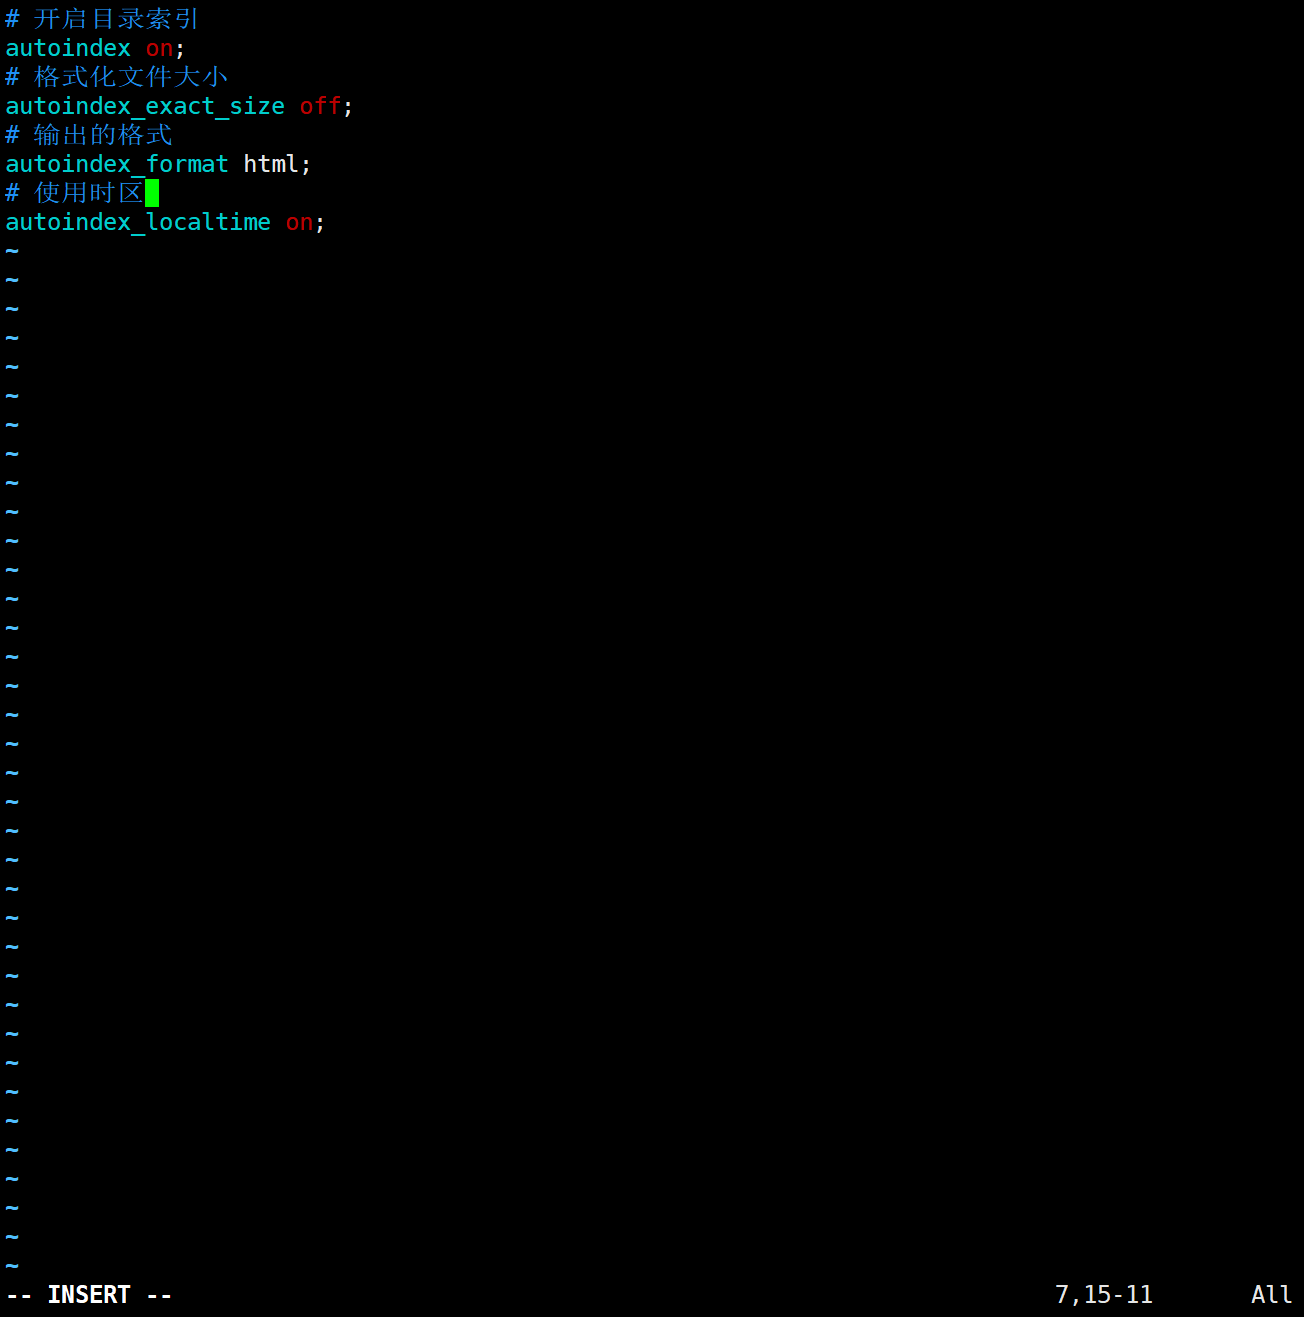
# 开启目录索引
autoindex on;
# 格式化文件大小
autoindex_exact_size off;
# 输出的格式
autoindex_format html;
# 使用时区
autoindex_localtime on;
2.修改网址模块
全局定义后 原本的网址模块文件内的模块就可以进行删除并直接调用 nginx 全局定义内模块的文件(autoindex_params)了
3.测试
nginx -t
4.重启
systemctl restart nginx
5.网址运行
http://index.test.com/
六:Nginx认证模块
		Syntax:	auth_basic string | off;	如果跟string,就代表开启。
		Default:
		auth_basic off;
		Context:	http, server, location, limit_except

	    Syntax:	auth_basic_user_file file;
        Default:	—
        Context:	http, server, location, limit_except
1.认证模块(htpasswd)先下载
yum install httpd-tools -y
2.设置用户名和密码
[root@web01 ~]# cd /etc/nginx/
设置用户名密码 配置加密
[root@web01 conf.d]# htpasswd -c /etc/nginx/auth zhanglulu

3.查看存储密码文件
[root@web01 conf.d]# cd /etc/nginx/
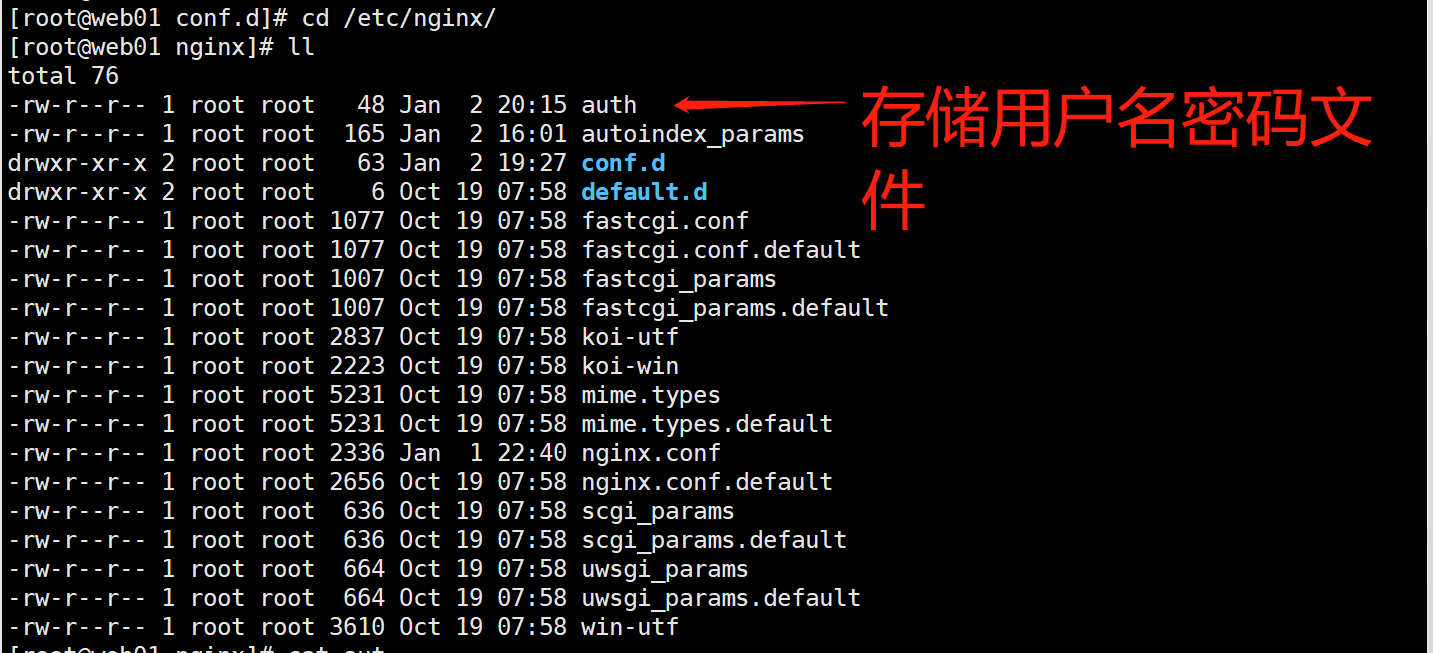
4.创建网址模块文件并修改
将用户密码存储文件 添加到模块文件中
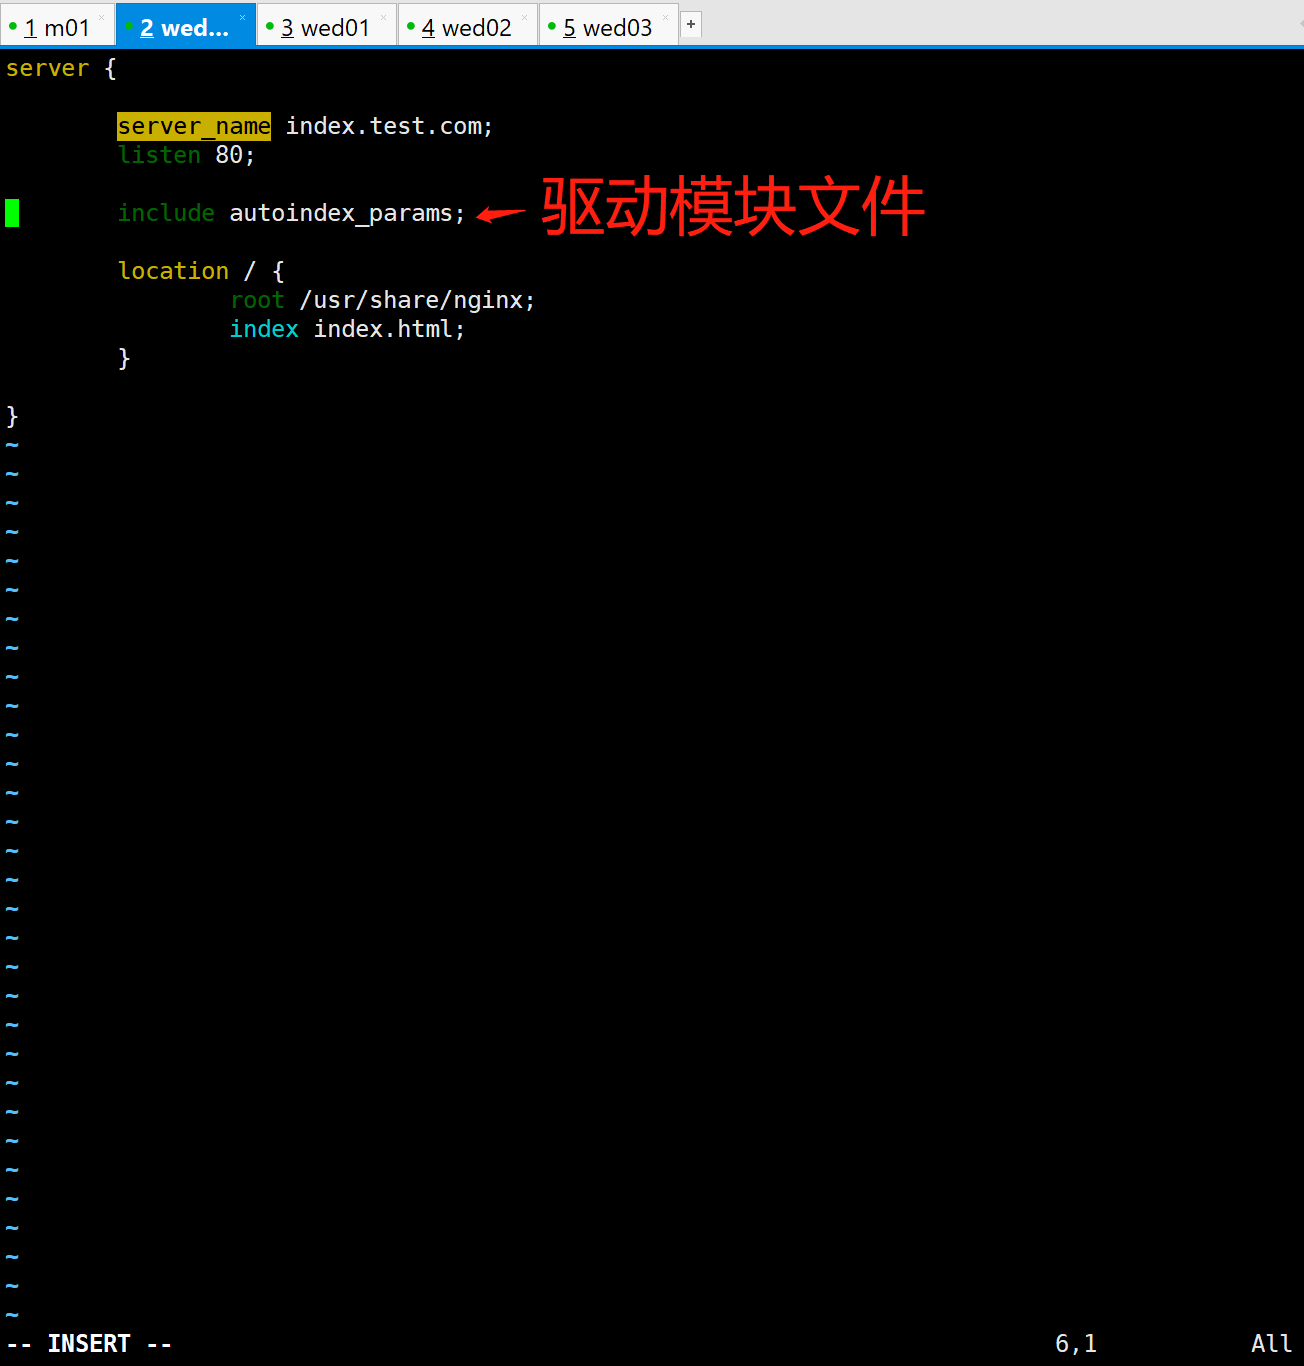
[root@web01 ~]# vim /etc/nginx/conf.d/autoindex.conf
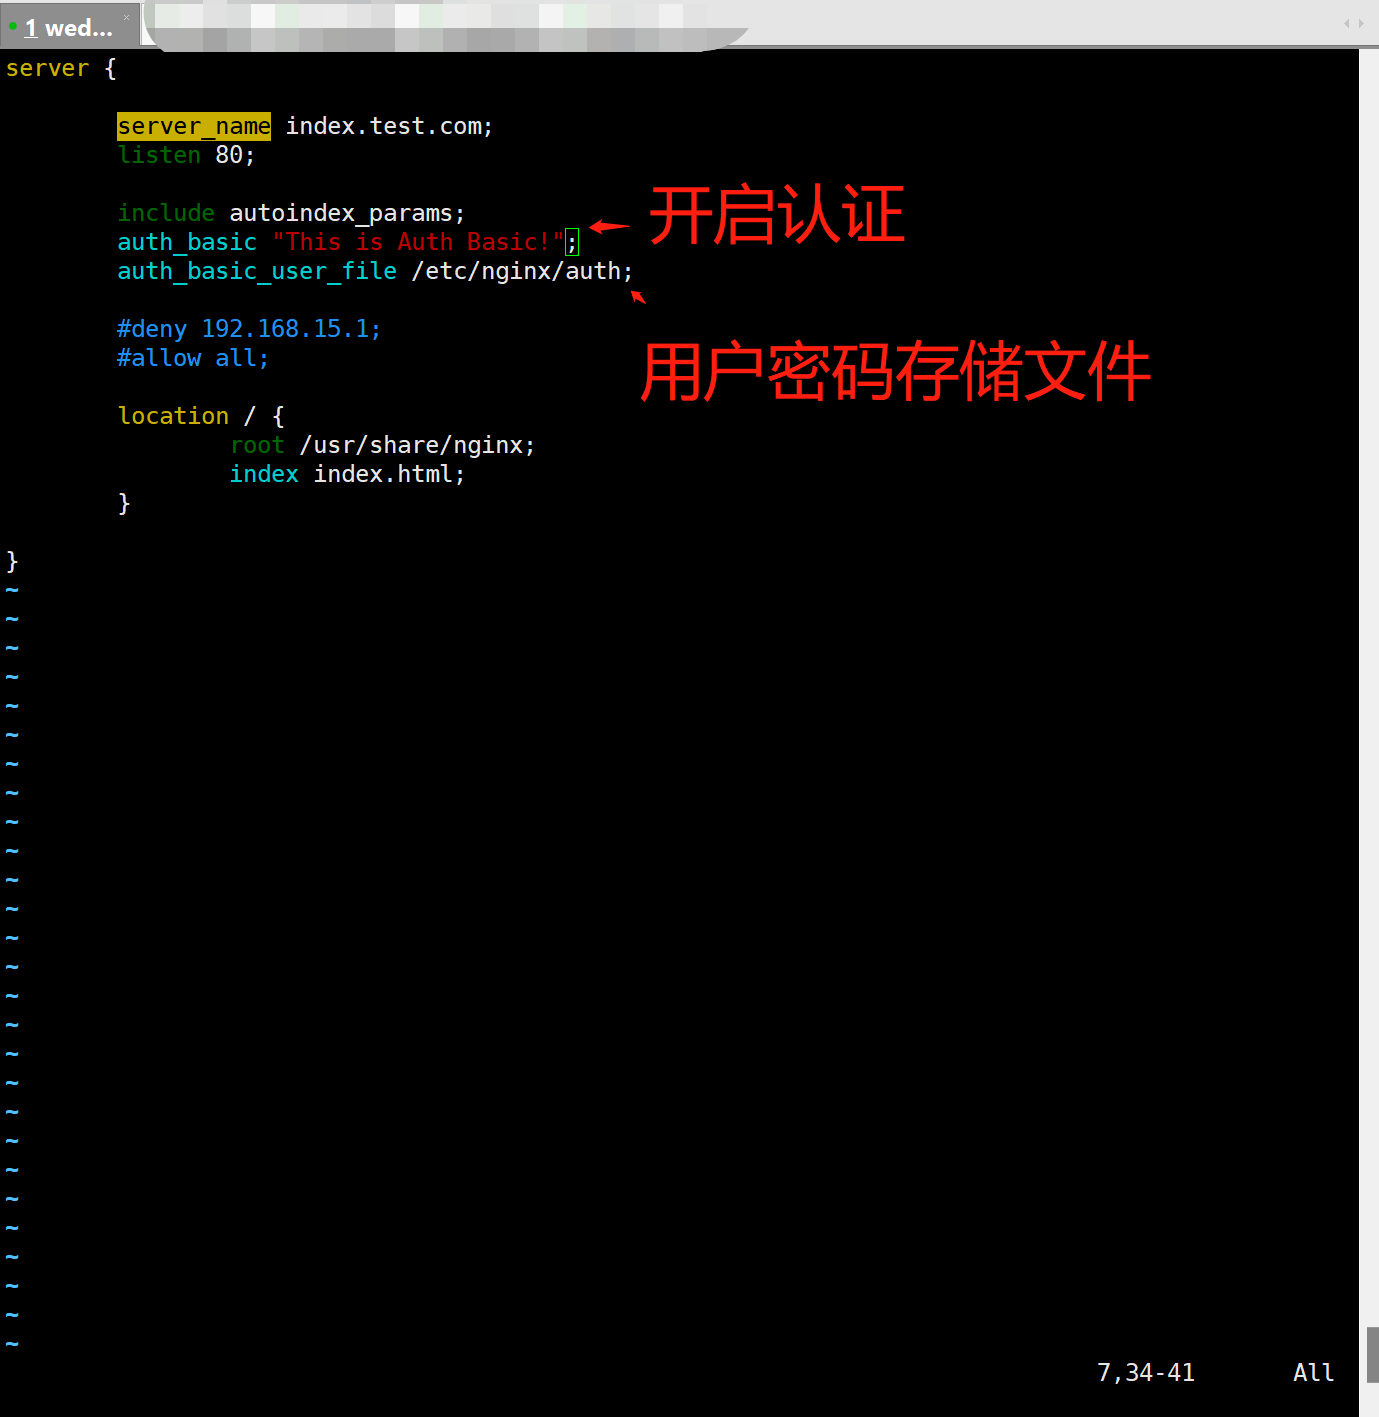
server {
server_name index.test.com;
listen 80;
include autoindex_params;
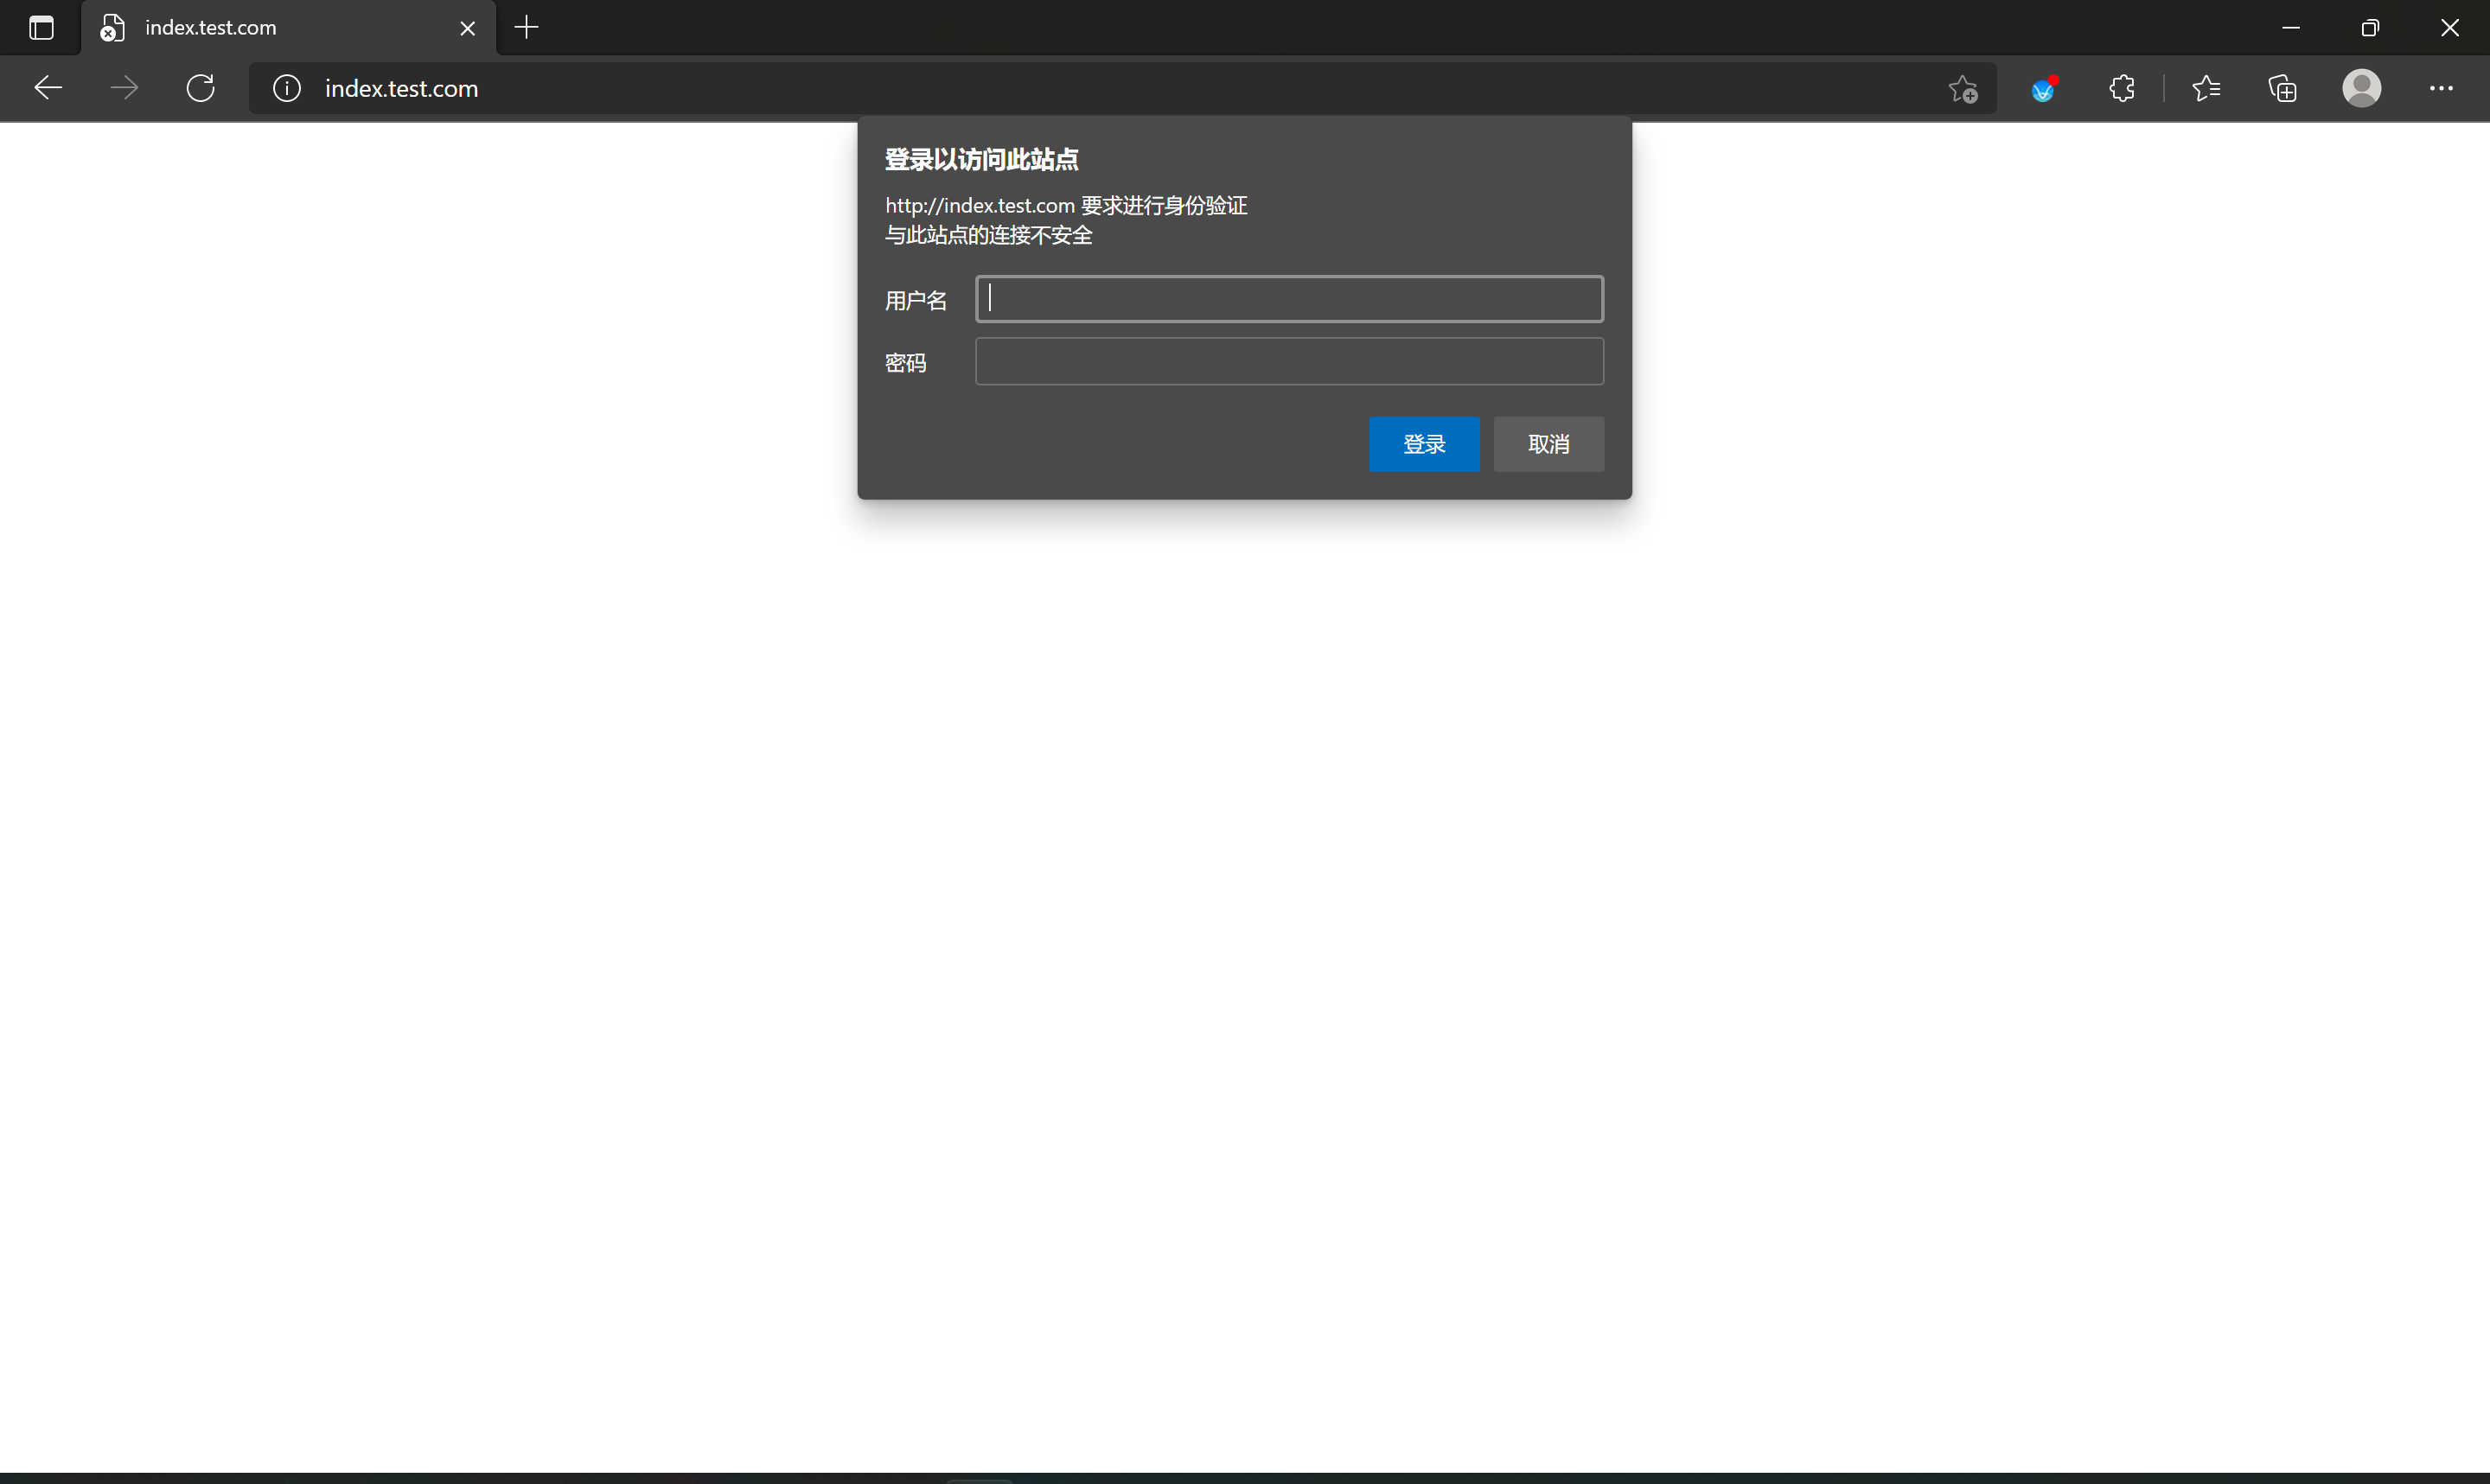
auth_basic "This is Auth Basic!";
auth_basic_user_file /etc/nginx/auth;
location / {
root /usr/share/nginx;
index index.html;
}
}
5.测试
nginx -t
6.重启
systemctl restart nginx
7.设置DNS解析域名
192.168.15.7 index.test.com
8.测试网址认证用户密码
http://index.test.com/
9.在命令行中的访问方式
[root@m01 ~]# curl -H'Host: index.test.com' http://cehngyang:123456@192.168.15.7
七:Nginx状态模块
1.修改网址模块
[root@web01 ~]# vim /etc/nginx/conf.d/autoindex.conf
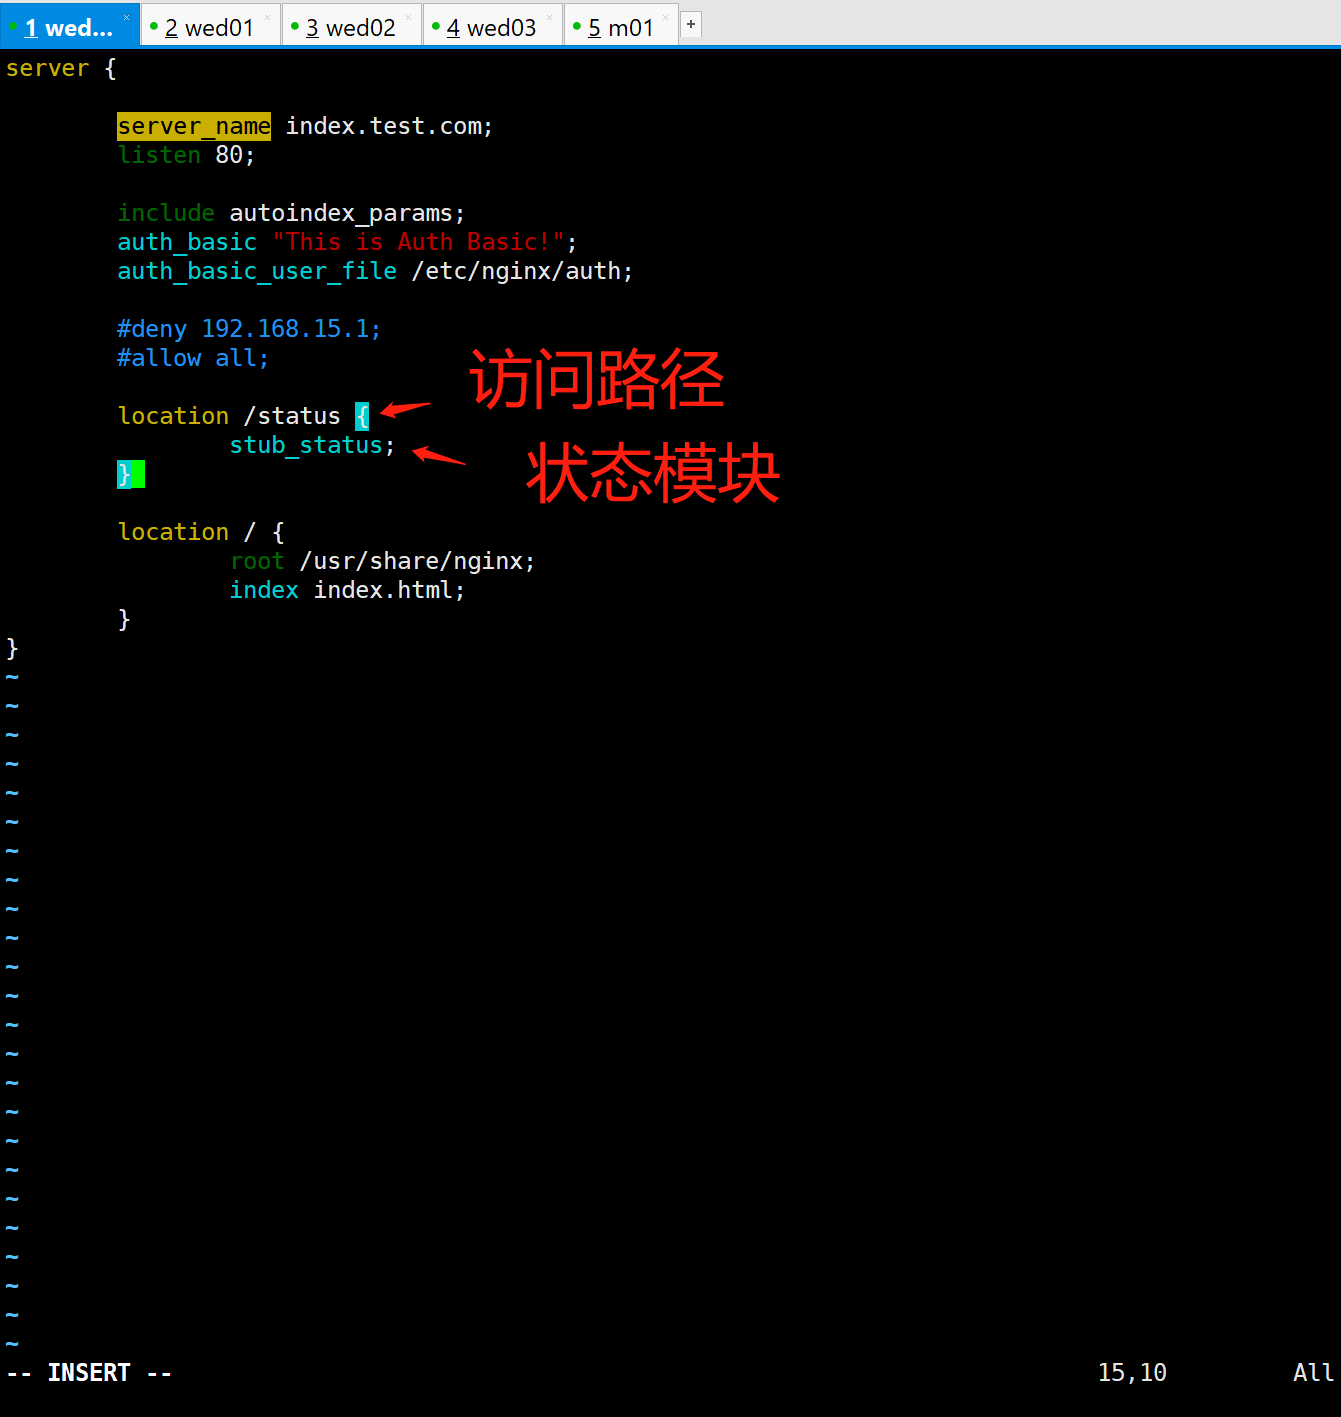
server {

	server_name index.test.com;
	listen 80;

	include autoindex_params;
	auth_basic "This is Auth Basic!";
	auth_basic_user_file /etc/nginx/auth;

	location /status {
		stub_status;
	}


	location / {
		root /usr/share/nginx;
		index index.html;
	}
}
2.测试
nginx -t
3.重启
systemctl restart nginx
4.网址测试
index.test.com/status

* 目前程序开启的是短链接

长连接与短连接原理:

短连接的原理:
客户端连接--创建socket认证连接--维护连接--数据传输--关闭连接            #连接-》数据传输-》关闭连接;

长连接的原理:
客户端连接--创建socket认证连接--维护连接--数据传输--维护连接--数据传输.....-关闭连接    #连接-》数据传输-》保持连接-》数据传输-》保持连接-》…………-》关闭连接;
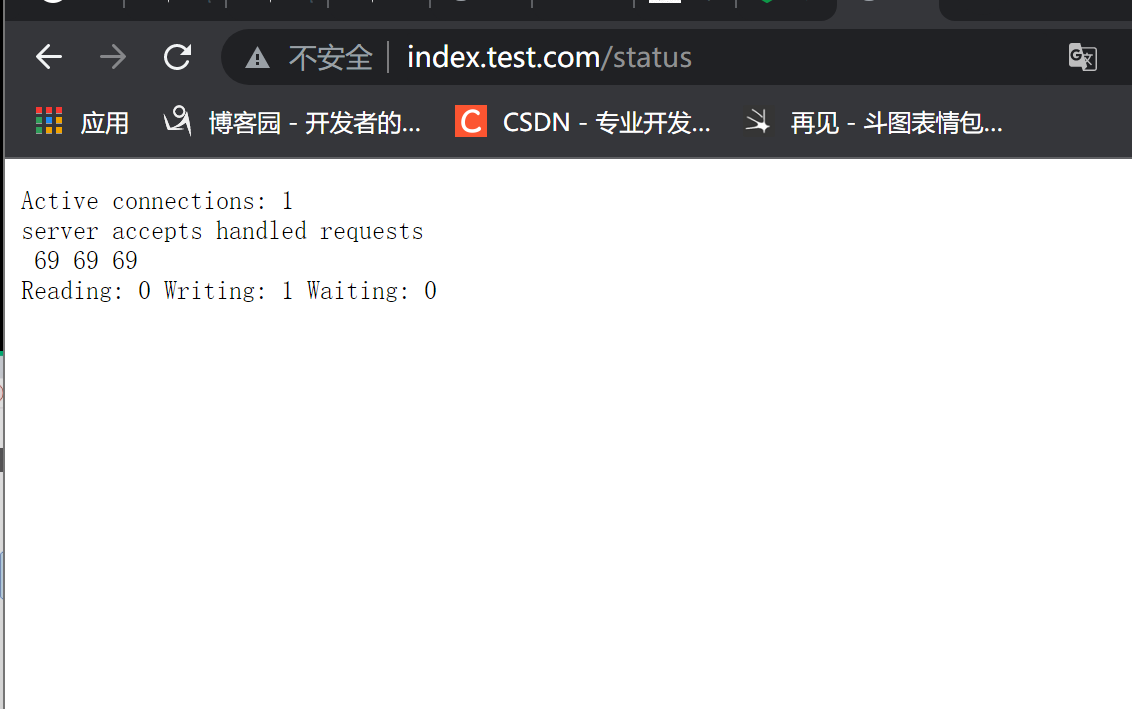
状态信息

Active connections	: 当前活动客户端连接数,包括Waiting连接数。

accepts			   : 接受的客户端连接总数。

handled			   : 处理的连接总数。通常,accepts 除非达到某些资源限制(例如,worker_connections限制),否则 该参数值是相同的。

requests		   : 客户端请求的总数。

Reading			   : nginx 正在读取请求头的当前连接数。

Writing			   : nginx 将响应写回客户端的当前连接数。

Waiting			   : 当前等待请求的空闲客户端连接数。
八:限制ip访问模块
- 简介
当计算机受到黑客攻击时,网址如果打不开时,因为网址被访问的太多次,导致我的请求变慢,所以用到了限制访问
1.禁用IP和开放IP访问
		allow	: 允许IP访问
		deny	:禁止IP访问
2.作用
允许
Syntax: allow address | CIDR | unix: | all;
Default:    —
Context:    http, server, location, limit_except

禁止

Syntax: deny address | CIDR | unix: | all;
Default:    —
Context:    http, server, location, limit_except

作用:
address		: ip地址
CIDR		: 网段
unix		: 文件
all			: 所以
3.执行顺序
允许与禁止的执行顺序是
	优先级从上至下的执行的
		可调换顺序
九:案例1:只允许192.168.15.1来访问(限制ip模块)
1.案例1:只允许192.168.15.1来访问
1、允许192.168.15.1来访问

allow 192.168.15.1;

2、禁止其他所有IP来访问

deny all;
2.进入网址模块配置
[root@web01 ~]# vim /etc/nginx/conf.d/autoindex.conf
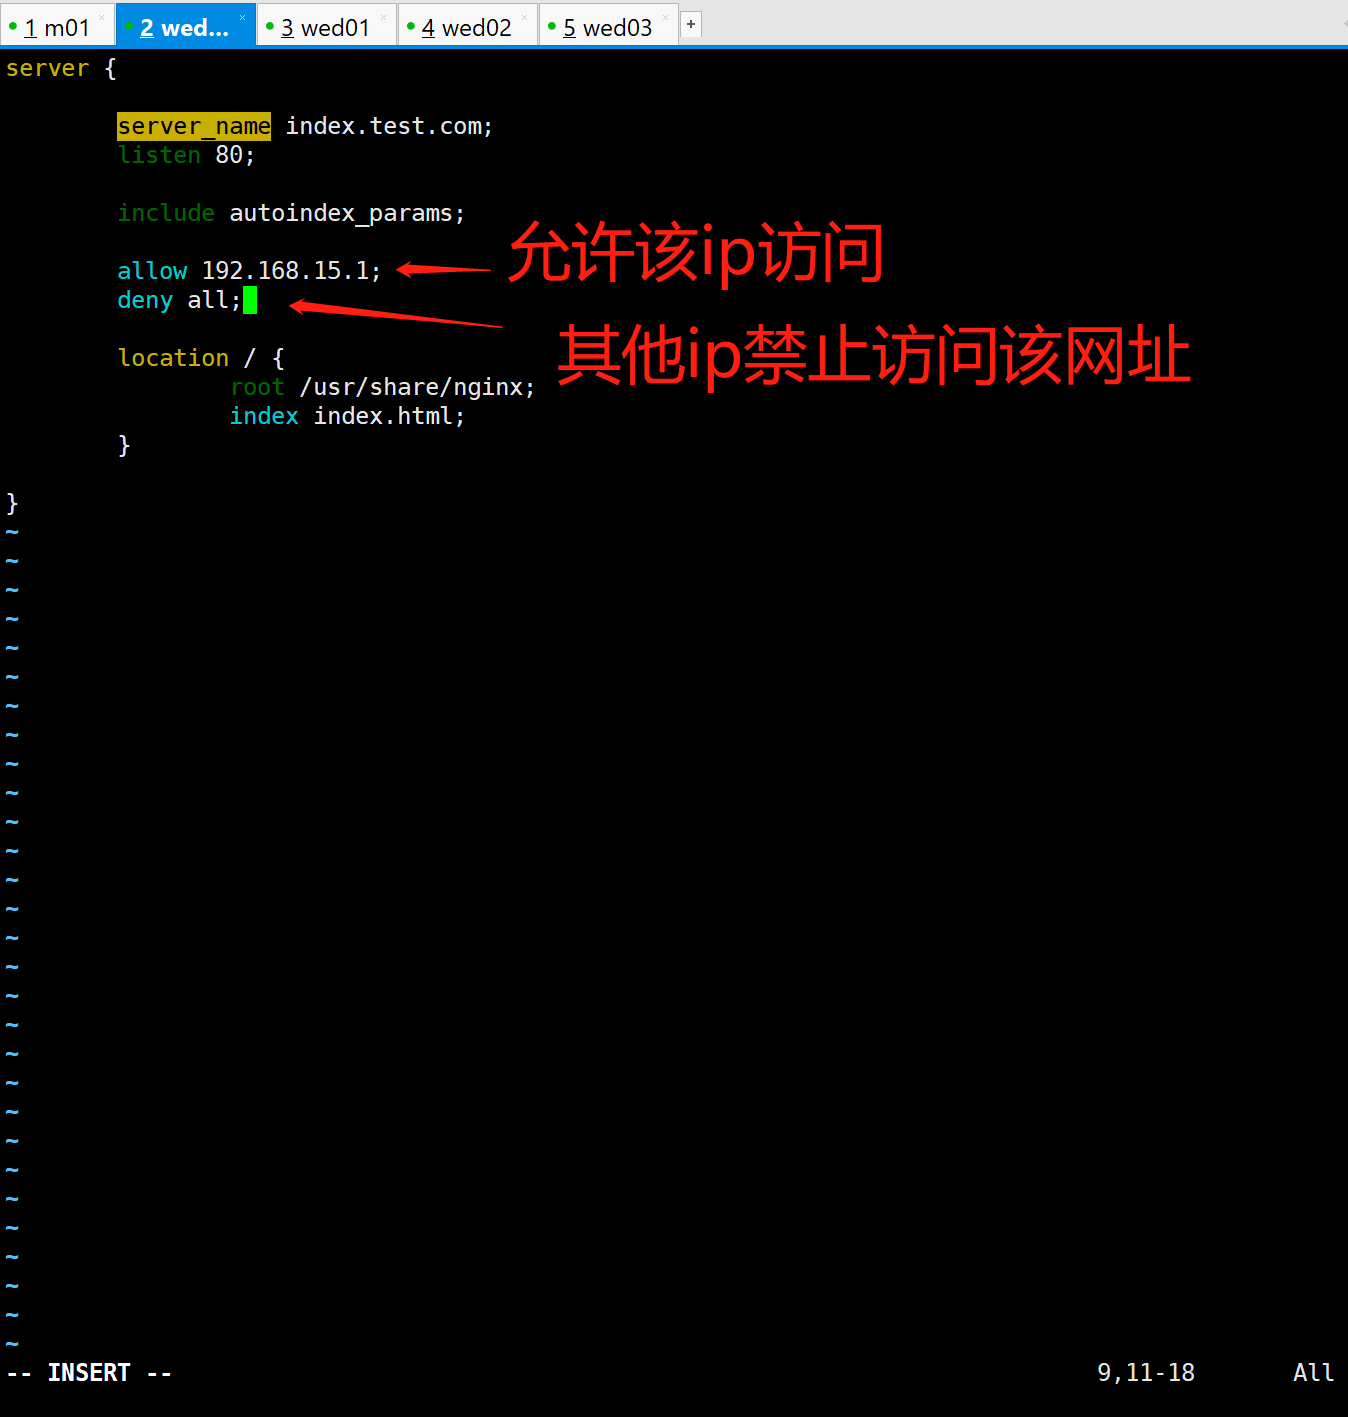
server {

	server_name index.test.com;
	listen 80;

	include autoindex_params;
	auth_basic "This is Auth Basic!";
	auth_basic_user_file /etc/nginx/auth;

	allow 192.168.15.1;
	deny all;

	location /status {
		stub_status;
	}

	location / {
		root /usr/share/nginx;
		index index.html;
	}
}
3.测试
nginx -t
4.重启
systemctl restart nginx
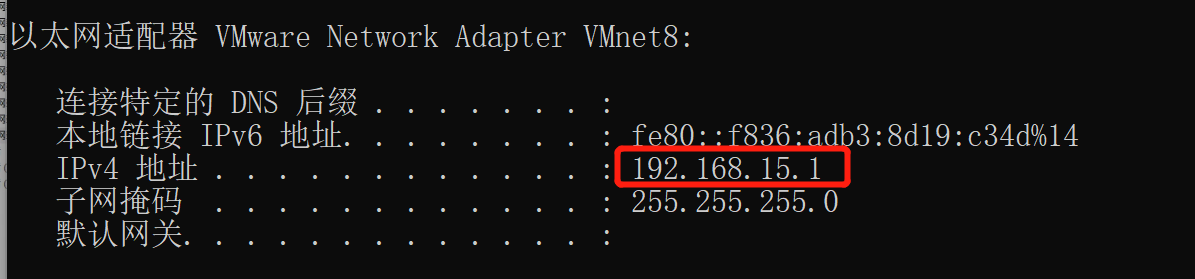
5.本机windows地址ip
ipconfig
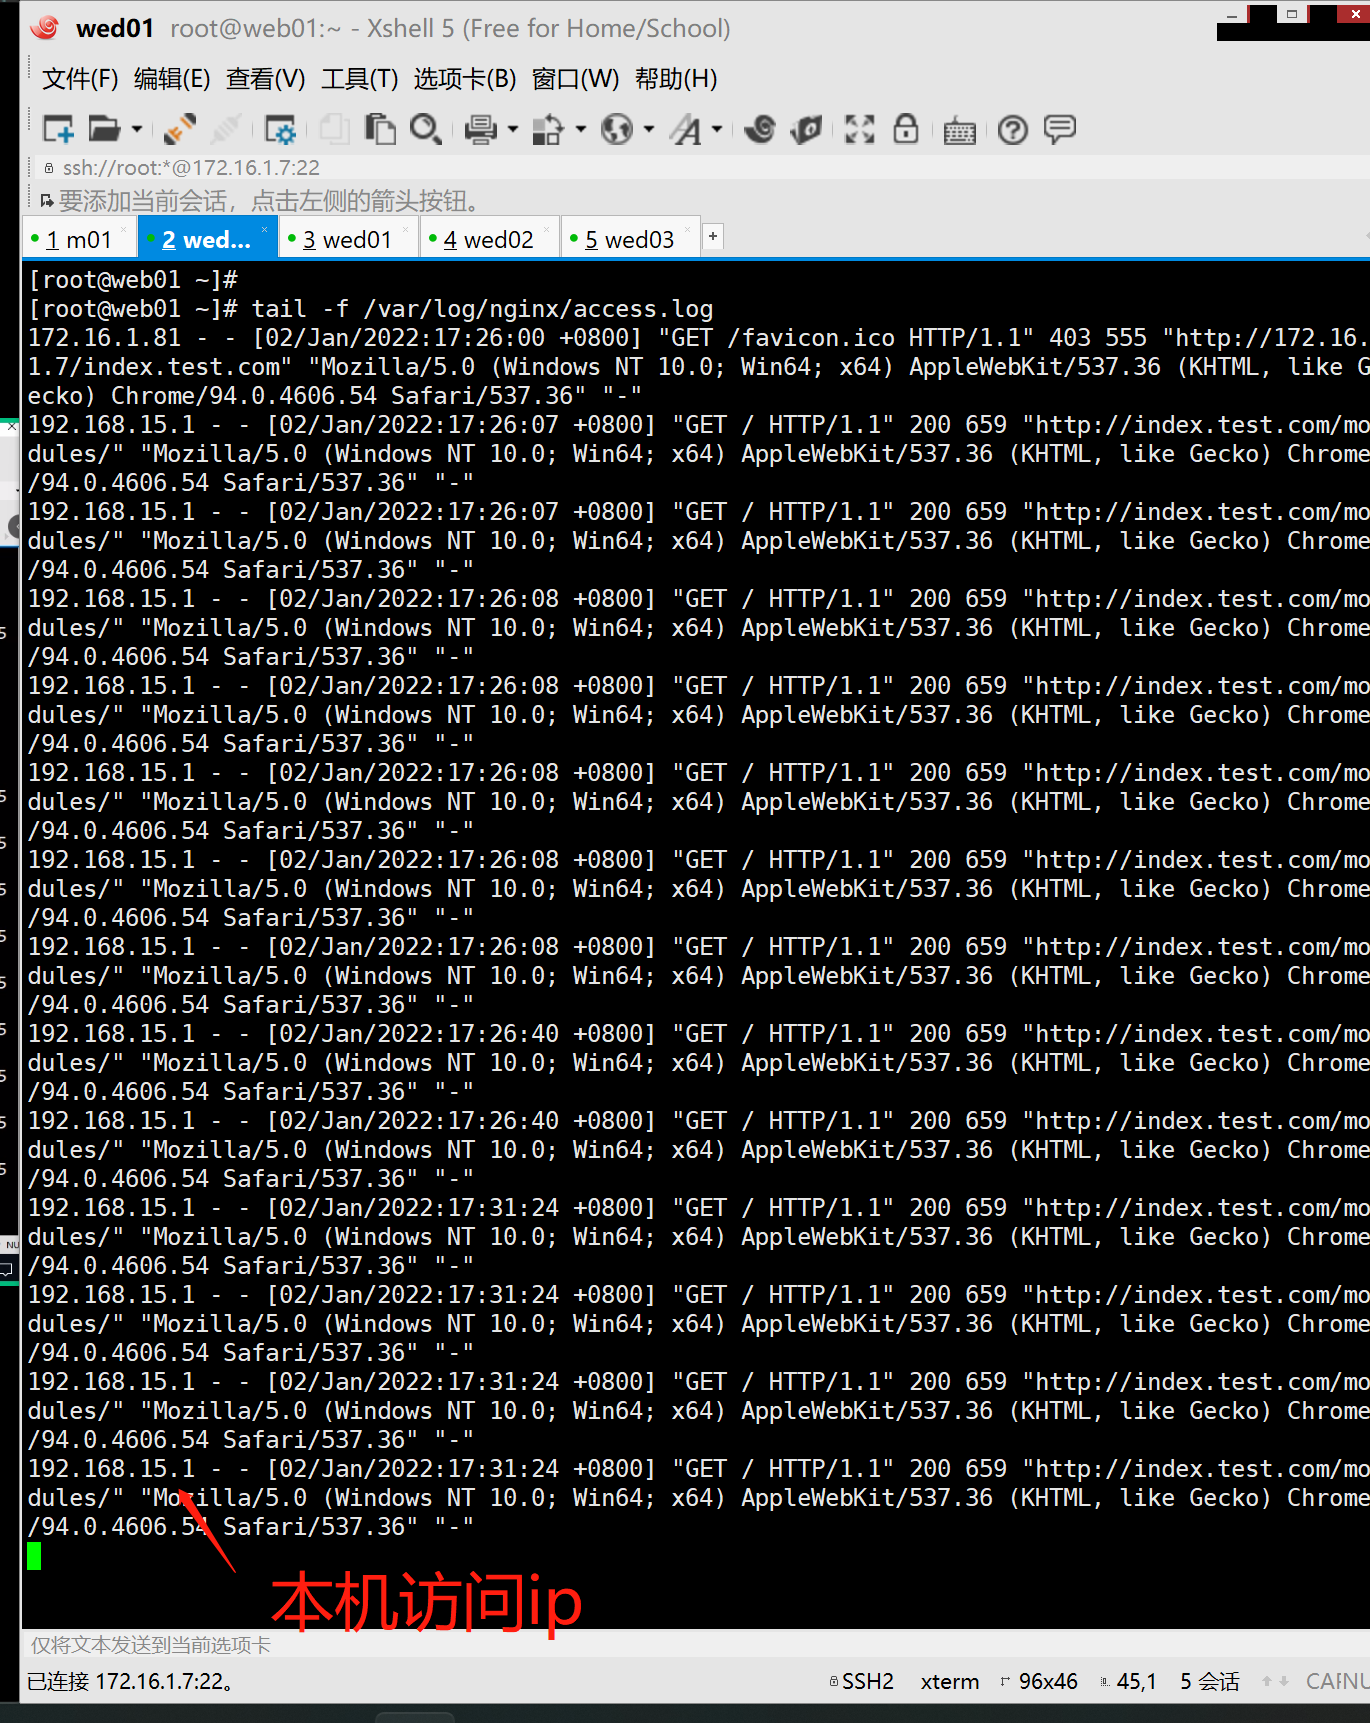
6.实时监控日志
[root@web01 ~]# tail -f /var/log/nginx/access.log
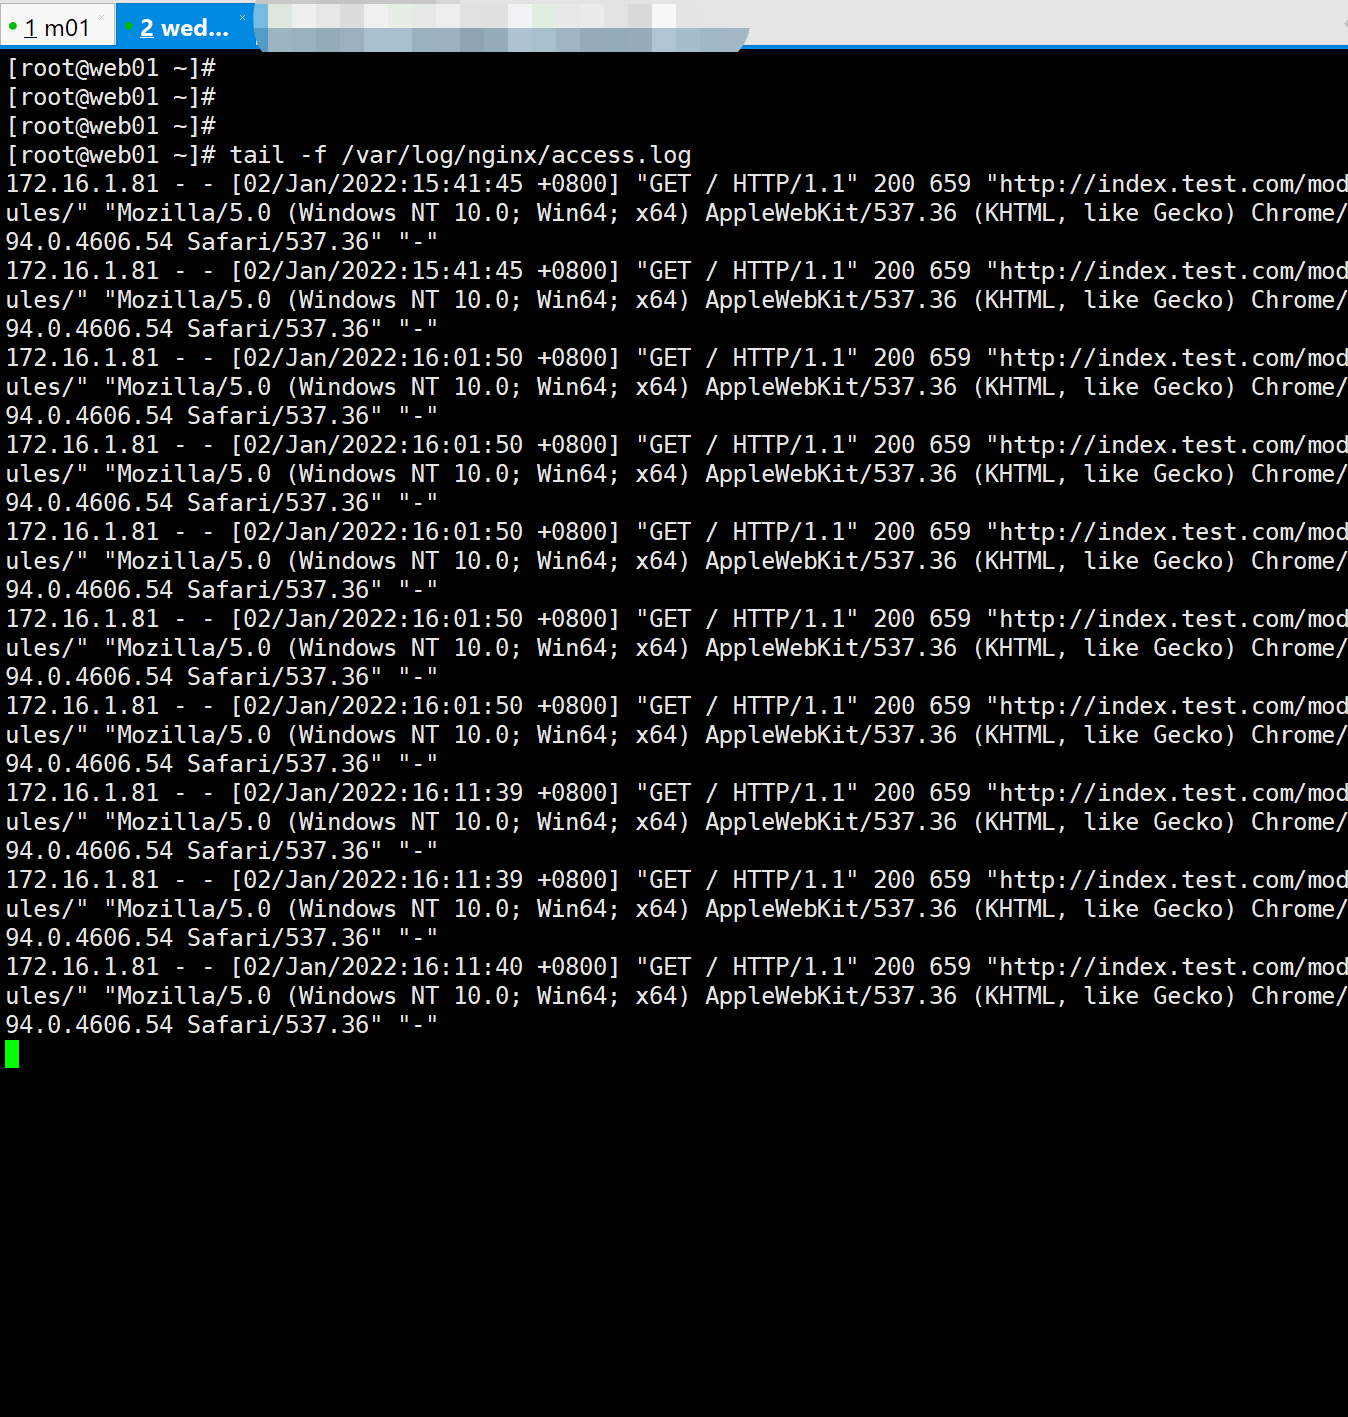
7.本机网址访问测试 日志实时记录
index.test.com

- 日志实时记录
8.修改DNS解析后再次测试
9.192.168.15.1本机再次网址测试被拒绝访问
http://index.test.com/
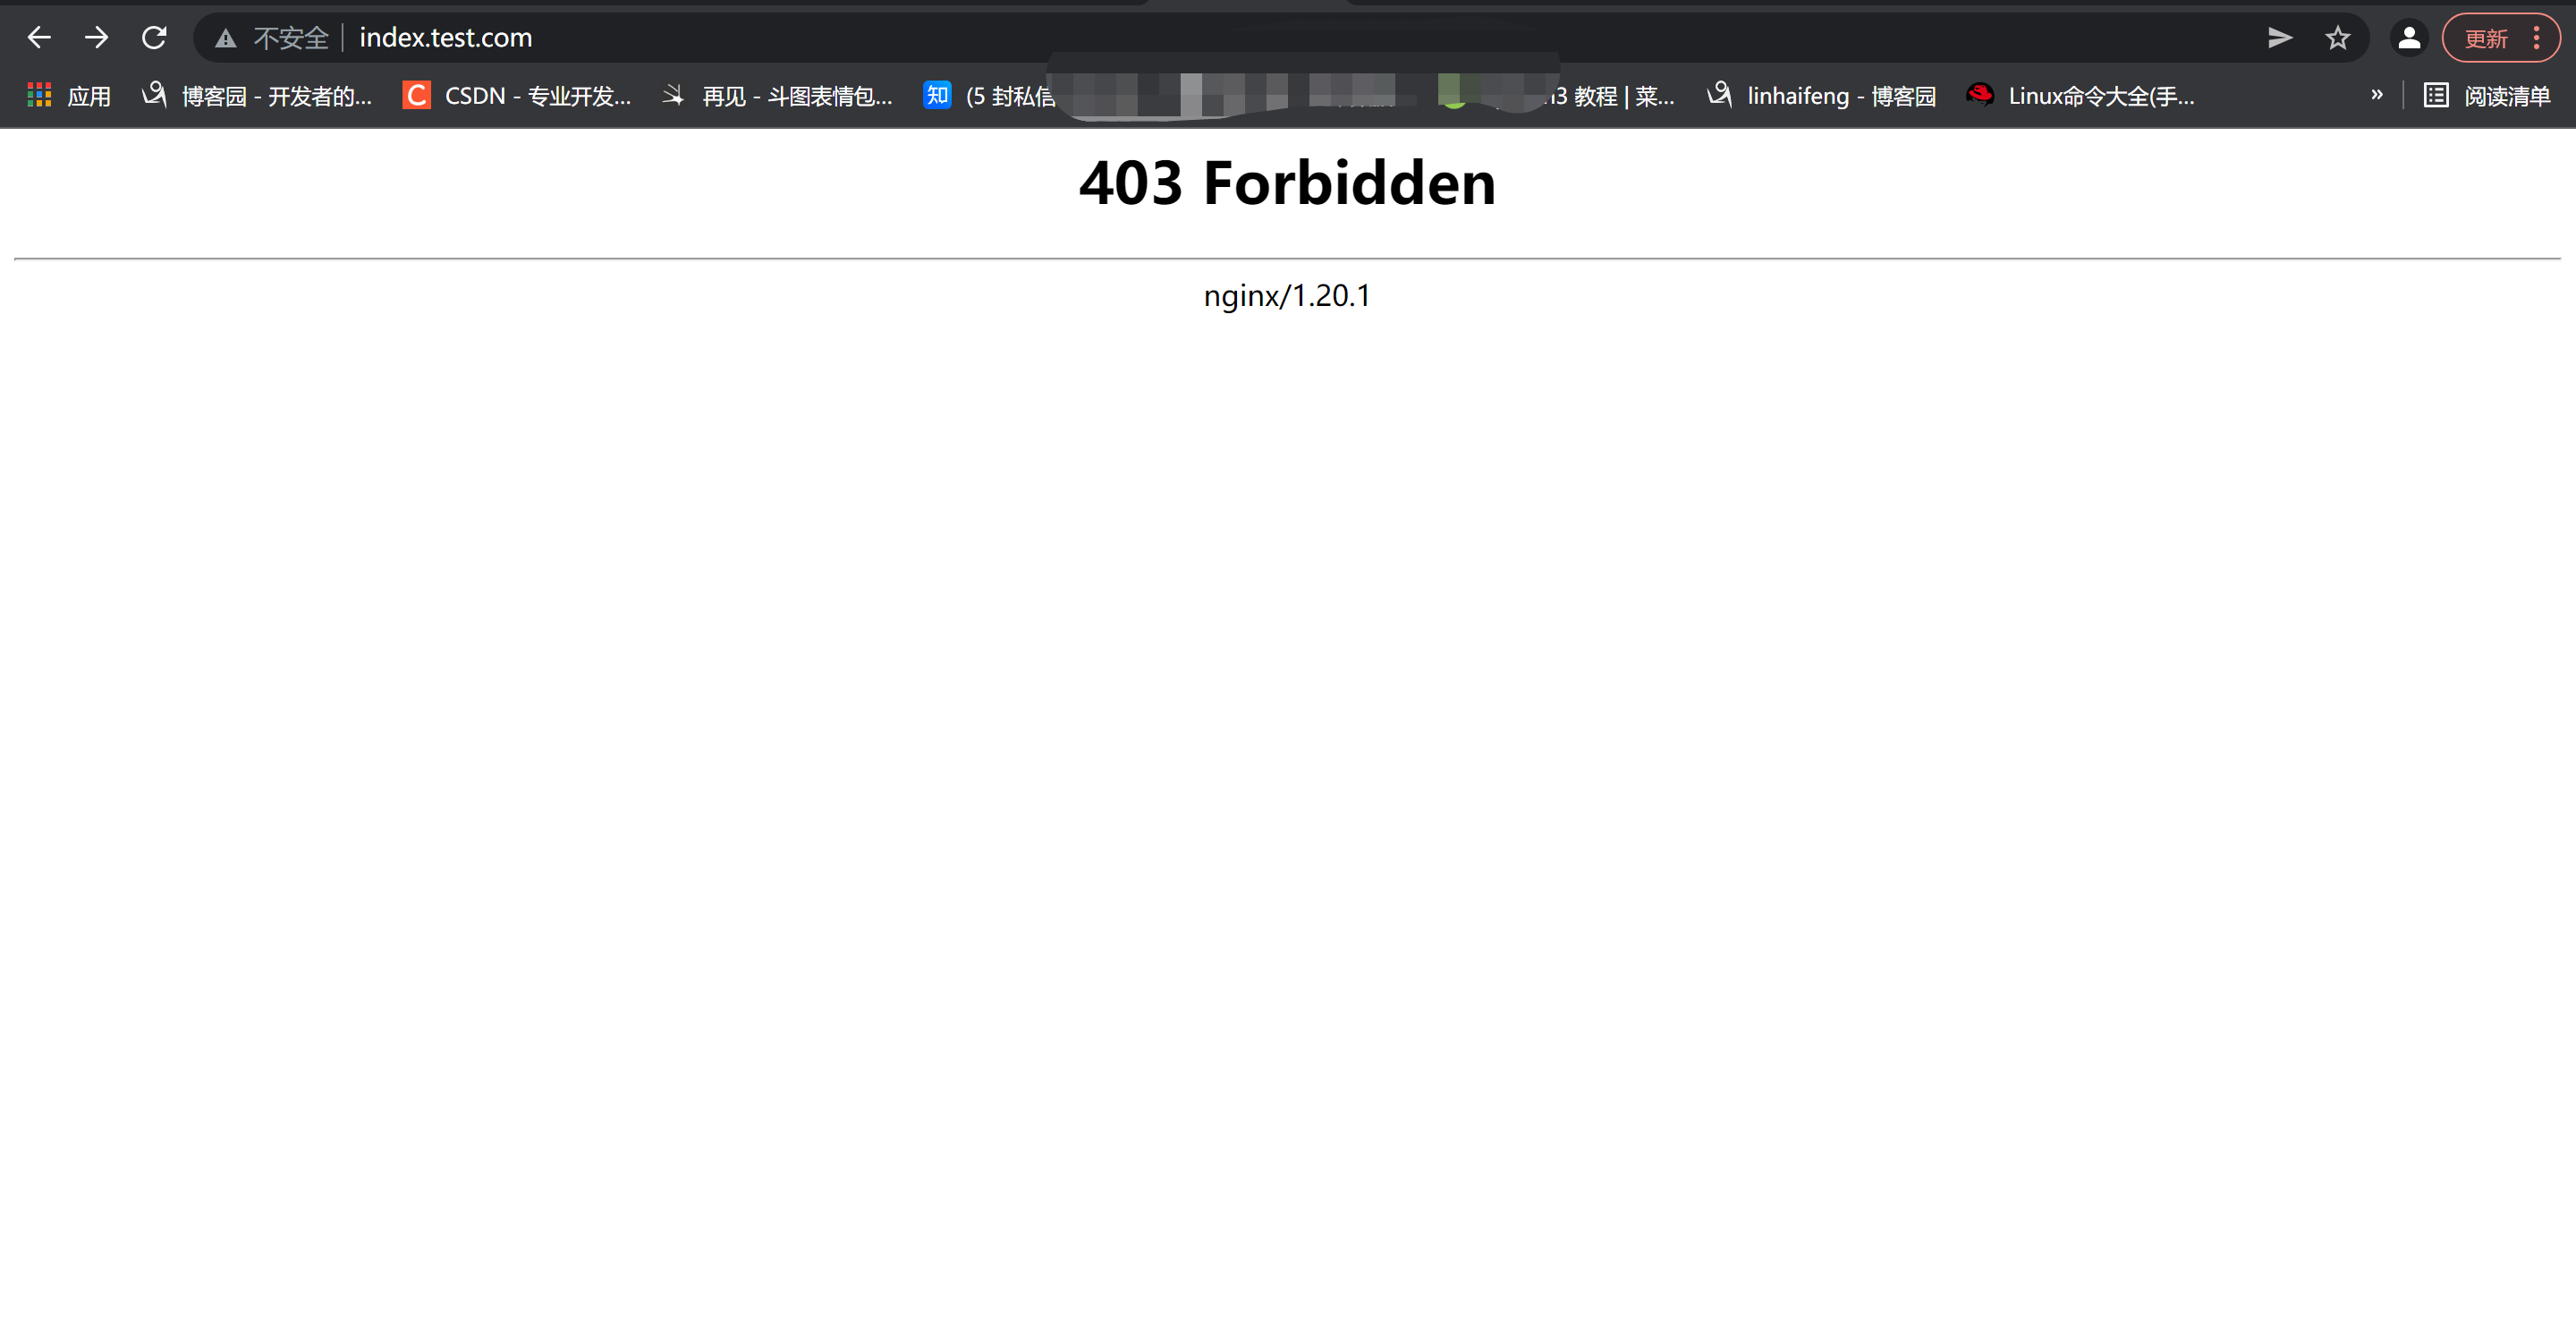
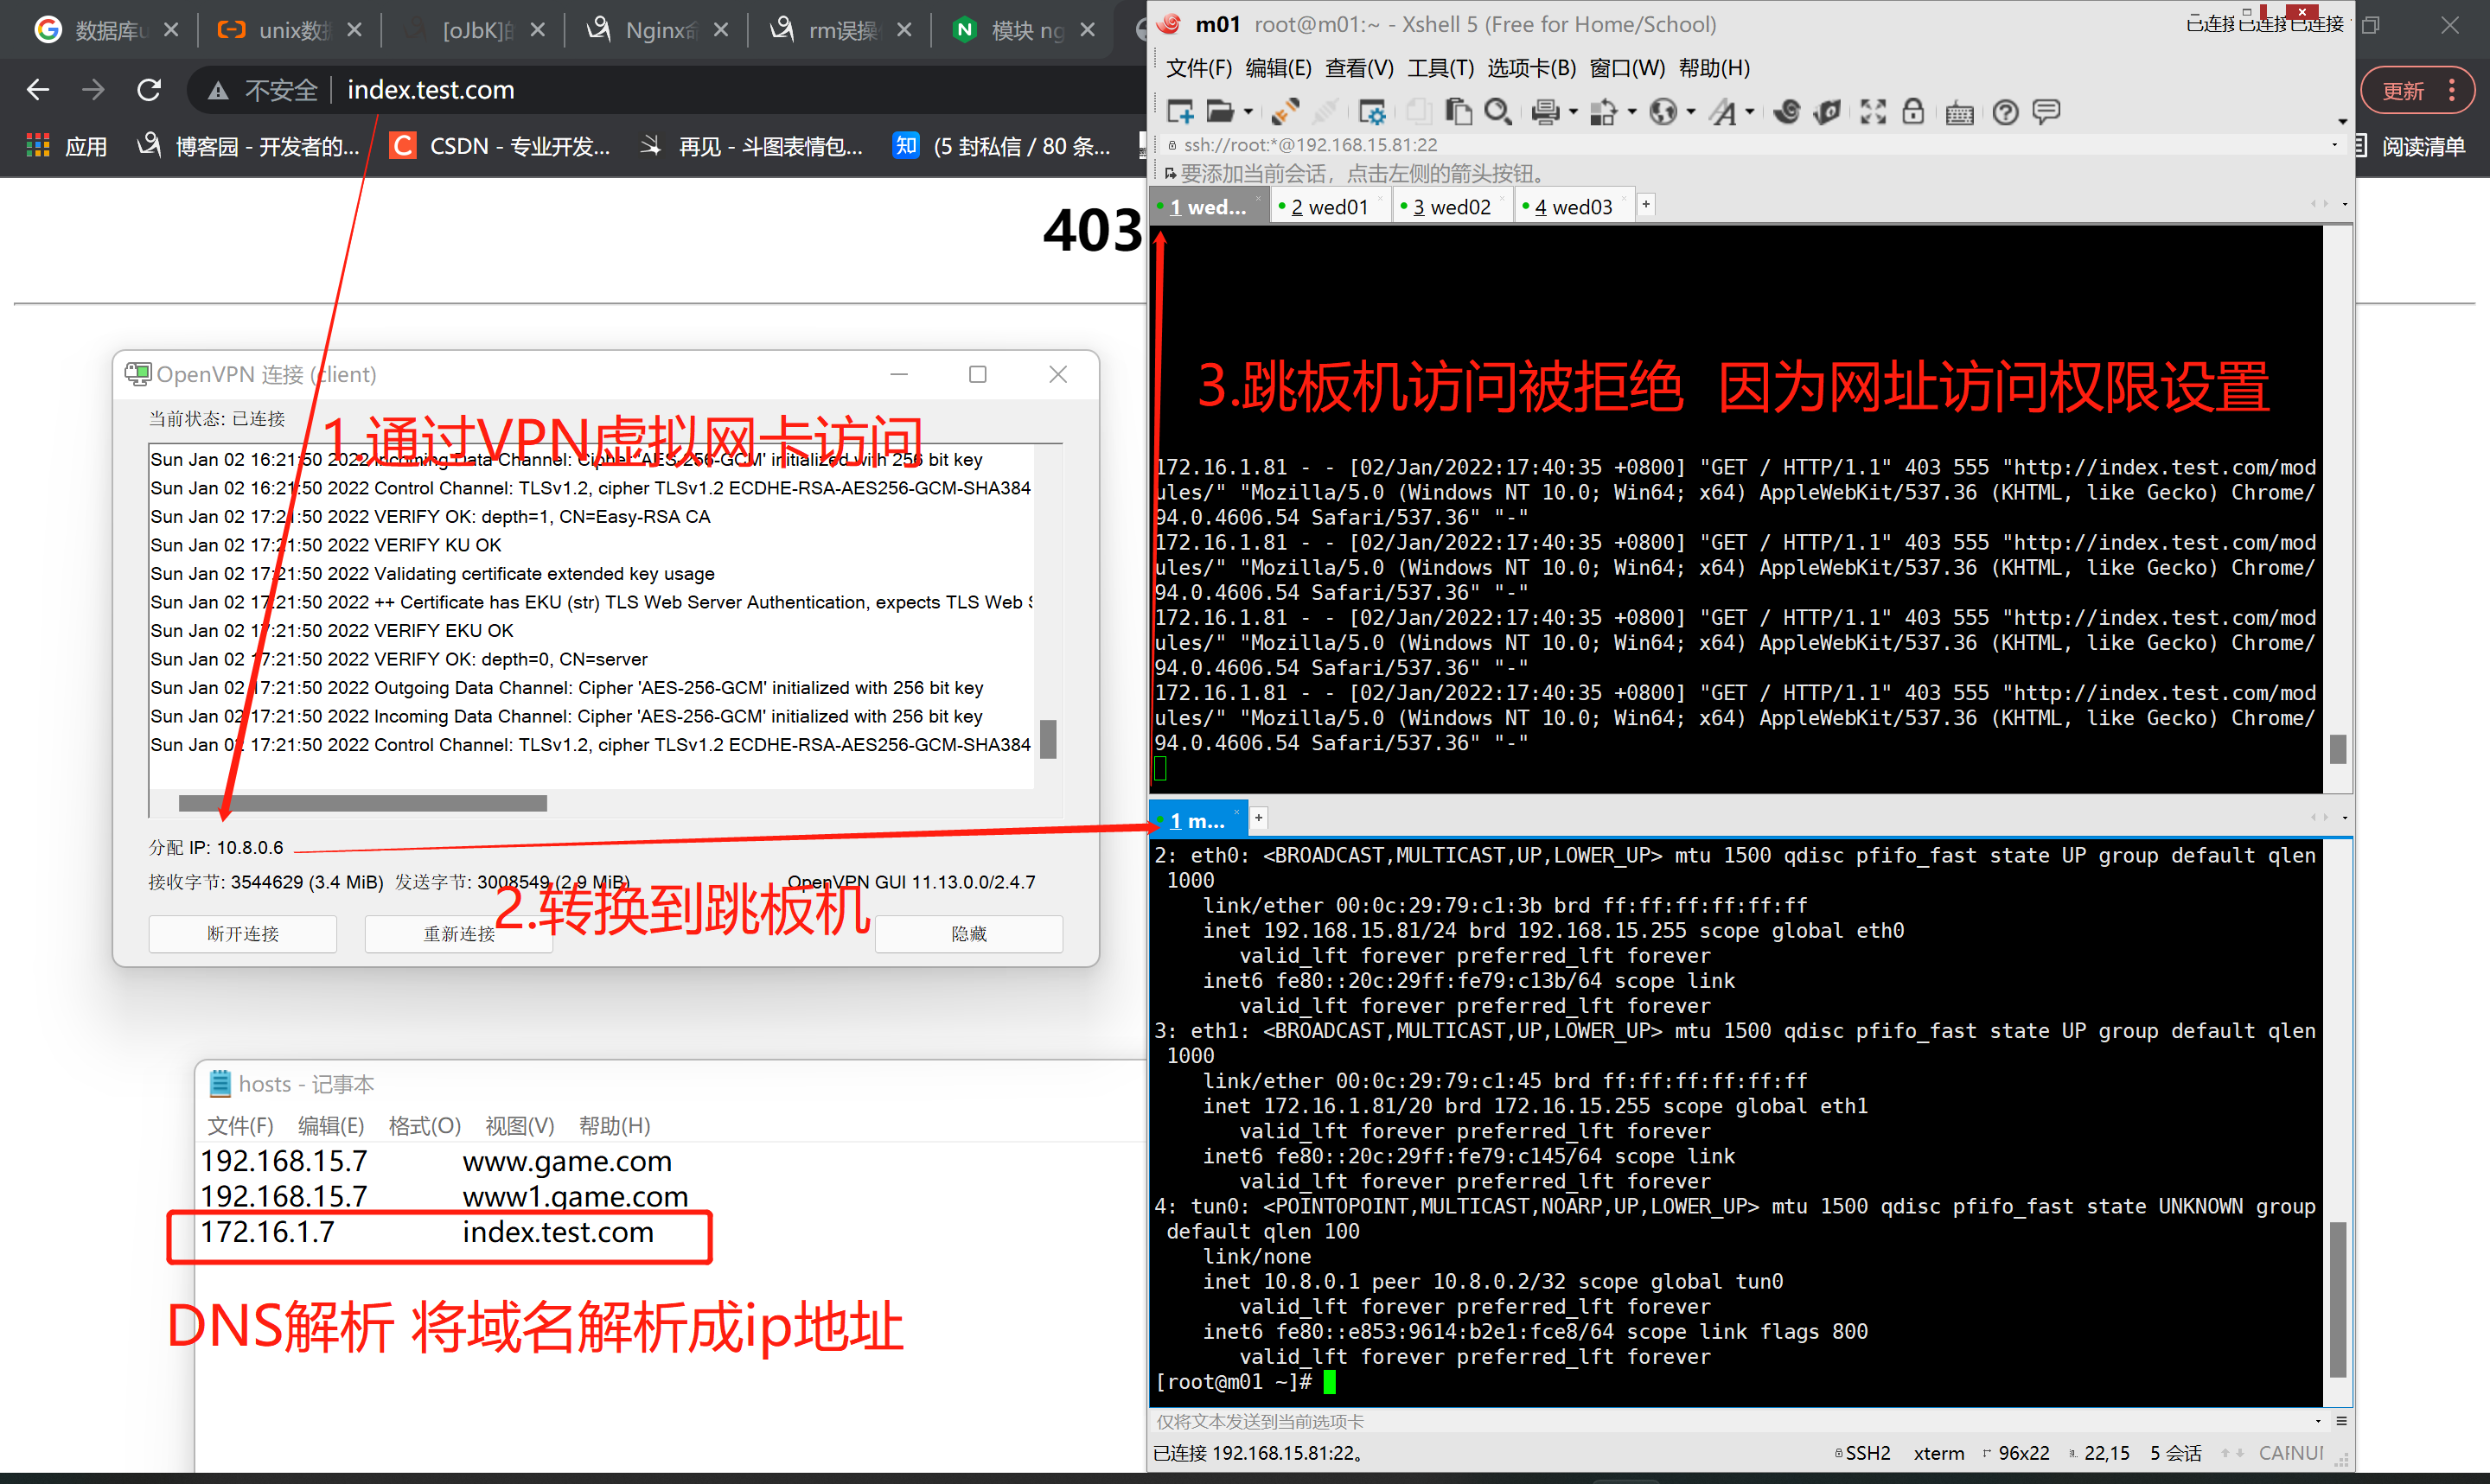
10.总结(拒绝原因)
拒绝原因
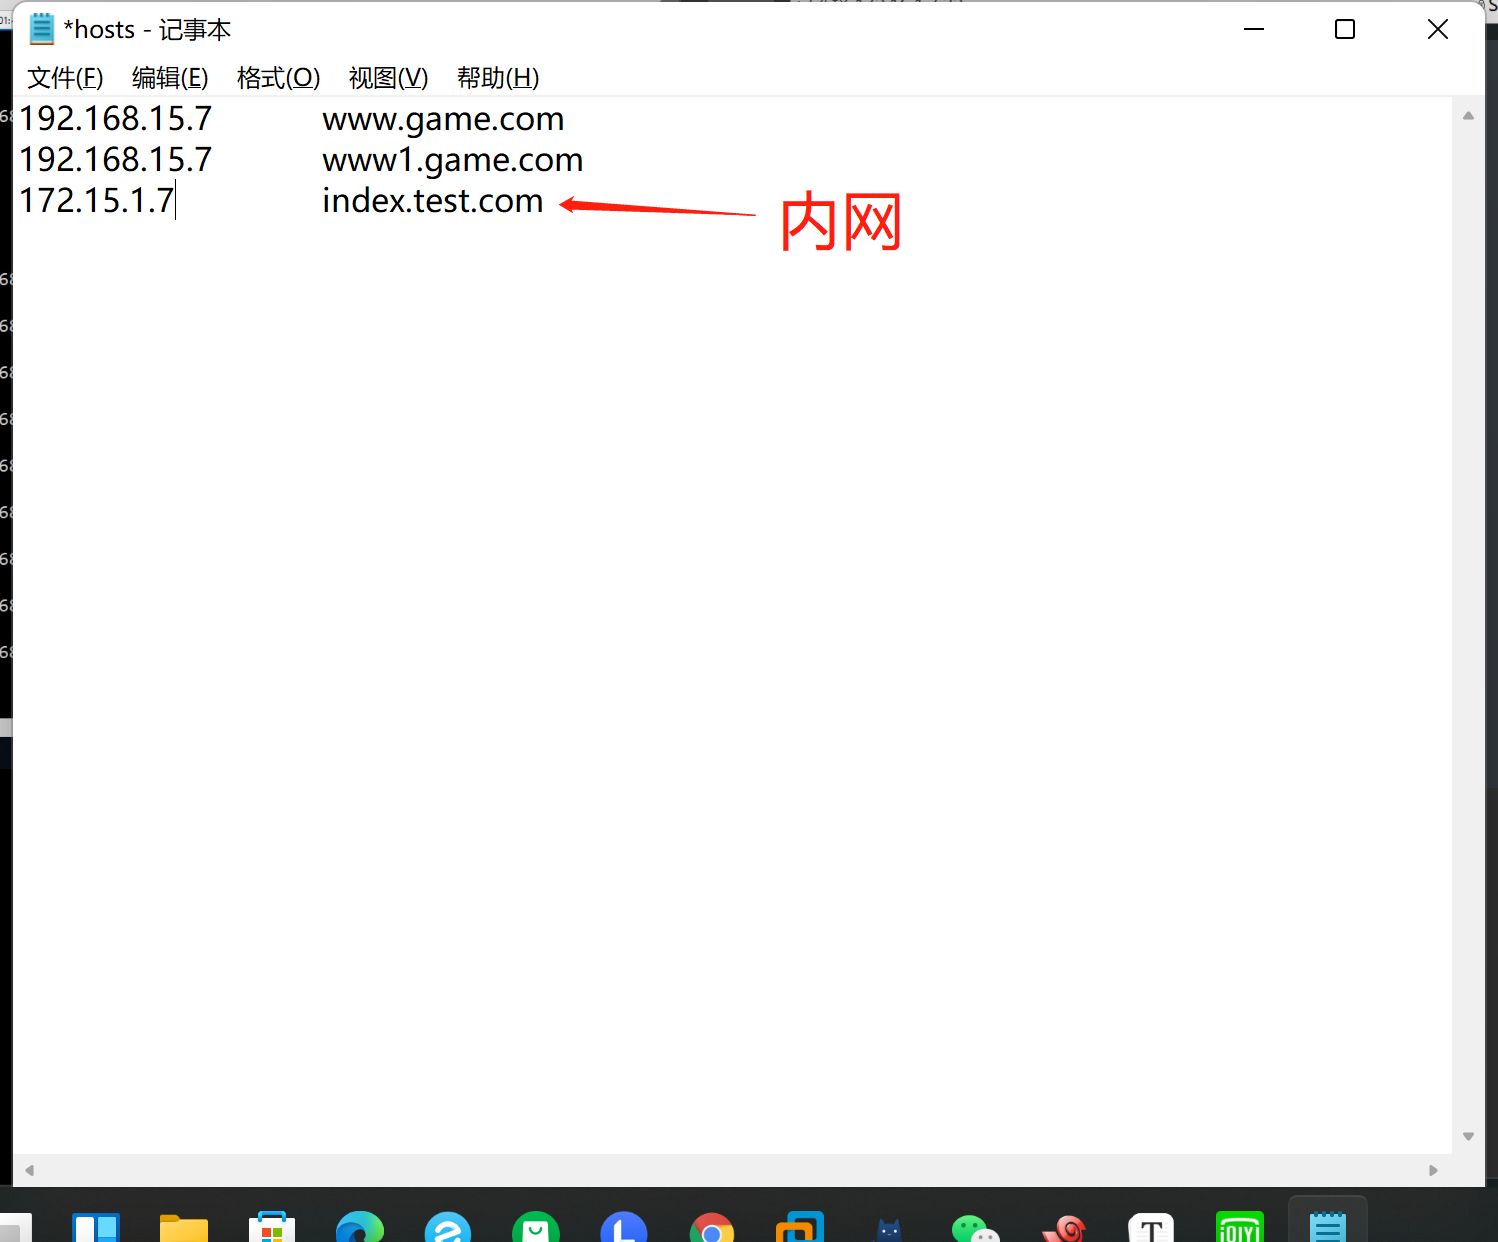
地址 ip 设置成 172.16.1.7 内网
解析作用 DNS 将域名解析成 ip地址
1.域名访问内网 需要通过VPN 因不在同一个局域网
2.VPN转换到跳板机,在进行访问网址ip地址
3.访问失败
原因:
网址ip设置了访问权限模块 只允许192.168.15.1 访问
其他拒绝
十:案例2:只允许192.168.15.0 网段来访问(限制ip)
- 案例需求
只允许192.168.15.0 网段来访问

1、允许192.168.15.0 网段来访问

allow 192.168.15.0/24;

2、禁止其他所有IP来访问

deny all;
1.修改网址模块
[root@web01 ~]# vim /etc/nginx/conf.d/autoindex.conf

server {

	server_name index.test.com;
	listen 80;

	include autoindex_params;
	auth_basic "This is Auth Basic!";
	auth_basic_user_file /etc/nginx/auth;

	location /status {
		stub_status;
	}

	allow 192.168.15.0/24;
	deny all;
	location / {
		root /usr/share/nginx;
		index index.html;
	}
}
2.测试
nginx -t
3.重启
systemctl restart nginx
4.修改DNS解析ip
192.168.15.7 index.test.com
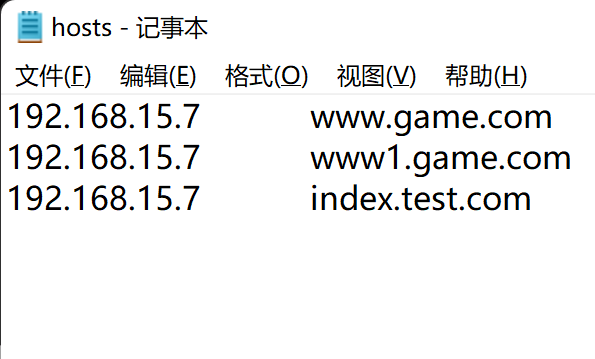
5.本机192.168.15.1 访问网址
http://index.test.com/
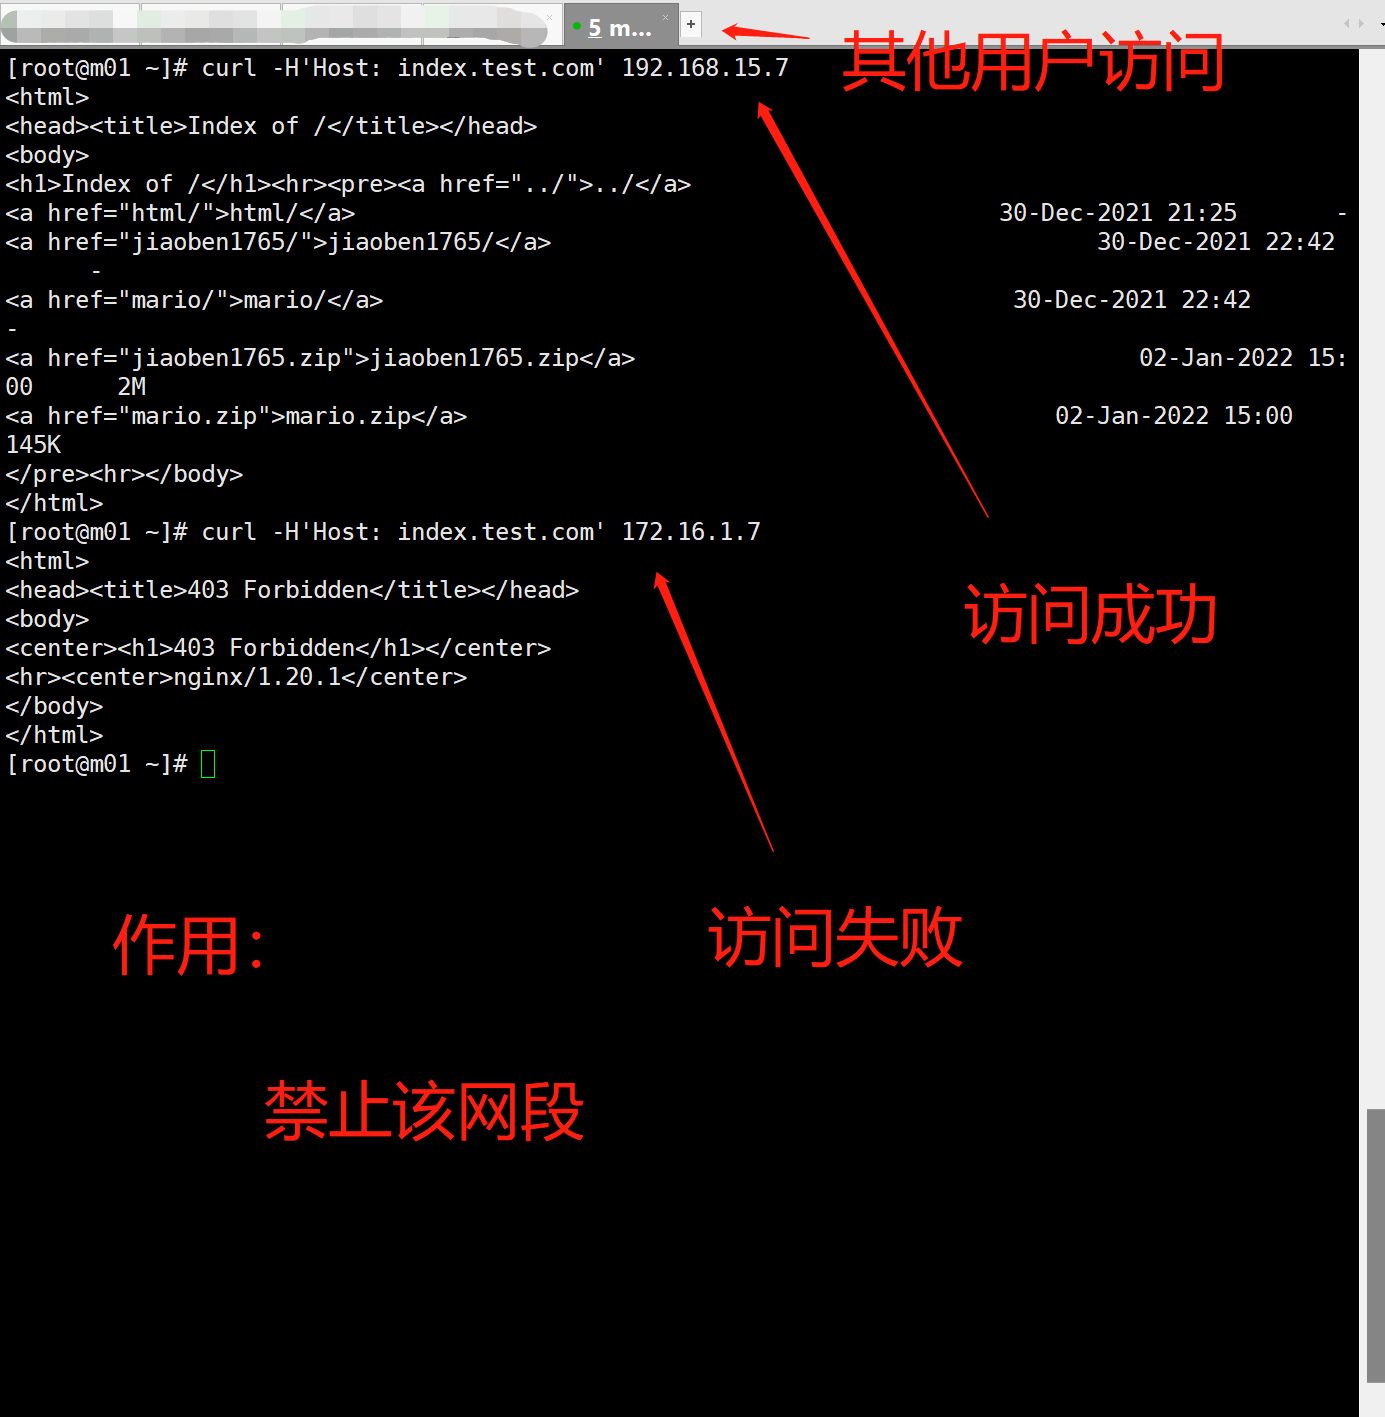
6.其他用户访问 不同网段区别
1.访问192.168.15.7 网段成功
2.访问172.16.1.7	网段失败
十一:案例3:要求禁止192.168.15.1来访问(限制ip模块)
- 需求
1、禁止  1来访问

deny 192.168.15.1;

2、允许其他所有的IP来访问

allow all;
1.修改网址模块
[root@web01 ~]# vim /etc/nginx/conf.d/autoindex.conf

2.测试
nginx -t
4.重启
systemctl restart nginx
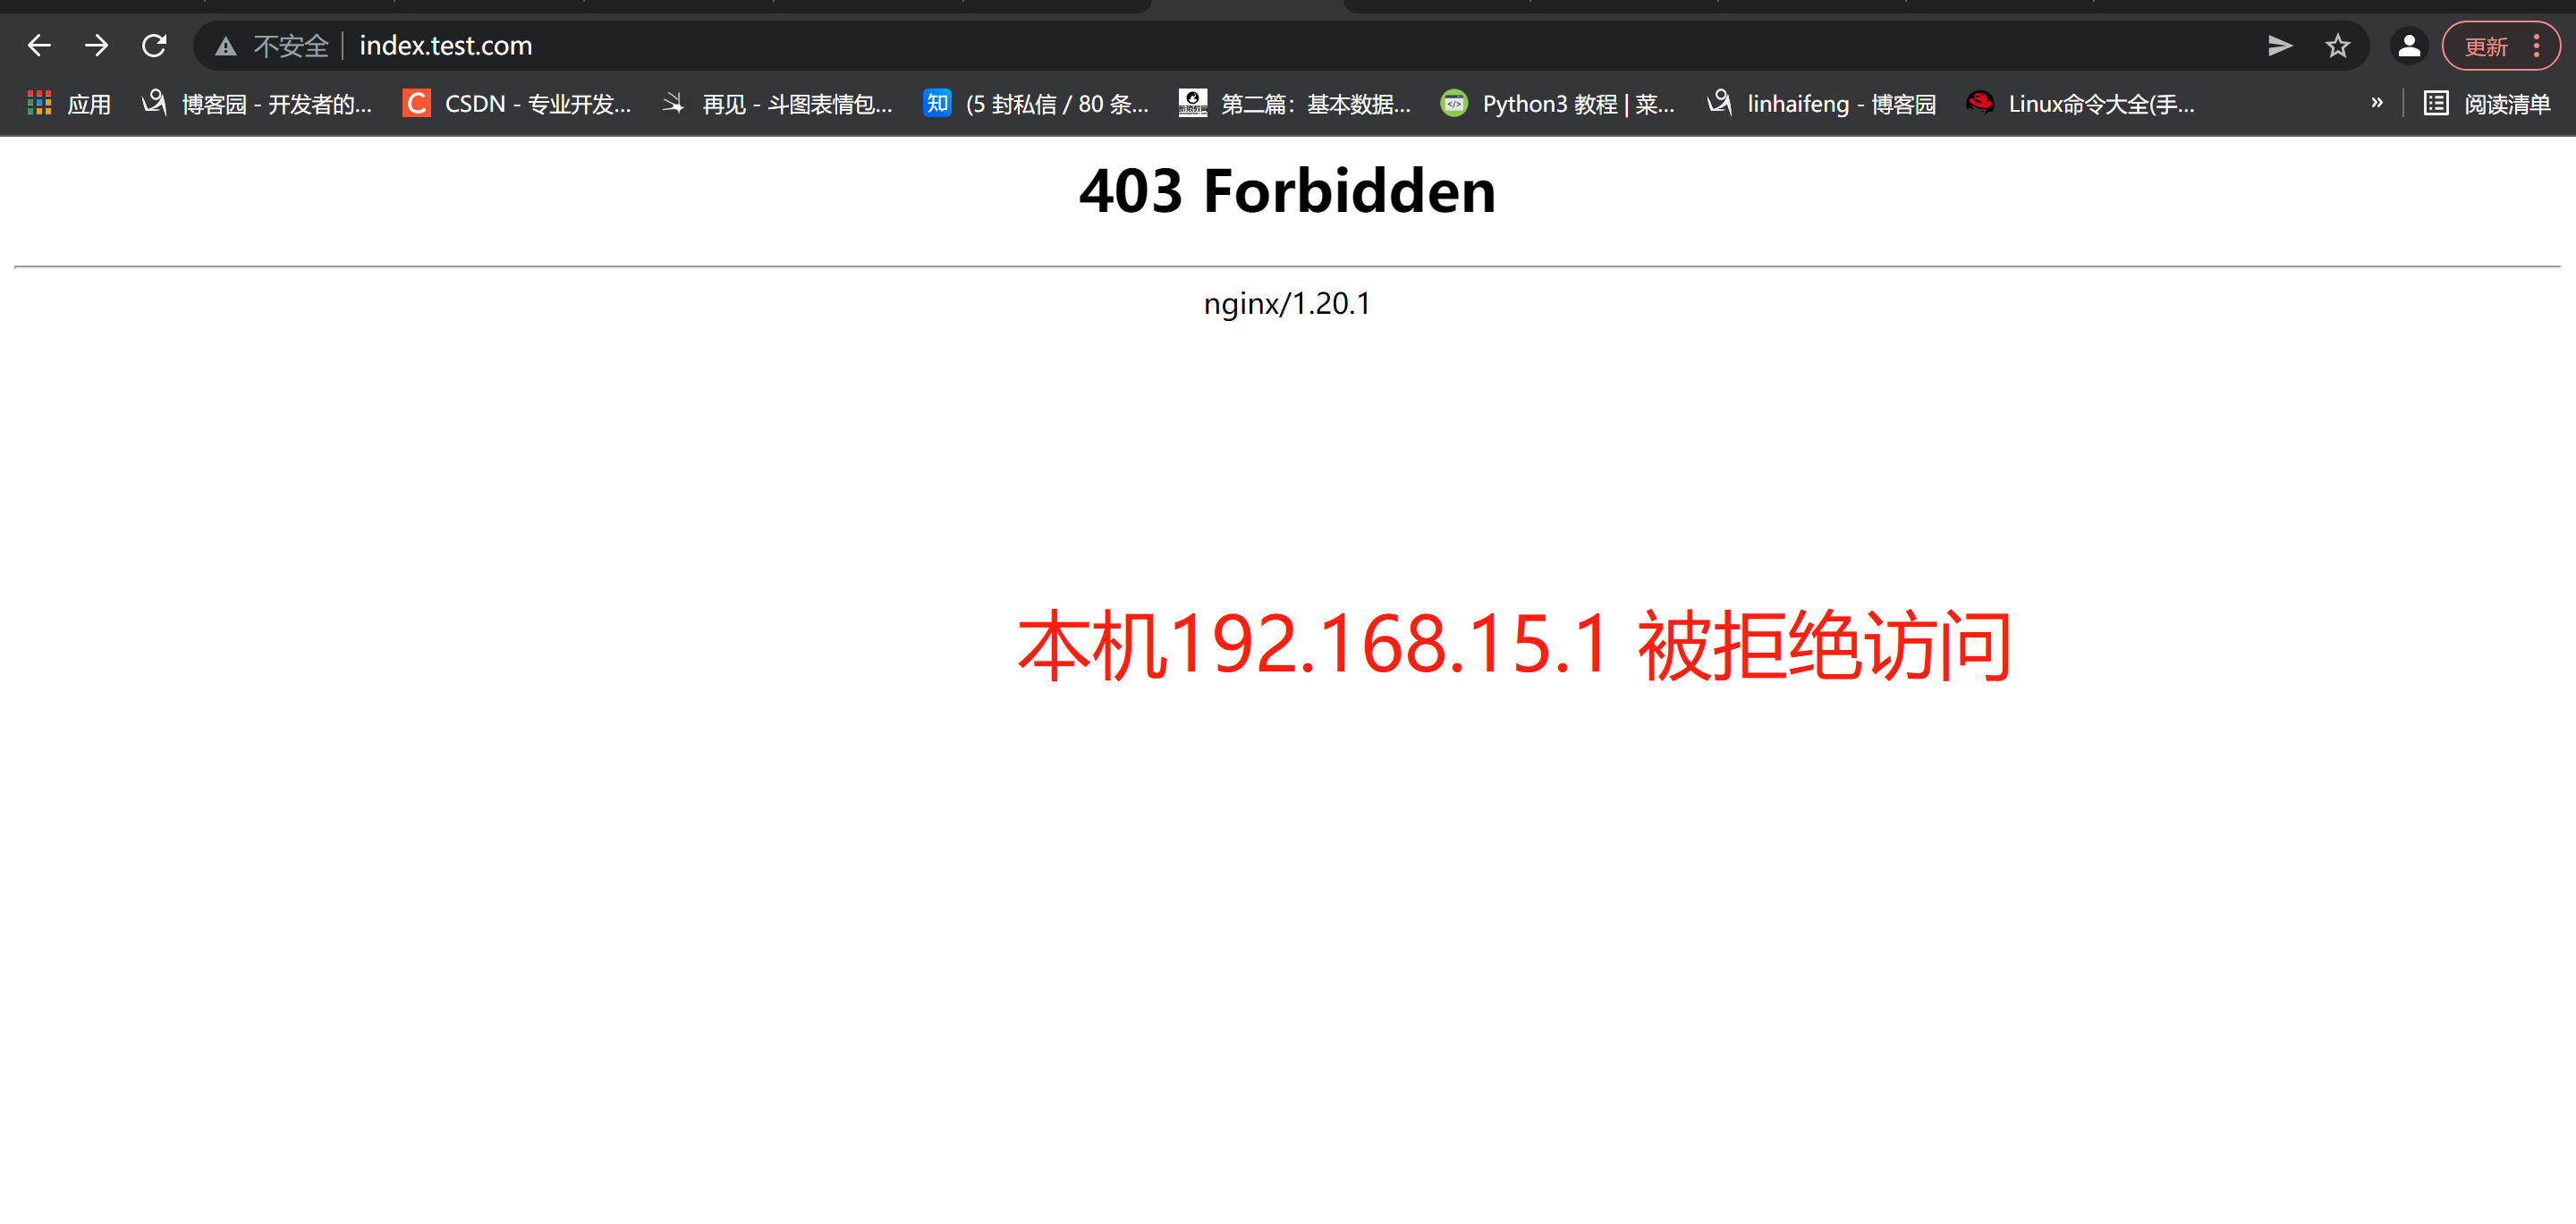
5.测试网址
windows本机(192.168.15.1)被拒绝访问该网址
http://index.test.com/
- 总结
禁用 或 允许
[root@web01 conf.d]# tail -f /var/log/nginx/access.log
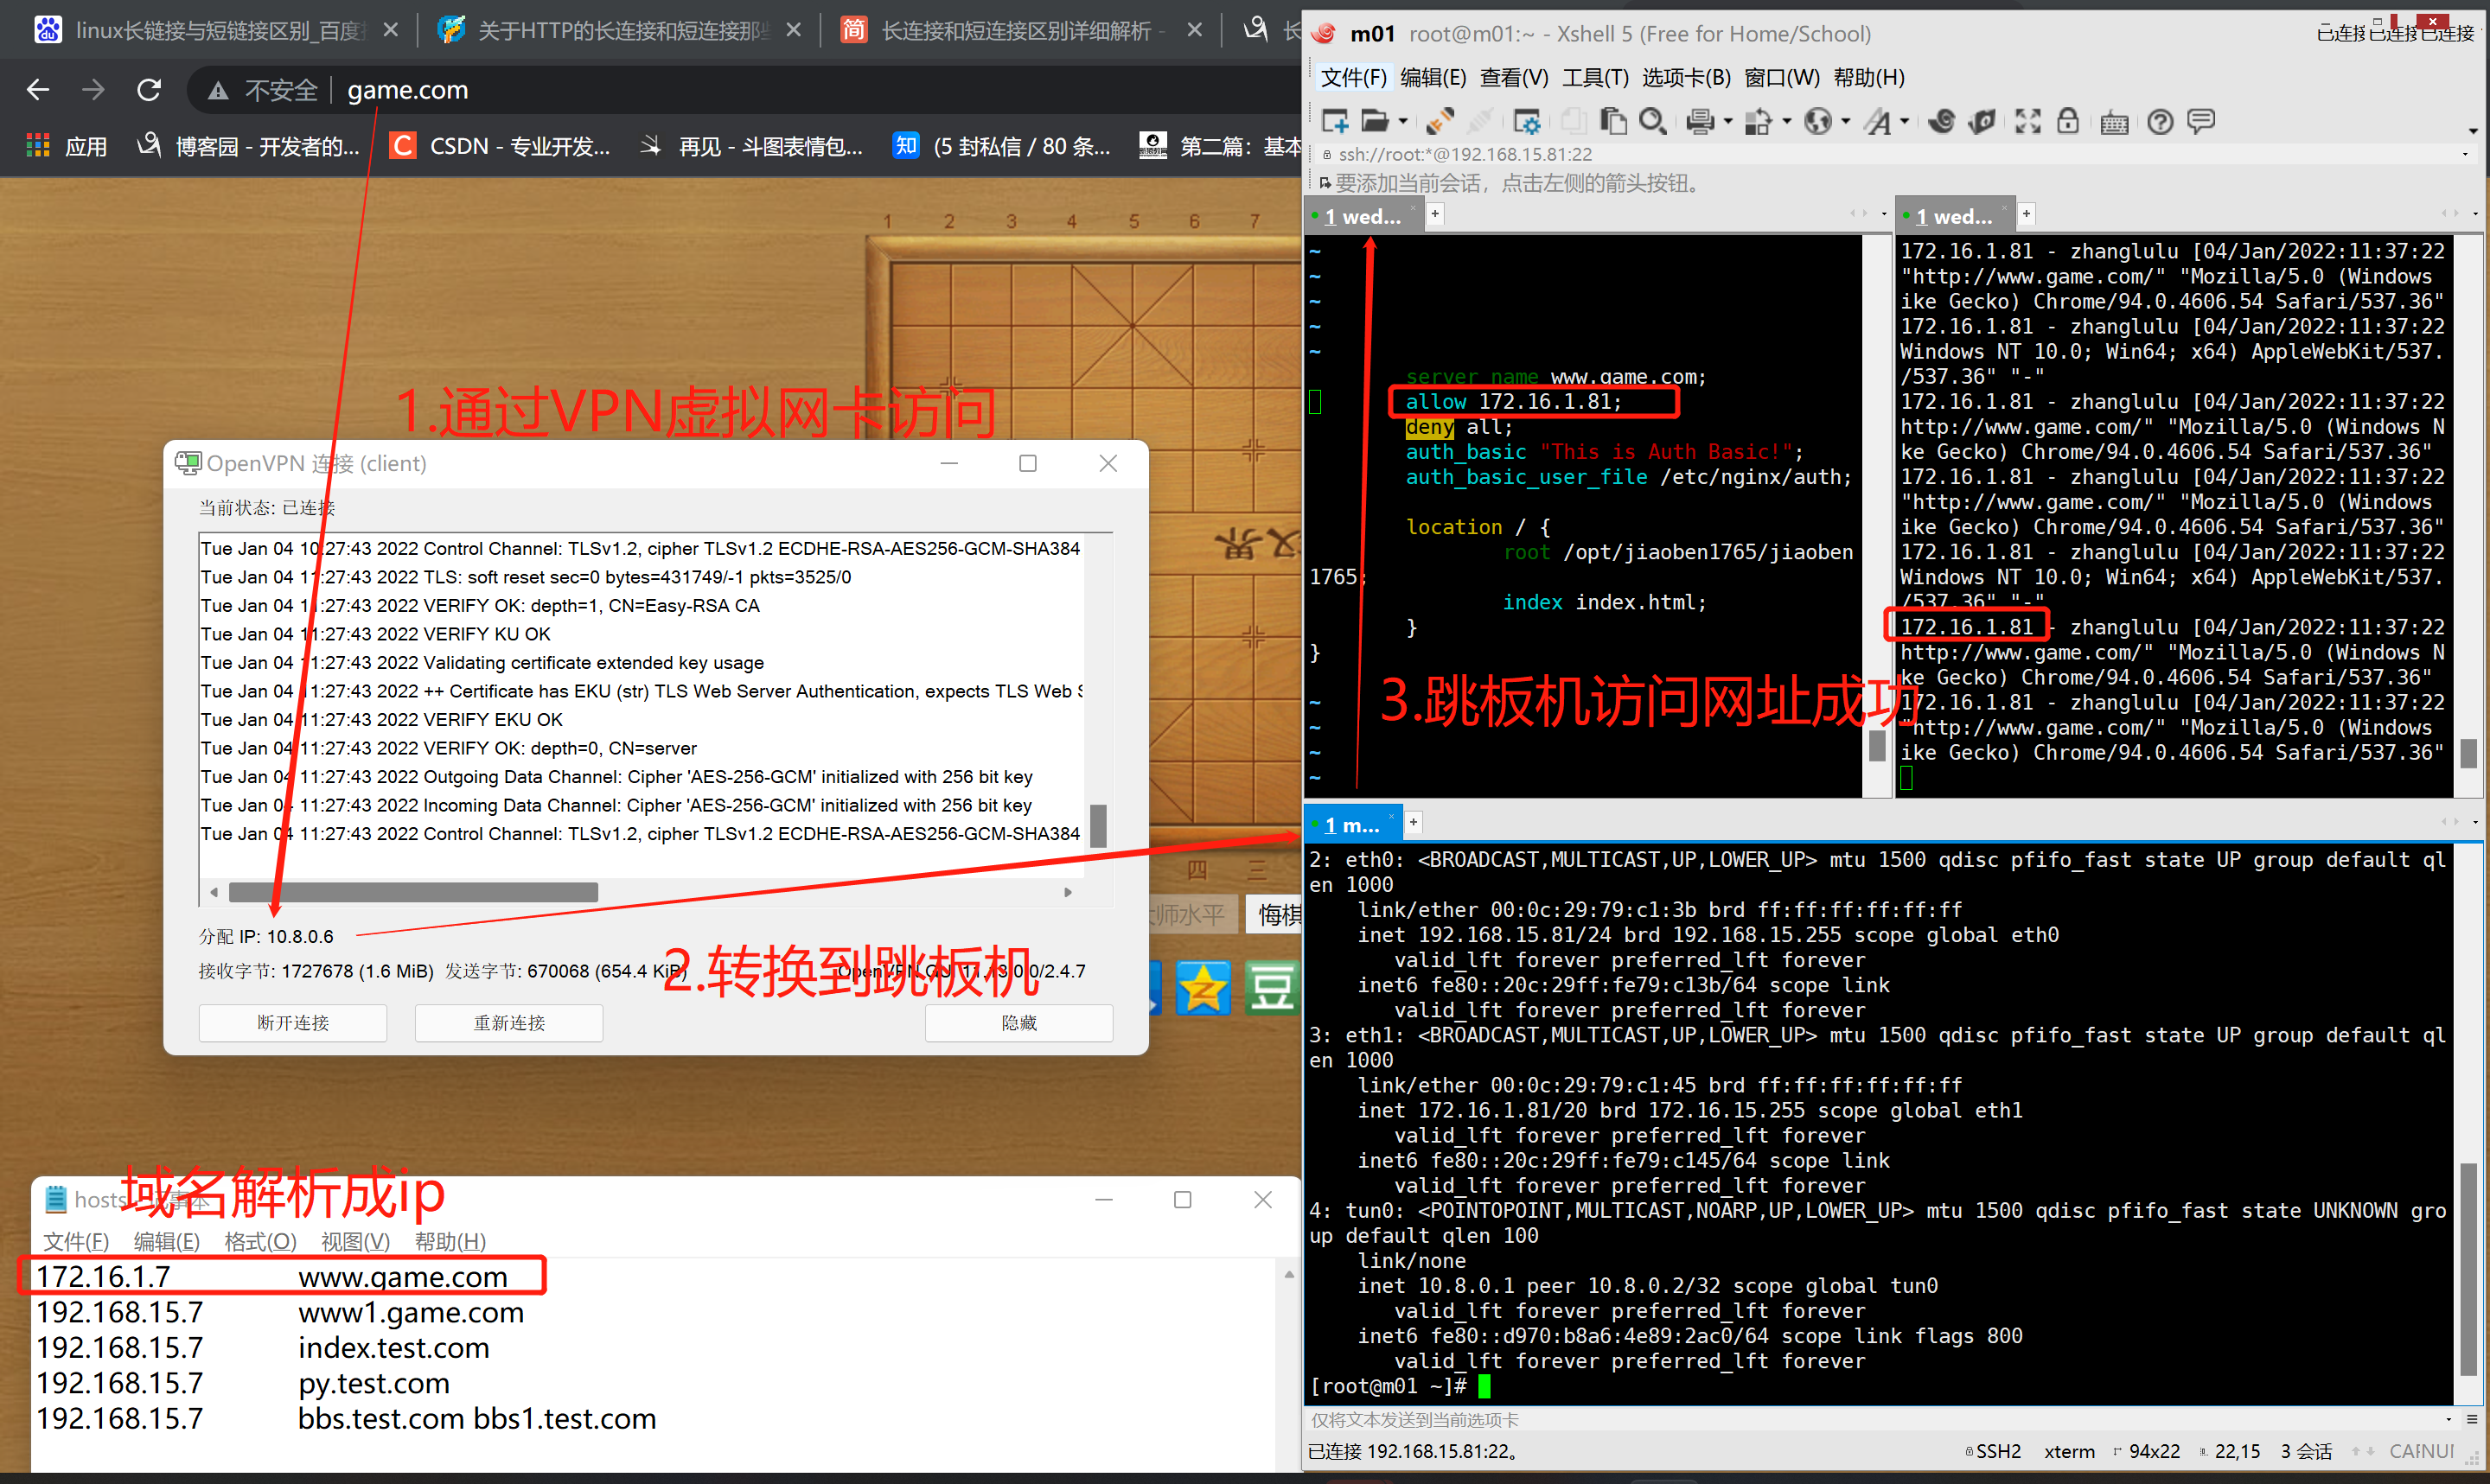
十二:只允许通过VPN来访问
- 案例需求
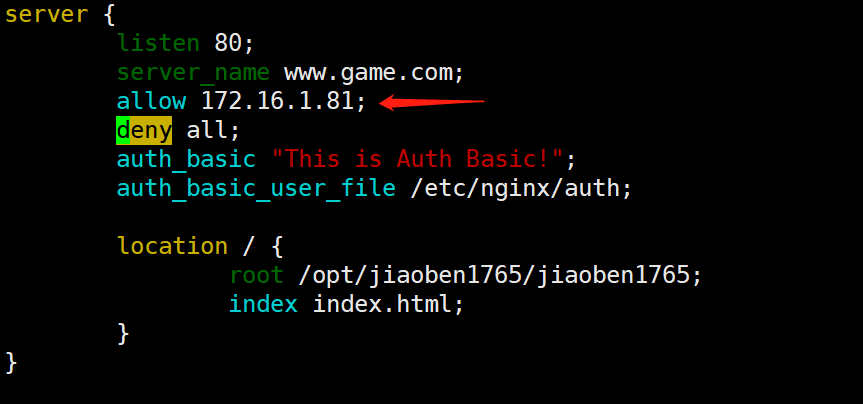
允许:
   allow 172.16.1.81;
拒绝:
   deny all;
1.修改网址模块
[root@web01 ~]# vim /etc/nginx/conf.d/autoindex.conf
2.测试
nginx -t
3.重启
systemctl restart nginx
4.日志实时监控
[root@web01 ~]# tail -f /var/log/nginx/access.log
5.解析DNS设置
172.16.1.7 www.game.com

6.网址测试
允许原因
地址 ip 设置成 172.16.1.7 内网
解析作用 DNS 将域名解析成 ip地址

1.域名访问内网 需要通过VPN 因在同一个局域网
2.VPN转换到跳板机,在进行访问网址ip地址
3.访问成功
原因:
	网址ip设置了访问权限模块 只允许172.16.1.81 访问
	其他拒绝