shiro集成spring&工作流程&DelegatingFilterProxy
1.集成Spring
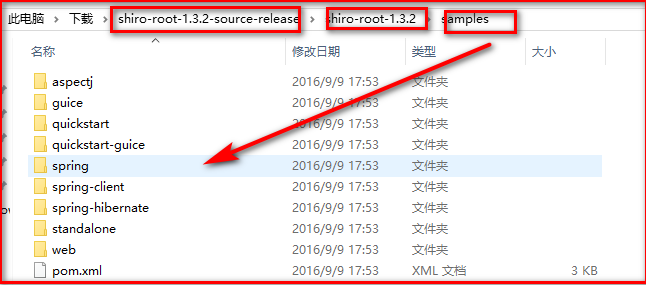
参考文献:

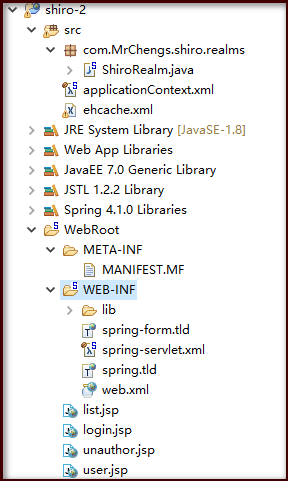
新建web工程:


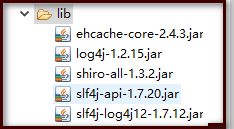
ehcache-core来自Hibernate
wen.xml
<?xml version="1.0" encoding="UTF-8"?>
<web-app xmlns:xsi="http://www.w3.org/2001/XMLSchema-instance"  xmlns="http://xmlns.jcp.org/xml/ns/javaee"  xsi:schemaLocation="http://xmlns.jcp.org/xml/ns/javaeehttp://xmlns.jcp.org/xml/ns/javaee/web-app_3_1.xsd"  version="3.1">
  <display-name>shiro-2</display-name>

  <listener>
     <listener-class>org.springframework.web.context.ContextLoaderListener</listener-class>
  </listener>
  <context-param>
    <param-name>contextConfigLocation</param-name>
    <param-value>classpath:applicationContext.xml</param-value>
  </context-param>


  <servlet>
      <servlet-name>spring</servlet-name>
      <servlet-class>org.springframework.web.servlet.DispatcherServlet</servlet-class>
  </servlet>
  <servlet-mapping>
      <servlet-name>spring</servlet-name>
      <url-pattern>/</url-pattern>
  </servlet-mapping>

  <welcome-file-list>
  <welcome-file>user.jsp</welcome-file>
  </welcome-file-list>

   <!-- 1.配置shiroFilter -->
   <!-- 参考官方文档 -->
    DelegatingFilterProxy实际上是Filter的一个带啦对象,默认情况下,spring会到IOC容器中查找和filter-name对应的filter bean ,也可以通过targetBeanName
    的初始化参数来配置filter的bean的id
   <filter>
        <filter-name>shiroFilter</filter-name>
         <filter-class>org.springframework.web.filter.DelegatingFilterProxy</filter-class>
        <init-param>
            <param-name>targetFilterLifecycle</param-name>
            <param-value>true</param-value>
        </init-param>
    </filter>
    <filter-mapping>
        <filter-name>shiroFilter</filter-name>
        <url-pattern>/*</url-pattern>
    </filter-mapping>

</web-app>
spring-servlet.xml
<context:component-scan  base-package="com.MrChengs.shiro"></context:component-scan>
<bean  class="org.springframework.web.servlet.view.InternalResourceViewResolver">
     <property name="prefix" value="/"></property>
     <property name="suffix" value=".jsp"></property>
</bean>
<mvc:annotation-driven></mvc:annotation-driven>
<mvc:default-servlet-handler/>
ehcache.xml来自

applicationContext.xml
     <!--
      1.配置SecurityManager
      -->
    <bean id="securityManager"  class="org.apache.shiro.web.mgt.DefaultWebSecurityManager">

        <property name="cacheManager" ref="cacheManager"/>
        <!-- Single realm app.  If you have multiple realms, use  the 'realms' property instead. -->

        <property name="realm" ref="jdbcRealm"/>
    </bean>


  <!--
      2. 配置CacheManager
      2.1需要加入ehcache的jar和配置文件
       -->
    <bean id="cacheManager"  class="org.apache.shiro.cache.ehcache.EhCacheManager">
        <!-- Set a net.sf.ehcache.CacheManager instance here if  you already have one.  If not, a new one
             will be creaed with a default config:
             <property name="cacheManager" ref="ehCacheManager"/>  -->
        <!-- If you don't have a pre-built  net.sf.ehcache.CacheManager instance to inject, but you want
             a specific Ehcache configuration to be used, specify  that here.  If you don't, a default
             will be used.: -->

        <property name="cacheManagerConfigFile"  value="classpath:ehcache.xml"/>
    </bean>

         <!--
            3.配置Realm
            3.1直接实现Realm接口的bean
          -->
    <bean id="jdbcRealm"  class="com.MrChengs.shiro.realms.ShiroRealm">

    </bean>


     <!--
      4.生命周期的LifecycleBeanPostProcessor,可以自动来调用在springIOC容器中shiro bean的生命周期的方法
      -->
    <bean id="lifecycleBeanPostProcessor"  class="org.apache.shiro.spring.LifecycleBeanPostProcessor"/>
    <!-- Enable Shiro Annotations for Spring-configured beans.   Only run after
         the lifecycleBeanProcessor has run: -->
    <!--
      5.启用IOC容器中shiro注解,但是必须在配置了lifecycleBeanProcessor之后才可以使用
     -->
    <bean  class="org.springframework.aop.framework.autoproxy.DefaultAdvisorAutoProxyCreator"
          depends-on="lifecycleBeanPostProcessor"/>
    <bean  class="org.apache.shiro.spring.security.interceptor.AuthorizationAttributeSourceAdvisor">
        <property name="securityManager" ref="securityManager"/>
    </bean>

     <!--
      6.配置ShiroFilterFactoryBean
       id必须和web.xml文件中的DelegatingFilterProxy,的filter-name一致
        若不一致,则会抛异常org.springframework.beans.factory.NoSuchBeanDefinitionException:  No bean named 'shiroFilter' is defined
        因为Shiro会在IOC容器中查找和<filter-name>和
      -->
    <bean id="shiroFilter"  class="org.apache.shiro.spring.web.ShiroFilterFactoryBean">
        <property name="securityManager" ref="securityManager"/>

        <!-- 登陆页面 -->
        <property name="loginUrl" value="/login.jsp"/>
        <!-- 登陆成功页面 -->
        <property name="successUrl" value="/list.jsp"/>
        <!-- 没有权限的页面 -->
        <property name="unauthorizedUrl" value="/unauthor.jsp"/>
        <!-- The 'filters' property is not necessary since any  declared javax.servlet.Filter bean
             defined will be automatically acquired and available  via its beanName in chain
             definitions, but you can perform overrides or  parent/child consolidated configuration
             here if you like: -->
        <!-- <property name="filters">
            <util:map>
                <entry key="aName" value-ref="someFilterPojo"/>
            </util:map>
        </property> --

        <!--
            配置那些页面需要受保护,以及访问这些页面需要的的权限

            1)anon 可以被匿名访问
            2)authc 必须认证即登陆后才可以访问的页面
        -->
        <property name="filterChainDefinitions">
            <value>
                /login.jsp = anon

                # everything else requires authentication:
                /** = authc
            </value>
        </property>
    </bean>
此时访问几个jsp页面都是默认自动访问下面的url
2.工作流程
与web集成
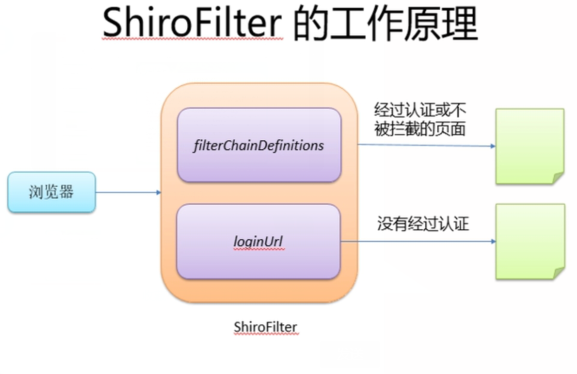
---Shiro提供了与web集成的支持,其通过ShiroFilter入口拦截需要安全控制的URL,然后进行相应的控制
---ShiroFilter类似Strus2/Springmvc这种web框架的前端控制器,是安全控制的入口点,其负责读取配置文件,然后判断URL是否需要登陆/权限等工作

3.关于DelegatingFilterProxy的配置
两种方法:
两个名字一致
或者下图的方法

其他均会报错!!!


