6、Android---运用手机多媒体(待完成)
6.1、程序运行在手机上
6.2、使用通知
通知是Android中比较由特色的一个功能
当某个应用程序需要向用户发出一些提示信息时
而该程序由不在前台的显示
就可以借助通知来实现
6.2.1、通知的基本用法
通知既可以在活动中创建又可以在广播接收器中创建
步骤:
首先需要一个NotificationManager来对通知进行管理
可以调用Contexe大的getSystemService()方法获取到
getSystemService()方法接受一个字符串参数用于确定获取系统的哪一个服务
这里传入Context.NOTIFICATION_SERVICE即可
获取NotificationManager的梳理就可以写成:
NotificationManager manager = (NotificationManager)
getSystemService(Context.NOTIFICATION_SERVICE);
其次使用一个Builder构造器来创建Notification对象
使用support库中提供的兼容API
support-4库中提供了一个Notification类
是哟个这个类构造器创建Notification对象
可以保证在所有的Android系统版本上都能使用
Notification notification = new NotificationCompat.Builder(content).build();
此时创建了一个空的Notification对象,并没有实际的作用
可以使用最终的build()方法之前连缀任意多的设置方法来创建一个丰富的Notification对象
Notification notification = new BotificationCompat.Builder(context)
.setContentTittle("tittle")
.setContentText("text")
.setWhen(System.currentTimeMillis())
.setSmallIcon(R.drawable,small,icon)
.setLargeIcon(BitmapFactory.decodeResource(getResource(),
R.drawable.larfe_icon))
.build();
setContentTittle:用于指定指定通知标题的内容,下拉系统状态栏就可以看到这部分内容
setContentText:指定统治的正文的上下文
setWhen:指定通知被创建的时间
setSmallIcon:设置通知的小图标
setLargeIcon:设置通知的大图标,当系统下拉时能可以看到设置的大图标
最后:以上的工作都做完之后
只需要调用NotificationManager的notify()方法就可以让通知显示出来
两个参数:
1、id,保证每个统治的id都是不同的
2、Notification对象,这里直接将创建好的Notification对象传入即可
manager.notify(1,notification);
设置一按钮进行发送通知:
    <Button
        android:text="发送通知"
        android:id="@+id/send"
        android:layout_width="match_parent"
        android:layout_height="wrap_content" />
在MianActivity中:
public class MainActivity extends AppCompatActivity {

    @Override
    protected void onCreate(Bundle savedInstanceState) {
        super.onCreate(savedInstanceState);
        setContentView(R.layout.activity_main);


        Button button = (Button) findViewById(R.id.send);
        button.setOnClickListener(new View.OnClickListener() {
            @Override
            public void onClick(View v) {
                NotificationManager manager =
                        (NotificationManager) getSystemService(NOTIFICATION_SERVICE);
                Notification notification = new NotificationCompat.Builder(MainActivity.this)
                        .setContentTitle("tittle")
                        .setContentText("msg")
                        .setWhen(System.currentTimeMillis())
                        .setSmallIcon(R.drawable.send)
                        .setLargeIcon(BitmapFactory.decodeResource(getResources(),R.drawable.ff))
                        .build();
                manager.notify(1,notification);
            }
        });

    }
}
ff.png:

send.png

点击按钮之后
通知栏中会进行发送通知
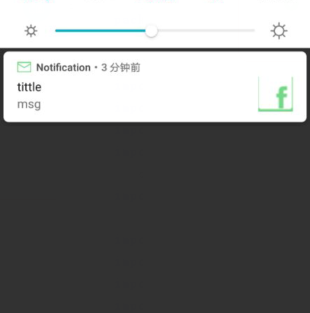
此时的这个是没有点击效果的
也没有反应
如果要实现点击的设置
需要涉及到:PendingIntent
PendingInternet的用法:
提供了几个静态方法用于获取PendingInternet的实例
可以根据选择使用getActivity()方法
getBroadcast()方法、getService()方法
这几个方法的参数都是相同的
1、content
2、一般传入0
3、Intent对象,可以通过这个对象构建出pendingInternet
4、用于确定PendingInternet的行为
FLAG_ONE_SHOT、FLAG_NO_CREATE、FLAG_CANCEL_CURRENT、FLAG_UPDATE_CURRENT
通常情况下传入0
NotificationCompat.Buolder这个构造器中还可以连缀一个setContentIntent()方法
接受的参数十一和PPendingIntent对象
这里就可以通过构造出的一个延迟执行的意图
当用户点击时就可以跳转到该逻辑
此时新建一个活动:
    <TextView
        android:layout_width="match_parent"
        android:layout_height="wrap_content"
        android:text="已经跳转到第二个页面"/>
在哦MianActivity中:
public class MainActivity extends AppCompatActivity {

    @Override
    protected void onCreate(Bundle savedInstanceState) {
        super.onCreate(savedInstanceState);
        setContentView(R.layout.activity_main);


        Button button = (Button) findViewById(R.id.send);
        button.setOnClickListener(new View.OnClickListener() {
            @Override
            public void onClick(View v) {
                Toast.makeText(MainActivity.this,"send",Toast.LENGTH_LONG).show();
                Intent intent = new Intent(MainActivity.this,Main2Activity.class);
                PendingIntent pendingIntent = PendingIntent.getActivity(MainActivity.this,0,intent,0);

                NotificationManager manager =
                        (NotificationManager) getSystemService(NOTIFICATION_SERVICE);
                Notification notification = new NotificationCompat.Builder(MainActivity.this)
                        .setContentTitle("tittle")
                        .setContentText("msg")
                        .setWhen(System.currentTimeMillis())
                        .setSmallIcon(R.drawable.send)
                        .setLargeIcon(BitmapFactory.decodeResource(getResources(),R.drawable.ff))
                        .setContentIntent(pendingIntent)
                        .build();
                manager.notify(1,notification);
            }
        });
    }
}
此时点击通知之后直接跳转到新建的页面
移除通知:
此时点击之后的通知依然还在通知栏并没有消失
此时突然让其消失的方法由:
 Notification notification = new NotificationCompat.Builder(MainActivity.this)
                        .setContentTitle("tittle")
                        .setContentText("msg")
                        .setWhen(System.currentTimeMillis())
                        .setSmallIcon(R.drawable.send)
                        .setLargeIcon(BitmapFactory.decodeResource(getResources(),R.drawable.ff))
                        .setContentIntent(pendingIntent)
                        .setAutoCancel(true)
                        .build();
                manager.notify(1,notification);
使用setAuticancel()方法闯入true:表示点击这个统治的时候通知会自动去小品
6.2.2、通知的进阶技巧
NotificationCompat.Builder中提供了非常丰富的API来创建通知
对API中的一些常用的额方法进行学习
1、setSound()方法可以在接收通知的时候发送一段音频
能够更好的告知用户通知的到来
接收一个Uri参数
所以在指定音频文件的时候还需要首先获取到音频文件对应的Uri
手机/system/media/audio/ringtones目录下就有很多的音频文件
2、setvibrate()方法在接收通知的时候让手机震动
参数是一个数组,用于设置手机震动的时长
以毫秒为单位

想要手机震动还需要申请权限:
                Intent intent = new Intent(MainActivity.this,Main2Activity.class);
                PendingIntent pendingIntent = PendingIntent.getActivity(MainActivity.this,0,intent,0);

                NotificationManager manager =
                        (NotificationManager) getSystemService(NOTIFICATION_SERVICE);
                manager.cancel(1);
                Notification notification = new NotificationCompat.Builder(MainActivity.this)
                        .setContentTitle("tittle")
                        .setContentText("msg")
                        .setWhen(System.currentTimeMillis())
                        .setSmallIcon(R.drawable.send)
                        .setLargeIcon(BitmapFactory.decodeResource(getResources(),R.drawable.ff))
                        .setContentIntent(pendingIntent)
                        .setVibrate(new long[]{0,2000,1000,1000})
                        .setSound(Uri.fromFile(new File("/netease/cloudmusic/Music/dd.mp3")))

                        .build();
                manager.notify(1,notification);
            }
关于LED等的设置
一般手机设置的都有Led等
setLights()接收三个参数
1、LED灯的颜色
2、指定LED灯亮的时长
3、执行LED等暗去的时长
毫秒为单位
                Notification notification = new NotificationCompat.Builder(MainActivity.this)
                        .setContentTitle("tittle")
                        .setContentText("msg")
                        .setWhen(System.currentTimeMillis())
                        .setSmallIcon(R.drawable.send)
                        .setLargeIcon(BitmapFactory.decodeResource(getResources(),R.drawable.ff))
                        .setContentIntent(pendingIntent)
                        .setVibrate(new long[]{0,2000,1000,1000})
                        .setSound(Uri.fromFile(new File("/netease/cloudmusic/Music/dd.mp3")))
                        .setLights(Color.RED,1000,1000)
                        .build();
6.2.3、通知的高级功能
NotificationCompat.Builder类中
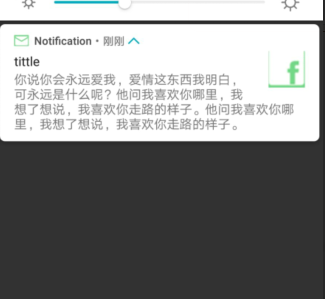
1、setStyle()方法,允许构建出富文本通知内容
也就是说通知中通知中不仅可以文字和图片还可以有其他的通知效果
接收一个NotificationCompat.Style的参数这个参数即使用来构建富文本信息的如文字、图片等
当文字内容较多的时候会使用...来代替
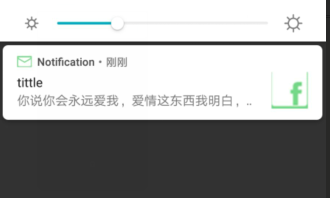
使用:setStyle(new NotificationCompat.BigTextStyle().bigText()
       Notification notification = new NotificationCompat.Builder(MainActivity.this)
                        .setContentTitle("tittle")

                        .setWhen(System.currentTimeMillis())
                        .setSmallIcon(R.drawable.send)
                        .setLargeIcon(BitmapFactory.decodeResource(getResources(),R.drawable.ff))
                        .setContentIntent(pendingIntent)
                        .setVibrate(new long[]{0,2000,1000,1000})
                        .setLights(Color.RED,1000,1000)
                        .setPriority(NotificationCompat.PRIORITY_MAX)
                        .setStyle(new NotificationCompat.BigTextStyle().bigText("你说你会永远爱我,爱情这东西我明白,可永远是什么呢?他问我喜欢你哪里,我想了想说,我喜欢你走路的样子。他问我喜欢你哪里,我想了想说,我喜欢你走路的样子。"))
                        .build();
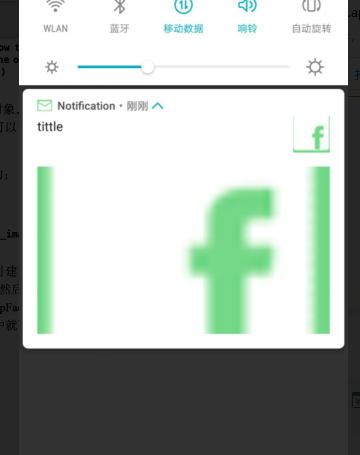
同时还可以设置图片进行方法:new NotificationCompat.BigPictureStyle().bigPicture()
                Notification notification = new NotificationCompat.Builder(MainActivity.this)
                        .setContentTitle("tittle")

                        .setWhen(System.currentTimeMillis())
                        .setSmallIcon(R.drawable.send)
                        .setLargeIcon(BitmapFactory.decodeResource(getResources(),R.drawable.ff))
                        .setContentIntent(pendingIntent)
                        .setVibrate(new long[]{0,2000,1000,1000})
                        .setLights(Color.RED,1000,1000)
                        .setPriority(NotificationCompat.PRIORITY_MAX)
                        .setStyle(new NotificationCompat.BigTextStyle().bigText("你说你会永远爱我,爱情这东西我明白,可永远是什么呢?他问我喜欢你哪里,我想了想说,我喜欢你走路的样子。他问我喜欢你哪里,我想了想说,我喜欢你走路的样子。"))
                        .setStyle(new NotificationCompat.BigPictureStyle().bigPicture(BitmapFactory.decodeResource(getResources(),R.drawable.ff)) )
                        .build();
2、setProiority()设置统治的重要程度
接受一个整形的参数用于设置这条统治的重要程度
1、PRIORITY_DEFAULT默认重要程度
2、PRIORITY_MIN最低的重要程度,可能在特定的常豪才能进行显示该通知
3、PRIORITY_LOW较低的重要程度
系统可能将这类通知缩小或者显示在其中中国要通知之后
4、PRIORITY_HIGH表示较高的程度
系统可能将这类通知方法
5、PRIORITY_MAX最高成都的通知
这类通知消息必须要用户立刻看到
         Notification notification = new NotificationCompat.Builder(MainActivity.this)
                        .setContentTitle("tittle")
                        .setContentText("你说你会永远爱我,爱情这东西我明白,可永远是什么呢?他问我喜欢你哪里,我想了想说,我喜欢你走路的样子。他问我喜欢你哪里,我想了想说,我喜欢你走路的样子。")
                        .setWhen(System.currentTimeMillis())
                        .setSmallIcon(R.drawable.send)
                        .setLargeIcon(BitmapFactory.decodeResource(getResources(),R.drawable.ff))
                        .setContentIntent(pendingIntent)
                        .setVibrate(new long[]{0,2000,1000,1000})
                        .setLights(Color.RED,1000,1000)
                        .setPriority(NotificationCompat.PRIORITY_MAX)
                        .build();
6.3、调用摄像头和相册
如现在社交软件可以使用摄像头拍摄进行上传等
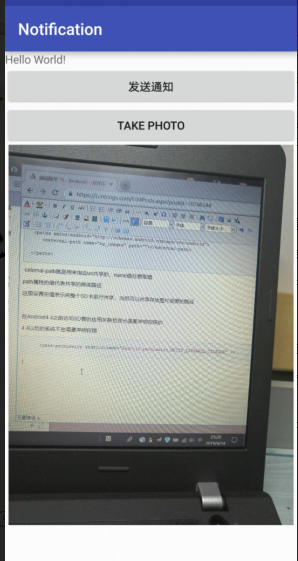
按钮用于前去相机页面
ImageView用于显示拍照之后的图片
    <Button
        android:id="@+id/take_photo"
        android:text="take photo"
        android:layout_width="match_parent"
        android:layout_height="wrap_content" />

    <ImageView
        android:layout_width="wrap_content"
        android:layout_height="wrap_content"
        android:id="@+id/photo"
        android:layout_gravity="center_horizontal"/>
MainActivity中
public class MainActivity extends AppCompatActivity {
    private Uri imageUri;
    private ImageView picture;
    public  static final  int TAKE_PHOTO = 1;

    @Override
    protected void onCreate(Bundle savedInstanceState) {
        super.onCreate(savedInstanceState);
        setContentView(R.layout.activity_main);

        Button take_photo = (Button) findViewById(R.id.take_photo);
        picture = (ImageView) findViewById(R.id.photo);
        take_photo.setOnClickListener(new View.OnClickListener() {
            @Override
            public void onClick(View v) {
                File outputImage = new File(getExternalCacheDir(),"output_image.jpg");

                try {
                    if (outputImage.exists()){
                        outputImage.delete();
                    }
                    outputImage.createNewFile();
                }catch (Exception e){
                    e.printStackTrace();
                }

                if (Build.VERSION.SDK_INT >=24){
                    imageUri = FileProvider.getUriForFile(MainActivity.this,"com.example.cameraalbumtest",outputImage);
                }else {
                    imageUri = Uri.fromFile(outputImage);
                }
                //启动相机
                Intent intent = new Intent("android.media.action.IMAGE_CAPTURE");
                intent.putExtra(MediaStore.EXTRA_OUTPUT,imageUri);
                startActivityForResult(intent,TAKE_PHOTO);
            }
        });

    }

    @Override
    protected void onActivityResult(int requestCode, int resultCode, Intent data) {
        switch (requestCode){
            case TAKE_PHOTO:
                if (resultCode == RESULT_OK){
                    try {
                        //显示照片
                        Bitmap bitmap = BitmapFactory.decodeStream(getContentResolver().openInputStream(imageUri));
                        picture.setImageBitmap(bitmap);
                    }catch (Exception e){
                        e.printStackTrace();
                    }
                }
                break;
            default:
        }
    }
}
首先是对控件进行绑定,按钮实现点击事件的监听
点击事件的逻辑:
1、创建一个File对象,用于存放摄像头拍下的图片,并且把图片命名为output_image.jpg
并将照片存放在手机SD卡的应用关联目录下
关联目录:指SD卡中专门用于存放当前应用缓存的数据,
使用getExternalCacheDir()方法可以得到这个目录
具体的路径是:/sdcard/Android/data<package name>/cache
Android6.0之后SD卡被列为危险权限,如果将图片存放在SD卡任何目录
都要进行运行时权限处理才行,使用关联目录可以跳过这一步
2、判断, if (Build.VERSION.SDK_INT >=24)
如果运行设备版本系统低于7.0,就调用Uri的fromFile()方法将File对象转换为Uri对象
这个Uri对象标识着output_image.jpg这张图片的真实路径
否则,就调用FileProvider的getUriForFile()方法将File对象转为一个封装过的Uri
getUriForFile()方法接收三个参数:
1、content对象
2、任意唯一的字符串
3、刚刚创建的File对象
Android7.0开始,直接使用本地真实路径的Uri是认为是不安全的,会抛出一个FilrUriException以尝
而FileProvider是一个特殊的内容提供器,使用和内容提供器类似的机制对数据进行保护
可以选择性的将封装过的Uri共享给外部,从而提高应用的安全性
3、创建一个Intent对象,并将这个Intent的action指定为android.media.action.IMAGE_CAPTURE
在调用Intent的putExtra()方法指定图片的输出地址,填入Uri对象
最后调用startActivityForResult()方法启动活动
传递的是一个隐式的Intent,系统能够相应这个Intent的活动启动,这样照相机就被打开了
使用的是startActivityForResult()启动活动,拍完照之后会有结果返回到onActivityResult()中
如果发现拍照成功就调用BitmapFactory的decodeStream()方法将output_image.jsp
这张图片解析成Bitmap对象
最后将他设置到ImageView中
 中进行注册
中进行注册
  ......
  <provider
            android:name="android.support.v4.content.FileProvider"
            android:authorities="com.example.cameraalbumtest"
            android:exported="false"
            android:grantUriPermissions="true" >
            <meta-data
                android:name="android.support.FILE_PROVIDER_PATHS"
                android:resource="@xml/file_paths" />
        </provider>
    </application>
android:name属性值是固定的
android:authorities属性的指必须和刚刚FileProvider.getUriForFile()方法中的第二个参数一致
使用meta-data标签指定Uri的共享路径
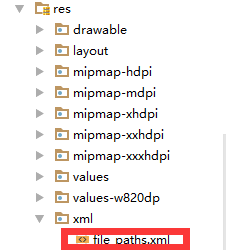
并且引用 一个@xml/file_paths资源
file_paths.xml
<?xml version="1.0" encoding="utf-8"?>
 <paths xmlns:android="http://schemas.android.com/apk/res/android">
    <external-path name="my_images" path=""></external-path>

</paths>
external-path就是用来指定uri共享的,name值任意取值
path属性的值代表共享的具体路径
这里设置空值表示将整个SD卡进行共享,当然可以共享存放图片资源的路径
在Android4.4之前访问SD看的应用关联目录也是要声明权限的
4.4以后的系统不在需要声明权限
<uses-permission android:name="android.permission.WRITE_EXTERNAL_STORAGE" />
6.3.2、从相册中选择照片


