【编程不良人】RabbitMQ笔记-RabbitMQ快速入门
声明:本笔记是博主在学习b站up主“编程不良人”的RabbitMQ视频中的随笔,全为自己手敲
安装运行rabbitmq
1.docker安装rabbitmq:
docker run -it --rm --name rabbitmq -p 5672:5672 -p 15672:15672 rabbitmq:3-management
- - rm(关闭容器时删除容器)
2.访问localhost:15672

Java 使用rabbitmq
1 .导入依赖:
   <dependency>
      <groupId>com.rabbitmq</groupId>
      <artifactId>amqp-client</artifactId>
      <version>5.7.2</version>
   </dependency>
2.创建虚拟主机:

3.创建用户:

4.赋予ems用户权限:

六种模型(老版本,现在为七种):

1.Hello World模型(点对点消费)
1 . 创建生产者类:
public class Provider {
    @Test
    public void testSend() throws Exception{
        //创建连接工厂
        ConnectionFactory connectionFactory = new ConnectionFactory();
        //设置主机
        connectionFactory.setHost("127.0.0.1");
        //设置端口
        connectionFactory.setPort(5672);
        //设置连接的虚拟主机
        connectionFactory.setVirtualHost("/ems");
        //设置用户名和密码
        connectionFactory.setUsername("ems");
        connectionFactory.setPassword("123");

        //获取连接对象
        Connection connection = connectionFactory.newConnection();
        //获取连接通道
        Channel channel = connection.createChannel();
        //通道绑定消息队列
        channel.queueDeclare("hello", false, false, false, null);

        //发部消息
        channel.basicPublish("","hello",null,"hello rabbitmq".getBytes());

        channel.close();
        connection.close();

    }
}
2.运行生产者:

3.发送成功:

4.创建Consumer消费者:
注意这里要用main函数
public class Consumer {

    public static void main(String[] args) throws Exception {

        //创建连接工厂
        ConnectionFactory connectionFactory = new ConnectionFactory();
        //设置主机
        connectionFactory.setHost("127.0.0.1");
        //设置端口
        connectionFactory.setPort(5672);
        //设置连接的虚拟主机
        connectionFactory.setVirtualHost("/ems");
        //设置用户名和密码
        connectionFactory.setUsername("ems");
        connectionFactory.setPassword("123");

        //获取连接对象
        Connection connection = connectionFactory.newConnection();
        //获取连接通道
        Channel channel = connection.createChannel();
        //通道绑定消息队列
        channel.queueDeclare("hello", false, false, false, null);

        channel.basicConsume("hello", true, new DefaultConsumer(channel) {
            /**
             * @param body 接受到的消息
             */
            @Override
            public void handleDelivery(String consumerTag, Envelope envelope, AMQP.BasicProperties properties, byte[] body) throws IOException {
                System.out.println(new String(body));
            }
        });

        //如果想一直监听就不要关闭通道
//        channel.close();
//        connection.close();


    }
}
5.运行消费者:
注意这里有3条未消费的信息:
 一次运行全部取出:
提示:
- 参数详解:
![在这里插入图片描述]()
- 消息队列持久化修改第三个参数:
![在这里插入图片描述]()
- 生产者和消费者绑定的通道的参数必须一模一样,否则找不到对应的队列
![在这里插入图片描述]()


2.workqueue模式(拿到消息即销毁)
1.生产者
public class Provider {
    @Test
    public void testSend() throws Exception{
        //获取连接对象
        Connection connection = RabbitMQUtil.getConnection();


        //获取连接通道
        Channel channel = connection.createChannel();
        //通道绑定消息队列
        channel.queueDeclare("work", false, false, false, null);

        for (int i = 1 ;i <= 20;i++) {
            //发部消息
            channel.basicPublish("","work",null,("   :"+i+"hello rabbitmq").getBytes());
        }

        RabbitMQUtil.close(channel, connection);
    }

}
2.消费者1,2
public class Consumer1 {

    public static void main(String[] args) throws Exception {

        Connection connection = RabbitMQUtil.getConnection();
        //获取连接通道
        Channel channel = connection.createChannel();
        //通道绑定消息队列
        channel.queueDeclare("work", false, false, false, null);

        channel.basicConsume("work", true, new DefaultConsumer(channel) {
            /**
             * @param body 接受到的消息
             */
            @Override
            public void handleDelivery(String consumerTag, Envelope envelope, AMQP.BasicProperties properties, byte[] body) throws IOException {
                System.out.println("消费者1"+new String(body));
            }
        });


    }
}
public class Consumer2 {

    public static void main(String[] args) throws Exception {

        Connection connection = RabbitMQUtil.getConnection();
        //获取连接通道
        Channel channel = connection.createChannel();
        //通道绑定消息队列
        channel.queueDeclare("work", false, false, false, null);

        channel.basicConsume("work", true, new DefaultConsumer(channel) {
            /**
             * @param body 接受到的消息
             */
            @Override
            public void handleDelivery(String consumerTag, Envelope envelope, AMQP.BasicProperties properties, byte[] body) throws IOException {
                System.out.println("消费者2"+new String(body));
            }
        });

    }
}
3.运行:


这个时候会有两种问题:
1.不能实现能者多劳
2.一次性接受全部的数据,万一一个消费者执行到一般就死机了,后面没确认的数据会全部丢失
下面来改进一下:
1.消费者1:
public class Consumer1 {

    public static void main(String[] args) throws Exception {

        Connection connection = RabbitMQUtil.getConnection();
        //获取连接通道
        Channel channel = connection.createChannel();
        //通道绑定消息队列
        channel.queueDeclare("work", false, false, false, null);
        //每一次只能消费一个消息
        channel.basicQos(1);
        //false 不会自动确认消息
        channel.basicConsume("work", false, new DefaultConsumer(channel) {
            /**
             * @param body 接受到的消息
             */

            @Override
            public void handleDelivery(String consumerTag, Envelope envelope, AMQP.BasicProperties properties, byte[] body) throws IOException {
                try {
                    Thread.sleep(2000);
                } catch (InterruptedException e) {
                    e.printStackTrace();
                }
                System.out.println("消费者1"+new String(body));
            }
        });


    }
}
2.消费者2
public class Consumer2 {

    public static void main(String[] args) throws Exception {

        Connection connection = RabbitMQUtil.getConnection();
        //获取连接通道
        Channel channel = connection.createChannel();

        //每一次只能消费一个消息
        channel.basicQos(1);
        //通道绑定消息队列
        channel.queueDeclare("work", false, false, false, null);

        channel.basicConsume("work", false, new DefaultConsumer(channel) {
            /**
             * @param body 接受到的消息
             */
            @Override
            public void handleDelivery(String consumerTag, Envelope envelope, AMQP.BasicProperties properties, byte[] body) throws IOException {
                System.out.println("消费者2"+new String(body));
            }
        });

    }
}
3.运行


这个时候查看队列:
但是!这个时候我们打开后台发现还有一条消息未确认,
 因为我们没有打开手动确认,所有我们在代码中还要添加一条代码:
-//手动确认 参数1:手动确认消息标识  参数2:false 每次确认一个
channel.basicAck(envelope.getDeliveryTag(),false);


总结:
1.实现了能者多劳
2.不会出现消息的丢失
3.Publish模型(发布订阅/fanout模型)
1.创建生产者:
public class Provider {

    @Test
    public void testSend() throws IOException, TimeoutException {
        //获取连接对象
        Connection connection = RabbitMQUtil.getConnection();
        //获取连接通道
        Channel channel = connection.createChannel();
        //声明交换机 参数一:声明交换机的名字 参数二:声明交换机的类型 这里必须是fanout,即发布订阅模型
        channel.exchangeDeclare("logs", "fanout");

        channel.basicPublish("logs","",null,"hello rabbitMQ fanout".getBytes());

        RabbitMQUtil.close(channel,connection);

    }
}
2 .消费者(3个一样):
public class Consumer1 {

    public static void main(String[] args) throws Exception {

        Connection connection = RabbitMQUtil.getConnection();
        //获取连接通道
        Channel channel = connection.createChannel();
        //创建临时队列
        String queueName = channel.queueDeclare().getQueue();

        //绑定交换机和队列
        channel.queueBind(queueName, "logs", "");

        channel.basicConsume(queueName, true, new DefaultConsumer(channel) {
            /**
             * @param body 接受到的消息
             */
            @Override
            public void handleDelivery(String consumerTag, Envelope envelope, AMQP.BasicProperties properties, byte[] body) throws IOException {
                System.out.println("消费者1  :"+new String(body));
            }
        });

    }
}
3.运行:

即可实现发布订阅模型(广播模型)
4.Routing(静态路由模型)
指定routingkey,如果消费者拥有和生产者相同的routingkey就可以接受到生产者发送的信息
1.生产者
public class Provider {

    @Test
    public void testSend() throws IOException, TimeoutException {

        Connection connection = RabbitMQUtil.getConnection();
        //获取连接通道
        Channel channel = connection.createChannel();
        //定义交换机名称
        String exchangeName = "log_direct";
        //第二个参数:direct 声明该模式为路由模式
        channel.exchangeDeclare(exchangeName, "direct");
        //定义路由类型
        String routingkey = "error";
        channel.basicPublish(exchangeName,routingkey,null,(routingkey+"的消息由生产者发送").getBytes());

        RabbitMQUtil.close(channel,connection);
    }

}
2.消费者1:
public class Consumer1 {

    public static void main(String[] args) throws Exception {

        Connection connection = RabbitMQUtil.getConnection();
        //获取连接通道
        Channel channel = connection.createChannel();
        //定义交换机名称
        String exchangeName = "log_direct";
        channel.exchangeDeclare(exchangeName, "direct");

        //创建一个临时队列
        String queue = channel.queueDeclare().getQueue();

        //绑定交换机和队列
        channel.queueBind(queue, exchangeName, "error");

        channel.basicConsume(queue,true,new DefaultConsumer(channel){
            @Override
            public void handleDelivery(String consumerTag, Envelope envelope, AMQP.BasicProperties properties, byte[] body) throws IOException {
                System.out.println("消费者1  :"+new String(body));
            }
        });


    }
}
3.消费者2:
public class Consumer2 {

    public static void main(String[] args) throws Exception {

        Connection connection = RabbitMQUtil.getConnection();
        //获取连接通道
        Channel channel = connection.createChannel();
        //定义交换机名称
        String exchangeName = "log_direct";
        channel.exchangeDeclare(exchangeName, "direct");

        //创建一个临时队列
        String queue = channel.queueDeclare().getQueue();

        //绑定交换机和队列,指定routingkey
        channel.queueBind(queue, exchangeName, "debug");
        channel.queueBind(queue, exchangeName, "info");
        channel.queueBind(queue, exchangeName, "warning");

        channel.basicConsume(queue,true,new DefaultConsumer(channel){
            @Override
            public void handleDelivery(String consumerTag, Envelope envelope, AMQP.BasicProperties properties, byte[] body) throws IOException {
                System.out.println("消费者2  :"+new String(body));
            }
        });


    }
}
4.运行:

5.topics(动态路由)
代码基本一样

这个跟静态路由的区别就是可以使用通配符:
* 代表一个单词
#代表零个或者多个单词
比如生产者发布的routinkey为 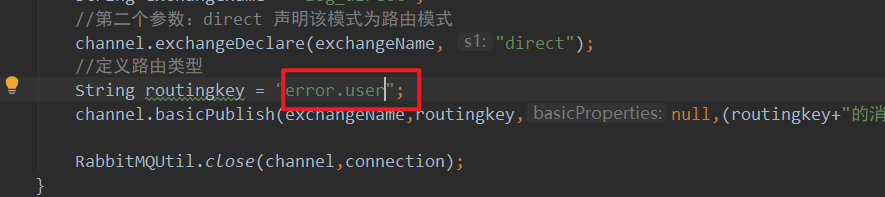
消费者要接受的就是*.user 或者error.*

消费者要接受的就是*.user.* 或者error.*.*
或者就是error.#
spring boot整合RabbitMQ: 十分钟急速上手.

 浙公网安备 33010602011771号