Steps to developing Metro style apps 第一章-Creat a UI(1)
原文地址:http://msdn.microsoft.com/en-us/library/windows/apps/br211362.aspx
第一节:Defining layout, navigation, and commands (JavaScript)
Supporting Navigation-Quickstart: Using single-page navigation
Creating a basic link-创建基础连接
最简单的导航就是超级连接了,下面看个例子:
<p><a href="page2.html">Go to page 2</a></p>
这是一个相对地址连接。如果想明确指定 本地文件的完全路径,可以使用 ms-appx URL scheme,
格式:ms-appx:///file path
例子:
<p><a href="ms-appx:///page2.html">Go to page 2</a></p>
Navigation models: multi-page 多页面导航/ single-page 单页面导航
multi-page navigation:每一个网站都会有很多导航页面,每个页面都有自己的脚本,样式,内容去展示。
single-page navigation:把页面分成很多块,他不会导航到别的页面,而是载入需要的数据到本页面来。
实现但页面导航,可以使用如下四种办法:
1.使用DOM 从别的地方载入文档
2.使用 HTMLControl (http://msdn.microsoft.com/en-us/library/windows/apps/hh700625.aspx)
3.使用 Iframe(http://msdn.microsoft.com/en-us/library/windows/apps/hh465955.aspx)
4.使用PageControl(http://msdn.microsoft.com/en-us/library/windows/apps/hh770100.aspx)
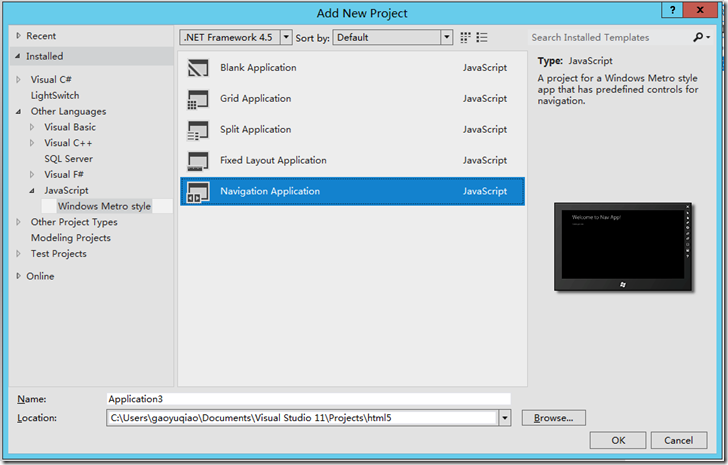
vs11提供了现成的 Navigation模板,下面演示创建多页面导航和使用但页面导航。
1.新建 Navigation Application
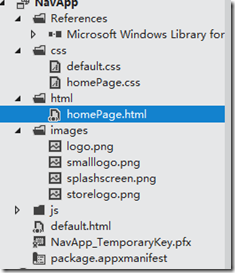
文件结构:
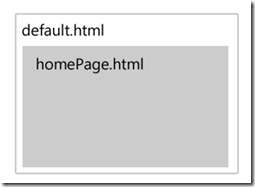
default.html是起始页面。
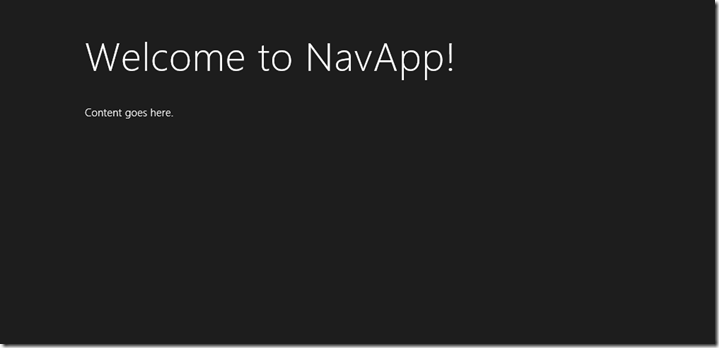
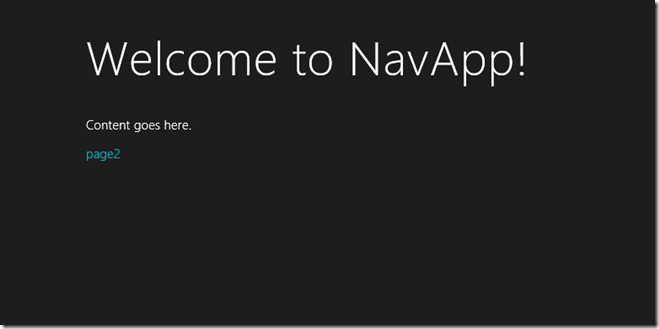
homepage.html 显示的内容是 Content goes here,是嵌套在 default.html内得,
项目运行如图:
下面是 default.html页面的HTML代码:
1: <!DOCTYPE html>
2: <html>
3: <head>
4: <meta charset="utf-8">
5: <title>NavApp</title>
6: 7: <!-- WinJS references -->
8: <link href="//Microsoft.WinJS.0.6/css/ui-dark.css" rel="stylesheet">
9: <script src="//Microsoft.WinJS.0.6/js/base.js"></script>
10: <script src="//Microsoft.WinJS.0.6/js/ui.js"></script>
11: 12: <!-- NavApp references -->13: <link href="/css/default.css" rel="stylesheet">
14: <script src="/js/default.js"></script>
15: <script src="/js/navigator.js"></script>
16: </head>
17: <body>
18: <div id="contenthost" data-win-control="NavApp.PageControlNavigator" data-win-options="{home: '/html/homePage.html'}"></div>
19: <!-- <div id="appbar" data-win-control="WinJS.UI.AppBar">
20: <button data-win-control="WinJS.UI.AppBarCommand" data-win-options="{id:'cmd', label:'Command', icon:'placeholder'}"></button>
21: </div> -->
22: </body>
23: </html>
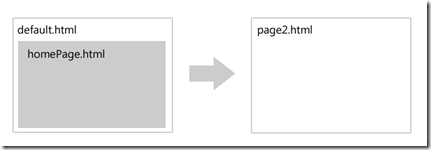
下面的图就是 展示 default.html和 homePage.html的层次关系:
下面,我们使用PageControlNavigator和 Page controls来创建我们自己的页面。
在html文件夹内新建一个 页面控件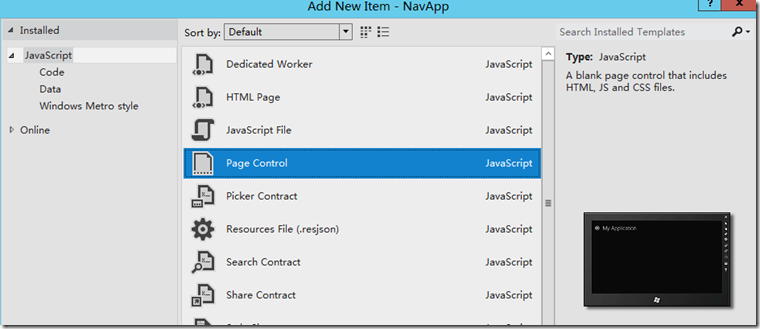
page2.html内容应是如下:
1: <!DOCTYPE html>
2: <html>
3: <head>
4: <meta charset="utf-8">
5: <title>page2</title>
6: 7: <!-- WinJS references -->
8: <link href="//Microsoft.WinJS.0.6/css/ui-dark.css" rel="stylesheet">
9: <script src="//Microsoft.WinJS.0.6/js/base.js"></script>
10: <script src="//Microsoft.WinJS.0.6/js/ui.js"></script>
11: 12: <link href="page2.css" rel="stylesheet">
13: <script src="page2.js"></script>
14: </head>
15: <body>
16: <div class="page2 fragment">
17: <header aria-label="Header content" role="banner">
18: <button class="win-backbutton" aria-label="Back" disabled></button>
19: <h1 class="titlearea win-type-ellipsis">
20: <span class="pagetitle">Welcome to page2</span>
21: </h1>
22: </header>
23: <section aria-label="Main content" role="main">
24: <p>Content goes here.</p>
25: </section>
26: </div>
27: </body>
28: </html>
1下面我们修改这个页面的内容。
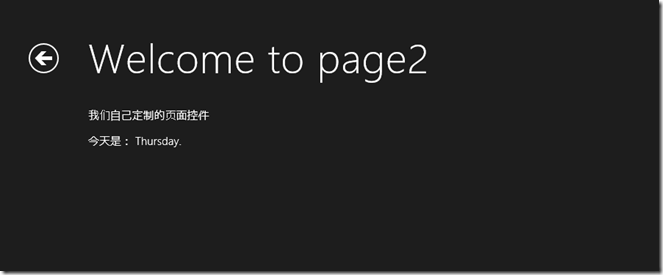
让页面显示新的东西和 显示今天的日期,修改的文件如下:
1: <!DOCTYPE html>
2: <html>
3: <head>
4: <meta charset="utf-8">
5: <title>page2</title>
6: 7: <!-- WinJS references -->
8: <link href="//Microsoft.WinJS.0.6/css/ui-dark.css" rel="stylesheet">
9: <script src="//Microsoft.WinJS.0.6/js/base.js"></script>
10: <script src="//Microsoft.WinJS.0.6/js/ui.js"></script>
11: 12: <link href="page2.css" rel="stylesheet">
13: <script src="page2.js"></script>
14: </head>
15: <body>
16: <div class="page2 fragment">
17: <header aria-label="Header content" role="banner">
18: <button class="win-backbutton" aria-label="Back" disabled></button>
19: <h1 class="titlearea win-type-ellipsis">
20: <span class="pagetitle">Welcome to page2</span>
21: </h1>
22: </header>
23: <section aria-label="Main content" role="main">
24: <p>我们自己定制的页面控件</p>
25: <p>今天是: <span id="datePlaceholder"></span>.</p>
26: </section>
27: </div>
28: </body>
29: </html>
2打开page2.js文件,内面的内容如下:
1: // For an introduction to the HTML Fragment template, see the following documentation:
2: // http://go.microsoft.com/fwlink/?LinkId=232511
3: (function () {
4: "use strict";
5: 6: // This function is called whenever a user navigates to this page. It
7: // populates the page elements with the app's data.
8: function ready(element, options) {
9: // TODO: Initialize the fragment here.
10: } 11: 12: function updateLayout(element, viewState) {
13: // TODO: Respond to changes in viewState.
14: } 15: 16: WinJS.UI.Pages.define("/html/page2.html", {
17: ready: ready, 18: updateLayout: updateLayout 19: }); 20: })();3下面来修改 ready函数来设置 page2.html内 第25行<span>的innerText,修改后的page2.js入下:
1: // For an introduction to the HTML Fragment template, see the following documentation:
2: // http://go.microsoft.com/fwlink/?LinkId=232511
3: (function () {
4: "use strict";
5: 6: // This function is called whenever a user navigates to this page. It
7: // populates the page elements with the app's data.
8: function ready(element, options) {
9: 10: var holder = document.querySelector("#datePlaceholder");
11: var calender = new Windows.Globalization.Calendar();
12: holder.innerText = calender.dayOfWeekAsString(); 13: 14: 15: } 16: 17: function updateLayout(element, viewState) {
18: // TODO: Respond to changes in viewState.
19: } 20: 21: WinJS.UI.Pages.define("/html/page2.html", {
22: ready: ready, 23: updateLayout: updateLayout 24: }); 25: })();4.使用 导航函数来实现页面间的跳转。
看下面 homePage.html的内容如下:
1: <!DOCTYPE html>
2: <html>
3: <head>
4: <meta charset="utf-8">
5: <title>homePage</title>
6: 7: <!-- WinJS references -->
8: <link href="//Microsoft.WinJS.0.6/css/ui-dark.css" rel="stylesheet">
9: <script src="//Microsoft.WinJS.0.6/js/base.js"></script>
10: <script src="//Microsoft.WinJS.0.6/js/ui.js"></script>
11: 12: <link href="/css/default.css" rel="stylesheet">
13: <link href="/css/homePage.css" rel="stylesheet">
14: <script src="/js/homePage.js"></script>
15: </head>
16: <body>
17: <!-- The content that will be loaded and displayed. -->
18: <div class="fragment homepage">
19: <header aria-label="Header content" role="banner">
20: <button class="win-backbutton" aria-label="Back" disabled></button>
21: <h1 class="titlearea win-type-ellipsis">
22: <span class="pagetitle">Welcome to NavApp!</span>
23: </h1>
24: </header>
25: <section aria-label="Main content" role="main">
26: <p>Content goes here.</p>
27: <a href="page2.html">page2</a>
28: </section>
29: </div>
30: </body>
31: </html>
首先 在 homepage.js里面添加一个函数,实现更改 超级连接的默认行为。
1: function linkClickEventHandler(eventInfo) {
2: eventInfo.preventDefault(); //阻止 超级连接的默认行为3: var link = eventInfo.target; //获取连接
4: WinJS.Navigation.navigate(link.href);//调用跳转 5: 6: }之后要在 homePage.js的ready函数内 给a标签添加 click事件监听,并赋予其 处理函数,
WinJS.Utilities.query("a").listen("click", linkClickEventHandler, false);
下面是完整的homePage.js的内容:
1: (function () {
2: "use strict";
3: 4: // This function is called whenever a user navigates to this page. It
5: // populates the page elements with the app's data.
6: 7: 8: function linkClickEventHandler(eventInfo) {
9: eventInfo.preventDefault();10: var link = eventInfo.target;
11: WinJS.Navigation.navigate(link.href); 12: 13: }14: function ready(element, options) {
15: // TODO: Initialize the fragment here.
16: WinJS.Utilities.query("a").listen("click", linkClickEventHandler, false);
17: } 18: 19: WinJS.UI.Pages.define("/html/homePage.html", {
20: ready: ready 21: }); 22: })();效果:
初始页面:
点击page2

