

nginx下目录浏览及其验证功能
工作中常常有写不能有网页下载东西的需求,在Apache下搭建完成后直接导入文件即可达到下载/显示文件的效果;
而Nginx的目录列表功能默认是关闭的,如果需要打开Nginx的目录列表功能,需要手动配置,还可以进行访问验证;
nginx目录列表功能需要用到下面这个模块:
ngx_http_autoindex_module
此模块用于自动生成目录列表,只在 ngx_http_index_module模块未找到索引文件时发出请求.
下面就对nginx的目录浏览及验证访问功能的操作进行梳理:
一、设置目录浏览
打开nginx的配置文件,如:
[root@wangshibo ~]# vim /usr/local/nginx/conf/vhost/test.conf
 server {
   listen 80;
   server_name localhost;            //访问http://ip,发现访问的站点目录还是默认的;可以将此处的localhost直接改成服务器ip地址
   root /var/www/html;
   index index.html;

   location / {
   autoindex on;
   autoindex_exact_size off;
   autoindex_localtime on;
   }

   location /images {
      root   /var/www/html/shibo;
      autoindex on;
        }

   location /bo   {
      autoindex  on;                        #自动显示目录
      autoindex_exact_size  off;            #改为off后,显示出文件的大概大小,单位是kB或者MB或者GB;即人性化方式显示文件大小否则以byte显示
      autoindex_localtime on;               #显示的文件时间为文件的服务器时间;即按服务器时间显示
      limit_rate_after 10m;                 #10m之后下载速度为10k
      limit_rate 10k;
      alias /opt/html/redhat;   #虚拟目录
      }

}
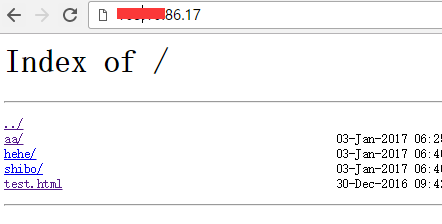
查看下站点根目录下的文件:
[root@wangshibo ~]# ls /var/www/html/
aa hehe shibo test.html
重启nginx服务
[root@wangshibo ~]# /usr/local/nginx/sbin/nginx -s reload
然后就可以访问了:
如上的设置,要想设置nginx的目录浏览功能,必须要打开下面这个参数
autoindex on;
此外,另外两个参数最好也加上去:
autoindex_exact_size off;
默认为on,显示出文件的确切大小,单位是bytes。
改为off后,显示出文件的大概大小,单位是kB或者MB或者GB
autoindex_localtime on;
默认为off,显示的文件时间为GMT时间。
改为on后,显示的文件时间为文件的服务器时间
二、设置访问验证
创建类htpasswd文件(如果没有htpasswd命令,可通过"yum install -y *htpasswd*"或"yum install -y httpd")
[root@wangshibo ~]# htpasswd -c /usr/local/nginx/conf/auth_password wangshibo //会被要求输入两次密码
[root@wangshibo ~]# cat /usr/local/nginx/conf/auth_password
wangshibo:$awe1$I2FIVtPG$I51oSU4eatH.tJdnmxtg67

Nginx配置中添加auth认证配置
[root@wangshibo ~]# vim /usr/local/nginx/conf/vhost/test.conf
......
location ^~ /soft/ {
     root /var/www/html;              //此处为soft的上一级目录。注意root和alias虚拟目录设置区别
     autoindex on;
     autoindex_exact_size off;
     autoindex_localtime on;
     auth_basic "MyPath Authorized";                    //为提示信息,可以自行修改;会出现在第一次访问Nginx站点的弹出框内
     auth_basic_user_file /usr/local/nginx/conf/auth_password;                  //最好跟htpasswd文件的全路径
}

重启nginx服务
[root@wangshibo ~]# /usr/local/nginx/sbin/nginx -s reload
这时候访问站点的soft目录时就会被要求输入用户名和密码:

需要特别注意的是:
加上认证之后该目录下的php文件将不会被解析,会运行下载。
如果要使其能够解析php可以,可将上面的配置改为:
location ^~ /soft/ {
   location ~ \.php$ {                           //或者是location ~ .*\.(php|php5)?$ {
      root   /var/www/html;
      fastcgi_pass   127.0.0.1:9000;
      fastcgi_read_timeout 300;
      fastcgi_index  index.php;
      fastcgi_param  SCRIPT_FILENAME  $document_root$fastcgi_script_name;;
      include        fastcgi.conf;
  }
      auth_basic "Authorized users only";
      auth_basic_user_file /usr/local/nginx/conf/auth_password;
}
nginx运行目录浏览后,就可以利用wget进行文件远程传输了(只针对文件,因为在http下只能文件访问,直接跟url访问目录是404):
比如:
[root@wangshibo ~]# cat /var/www/html/aa/haha
this is test file
在浏览器里直接点击站点下的文件(比如上面的haha文件)就会下载下来了(点击文件,除了html格式的文件能直接读出来,其他文件都是直接下载)。
也可以在linux终端命令行里使用wget进行文件传输,比如在远程机器上下载上面站点的haha文件:
[root@bastion-IDC ~]# wget http://113.110.186.117/aa/haha -P /tmp/testmd
--2017-01-03 15:14:18-- http://113.110.186.117/aa/haha
Connecting to 113.110.186.117... connected.
HTTP request sent, awaiting response... 200 OK
Length: 18 [application/octet-stream]
Saving to: “/tmp/testmd/haha”
100%[=====================================================================================================>] 18 --.-K/s in 0s
2017-01-03 15:14:18 (2.60 MB/s) - “/tmp/testmd/haha” saved [18/18]
查看,发现已经传过来了
[root@bastion-IDC ~]# ls /tmp/testmd/
haha
[root@bastion-IDC ~]# cat /tmp/testmd/haha
this is test file
本文转至:https://www.cnblogs.com/kevingrace/p/6244812.html

 浙公网安备 33010602011771号