Istio安装使用
Istio下载及安装
进入Istio发布页面,下载适配本文操作系统的最新版本istio-1.8.1-osx.tar.gz,然后解压到/data/istio-1.8.1,可以看到下面包含bin及samples文件夹,bin里包含istioctl命令,samples里包含Istio自带的样例应用的部署配置。
[root@centos istio-1.8.1]# tree
.
├── bin
│   └── istioctl
├── LICENSE
├── manifests
│   ├── charts
│   │   ├── base
│   │   │   ├── Chart.yaml
│   │   │   ├── crds
│   │   │   │   ├── crd-all.gen.yaml
│   │   │   │   └── crd-operator.yaml
│   │   │   ├── files
│   │   │   │   └── gen-istio-cluster.yaml
│   │   │   ├── kustomization.yaml
│   │   │   ├── NOTES.txt
│   │   │   ├── templates
│   │   │   │   ├── clusterrolebinding.yaml
│   │   │   │   ├── clusterrole.yaml
│   │   │   │   ├── crds.yaml
│   │   │   │   ├── endpoints.yaml
│   │   │   │   ├── rolebinding.yaml
│   │   │   │   ├── role.yaml
│   │   │   │   ├── serviceaccount.yaml
│   │   │   │   ├── services.yaml
│   │   │   │   └── validatingwebhookconfiguration.yaml
│   │   │   └── values.yaml
...
将/data/istio-1.8.1/bin移动到/usr/local/bin,这样即可以随时随地使用istioctl命令了。
cp /data/istio-1.8.1/bin/istioctl /usr/local/bin/
因我们安装Istio主要作样例演示,所以选择profile=demo,安装命令如下:
$ istioctl install --set profile=demo -y

...
✔ Istio core installed
✔ Istiod installed
✔ Egress gateways installed
✔ Ingress gateways installed
✔ Installation complete
约1分钟后,其主要组件Istiod, Ingress Gateway, Egress Gateway都安装完成了。可以发现,其将上述组件安装到了istio-system这个namespace下。
$ kubectl get deployments -n istio-system

NAME                   READY   UP-TO-DATE   AVAILABLE   AGE
istio-egressgateway    1/1     1            1           14h
istio-ingressgateway   1/1     1            1           14h
istiod                 1/1     1            1           14h
Bookinfo样例应用部署
在部署样例应用前,我们新建一个专门用来演示的namespace istio-demo,且标记该namespace使用istio自动注入。
$ cd /data/istio-1.8.1
$ kubectl apply -n istio-demo -f samples/bookinfo/platform/kube/bookinfo.yaml

...
deployment.apps/reviews-v1 created
deployment.apps/reviews-v2 created
deployment.apps/reviews-v3 created
...
可以看到reviews组件部署了3个版本,除此之外,其他组件均部署了一个版本。
Bookinfo样例应用访问
查看deployments及pods,发现Bookinfo的各个组件已部署完成:
$ kubectl get deployments -n istio-demo

NAME             READY   UP-TO-DATE   AVAILABLE   AGE
details-v1       1/1     1            1           7m6s
productpage-v1   1/1     1            1           7m4s
ratings-v1       1/1     1            1           7m6s
reviews-v1       1/1     1            1           7m5s
reviews-v2       1/1     1            1           7m5s
reviews-v3       1/1     1            1           7m5s
$ kubectl get pods -n istio-demo

NAME                              READY   STATUS    RESTARTS   AGE
details-v1-79c697d759-c8h6k       2/2     Running   0          7m12s
productpage-v1-65576bb7bf-5ln54   2/2     Running   0          7m11s
ratings-v1-7d99676f7f-2k75j       2/2     Running   0          7m12s
reviews-v1-987d495c-njj9f         2/2     Running   0          7m12s
reviews-v2-6c5bf657cf-c6x46       2/2     Running   0          7m12s
reviews-v3-5f7b9f4f77-mpt9z       2/2     Running   0          7m12s
下面我们试着在ratings容器里访问Bookinfo的入口页面productpage。
使用kubectl describe pod可以发现ratings pod除了原有容器ratings外,多了两个Sidecar:istio-init与istio-proxy。
$ kubectl describe pod/ratings-v1-7d99676f7f-2k75j -n istio-demo

...
Created container istio-init
...
Created container ratings
...
Created container istio-proxy
所以,执行命令时,需指定容器为ratings,curl请求productpage,发现页面标题已可正常显示。
$ kubectl apply -n istio-demo -f samples/bookinfo/networking/bookinfo-gateway.yaml
然后查看下Ingress Gateway的ip及端口。
[root@centos bin]# kubectl get service istio-ingressgateway -n istio-system
NAME                   TYPE       CLUSTER-IP     EXTERNAL-IP   PORT(S)                                                                      AGE
istio-ingressgateway   NodePort   10.96.71.146   <none>        15021:31925/TCP,80:32205/TCP,443:31580/TCP,31400:30801/TCP,15443:30754/TCP   33d
注:因为istio-ingressgateway使用的暴露外网方式是LoadBalancer,我用的是本地的环境没有公网SLB使用,所以要修改为NodePort模式
[root@centos bin]# kubectl edit svc istio-ingressgateway  -n istio-system
apiVersion: v1
kind: Service
metadata:
  annotations:
    kubectl.kubernetes.io/last-applied-configuration: |
  creationTimestamp: "2020-12-30T10:02:56Z"
  labels:
    app: istio-ingressgateway
    install.operator.istio.io/owning-resource: unknown
    install.operator.istio.io/owning-resource-namespace: istio-system
    istio: ingressgateway
    istio.io/rev: default
    operator.istio.io/component: IngressGateways
    operator.istio.io/managed: Reconcile
    operator.istio.io/version: 1.8.1
    release: istio
  name: istio-ingressgateway
  namespace: istio-system
  resourceVersion: "26450696"
  selfLink: /api/v1/namespaces/istio-system/services/istio-ingressgateway
  uid: be2a1750-369c-4c3a-ab77-f2da0be27edd
spec:
  clusterIP: 10.96.71.146
  externalTrafficPolicy: Cluster
  ports:
  - name: status-port
    nodePort: 31925
    port: 15021
    protocol: TCP
    targetPort: 15021
  - name: http2
    nodePort: 32205
    port: 80
    protocol: TCP
    targetPort: 8080
  - name: https
    nodePort: 31580
    port: 443
    protocol: TCP
    targetPort: 8443
  - name: tcp
    nodePort: 30801
    port: 31400
    protocol: TCP
    targetPort: 31400
  - name: tls
    nodePort: 30754
    port: 15443
    protocol: TCP
    targetPort: 15443
  selector:
    app: istio-ingressgateway
    istio: ingressgateway
  sessionAffinity: None
  type: NodePort #修改为NodePort
status:
  loadBalancer: {}
采用http://IP/productpage即可访问Bookinfo的productpage页面。
Istio Dashboard安装
下面安装一下Istio的几个插件,
$ cd /data/istio-1.8.1
$ kubectl apply -f samples/addons

...
deployment.apps/kiali created
deployment.apps/prometheus created
deployment.apps/jaeger created
...
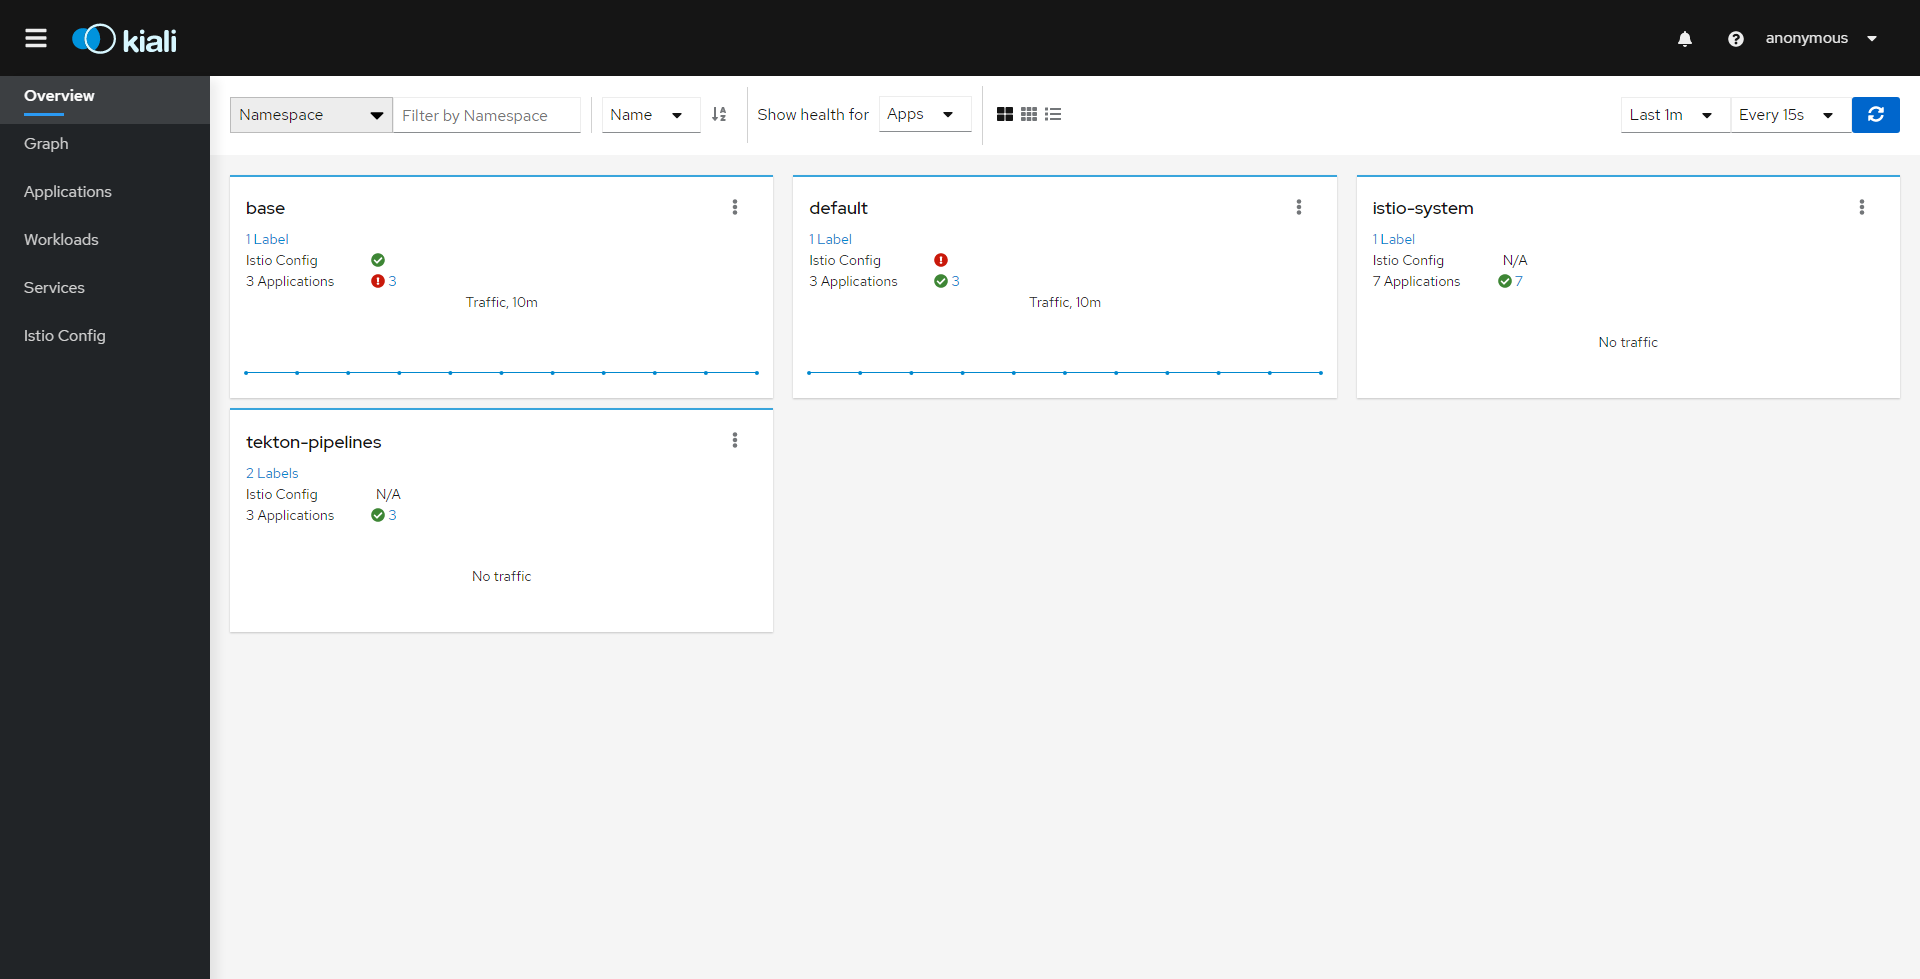
- 先看一下Kiali面板
http://10.154.68.170:31270/kiali/console/overview
注:kiali的服务暴露也用的是LoadBalancer,我用的是本地的环境没有公网SLB使用,所以要修改为NodePort模式
kubectl edit svc kiali -n istio-system
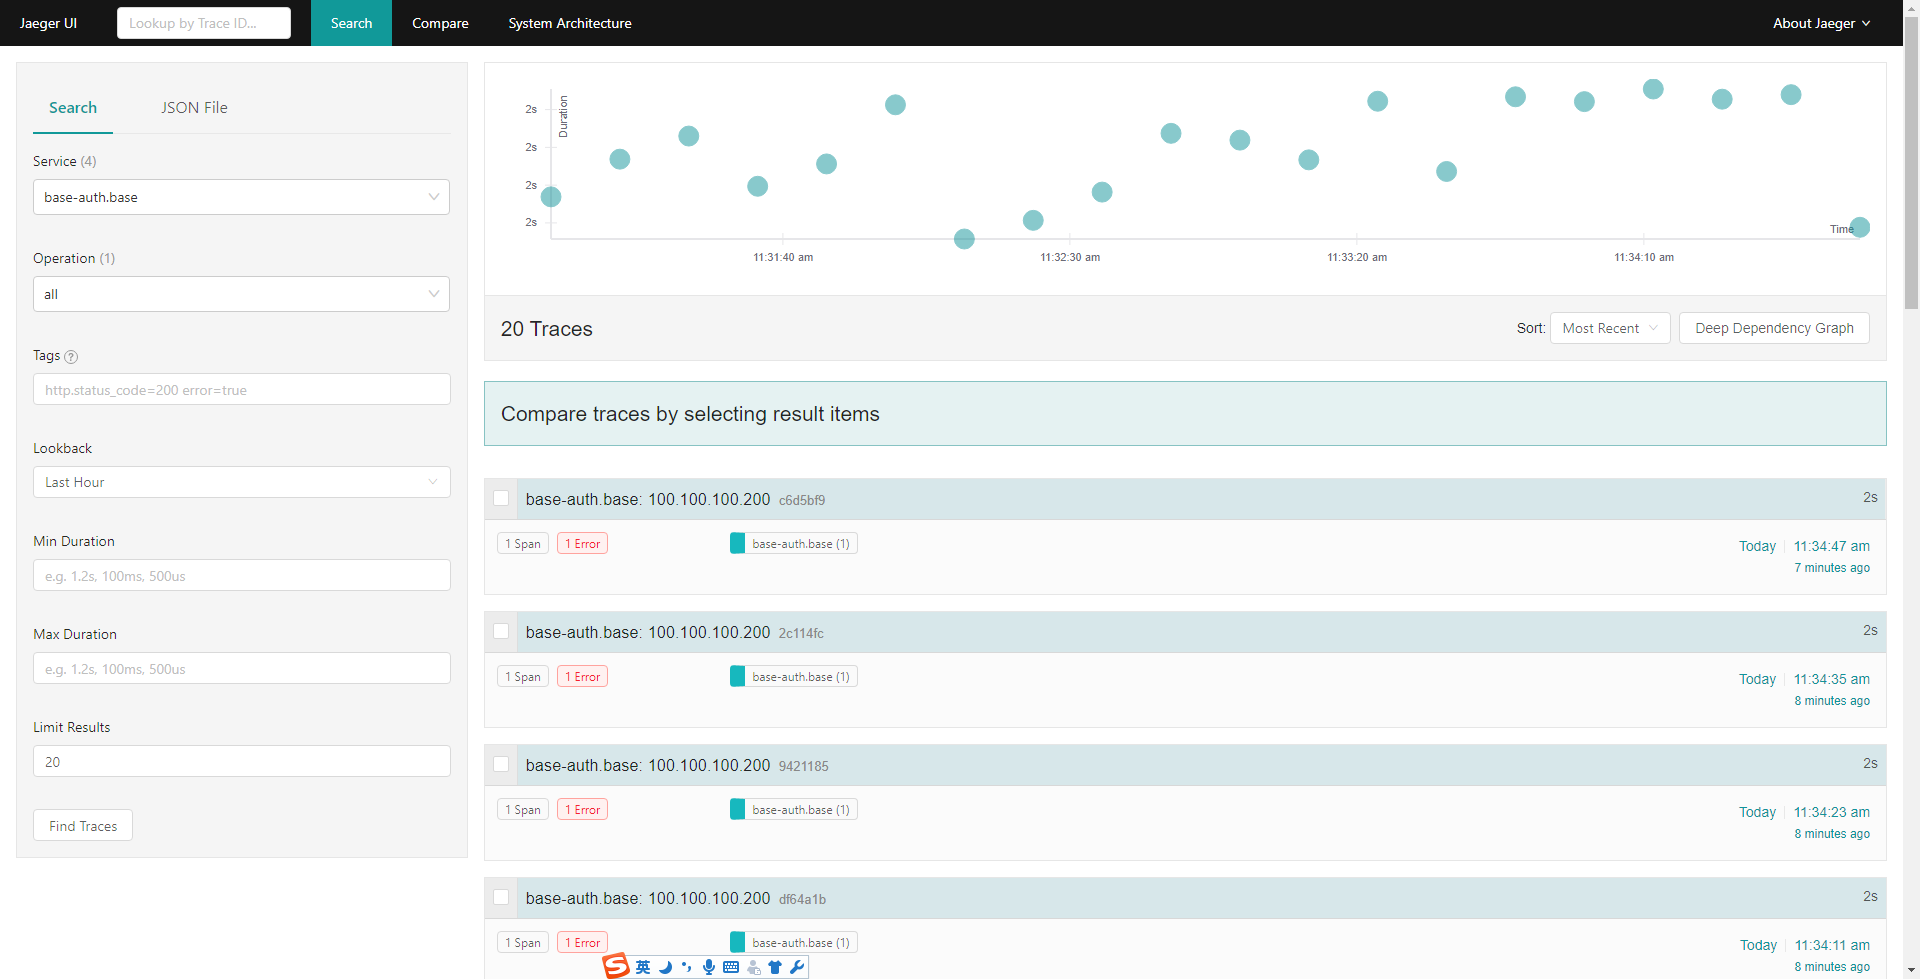
- 再看一下Jaeger面板
注:Jaeger的服务暴露也用的是LoadBalancer,我用的是本地的环境没有公网SLB使用,所以要修改为NodePort模式
http://10.154.68.170:32260/jaeger/search
Istio卸载
- 卸载addons
$ cd /data/istio-1.8.1
$ kubectl delete -f samples/addons
- 卸载Bookinfo
$ cd /data/istio-1.8.1
$ kubectl delete -n istio-demo -f samples/bookinfo/platform/kube/bookinfo.yaml
$ kubectl delete -n istio-demo -f samples/bookinfo/networking/bookinfo-gateway.yaml
- 卸载Istio
$ istioctl manifest generate --set profile=demo | kubectl delete --ignore-not-found=true -f -
- 删除namespace istio-system
$ kubectl delete namespace istio-system
- 取消对istio-demo进行Istio自动注入
$ kubectl label namespace istio-demo istio-injection-
- 删除namespace istio-demo
$ kubectl delete namespace istio-demo
参考资料
Get Started - Istio
