

node使用express路由router
node使用express路由router
//  app.js 首页
const express = require('express');
const app = express();
const bodyParser = require('body-parser');
const mysql = require('mysql');
const router = require('./router/index')  //  引入路由

//  开启数据库
const connection = mysql.createConnection({
    host: 'localhost',
    user: 'root',
    password: '',
    database: 'test',
    multipleStatements: true, //  允许执行多条语句
})

connection.connect(() =>{
    console.log('链接成功')
});

app.use(bodyParser.urlencoded({
    extends: true
}));

//设置跨域访问
app.all('*', (req, res, next) => {
    res.header("Access-Control-Allow-Origin", "*");
    res.header("Access-Control-Allow-Headers", "X-Requested-With");
    res.header("Access-Control-Allow-Methods", "PUT,POST,GET,DELETE,OPTIONS");
    res.header("X-Powered-By", ' 3.2.1');
    res.header("Content-Type", "application/json;charset=utf-8");
    next();
});

//  使用路由 /index 是路由指向名称
app.use(`/index`,router)

//配置服务端口
var server = app.listen(3000, () => {
    const hostname = 'localhost';
    const port = 3000;
    console.log(`Server running at http://${hostname}:${port}/`);
})
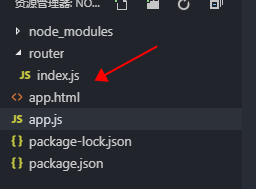
新建一个路由的文件夹,并且新建一个index.js的文件
const express = require(`express`)
const router = express.Router()

router.use((req, res, next) => {
  console.log(`路由执行成功啦~~~`, Date.now());
  next()
})

router.get(`/`, (req, res, next) => {
  res.json({
    status: 200,
    data: `请求成功`
  })
})

router.get(`/data`, (req, res, next) => {
  res.json({
    status: 200,
    data: [1, 2, 3, 4, 5, 6, 7]
  })
})

module.exports = router
下面可用通过请求测试路由
http://localhost:3000/index/data
或者
http://localhost:3000/index
/index/data 和 /index 两种方法都可以访问
大功告成啦~~~
接下来可用根据自己项目需求分出多个模块,建立不同名称的文件来管理不同的路由请求。

 浙公网安备 33010602011771号