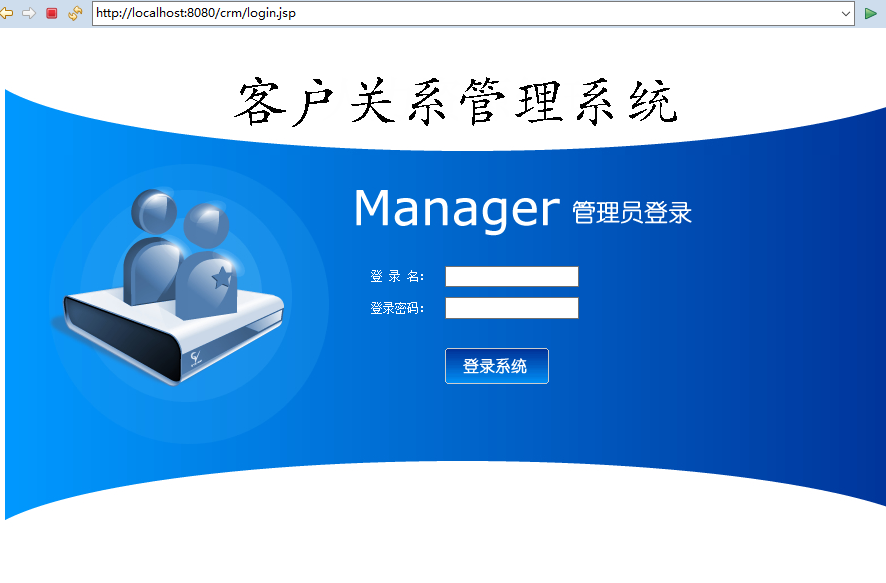
1、SSH框架整合
1、建立项目
2、导入SSHjar包
http://pan.baidu.com/s/1hsELr04
3、引入web.xml文件
<?xml version="1.0" encoding="UTF-8"?>
<web-app xmlns:xsi="http://www.w3.org/2001/XMLSchema-instance"
    xmlns="http://java.sun.com/xml/ns/javaee"
    xsi:schemaLocation="http://java.sun.com/xml/ns/javaee http://java.sun.com/xml/ns/javaee/web-app_2_5.xsd"
    id="WebApp_ID" version="2.5">
    <display-name>crm</display-name>

    <!-- 配置Spring框架整合WEB的监听器 -->
    <listener>
        <listener-class>org.springframework.web.context.ContextLoaderListener</listener-class>
    </listener>
    <context-param>
        <param-name>contextConfigLocation</param-name>
        <param-value>classpath:applicationContext.xml</param-value>
    </context-param>
<!-- 解决延迟加载的问题也注释掉 -->
    <!-- 解决延迟加载的问题 -->
    <filter>
        <filter-name>OpenSessionInViewFilter</filter-name>
        <filter-class>org.springframework.orm.hibernate5.support.OpenSessionInViewFilter</filter-class>
    </filter>
    <filter-mapping>
        <filter-name>OpenSessionInViewFilter</filter-name>
        <url-pattern>/*</url-pattern>
    </filter-mapping>


    <!-- 配置Struts2框架的核心的过滤器 -->
    <filter>
        <filter-name>struts2</filter-name>
        <filter-class>org.apache.struts2.dispatcher.ng.filter.StrutsPrepareAndExecuteFilter</filter-class>
    </filter>
    <filter-mapping>
        <filter-name>struts2</filter-name>
        <url-pattern>/*</url-pattern>
    </filter-mapping>

    <!-- 程序出现了500的异常,跳转到error.jsp的页面 -->
    <error-page>
        <error-code>500</error-code>
        <location>/jsp/error.jsp</location>
    </error-page>

    <welcome-file-list>
        <welcome-file>login.jsp</welcome-file>
    </welcome-file-list>
</web-app>
4、导入struts.xml、log4j.properties、applicationContext.xml
<!--struts.xml基本上不需要变化,模仿写配置即可-->
<?xml version="1.0" encoding="UTF-8" ?>
<!DOCTYPE struts PUBLIC
    "-//Apache Software Foundation//DTD Struts Configuration 2.3//EN"
    "http://struts.apache.org/dtds/struts-2.3.dtd">
<struts>

    <!-- 先配置包结构 -->
    <package name="crm" extends="struts-default" namespace="/">

        <!-- 配置全局的结果页面 -->
        <global-results>
            <result name="login" type="redirect">/login.jsp</result>
        </global-results>

        <!-- 配置客户的Action,如果Action由Spring框架来管理,class标签上只需要编写ID值就OK -->
        <action name="customer_*" class="customerAction" method="{1}">
            <result name="page">/jsp/customer/list.jsp</result>
        </action>

        <!-- 配置用户的模块 -->
        <action name="user_*" class="userAction" method="{1}">
            <result name="loginOK" type="redirect">/index.jsp</result>
        </action>

    </package>

</struts>
###log4j.properties基本上不需要变化
### direct log messages to stdout ###
log4j.appender.stdout=org.apache.log4j.ConsoleAppender
log4j.appender.stdout.Target=System.err
log4j.appender.stdout.layout=org.apache.log4j.PatternLayout
log4j.appender.stdout.layout.ConversionPattern=%d{ABSOLUTE} %5p %c{1}:%L - %m%n

### direct messages to file mylog.log ###
log4j.appender.file=org.apache.log4j.FileAppender
log4j.appender.file.File=c\:mylog.log
log4j.appender.file.layout=org.apache.log4j.PatternLayout
log4j.appender.file.layout.ConversionPattern=%d{ABSOLUTE} %5p %c{1}:%L - %m%n

### set log levels - for more verbose logging change 'info' to 'debug' ###

log4j.rootLogger=info, stdout
<!-- spring配置文件中可能要改变数据库信息 -->
<?xml version="1.0" encoding="UTF-8"?>
<beans xmlns="http://www.springframework.org/schema/beans"
    xmlns:xsi="http://www.w3.org/2001/XMLSchema-instance"
    xmlns:context="http://www.springframework.org/schema/context"
    xmlns:aop="http://www.springframework.org/schema/aop"
    xmlns:tx="http://www.springframework.org/schema/tx"
    xsi:schemaLocation="http://www.springframework.org/schema/beans
    http://www.springframework.org/schema/beans/spring-beans.xsd
    http://www.springframework.org/schema/context
    http://www.springframework.org/schema/context/spring-context.xsd
    http://www.springframework.org/schema/aop
    http://www.springframework.org/schema/aop/spring-aop.xsd
    http://www.springframework.org/schema/tx
    http://www.springframework.org/schema/tx/spring-tx.xsd">

    <!-- 先配置C3P0的连接池 -->
    <bean id="dataSource" class="com.mchange.v2.c3p0.ComboPooledDataSource">
        <property name="driverClass" value="com.mysql.jdbc.Driver"/>
        <property name="jdbcUrl" value="jdbc:mysql:///crm_28"/>
        <property name="user" value="root"/>
        <property name="password" value="root"/>
    </bean>

    <!-- LocalSessionFactoryBean加载配置文件 -->
    <bean id="sessionFactory" class="org.springframework.orm.hibernate5.LocalSessionFactoryBean">
        <!-- 先加载连接池 -->
        <property name="dataSource" ref="dataSource"/>
        <!-- 加载方言,加载可选 -->
        <property name="hibernateProperties">
            <props>
                <prop key="hibernate.dialect">org.hibernate.dialect.MySQLDialect</prop>
                <prop key="hibernate.show_sql">true</prop>
                <prop key="hibernate.format_sql">true</prop>
                <prop key="hibernate.hbm2ddl.auto">update</prop>
            </props>
        </property>

        <!-- 引入映射的配置文件,这部分先删除,不删除的话,会报mappingResources的问题,后面使用的时候可以模仿 -->
        <property name="mappingResources">
            <list>
                <value>com/itheima/domain/User.hbm.xml</value>
                <value>com/itheima/domain/Customer.hbm.xml</value>
                <value>com/itheima/domain/Dict.hbm.xml</value>
            </list>
        </property>
    </bean>

    <!-- 先配置平台事务管理器 -->
    <bean id="transactionManager" class="org.springframework.orm.hibernate5.HibernateTransactionManager">
        <property name="sessionFactory" ref="sessionFactory"/>
    </bean>

    <!-- 开启事务的注解 -->
    <tx:annotation-driven transaction-manager="transactionManager"/>
<!-- 这部分一定要注释掉,因为没有类,在运行的时候,加载找不到类,后面使用的时候可以模仿 -->
    <!-- 配置客户模块 -->
    <bean id="customerAction" class="com.itheima.web.action.CustomerAction" scope="prototype">
        <property name="customerService" ref="customerService"/>
    </bean>

    <bean id="customerService" class="com.itheima.service.CustomerServiceImpl">
        <property name="customerDao" ref="customerDao"/>
    </bean>

    <bean id="customerDao" class="com.itheima.dao.CustomerDaoImpl">
        <property name="sessionFactory" ref="sessionFactory"/>
    </bean>

    <!-- 配置用户的模块 -->
    <bean id="userAction" class="com.itheima.web.action.UserAction" scope="prototype">
        <property name="userService" ref="userService"/>
    </bean>

    <bean id="userService" class="com.itheima.service.UserServiceImpl">
        <property name="userDao" ref="userDao"/>
    </bean>

    <bean id="userDao" class="com.itheima.dao.UserDaoImpl">
        <property name="sessionFactory" ref="sessionFactory"/>
    </bean>

</beans>
5、导入静态页面(页面有些问题)
6、运行

至此,SSH框架搭建好了,SSH框架搭建源码
posted on 2017-10-19 09:13 Michael2397 阅读(296) 评论(2) 收藏 举报


 浙公网安备 33010602011771号