SpringCloud Config Refresh
确认了开发环境之后,我们再来添加相关的pom依赖。
<dependencies>
   	<dependency>
		<groupId>org.springframework.cloud</groupId>
		<artifactId>spring-cloud-starter-config</artifactId>
	</dependency>
	<dependency>
		<groupId>org.springframework.cloud</groupId>
		<artifactId>spring-cloud-starter-netflix-eureka-server</artifactId>
	</dependency>
</dependencies>

<dependencies>
	<dependency>
		<groupId>org.springframework.cloud</groupId>
		<artifactId>spring-cloud-starter-netflix-eureka-server</artifactId>
	</dependency>
</dependencies>

spring.application.name=springcloud-config-bus-eureka
server.port=8006
eureka.client.register-with-eureka=false
eureka.client.fetch-registry=false
eureka.client.serviceUrl.defaultZone=http://localhost:${server.port}/eureka/

@SpringBootApplication
	@EnableEurekaServer
	public class ConfigBusEurekaApplication {

		public static void main(String[] args) {
			SpringApplication.run(ConfigBusEurekaApplication.class, args);
			 System.out.println("config bus 注册中心服务启动...");
		}
	}
服务端pom配置、application.properties配置和代码如下:
<dependencies>
	<dependency>
		<groupId>org.springframework.cloud</groupId>
		<artifactId>spring-cloud-config-server</artifactId>
	</dependency>
	<dependency>
		<groupId>org.springframework.cloud</groupId>
		<artifactId>spring-cloud-starter-netflix-eureka-server</artifactId>
	</dependency>
</dependencies>
application.properties:
spring.application.name=springcloud-config-server
 server.port=9005
 eureka.client.serviceUrl.defaultZone=http://localhost:8005/eureka/
 spring.cloud.config.server.git.uri = https://github.com/xuwujing/springcloud-study/
 spring.cloud.config.server.git.search-paths = /springcloud-config/config-repo
 spring.cloud.config.server.git.username =
 spring.cloud.config.server.git.password =
代码:
@EnableDiscoveryClient
	@EnableConfigServer
	@SpringBootApplication
	public class ConfigServerApplication {

		public static void main(String[] args) {
			SpringApplication.run(ConfigServerApplication.class, args);
			System.out.println("配置中心服务端启动成功!");
		}
	}

<dependency>
		<groupId>org.springframework.boot</groupId>
		<artifactId>spring-boot-starter-actuator</artifactId>
	</dependency>

management.endpoints.web.exposure.include=refresh

@RestController
	@RefreshScope
	public class ClientController {

		@Value("${word}")
		private String word;

	    @RequestMapping("/hello")
	    public String index(@RequestParam String name) {
	        return name+","+this.word;
	    }
	}
测试
完成上述的代码开发后,我们来进行测试Spring-Config是否可以进行配置实时更新。 首先依次启动springcloud-config-bus-eureka、springcloud-config-bus-server和springcloud-config-bus-client这三个项目。其中9005是服务端springcloud-config-bus-server的端口,9006是第一个客户端springcloud-config-bus-client的端口。 启动成功之后,在浏览器输入:
界面返回:
pancm,hello world!!
可以正常得到服务端configtest-pro.properties的配置信息。
然后在把configtest-pro.properties的配置更改为:
word=hello
然后我们再浏览器输入:
界面返回:
pancm,hello world!!
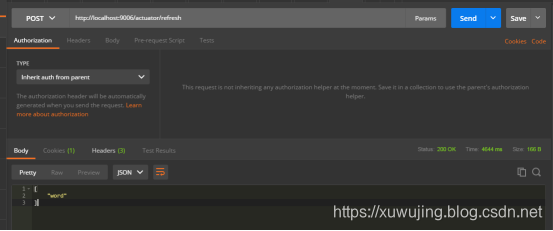
可以发现配置并没有实时的刷新,查阅官方文档得知,需要客户端通过POST方法触发各自的/refresh,所以这里我们就用Postman工具模拟post请求刷新,然后再查看信息。
使用POST请求如下地址:
返回:
-
[
-
"word"
-
]
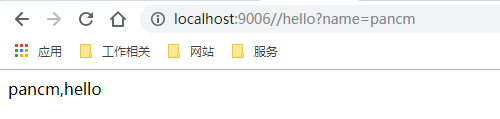
说明完成了word配置的刷新,我们再浏览器输入:
界面返回:
pancm,hello
发现已经成功实现配置刷新了!
示例图: 

 浙公网安备 33010602011771号