博客园样式美化(背景图片、公告栏头像、看板娘、鼠标特效、网易云音乐)
一、博客园样式美化
1、功能:
背景图片
公告栏头像
看板娘
鼠标特效
音乐插件
二、博客园设置步骤
1、准备工作
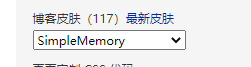
(1)、进博客园管理-设置页面使用如下皮肤。
(2)、申请公告栏JS权限,博客侧边栏公告(支持HTML代码)处点击申请,
理由可以写,制作个人风格博客等。审批很快的。
(3)、打开公告栏,进博客园管理-选项页面勾选公告。本人就放入了一个头像。
还可以写些文字放入支付宝或者微信赞助码等,可以自己百度研究。

2、背景图片设置步骤
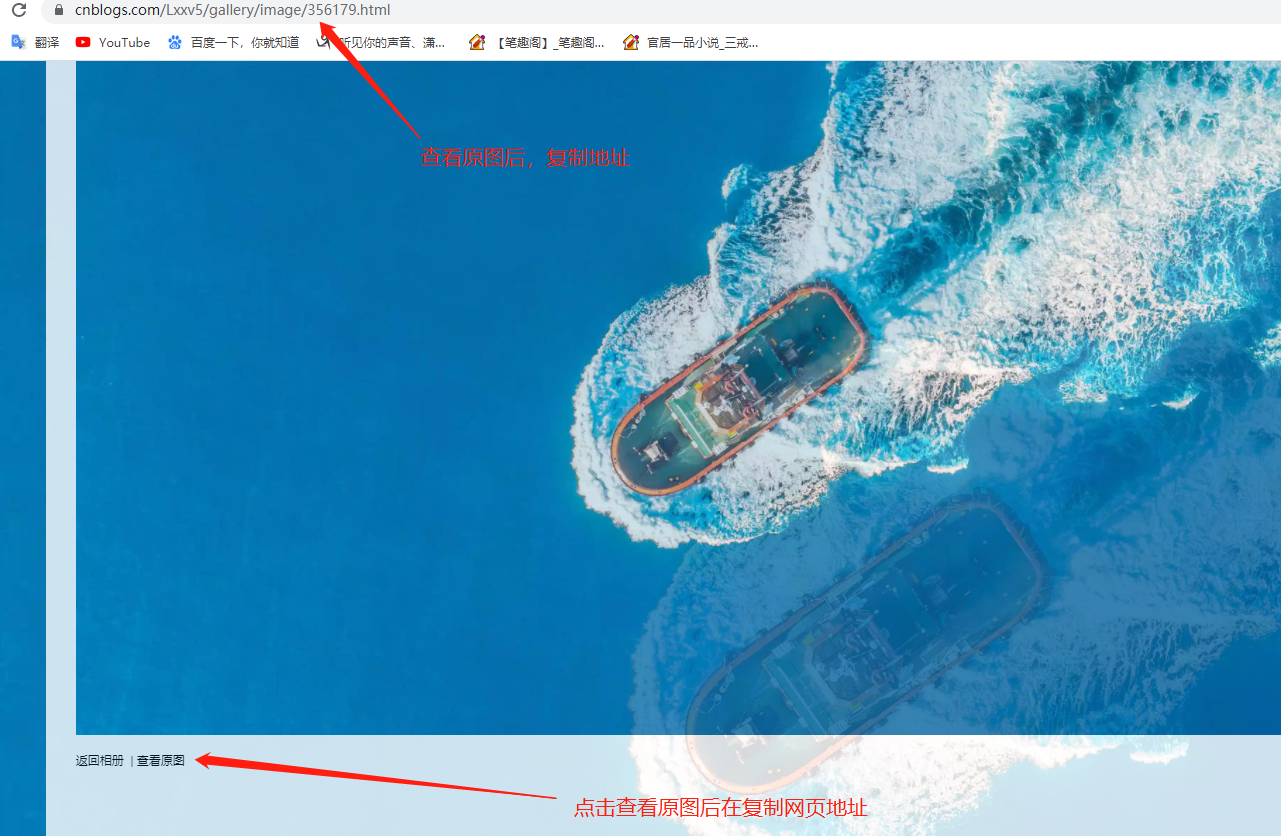
(1)、选择一张自己的图片,进入博客园管理-相册,上传到博客园的相册,然后查看原图,复制查看原图的网址。
(2)、进博客园管理-设置页面,在页面定制 CSS 代码放入代码不禁用CCS模板,
background: url处改成刚才复制的查看原图网页地址,喜欢本人的图片可以不该地址。
#google_ad_c1, #google_ad_c2 {display:none;}
.syntaxhighlighter a, .syntaxhighlighter div, .syntaxhighlighter code, .syntaxhighlighter table, .syntaxhighlighter table td, .syntaxhighlighter table tr, .syntaxhighlighter table tbody, .syntaxhighlighter table thead, .syntaxhighlighter table caption, .syntaxhighlighter textarea {
font-size: 14px!important;
}
#home {
opacity: 0.80;
margin: 0 auto;
width: 85%;
min-width: 950px;
background-color: #fff;
padding: 30px;
margin-top: 30px;
margin-bottom: 50px;
box-shadow: 0 2px 6px rgba(100, 100, 100, 0.3);
}
#blogTitle h1 {
font-size: 30px;
font-weight: bold;
font-family: "Comic Sans MS";
line-height: 1.5em;
margin-top: 20px;
color: #515151;
}
#navList a:hover {
color: #4C9ED9;
text-decoration: none;
}
#navList a {
display: block;
width: 5em;
height: 22px;
float: left;
text-align: center;
padding-top: 18px;
}
#navigator {
font-size: 15px;
border-bottom: 1px solid #ededed;
border-top: 1px solid #ededed;
height: 50px;
clear: both;
margin-top: 25px;
}
.catListTitle {
margin-top: 21px;
margin-bottom: 10.5px;
text-align: left;
border-left: 10px solid rgba(82, 168, 236, 0.8);
padding: 10px 0 14px 10px;
background-color: #f5f5f5;
}
#ad_under_post_holder #google_ad_c1,#google_ad_c2{
display: none !important;
}
body {
color: #000;
background: url(https://images.cnblogs.com/cnblogs_com/Lxxv5/1907760/o_201228063819%E8%A5%BF%E5%B7%B4%E4%B8%B9%E5%B2%9B.jpeg?id=1527765712574744) fixed;
background-size: 100%;
background-repeat: no-repeat;
font-family: "Helvetica Neue",Helvetica,Verdana,Arial,sans-serif;
font-size: 12px;
min-height: 101%;
}
#topics .postTitle {
border: 0px;
font-size: 200%;
font-weight: bold;
float: left;
line-height: 1.5;
width: 100%;
padding-left: 5px;
}
div.commentform p{
margin-bottom:10px;
}
.comment_btn {
padding: 5px 10px;
height: 35px;
width: 90px;
border: 0 none;
border-radius: 5px;
background: #ddd;
color: #999;
cursor:pointer;
font-family: "Lato", Helvetica Neue, Helvetica, Microsoft Yahei, 宋体, Arial, sans-serif;
text-shadow: 0 0 1px #fff;
display: inline !important;
}
.comment_btn:hover{
padding: 5px 10px;
height: 35px;
width: 90px;
border: 0 none;
border-radius: 5px;
background: #258fb8;
color: white;
cursor:pointer;
font-family: "Lato", Helvetica Neue, Helvetica, Microsoft Yahei, 宋体, Arial, sans-serif;
text-shadow: 0 0 1px #fff;
display: inline !important;
}
#commentform_title {
background-image:none;
background-repeat:no-repeat;
margin-bottom:10px;
padding:0;
font-size:24px;
}
#commentbox_opt,#commentbox_opt + p {
text-align:center;
}
.commentbox_title {
width: 100%;
}
#tbCommentBody {
font-family:'Microsoft Yahei', Microsoft Yahei, 宋体, sans-serif;
margin-top:10px;
max-width:100%;
min-width:100%;
background:white;
color:#333;
border:2px solid #fff;
box-shadow:inset 0 0 8px #aaa;
// padding:10px;
height:250px;
font-size:14px;
min-height:120px;
}
.feedbackItem {
font-size:14px;
line-height:24px;
margin:10px 0;
padding:20px;
background:#F2F2F2;
box-shadow:0 0 5px #aaa;
}
.feedbackListSubtitle {
font-weight:normal;
}

#blog-comments-placeholder, #comment_form {
padding: 20px;
background: #fff;
-webkit-box-shadow: 1px 2px 3px #ddd;
box-shadow: 1px 2px 3px #ddd;
margin-bottom: 50px;
}
.feedback_area_title {
margin-bottom: 15px;
font-size: 1.8em;
}
.feedbackItem {
border-bottom: 1px solid #CCC;
margin-bottom: 10px;
padding: 5px;
background: rgb(248, 248, 248);
}
.color_shine {background: rgb(226, 242, 255);}
.feedbackItem:hover {-webkit-animation-name: color_shine;-webkit-animation-duration: 2s;-webkit-animation-iteration-count: infinite;}
#comment_form .title {
font-weight: normal;
margin-bottom: 15px;
}
2、公告栏头像
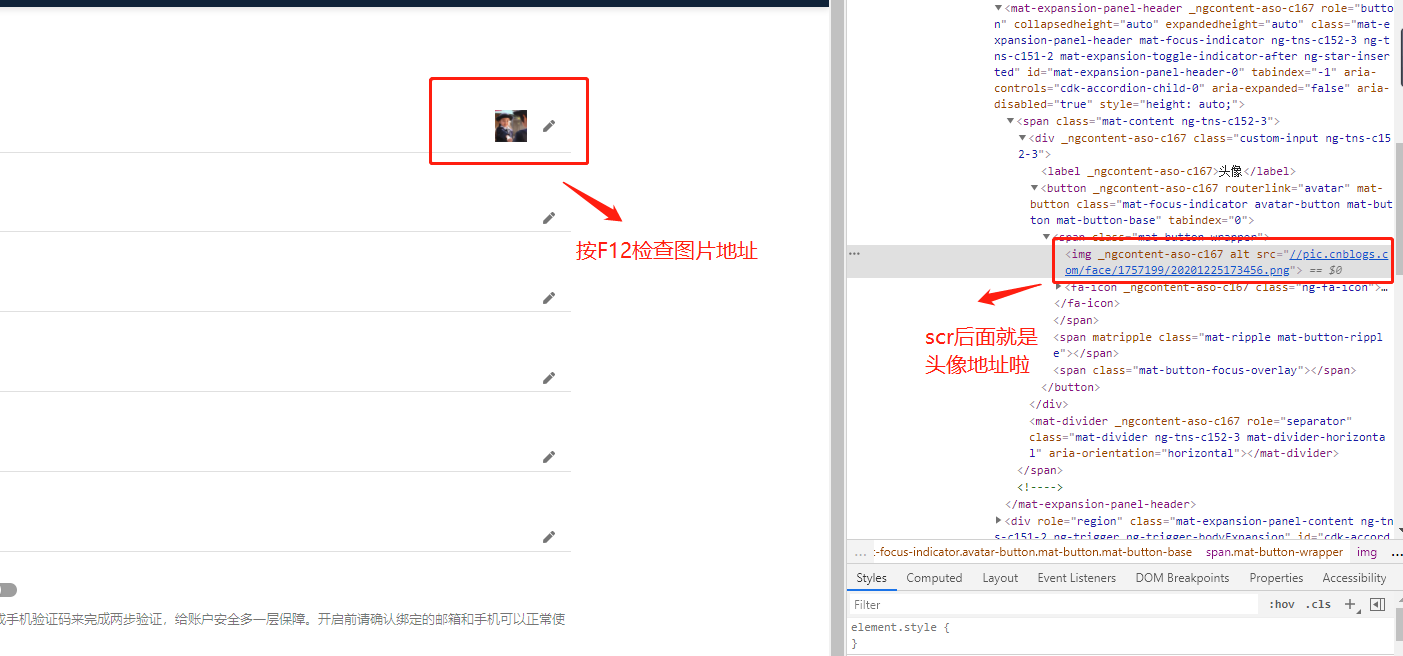
(1)、进入博客园管理-设置-头像设置处上传头像,上传后按F12检查头像地址,复制地址
(2)、进入博客园管理-设置页面的博客侧边栏公告放入如下代码:
src改成我们刚才检查的图片的地址
<!-- 公告头像 -->
<img src="https://pic.cnblogs.com/avatar/1757199/20201225173456.png">
2、看板娘
(1)、进入博客园管理-设置页面的博客侧边栏公告放入如下代码:
<!-- 看板娘 -->
<link rel="stylesheet" type="text/css" href="https://blog-static.cnblogs.com/files/clwydjgs/waifu.css"/>
  <link rel="stylesheet" type="text/css" href="https://blog-static.cnblogs.com/files/clwydjgs/waifu.css"/>
  <link rel="stylesheet" type="text/css" href="https://files.cnblogs.com/files/yjlblog/flat-ui.min.css"/>
      <div class="waifu" id="waifu" >
          <div class="waifu-tips" style="opacity: 1;"></div>
          <canvas id="live2d" width="280" height="250" class="live2d"></canvas>
          <div class="waifu-tool">
              <span class="fui-home"></span>
              <span class="fui-chat"></span>
             <span class="fui-eye"></span>
             <span class="fui-user"></span>
             <span class="fui-photo"></span>
             <span class="fui-info-circle"></span>
            <span class="fui-cross"></span>
         </div>
     </div>
     <script src="https://blog-static.cnblogs.com/files/clwydjgs/live2d.js"></script>
     <script src="https://blog-static.cnblogs.com/files/clwydjgs/waifu-tips.js"></script>
     <script type="text/javascript">initModel()</script>
3、鼠标特效
(1)、进入博客园管理-设置页面的博客侧边栏公告放入如下代码:
内容可以自定义
<!-- 爱心特效 -->
<script type="text/javascript">
        var a_idx = 0;
        jQuery(document).ready(function($) {
        $("body").click(function(e) {
        var a = new Array("❤喜欢就关注一下吧❤","❤不是点这里哦❤","❤快去点赞❤","❤在文章最下面哦❤","❤快去推荐一下吧❤","❤感谢观看❤","❤");
        var $i = $("<span></span>").text(a[a_idx]);
        a_idx = (a_idx + 1) % a.length;
        var x = e.pageX,
        y = e.pageY;
        $i.css({
            "z-index": 999999999999999999999999999999999999999999999999999999999999999999999,
            "top": y - 20,
            "left": x,
            "position": "absolute",
            "font-weight": "bold",
            "color": "rgb("+~~(255*Math.random())+","+~~(255*Math.random())+","+~~(255*Math.random())+")"
        });
        $("body").append($i);
        $i.animate({
            "top": y - 180,
            "opacity": 0
        },
        1500,
        function() {
            $i.remove();
        });
    });
});
</script>
4、网易云播放器
(1)、进入博客园管理-设置页面的页脚 HTML 代码放入如下代码:
<!-- 音乐播放器 -->
<link rel="stylesheet" href="https://cdn.jsdelivr.net/npm/aplayer@1.10.0/dist/APlayer.min.css">
<script src="https://cdn.jsdelivr.net/npm/aplayer@1.10.0/dist/APlayer.min.js"></script>
<div id="aplayer" class="aplayer" data-id="396543737" data-lrctype="0" data-server="netease" data-type="playlist" data-fixed="true" data-listfolded="true"></div>
<script src="https://unpkg.com/meting@1.2/dist/Meting.min.js"></script>
<script type="text/javascript"></script>
(2)、上面是我的网易云歌单,你可以在你的网易云歌单点击分享然后复制链接
链接是这样的:https://music.163.com/playlist?id=396543737&userid=287461793
id:396543737就是我们歌单地址,音乐播放器data—id换成你的id可以了。
样式美化就介绍到这里,后期还会更新,谢谢,请点赞加关注。

 浙公网安备 33010602011771号