
springboot整合RabbitMQ
一.SpringBoot整合RabbitMQ(Direct模式)
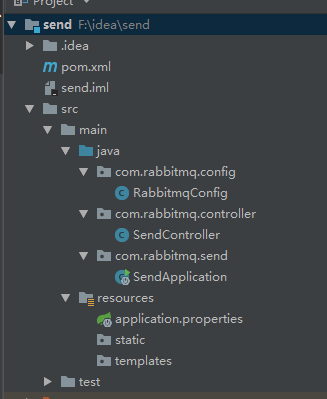
首先创建两个maven工程,这是为了模拟分布式应用系统中,两个应用之间互相交流的过程,一个发送者(Send),一个接收者(Receiver)
紧接着,配置pom.xml文件,注意其中用到了springboot对于AMQP(高级消息队列协议,即面向消息的中间件的设计)。
<?xml version="1.0" encoding="UTF-8"?>
<project xmlns="http://maven.apache.org/POM/4.0.0" xmlns:xsi="http://www.w3.org/2001/XMLSchema-instance"
         xsi:schemaLocation="http://maven.apache.org/POM/4.0.0 http://maven.apache.org/xsd/maven-4.0.0.xsd">
    <modelVersion>4.0.0</modelVersion>

    <groupId>com.rabbitmq</groupId>
    <artifactId>send</artifactId>
    <version>0.0.1-SNAPSHOT</version>
    <packaging>jar</packaging>

    <name>send</name>
    <description>Demo project for Spring Boot</description>

    <parent>
        <groupId>org.springframework.boot</groupId>
        <artifactId>spring-boot-starter-parent</artifactId>
        <version>2.0.4.RELEASE</version>
        <relativePath/> <!-- lookup parent from repository -->
    </parent>

    <properties>
        <project.build.sourceEncoding>UTF-8</project.build.sourceEncoding>
        <project.reporting.outputEncoding>UTF-8</project.reporting.outputEncoding>
        <java.version>1.8</java.version>
    </properties>

    <dependencies>
        <!--对rabbitMQ的支持-->
        <dependency>
            <groupId>org.springframework.boot</groupId>
            <artifactId>spring-boot-starter-amqp</artifactId>
        </dependency>
        <dependency>
            <groupId>org.springframework.boot</groupId>
            <artifactId>spring-boot-starter-web</artifactId>
        </dependency>

        <dependency>
            <groupId>org.springframework.boot</groupId>
            <artifactId>spring-boot-starter-test</artifactId>
            <scope>test</scope>
        </dependency>
    </dependencies>

    <build>
        <plugins>
            <plugin>
                <groupId>org.springframework.boot</groupId>
                <artifactId>spring-boot-maven-plugin</artifactId>
            </plugin>
        </plugins>
    </build>


</project>
紧接着,我们编写消息发送者相关的代码.首先毫无疑问,要书写启动类SendApplication:
package com.rabbitmq.send;

import org.springframework.boot.SpringApplication;
import org.springframework.boot.autoconfigure.SpringBootApplication;
import org.springframework.context.annotation.ComponentScan;

@SpringBootApplication
@ComponentScan("com.rabbitmq")
public class SendApplication {

    public static void main(String[] args) {
        SpringApplication.run(SendApplication.class, args);
    }
}
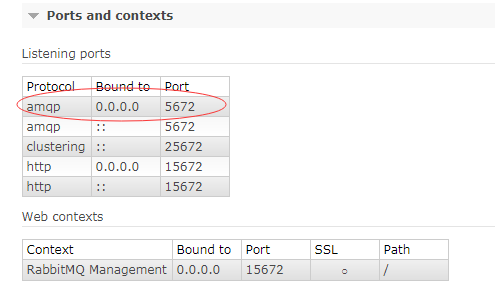
接着在application.properties中,去编辑和RabbitMQ相关的配置信息,配置信息的代表什么内容根据键就能很直观的看出了.这里端口是5672,不是15672...15672是管理端的端口!
application.properties相关设置
spring.application.name=spirng-boot-rabbitmq-sender
spring.rabbitmq.host=127.0.0.1
spring.rabbitmq.port=5672
spring.rabbitmq.username=guest
spring.rabbitmq.password=guest
接着就可以发送消息啦!在SpringBoot中,我们使用AmqpTemplate去发送消息! SendController 代码如下:
package com.rabbitmq.controller;

import org.springframework.amqp.core.AmqpTemplate;
import org.springframework.beans.factory.annotation.Autowired;
import org.springframework.web.bind.annotation.RequestMapping;
import org.springframework.web.bind.annotation.RestController;

import java.util.Date;

/**
 * Created by JiuLin on 2018/8/2
 */
@RestController
public class SendController {

    @Autowired
    private AmqpTemplate amqpTemplate;

    @RequestMapping("/send")
    public String send(){
         String content="";
        for (int i=0;i<50;i++){
            content="hello Date:"+i+new Date();
            amqpTemplate.convertAndSend("myQueue",content);
        }
        return content;
    }
}
myQueue指定接收端的队列名称。这样我们的发送端代码就编写完了~
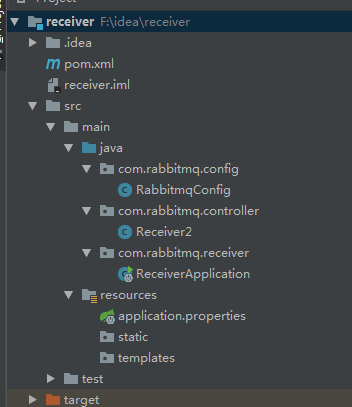
接着我们编写接收端.接收端的pom文件,application.properties(修改spring.application.name),App启动类都是一致的!这里省略不计.
配置Queue(消息队列).那注意由于采用的是Direct模式,需要在配置Queue的时候,指定一个键,使其和交换机绑定.RabbitmqConfig代码如下:
package com.rabbitmq.config;

import org.springframework.amqp.core.Queue;
import org.springframework.context.annotation.Bean;
import org.springframework.context.annotation.Configuration;


/**
 * Created by JiuLin on 2018/8/2
 */
@Configuration
public class RabbitmqConfig {
    @Bean
    public Queue queue1(){
        return new Queue("myQueue");
    }
}
主要在于我们需要配置监听器去监听绑定到的消息队列,当消息队列有消息的时候,予以接收,Receiver 代码如下:
package com.rabbitmq.controller;

import org.springframework.amqp.rabbit.annotation.RabbitListener;
import org.springframework.stereotype.Component;

/**
 * Created by JiuLin on 2018/8/2
 */
@Component
public class Receiver {

    @RabbitListener(queues = "myQueue")
    public void receiver(String msg){
        System.out.println("Receiver2"+msg);
    }
}
接下来就可以测试啦,首先启动接收端的应用,紧接着运行发送端浏览器调用controller,接收端应用打印出来接收到的消息,测试即成功!
需要注意的地方,Direct模式相当于一对一模式,一个消息被发送者发送后,会被转发到一个绑定的消息队列中,然后被一个接收者接收!
二.SpringBoot整合RabbitMQ(Topic转发模式)
首先我们看发送端,我们需要配置队列Queue,再配置交换机(Exchange),再把队列按照相应的规则绑定到交换机上:
@Configuration
public class SenderConf {

        @Bean(name="message")
        public Queue queueMessage() {
            return new Queue("topic.message");
        }

        @Bean(name="messages")
        public Queue queueMessages() {
            return new Queue("topic.messages");
        }

        @Bean
        public TopicExchange exchange() {
            return new TopicExchange("exchange");
        }
      /*topic.message队列以关键字topic.message绑定到exchange交换机上*/
        @Bean
        Binding bindingExchangeMessage(@Qualifier("message") Queue queueMessage, TopicExchange exchange) {
            return BindingBuilder.bind(queueMessage).to(exchange).with("topic.message");
        }

        @Bean
        Binding bindingExchangeMessages(@Qualifier("messages") Queue queueMessages, TopicExchange exchange) {
            return BindingBuilder.bind(queueMessages).to(exchange).with("topic.#");//*表示一个词,#表示零个或多个词
        }
}
而在接收端,我们配置两个监听器,分别监听不同的队列:
  @RabbitListener(queues="topic.message")    //监听器监听指定的Queue
    public void process1(String str) {
        System.out.println("message:"+str);
    }
    @RabbitListener(queues="topic.messages")    //监听器监听指定的Queue
    public void process2(String str) {
        System.out.println("messages:"+str);
    }
好啦!接着我们可以进行测试了!首先我们发送如下内容:

方法的第一个参数是交换机名称,第二个参数是发送的key,第三个参数是内容,RabbitMQ将会根据第二个参数去寻找有没有匹配此规则的队列,如果有,则把消息给它,如果有不止一个,则把消息分发给匹配的队列(每个队列都有消息!),显然在我们的测试中,参数2匹配了两个队列,因此消息将会被发放到这两个队列中,而监听这两个队列的监听器都将收到消息!那么如果把参数2改为topic.messages呢?显然只会匹配到一个队列,那么process2方法对应的监听器收到消息!
三.SpringBoot整合RabbitMQ(Fanout Exchange形式)
Fanout Exchange形式又叫广播形式,因此我们发送到路由器的消息会使得绑定到该路由器的每一个Queue接收到消息,这个时候就算指定了Key,或者规则(即上文中convertAndSend方法的参数2),也会被忽略!那么直接上代码,发送端配置如下:
@Configuration
public class SenderConf {

        @Bean(name="Amessage")
        public Queue AMessage() {
            return new Queue("fanout.A");
        }


        @Bean(name="Bmessage")
        public Queue BMessage() {
            return new Queue("fanout.B");
        }

        @Bean(name="Cmessage")
        public Queue CMessage() {
            return new Queue("fanout.C");
        }

        @Bean
        FanoutExchange fanoutExchange() {
            return new FanoutExchange("fanoutExchange");//配置广播路由器
        }

        @Bean
        Binding bindingExchangeA(@Qualifier("Amessage") Queue AMessage,FanoutExchange fanoutExchange) {
            return BindingBuilder.bind(AMessage).to(fanoutExchange);
        }

        @Bean
        Binding bindingExchangeB(@Qualifier("Bmessage") Queue BMessage, FanoutExchange fanoutExchange) {
            return BindingBuilder.bind(BMessage).to(fanoutExchange);
        }

        @Bean
        Binding bindingExchangeC(@Qualifier("Cmessage") Queue CMessage, FanoutExchange fanoutExchange) {
            return BindingBuilder.bind(CMessage).to(fanoutExchange);
        }

}
发送端使用如下代码发送:

接收端监听器配置如下:
@Component
public class Receive {
    @RabbitListener(queues="fanout.A")
    public void processA(String str1) {
        System.out.println("ReceiveA:"+str1);
    }
    @RabbitListener(queues="fanout.B")
    public void processB(String str) {
        System.out.println("ReceiveB:"+str);
    }
    @RabbitListener(queues="fanout.C")
    public void processC(String str) {
        System.out.println("ReceiveC:"+str);
    }


}
运行测试代码,发现三个监听器都接收到了数据,测试成功!

