WPF 验证表单方法3(弹窗)
本文讲述,当弹窗样式固定,表单与提交按钮不在同一个文件下时,如何控制提交按钮是否可用
比如自定义内容的弹窗就是这种情况
此时,我们希望无论自定义内容是什么,它都可以控制弹窗Window的提交按钮
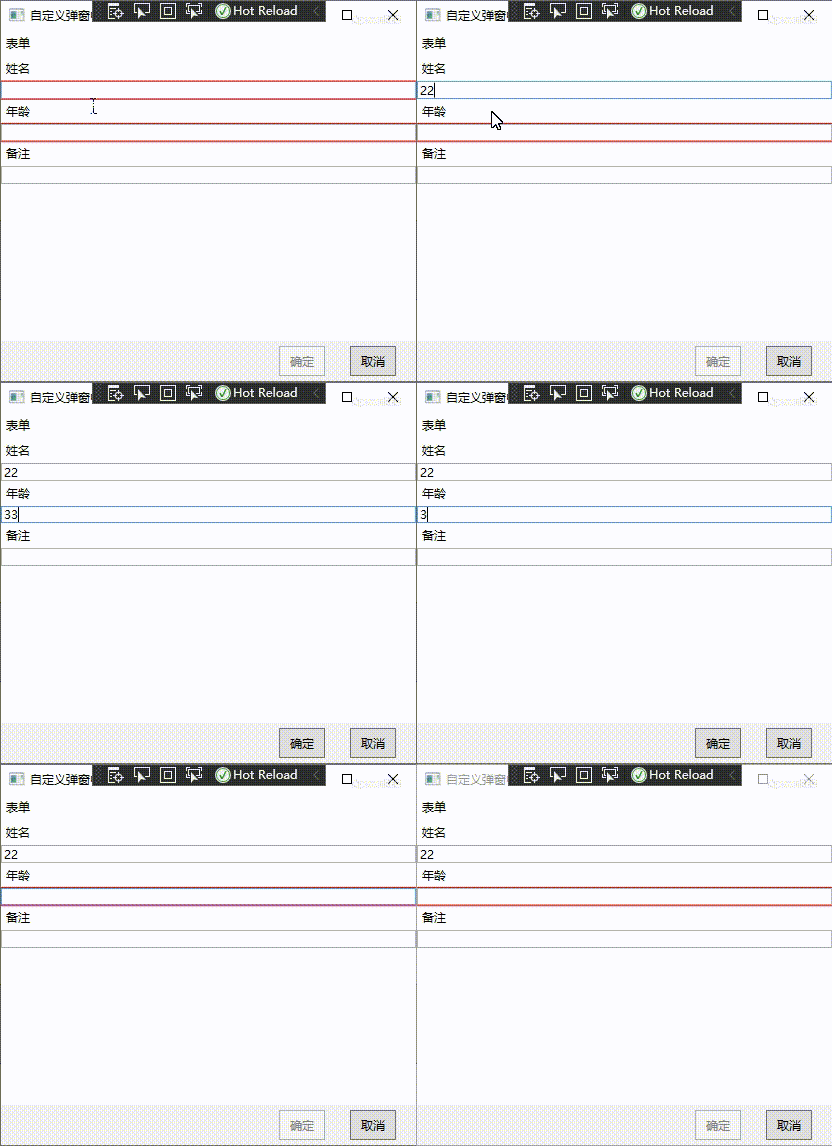
效果如图

这里的内容和弹窗是分隔开的
该文章基于WPF 验证表单方法1,在前文中讲述的内容不再赘述
首先,在自定义内容UserControl中设置一个控制提交按钮的属性
这里选择在ViewModel中添加IsSubmitButtonEnable属性
private bool isSubmitButtonEnable;

public bool IsSubmitButtonEnable
{
    get { return isSubmitButtonEnable; }
    set
    {
        if (isSubmitButtonEnable != value)
        {
            isSubmitButtonEnable = value;
            NotifyPropertyChanged(nameof(IsSubmitButtonEnable));
        }
    }
}
然后在弹窗生成的时候,检测这个属性,如果存在,则绑定提交按的IsEnabledProperty
Type t = control.DataContext.GetType();//获得该类的Type
var property = t.GetProperties().Where(x => x.Name == nameof(ViewModelWithValidation.IsSubmitButtonEnable)).FirstOrDefault();
if (property != null)
{
    btnOK.DataContext = control.DataContext;
    btnOK.SetBinding(Button.IsEnabledProperty, new Binding(nameof(ViewModelWithValidation.IsSubmitButtonEnable))
    {
        Mode = BindingMode.OneWay,
        UpdateSourceTrigger = UpdateSourceTrigger.PropertyChanged
    });
}
最后在自定义内容中通过检测输入框,更新这个属性即可
private void TextBox_TextChanged(object sender, TextChangedEventArgs e)
{
    vm.ValidationInputs(new List<DependencyObject>()
    {
        nameTextBox,
        ageTextBox,
        remarkTextBox
    });
}
这里没有贴出所有的代码,如果有不明白的地方,可以先看WPF 验证表单方法1,也可以直接看示例代码
示例代码
学习技术最好的文档就是【官方文档】,没有之一。
还有学习资料【Microsoft Learn】、【CSharp Learn】、【My Note】。
如果,你认为阅读这篇博客让你有些收获,不妨点击一下右下角的【推荐】按钮。
如果,你希望更容易地发现我的新博客,不妨点击一下【关注】。


 浙公网安备 33010602011771号