Django学习(五)---模板扩展,开发博客页面
(一)博客主页面开发
1.模板中可使用for循环,语法格式为:
{% for xs in xxs %}
HTML语句
{% endfor %}
2.更改app下的views.py, 获取后台models Article类下的数据列表集合
思路:1)取出数据库中所有文章对象 2)将文章对象们打包成列表返回到前端
from django.shortcuts import render
from . import models

# Create your views here.

def index(request):
    articles = models.Article.objects.all()
    return render(request,'blog/index.html',{'articles':articles})
3.修改html文件:
<!DOCTYPE html>
<html>
<head>
    <title>第一个Template</title>
</head>
<body>
<h1><a href="">添加新文章</a></h1>

{% for article in articles %}
    <a href="">{{ article.title }}</a>
    <br/>
{% endfor %}

</body>
</html>
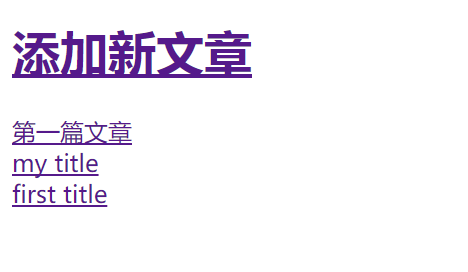
效果如下:

(二)博客文章页面开发
1.在app下views.py中添加响应函数page(对应文章内容页面)
2.点击博客主页面的文章链接会跳转到文章内容页面,实际上传递了点击的文章的唯一标识(主键 也就是django自己添加的id)
3.因此,在page方法里面添加参数article_id来传递主键id
4.获取文章对象,渲染到HTML
views.py如下:
from django.shortcuts import render
from django.http import HttpResponse
from . import models

# Create your views here.
def index(request):
    articles = models.Article.objects.all()
    return render(request,'blog/index.html',{'articles':articles})

def page(request,article_id):
    article = models.Article.objects.get(pk=article_id)
    return render(request,'blog/page.html',{'article':article})
5.创建templates下的page.html(文章内容页面)
<!DOCTYPE html>
<html>
<head>
    <title>my page</title>
</head>
<body>
<h1>{{ article.title }}</h1>
<br/>
<h3>{{ article.content }}</h3>
<br/><br/>
<a href="#">修改文章</a>
</body>
</html>
6.app中的urls.py中配置如下:
from django.conf.urls import url
from . import views

urlpatterns = [
    url(r'^index/$',views.index),
    url(r'article/(?P<article_id>[0-9]+)/$',views.page),
]
关键:URL参数传递
每个响应函数对应一个URL
上面的page响应函数多了一个参数,要在URL中体现出来
不同文章对应不同id localhost:8000/blog/article/1 ....article/2 对应不同文章
(?P<article_id>[0-9]+) 正则表达式匹配到的数字以article_id作为组名去匹配 组名必须和响应函数中的参数名保持一致。
使用(?P<>\d+)的形式捕获值给<>中的参数,比如(?P<article_id>\d+),当访问/index/article/1时,会将1捕获给article_id,这个值会传到views.py的page函数中的参数article_id,这样就可以判断展示哪个article的内容


