认识HTML
一、HTML基础
- HTML的英文全称是 Hyper Text Markup Language,即超文本标记语言
(一)标题
<h1>这是标题</h1>
<h2>这是标题</h2>
<h3>这是标题</h3>
(二)段落
- HTML段落是通过标签<p>来定义的。
<p>这是一个段落</p>
(三)链接
- <a>
<a>这是通往百度的链接</a><a href="https://www.baidu.com">这是通往百度的链接</a>
(四)图像
- <img>
<img src="/images/logo.png" width="200" height="100" /><img src="image/1.jpg">
二、HTML属性
- 属性可以在元素中添加附加信息
- 属性一般描述于开始标签
| 属性 | 描述 |
| id | id它是唯一的 |
| class | class可以同时存在多个 |
(一)HTML文本格式化
| <b> | 定义粗体文本 |
| <em> | 定义着重文字 |
| <i> | 定义斜体字 |
| <small> | 定义小号字 |
| <strong> | 定义加重语气 |
| <sub> | 定义下标字 |
| <sup> | 定义上标字 |
(二)HTML样式
1、背景颜色
<h1 style="background-color: #ff359b">这是一个标题</h1>
<p style="background-color: #00d2ff">这是一个段落</p>
2、字体样式
<h1 style="font-family: KaiTi">这是一个标题</h1>-
-
黑体 SimHei
-
微软雅黑 Microsoft YaHei
-
微软正黑体 Microsoft JhengHei
-
新宋体 NSimSun
-
新细明体 PMingLiU
-
细明体 MingLiU
-
标楷体 DFKai-SB
-
仿宋 FangSong
-
楷体 KaiTi
-
仿宋_GB2312 FangSong_GB2312
-
3、字体颜色
<h1 style="color:red">这是标题。</h1> 
4、字体大小
<p style="font-size: 18px">这是一个段落</p>
- 同时修改样式,颜色,大小
<p style="font-family: KaiTi;color:red;font-size: 18px">这是一个段落</p>
5、文本对齐
- 使用 text-align(文字对齐)属性指定文本的水平与垂直对齐方式。
<h1 style="text-align: center">这是一个标题</h1>
三、HTML表格
- <table> 标签来定义。每个表格均有若干行(由 <tr> 标签定义),每行被分割为若干单元格(由 <td>
<h1>一列:</h1>
    <table border="5">
      <tr>
        <td>100</td>
      </tr>
    </table>

<h1>一行三列:</h1>
    <table border="5">
      <tr>
        <td>100</td>
        <td>200</td>
        <td>300</td>
      </tr>
    </table>

<h1>两行三列:</h1>
    <table border="5">
      <tr>
        <td>100</td>
        <td>200</td>
        <td>300</td>
      </tr>
      <tr>
        <td>400</td>
        <td>500</td>
        <td>600</td>
      </tr>
</table>

- <th>
<h1>个人兴趣爱好</h1>
<table border="4">
    <caption style="font-size: 150%;font-family: KAITI;color: red">全民制作人</caption>
    <tr>
        <th>姓名</th>
        <th>性别</th>
        <th>爱好</th>
    </tr>
    <tr>
        <td>张三</td>
        <td>男</td>
        <td>唱歌</td>
    </tr>
    <tr>
        <td>李四</td>
        <td>男</td>
        <td>跳舞</td>
    </tr>
    <tr>
        <td>王五</td>
        <td>男</td>
        <td>rap</td>
    </tr>
</table>
如图:

四、HTML列表
- HTML 支持有序、无序列表
(一)有序列表
- 有序列表也是一列项目,列表项目使用数字进行标记。 有序列表始于 <ol> 标签。每个列表项始于 <li> 标签。
- 列表项使用数字来标记。
<h3>有序列表</h3>
    <ol>
        <li>有序列表第一行</li>
        <li>有序列表第二行</li>
        <li>有序列表第三行</li>
        <li>有序列表第四行</li>
    </ol>
如图:
(二)无序列表
<h3>无序列表</h3>
    <ul>
        <li>无序列表第一行</li>
        <li>无序列表第二行</li>
        <li>无序列表第三行</li>
        <li>无序列表第四行</li>
    </ul>
如图:
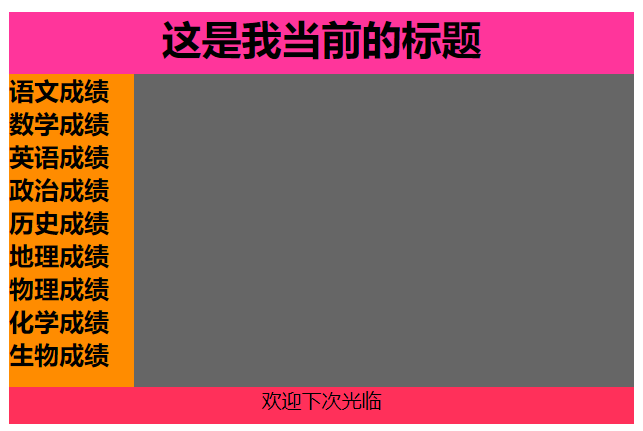
五、HTML区块
- <div> 和 <span>
<div style="width: 500px">
    <div style="background-color: #ff359b;width: 500px;height: 50px"><h1 style="text-align: center">这是我当前的标题</h1></div>
    <div style="background-color: darkorange;height: 250px;width: 100px;float: left;">
        <b style="font-size: 20px">语文成绩</b><br>
        <b style="font-size: 20px">数学成绩</b><br>
        <b style="font-size: 20px">英语成绩</b><br>
        <b style="font-size: 20px">政治成绩</b><br>
        <b style="font-size: 20px">历史成绩</b><br>
        <b style="font-size: 20px">地理成绩</b><br>
        <b style="font-size: 20px">物理成绩</b><br>
        <b style="font-size: 20px">化学成绩</b><br>
        <b style="font-size: 20px">生物成绩</b><br>
    </div>
    <div style="background-color: #666666;height: 250px; width: 400px;float: left"></div>
    <div style="background-color: #ff305a;height: 30px; width: 500px;text-align: center;float:left">欢迎下次光临</div>
</div>
如图:
六、表单和输入
-
HTML 表单用于收集用户的输入信息。
<form action="">
    请输入账号: <input type="text" name="user"><br>
    请输入密码: <input type="password" name="password">
</form>- 注意表单本身并不可见。
如图:
(一)提交和登录
1、提交
- <input type="submit"> 定义了提交按钮。
<form>
  Username:<input type="text" name="user">
  <input type="submit" value="提交">
</form>
如图:

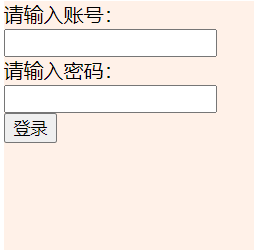
2、登录
- button
<button class="but" type="submit">登录</button> <div style="background-color: #fff1e8;width: 200px;height: 200px;margin:0 auto; margin-top:200px;">
请输入账号:<input type="text"><br>
请输入密码:<input type="password">
<button class="but" type="submit">登录</button>
</div>如图:
(二)实现登录页
 <style>
        input{
             margin: auto 0;
             width: 300px;
            /*间隔*/
             margin-bottom: 10px;
            /*空间*/
             padding: 10px;
             font-size: 15px;
            /*拐角*/
             border-radius: 4px;
        }
        .but{
            width: 150px;
            padding: 10px;
            background-color: aquamarine;

        }
</style>
<div style="background-color: #fffd87;width: 400px;height: 300px;margin: 0 auto;margin-top:200px;text-align: center">

    <h1 style="text-align: center">Login</h1>
    <input type="text" placeholder="用户名"><br>
    <input type="password" placeholder="密码">
    <button class="but" type="submit">登陆</button>
    <button class="but" type="submit">注册</button>


</div>
如图:


 浙公网安备 33010602011771号