Nginx
一:安装nginx
1:安装Nginx所需的pcre库
[root@xpq ~]# yum install pcre pcre-devel -y
[root@xpq ~]# rpm -qa pcre pcre-devel
pcre-8.32-17.el7.x86_64
pcre-devel-8.32-17.el7.x86_64
[root@xpq ~]#
1:创建存放文件的目录
[root@xpq tools]# pwd
/home/xpq/tools
[root@xpq tools]#
2:下载Nginx
[root@xpq tools]# wget http://nginx.org/download/nginx-1.6.3.tar.gz
3:解压
[root@xpq tools]# tar xf nginx-1.6.3.tar.gz
[root@xpq tools]# ll
total 788
drwxr-xr-x 8 1001 1001    158 Apr  7  2015 nginx-1.6.3
-rw-r--r-- 1 root root 805253 Apr  8  2015 nginx-1.6.3.tar.gz
[root@xpq tools]#
4:查看文件目录
[root@xpq tools]# ls
nginx-1.6.3  nginx-1.6.3.tar.gz
[root@xpq tools]# cd nginx-1.6.3/
[root@xpq nginx-1.6.3]# ls
auto  CHANGES  CHANGES.ru  conf  configure  contrib  html  LICENSE  man  README  src
[root@xpq nginx-1.6.3]#
5:查看配置帮助
[root@xpq nginx-1.6.3]# ./configure --help
6:安装
[root@xpq nginx-1.6.3]# yum install  openssl  openssl-devel -y
7:配置
[root@xpq nginx-1.6.3]# ./configure --user=xpq --group=xpq --with-http_ssl_module --with-http_stub_status_module --prefix=/application/nginx-1.6.3/
8:检查是否安装成功
[root@xpq nginx-1.6.3]# echo $?
0
[root@xpq nginx-1.6.3]#
root@xpq nginx-1.6.3]# make
[root@xpq nginx-1.6.3]# make instsll
9:创建软连接
[root@xpq ~]# mkdir /application/
[root@xpq ~]# ln -s /application/nginx-1.6.3/ /application/nginx
10:测试
[root@xpq ~]# /application/nginx/sbin/nginx -t
nginx: the configuration file /application/nginx-1.6.3//conf/nginx.conf syntax is ok
nginx: configuration file /application/nginx-1.6.3//conf/nginx.conf test is successful
11:启动
[root@xpq ~]# /application/nginx/sbin/nginx
[root@xpq ~]#
12:网页查看
[root@m01 home]# curl 172.16.1.7
<!DOCTYPE html>
<html>
<head>
<title>Welcome to nginx!</title>
<style>
body {
width: 35em;
margin: 0 auto;
font-family: Tahoma, Verdana, Arial, sans-serif;
}
</style>
</head>
<body>
<h1>Welcome to nginx!</h1>
<p>If you see this page, the nginx web server is successfully installed and
working. Further configuration is required.</p>
<p>For online documentation and support please refer to
<a href="http://nginx.org/">nginx.org</a>.<br/>
Commercial support is available at
<a href="http://nginx.com/">nginx.com</a>.</p>
<p><em>Thank you for using nginx.</em></p>
</body>
</html>
[root@m01 home]#
13:如果启动了,再次启动会失败
[root@xpq ~]# /application/nginx/sbin/nginx
nginx: [emerg] bind() to 0.0.0.0:80 failed (98: Address already in use)
nginx: [emerg] bind() to 0.0.0.0:80 failed (98: Address already in use)
nginx: [emerg] bind() to 0.0.0.0:80 failed (98: Address already in use)
nginx: [emerg] bind() to 0.0.0.0:80 failed (98: Address already in use)
nginx: [emerg] bind() to 0.0.0.0:80 failed (98: Address already in use)
nginx: [emerg] still could not bind()
[root@xpq ~]#
解决方案
[root@xpq ~]# killall nginx
[root@xpq ~]# /application/nginx/sbin/nginx
[root@xpq ~]#
3:查看Nginx的版本信息
[root@xpq ~]# /application/nginx/sbin/nginx   -V
nginx version: nginx/1.6.3
built by gcc 4.8.5 20150623 (Red Hat 4.8.5-36) (GCC)
TLS SNI support enabled
configure arguments: --user=xpq --group=xpq --with-http_ssl_module --with-http_stub_status_module --prefix=/application/nginx-1.6.3/
[root@xpq ~]#
注:
- 本人最后将nginx 安装在了 /tools/中
- Nginx 的安装路劲 /usr/local/nginx
- nginx 的配置文件 /usr/local/nginx/conf/nginx.cof
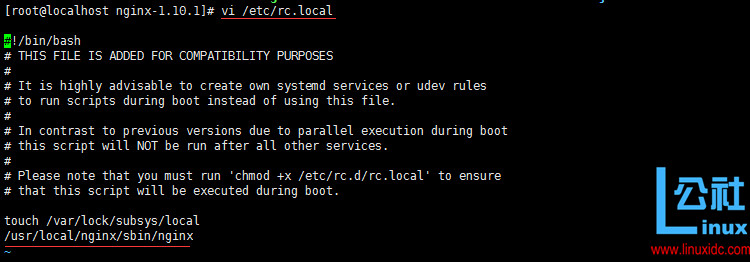
二:开机自启动
vi /etc/rc.local

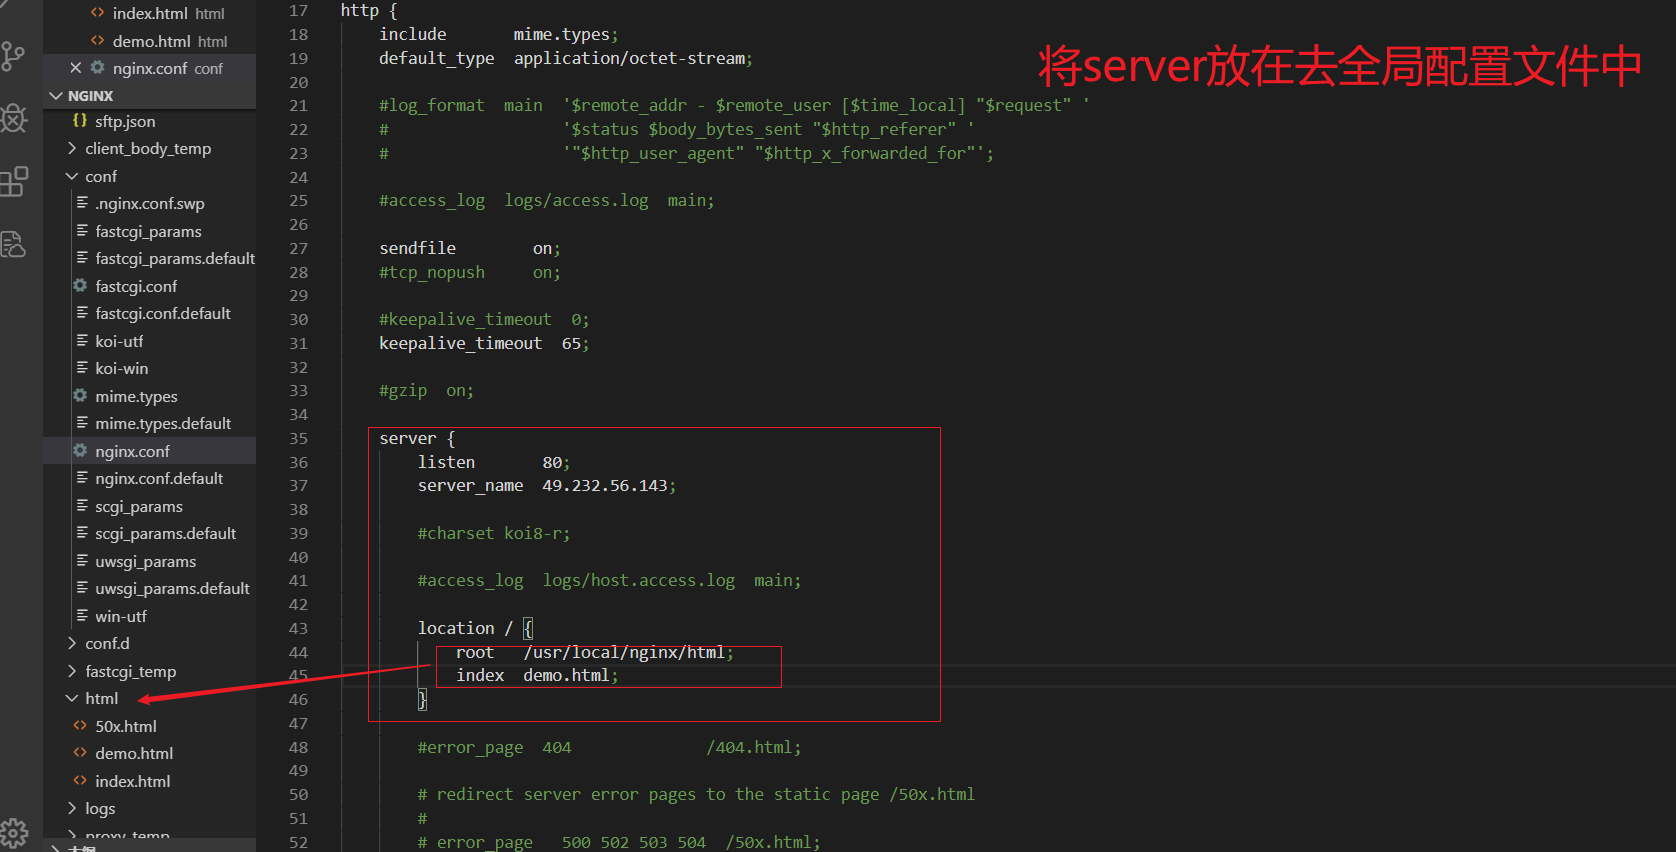
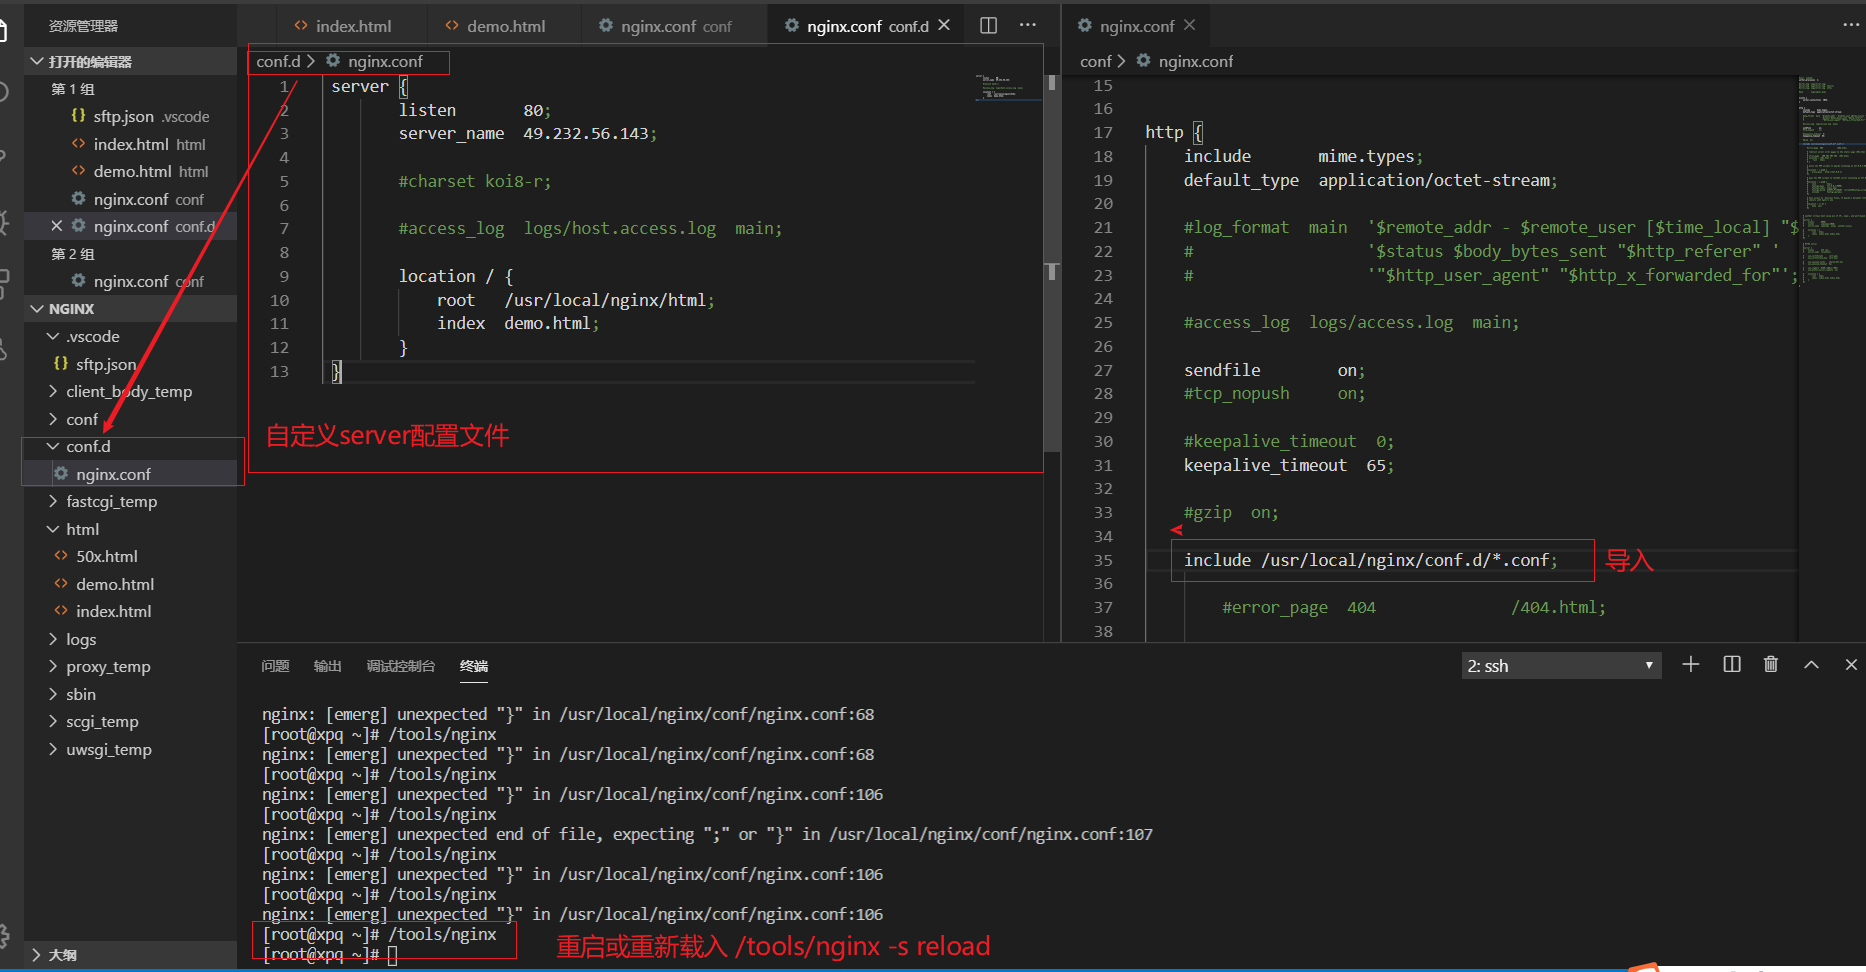
二:配置的两种方式
1:全局配置文件里面配置

2:自定义后缀名为.conf 的server对文件,然后在全局配置文件里面导入

四:路劲匹配的优先级
 server {
        listen  0.0.0.0:80;
        # server_name  49.232.56.143;

        #charset koi8-r;

        #access_log  logs/host.access.log  main;
        #通用匹配 (第三)
        location / {
            root   /usr/local/nginx/html;
            index  demo.html;
        }
        # #精确匹配 (最高)
        # location = / {
        #     return 404;
        # }
        #  #优先匹配 (第二)
        # location ~/ {
        #     return 405;
        # }
 }
六:try_files 和return的使用及区别
#----------try_files 和return 的使用
        #try_files 匹配根路劲 / 是无效的
        # location /a {
        #     try_files $uri $uri/ =401;
        # }
        #try_files 配合 @的使用
        location /a {
            try_files $uri $uri/ @meiduo;
        }
        location @meiduo {
            try_files $uri $uri/ =405;
        }
七:root 和 alias 的区别
# ------匹配路劲后面的斜杠问题()

        #root 和 alias 同时指定 文件路劲 不同之处在于
        #(1):匹配跟路劲的时候,root后面不需要/,alias后面需要/
        # location / {
        #     alias /usr/local/nginx/html/;
        #     index demo.html;
        # }
        #(2): 匹配子路劲的时候使用alias,使用root是找不到的
        location /a {
            alias  /usr/local/nginx/html/;
            index demo.html;
        }
八:访问权限与文件下载
#访问控制
       location / {
           stub_status on; #返回nginx的状态信息
           allow 10.236.56.143;#指定那个ip的客户端访问
           deny all; #除了允许的,其他都拒绝

       }

  #目录下载控制
       location /download {
           alias /usr/local/nginx;
           autoindex on;
       }
九:配置文件详解
1:全局配置:
主要是全局性的和服务级别的属性配置,常见的主要有以下几种设置:
#user  nobody;   #设置使用用户(worker)
worker_processes  1;  #进行增大并发连接数的处理 跟cpu保持一致 八核设置八个

#error_log  logs/error.log;   #nginx的错误日志
#error_log  logs/error.log  notice;
#error_log  logs/error.log  info;

#pid        logs/nginx.pid;     #nginx服务启动时候pid


events {   #定义事件相关的属性
    worker_connections  1024;  #一个进程允许处理的最大连接数
    #use      定义使用的内核模型
}


http {
    #主要配置server通用的一些配置
    include       mime.types;  # 文件扩展名与文件类型映射表
    default_type  application/octet-stream;   # 默认文件类型

    #log_format  main  '$remote_addr - $remote_user [$time_local] "$request" '
    #                  '$status $body_bytes_sent "$http_referer" '
    #                  '"$http_user_agent" "$http_x_forwarded_for"';

    #access_log  logs/access.log  main;

    sendfile        on;     # 开启高效文件传输模式。
    #tcp_nopush     on;  # 防止网络阻塞

    #keepalive_timeout  0;
    keepalive_timeout  65;  # 长连接超时时间,单位是秒

    #gzip  on;  # 开启gzip压缩输出

    server {
        listen       80;  #端口
        server_name  localhost;  #主机名

        #charset koi8-r;

        #access_log  logs/host.access.log  main;

        location / {
            root   html;
            index  index.html index.htm;
        }

        #error_page  404              /404.html;

        # redirect server error pages to the static page /50x.html
        #
        error_page   500 502 503 504  /50x.html;
        location = /50x.html {
            root   html;
        }

        # proxy the PHP scripts to Apache listening on 127.0.0.1:80
        #
        #location ~ \.php$ {
        #    proxy_pass   http://127.0.0.1;
        #}

        # pass the PHP scripts to FastCGI server listening on 127.0.0.1:9000
        #
        #location ~ \.php$ {
        #    root           html;
        #    fastcgi_pass   127.0.0.1:9000;
        #    fastcgi_index  index.php;
        #    fastcgi_param  SCRIPT_FILENAME  /scripts$fastcgi_script_name;
        #    include        fastcgi_params;
        #}

        # deny access to .htaccess files, if Apache's document root
        # concurs with nginx's one
        #
        #location ~ /\.ht {
        #    deny  all;
        #}
    }
server常见的属性
  server {
        listen       80;  #端口
        server_name  49.232.56.143;#主机名

        #charset koi8-r;

        #access_log  logs/host.access.log  main;

        location / {
            root   /usr/local/nginx/html;  #定义文件目录
            index  demo.html;  #指定返回的首页文件
            #return  404; 定义相应请求后的http状态码
        }
}
十:反向代理的使用
server {
    listen 0.0.0.0:80;
    location / {
        proxy_pass http://0.0.0.0:8000; #反向代理请求转发
    }

}

server {
    listen 0.0.0.0:8000;
    location / {
        root /usr/local/nginx/html;
        index demo.html;
    }
}
十一:负载均衡的使用
#负载均衡
upstream meiduo {
   #默认轮训
#    server 0.0.0.0:8000;
#    server 0.0.0.0:8001;
#    server 0.0.0.0:8002;
   #加权轮询
#    server 0.0.0.0:8000  weight=1;
#    server 0.0.0.0:8001  weight=2;
#    server 0.0.0.0:8002   weight=3;
  #ip_hash  第一次请求的时候匹配一个ip,以后每次请求都是用这个ip
  ip_hash;
   server 0.0.0.0:8000  weight=1;
   server 0.0.0.0:8001  weight=2;
   server 0.0.0.0:8002   weight=3;

}
server {
    listen 0.0.0.0:80;
    location / {
        proxy_pass http://meiduo; #反向代理请求转发
    }

}

server {
    listen 0.0.0.0:8000;
    location / {
        root /usr/local/nginx/html;
        index demo.html;
    }
}
server {
    listen 0.0.0.0:8001;
    location / {
        root /usr/local/nginx/html;
        index 8001.html;
    }
}
server {
    listen 0.0.0.0:8002;
    location / {
        root /usr/local/nginx/html;
        index 8002.html;
    }
}
十二:日志使用


