
springmvc
SpringMVC
1.什么是MVC?
- 模型(Dao,Service),视图(JSP),控制器(Servlet)
- 是一种代码规范
职责分析:
Controller:控制器servelt
- 取得表单数据
- 调用业务逻辑
- 转向指定的页面
Model:模型,指工程中的javaBean,用来处理数据
- 一类是实体类(pojo)Bean,专门用来储存数据
- 一类是业务Bean,指Service和Dao对象,专门用来处理业务逻辑和数据访问的
View:视图
- 显示页面
2.什么是SpringMVC?
2.1丶概念
Spring MVC是Spring的后续产品,是基于Java实现MVC的轻量级Web框架。
2.2丶优点
- 轻量级,简单易学
- 高效 , 基于请求响应的MVC框架
- 与Spring兼容性好(导的包跟spring很多一样),无缝结合
- 基于sevlet,通过功能强大的DispatherServlet
- 约定优于配置
- 功能强大:RESTful、数据验证、格式化、本地化、主题等
- 简洁灵活
3.Helloword
1.配置
依赖和添加web模块
-
创建项目,导入依赖
<dependencies> <!-- SpringMVC --> <dependency> <groupId>org.springframework</groupId> <artifactId>spring-webmvc</artifactId> <version>5.3.1</version> </dependency> <!-- 日志 --> <dependency> <groupId>ch.qos.logback</groupId> <artifactId>logback-classic</artifactId> <version>1.2.3</version> </dependency> <!-- ServletAPI --> <dependency> <groupId>javax.servlet</groupId> <artifactId>javax.servlet-api</artifactId> <version>3.1.0</version> <scope>provided</scope> </dependency> <!-- Spring5和Thymeleaf整合包 --> <dependency> <groupId>org.thymeleaf</groupId> <artifactId>thymeleaf-spring5</artifactId> <version>3.0.12.RELEASE</version> </dependency> </dependencies> -
scr 目录下 main目录下创建一个webapp目录
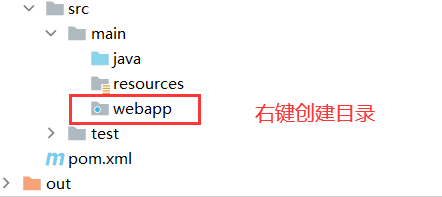
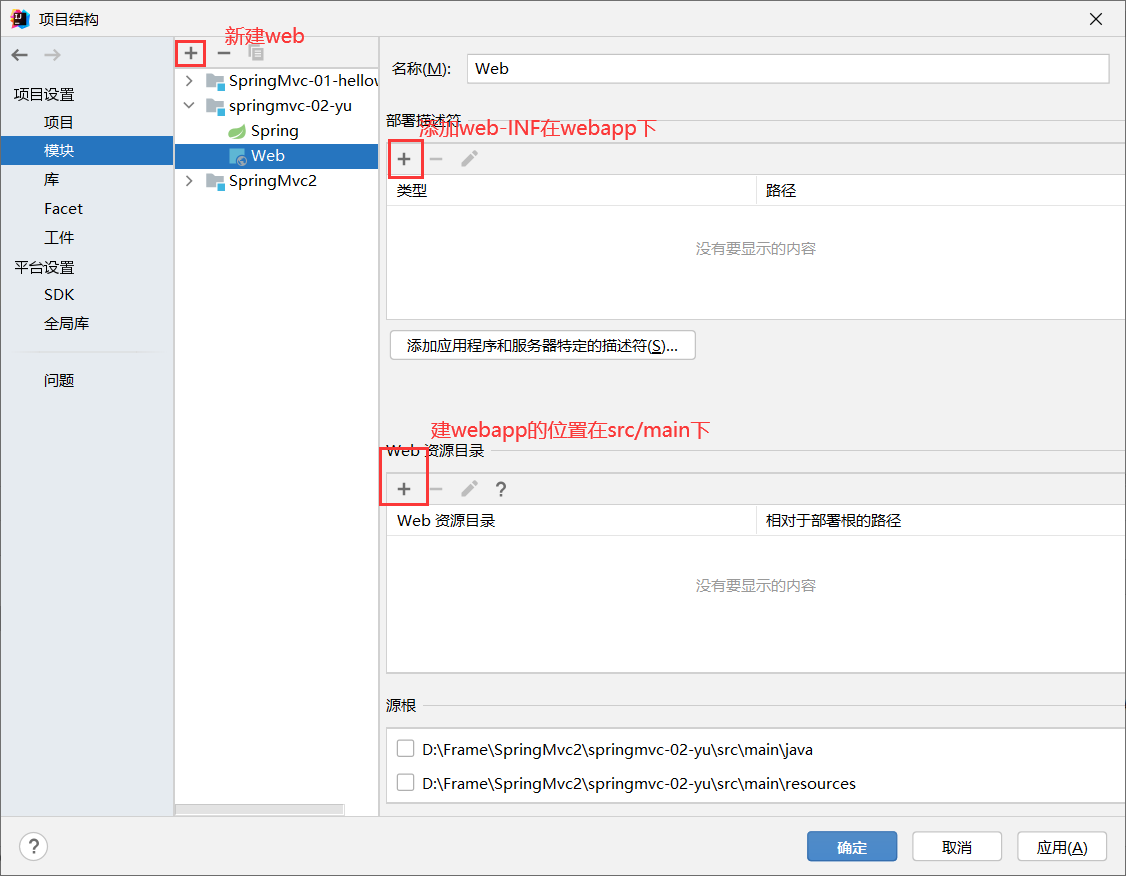
-
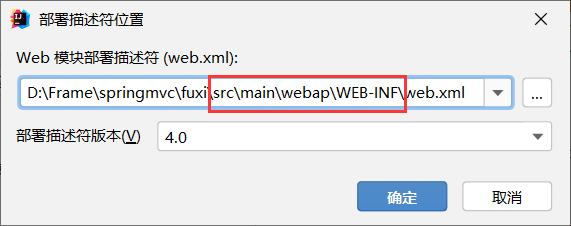
项目结构里模块中,添加web.xml到webapp下
xml配置(注册DispatcherServlet)
-
我们前面知道,DispatcherServlet前端控制器是基于Servelt的,所以也需要像Servelt一样注册
-
可通过init-param标签设置SpringMVC配置文件的位置和名称,通过load-on-startup标签设置 SpringMVC前端控制器DispatcherServlet的初始化时间
<?xml version="1.0" encoding="UTF-8"?>
<web-app xmlns="http://xmlns.jcp.org/xml/ns/javaee"
         xmlns:xsi="http://www.w3.org/2001/XMLSchema-instance"
         xsi:schemaLocation="http://xmlns.jcp.org/xml/ns/javaee http://xmlns.jcp.org/xml/ns/javaee/web-app_4_0.xsd"
         version="4.0">

    <!-- 配置SpringMVC的前端控制器,对浏览器发送的请求统一进行处理 -->
    <servlet>
        <servlet-name>SpringMvc</servlet-name>
        <servlet-class>org.springframework.web.servlet.DispatcherServlet</servlet-class>
        <!-- 通过初始化参数指定SpringMVC配置文件的位置和名称 -->
    <init-param>
        <!-- contextConfigLocation为固定值 -->
        <param-name>contextConfigLocation</param-name>
        <!-- 使用classpath:表示从类路径(main下的其他目录)查找配置文件,例如maven工程中的
src/main/resources -->
        <param-value>classpath:SpringMvc.xml</param-value>
    </init-param>
        <!--
作为框架的核心组件,在启动过程中有大量的初始化操作要做
而这些操作放在第一次请求时才执行会严重影响访问速度
因此需要通过此标签将启动控制DispatcherServlet的初始化时间提前到服务器启动时
-->
        <load-on-startup>1</load-on-startup>
    </servlet>
    <servlet-mapping>
        <servlet-name>SpringMvc</servlet-name>
        <url-pattern>/</url-pattern>
    </servlet-mapping>
    <!--
设置springMVC的核心控制器所能处理的请求的请求路径
/所匹配的请求可以是/login或.html或.js或.css方式的请求路径
但是/不能匹配.jsp请求路径的请求,因为jsp就是servelt,所以需要特殊的servlet来匹配
/*可以匹配到jsp-->
</web-app>
2.创建请求控制器
由于前端控制器对浏览器发送的请求进行了统一的处理,但是具体的请求有不同的处理过程,因此需要 创建处理具体请求的类,即请求控制器 请求控制器中每一个处理请求的方法成为控制器方法 因为SpringMVC的控制器由一个POJO(普通的Java类)担任,因此需要通过@Controller注解将其标识 为一个控制层组件,交给Spring的IoC容器管理,此时SpringMVC才能够识别控制器的存在
@Controller
public class HelloWorld {
}
3.创建SpringMvc的配置文件
<?xml version="1.0" encoding="UTF-8"?>
<beans xmlns="http://www.springframework.org/schema/beans"
       xmlns:xsi="http://www.w3.org/2001/XMLSchema-instance"
       xmlns:context="http://www.springframework.org/schema/context"
       xsi:schemaLocation="http://www.springframework.org/schema/beans http://www.springframework.org/schema/beans/spring-beans.xsd
       	http://www.springframework.org/schema/context
        https://www.springframework.org/schema/context/spring-context.xsd
">
   <context:component-scan base-package="com.LiuDeHen.Controller"/>

   <!-- 配置Thymeleaf视图解析器 -->
   <bean id="viewResolver"
         class="org.thymeleaf.spring5.view.ThymeleafViewResolver">
   <property name="order" value="1"/>
   <property name="characterEncoding" value="UTF-8"/>
   <property name="templateEngine">
   <bean class="org.thymeleaf.spring5.SpringTemplateEngine">
      <property name="templateResolver">
         <bean
                 class="org.thymeleaf.spring5.templateresolver.SpringResourceTemplateResolver">
            <!-- 视图前缀,所以我们要在WEB-Inf下创建templates目录 -->
            <property name="prefix" value="/WEB-INF/templates/"/>
            <!-- 视图后缀 -->
            <property name="suffix" value=".html"/>
            <property name="templateMode" value="HTML5"/>
            <property name="characterEncoding" value="UTF-8" />
         </bean>
      </property>
   </bean>
   </property>
   </bean>
</beans>
4.启动测试
注意:在启动的时候,出现异常,查看tocat日志,如果是没找到什么什么包之类的就是war打包没有把lib包打进去,解决:进入项目管理,点开工件,找到项目,查看web-INF下有没有lib包,没有就加进去,并把所有库文件加入
a>实现对首页的访问
// @RequestMapping注解:处理请求和控制器方法之间的映射关系
// @RequestMapping注解的value属性可以通过请求地址匹配请求,/表示的当前工程的上下文路径
@RequestMapping("/")
public String index() {
//设置视图名称
return "index";
}
b>通过超链接跳转到指定页面
- a标签下的/是绝对路径
- 绝对路径又分为被浏览器解析和服务器解析
- 而超链接就是浏览器解析,所以这里的/是localhost:8080缺少一个Springmvc(上下文路径)
- 这里用thymeleaf的语法,会根据我们的绝对路径自动帮我们加上上下文路径
<!DOCTYPE html>
<html lang="en"xmlns:th="http://www.thymeleaf.org">
<head>
    <meta charset="UTF-8">
    <title>Title</title>
</head>
<body>
<h1>首页</h1>
<a th:href="@{/target}">跳转</a>
</body>
</html>
5.总结
浏览器发送请求到前端控制器的ul-pattern,该请求就会被DispatcherServlet处理,前端控制器会读取springmvc的核心配置文件,通过组件扫描找到控制器,将请求地址和控制器中有@RequestMapping注解的方法的value属性值进行匹配,如果成功就会返回一个字符串类型的视图名称,这个视图名称会被视图解析器解析,加上前后缀,再通过 通过Thymeleaf对视图进行渲染,最终转发到视图所对应页
4. @RequestMapping注解
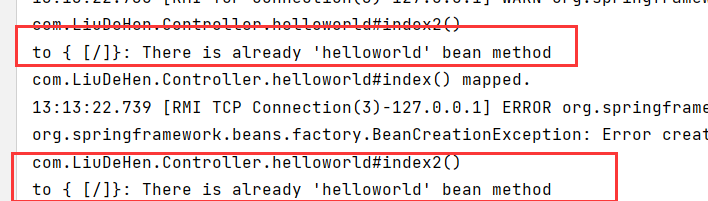
1.当有多个方法对应一个方法时就会出现异常
@RequestMapping("/")
    public String index(){
        return "index";
    }
@RequestMapping("/")
    public String index2(){
        return "index2";
    }
2.@RequestMapping注解的功能
从注解名称上我们可以看到,@RequestMapping注解的作用就是将请求和处理请求的控制器方法关联 起来,建立映射关系。 SpringMVC 接收到指定的请求,就会来找到在映射关系中对应的控制器方法来处理这个请求。
3.@RequestMapping注解的位置
-
@Target({ElementType.TYPE, ElementType.METHOD}) -
@RequestMapping标识一个类:设置映射请求的请求路径的初始信息
-
@RequestMapping标识一个方法:设置映射请求请求路径的具体信息
4.@RequestMapping注解的value属性
-
@AliasFor("path") String[] value() default {}; -
@RequestMapping注解的value属性通过请求的请求地址匹配请求映射
-
@RequestMapping注解的value属性是一个字符串类型的数组,表示该请求映射能够匹配多个请求地址 所对应的请求
-
@RequestMapping注解的value属性必须设置,至少通过请求地址匹配请求映射
  @RequestMapping(value={"/","/target"})
    public String index(){
        return "index";
    }
5.@RequestMapping注解的method属性
- @RequestMapping注解的method属性通过请求的请求方式(get或post)匹配请求映射
- 聊聊get和post请求
- get速度快不安全,传的数据少,因为参数属性跟着url传过去
- post速度慢些安全,传的数据多,因为参数属性在请求体里(所以只有post请求才有请求体)
- 上传文件时,不能用get,因为把文件拼接到url的时候,只是把文件名拼上去了,所以只能用post请求
- 超链接是get请求
- @RequestMapping注解的method属性是一个RequestMethod类型的数组,表示该请求映射能够匹配 多种请求方式的请求
- 若当前请求的请求地址满足请求映射的value属性,但是请求方式不满足method属性,则浏览器报错 405:Request method 'POST' not supported
- 实例:
<form th:action="@{/target}" method="post">
    <input type="submit">post
</form>
<form th:action="@{/target}" method="get">
    <input type="submit">get
</form>
@RequestMapping(value="/target"
 // RequestMethod这个类里定义了所有请求
    ,method = {RequestMethod.GET}
    )
- 此时我们定义了get请求,就只能通过get请求,如果我们没有定义method属性,那么任何请求都可以
- 注: 1、对于处理指定请求方式的控制器方法,SpringMVC中提供了@RequestMapping的派生注解
- 处理get请求的映射-->@GetMapping
- 处理post请求的映射-->@PostMapping
- 处理put请求的映射-->@PutMapping
- 处理delete请求的映射-->@DeleteMapping
- 2、常用的请求方式有get,post,put,delete
- 浏览器只支持get和post请求 - 可以使用这些注解代理method属性
6.@RequestMapping注解的params属性(了解)
-
@RequestMapping注解的params属性通过请求的请求参数匹配请求映射
-
@RequestMapping注解的params属性是一个字符串类型的数组,可以通过四种表达式设置请求参数 和请求映射的匹配关系
-
"param":要求请求映射所匹配的请求必须携带param请求参数
-
"!param":要求请求映射所匹配的请求必须不能携带param请求参数
-
"param=value":要求请求映射所匹配的请求必须携带param请求参数且param=value
-
"param!=value":要求请求映射所匹配的请求必须携带param请求参数但是param!=value
<a th:href="@{/test(username='admin',password=123456)">测试@RequestMapping的
params属性-->/test</a><br>
@RequestMapping( value = {"/testRequestMapping", "/test"} ,method = {RequestMethod.GET, RequestMethod.POST} ,params = {"username","password!=123456"} ) public String testRequestMapping(){ return "success"; }
注: 若当前请求满足@RequestMapping注解的value和method属性,但是不满足params属性,此时 页面回报错400:Parameter conditions "username, password!=123456" not met for actual request parameters: username={admin}, password=
7.@RequestMapping注解的headers属性(了解)
-
@RequestMapping注解的headers属性通过请求的请求头信息匹配请求映射
-
@RequestMapping注解的headers属性是一个字符串类型的数组,可以通过四种表达式设置请求头信 息和请求映射的匹配关系
-
"header":要求请求映射所匹配的请求必须携带header请求头信息
-
"!header":要求请求映射所匹配的请求必须不能携带header请求头信息
-
"header=value":要求请求映射所匹配的请求必须携带header请求头信息且header=value
-
"header!=value":要求请求映射所匹配的请求必须携带header请求头信息且header!=value
-
注:若当前请求满足@RequestMapping注解的value和method属性,但是不满足headers属性,此时页面 显示404错误,即资源未找到
8.SpringMVC支持ant风格的路径
?:表示任意的单个字符
*:表示任意的0个或多个字符
**:表示任意的一层或多层目录
注意:在使用时,只能使用//xxx的方式
<a th:href="@{/a1b}">ant风格--?</a> <br>
<a th:href="@{/12345a/ab}">ant风格--*</a> <br>
<a th:href="@{/1/2/3/4/ab}">ant风格--**</a>
//    @RequestMapping("/a?b")
//@RequestMapping("/*a/ab")
    @RequestMapping("/**/ab")
    public String  ant(){
        return "index2";
    }
9.SpringMVC支持路径中的占位符(重点)
-
原始方式:/deleteUser?id=1
-
rest方式:/deleteUser/1
-
SpringMVC路径中的占位符常用于RESTful风格中,当请求路径中将某些数据通过路径的方式传输到服 务器中,就可以在相应的@RequestMapping注解的value属性中通过占位符{xxx}表示传输的数据,在 通过@PathVariable注解,将占位符所表示的数据赋值给控制器方法的形参
<a th:href="@{/rest/123/liuchao}">rest风格</a>
  @RequestMapping("/rest/{id}/{name}")
    public String rest(@PathVariable("id")int id,@PathVariable("name") String name){
        System.out.println("name:"+name);
        System.out.println("id:"+id);
        return "index2";
    }
5.SpringMVC获取请求参数
1、通过ServletAPI获取
通过ServletAPI获取 将HttpServletRequest作为控制器方法的形参,此时HttpServletRequest类型的参数表示封装了来自前端控制器里请求的请求报文的对象
@RequestMapping("/testParam")
public String testParam(HttpServletRequest request){
String username = request.getParameter("username");
String password = request.getParameter("password");
System.out.println("username:"+username+",password:"+password);
return "success";
}
2、通过控制器方法的形参获取请求参数
在控制器方法的形参位置,设置和请求参数同名的形参,当浏览器发送请求,匹配到请求映射时,DispatcherServlet就会将请求参数赋值给相应的形参
<a th:href="@{/request(username='liuchao',pwd='123')}">形参获取请求</a>

//多个名字相同的参数
<form th:action="@{/request2}" method="get">
    <input type="checkbox" name="hobby" value="java"> java <br>
    <input type="checkbox" name="hobby" value="python"> python <br>
    <input type="checkbox" name="hobby" value="c"> c <br>
    <input type="submit" value="请求2">
</form>
  @RequestMapping("/request")
    public String re(String name,String pwd){
        System.out.println("name:"+name);
        System.out.println("pwd:"+pwd);
        return "index2";
    }
}
//多个名字相同的参数,可以使用字符串,会打出一个  java,python,c的字符串
//    也可以使用数组,遍历一下
  @RequestMapping("/request2")
    public String re2(String hobby/String []hobby){
        System.out.println(hobby);
        return "index2";
    }
注: 若请求所传输的请求参数中有多个同名的请求参数,此时可以在控制器方法的形参中设置字符串 数组或者字符串类型的形参接收此请求参数 若使用字符串数组类型的形参,此参数的数组中包含了每一个数据 若使用字符串类型的形参,此参数的值为每个数据中间使用逗号拼接的结果
3、@RequestParam
-
@RequestParam是将请求参数和控制器方法的形参创建映射关系
-
@RequestParam注解一共有三个属性:
-
value:指定为形参赋值的请求参数的参数名
-
required:设置是否必须传输此请求参数,默认值为true
-
defaultValue:不管required属性值为true或false,当value所指定的请求参数没有传输或传输的值 为""时,则使用默认值为形参赋值
-
//默认为true也就是当没有这个参数且没有defaultValue的时候就报错
boolean required() default true;
  @RequestMapping("/RequestParam")
    public String re3(@RequestParam(value = "User_name",required = false,defaultValue="默认值")
                                  String username){
        System.out.println(username);
        return "index2";
    }
4、@RequestHeader
@RequestHeader是将请求头信息和控制器方法的形参创建映射关系
@RequestHeader注解一共有三个属性:value、required、defaultValue,用法同@RequestParam
 @RequestMapping("/RequestParam2")
//这里value如果填一个请求头里没有的键,就会输出默认值haha
    public String re4(@RequestHeader(value = "Cookie",required = false,defaultValue ="haha")
                                  String cookie){
        System.out.println(cookie);
        return "index2";
    }
5、@CookieValue
- session和cookie
- session存储在服务器
- cookie在浏览器
- 当第一个创建一个session,session会在响应报文中由Cookie保存,如果是在请求报文中就不是第一次创建这个session
- 流程:创建第一次的session
- 我们当前的httpsession对象存储到我们当前的服务器维护的map集合中,以Cookie的随机序列作为map集合的键,然后把session对象作为map集合的值,这个时候再把cookie响应到浏览器
- 第一次之后,Cookie就存在请求报文中了(因为Cookie存在在浏览器之后,后面的每一次请求都会携带这个Cookie)
@CookieValue是将cookie数据和控制器方法的形参创建映射关系 @CookieValue注解一共有三个属性:value、required、defaultValue,用法同@RequestParam
	//这个JSESSIONID是cookie的键名,在第一次之后的请求头中可以找到
@RequestMapping("/RequestParam3")
    public String re5(@RequestHeader(value = "Cookie",required = false,defaultValue ="haha")
                              String cookie,@CookieValue("JSESSIONID")String JSESSIONID){
        System.out.println(JSESSIONID);
        return "index2";
    }
6、通过POJO获取请求参数
可以在控制器方法的形参位置设置一个实体类类型的形参,此时若浏览器传输的请求参数的参数名和实 体类中的属性名一致,那么请求参数就会为此属性赋值
//实体类
private String name;
    private String pwd;
    private String sex;
    private int age;
//控制层
@RequestMapping("/POJO")
    public String re6(User user){
        System.out.println(user);
        return "index2";
    }
//前端表单
<form th:action="@{/POJO}" method="get">
    用户:<input type="text" name="username"> <br>
    密码:<input type="password" name="pwd"> <br>
    性别: <input type="radio" name="sex" value="男">
         <input type="radio" name="sex" value="女"> <br>
    <input type="submit">
</form>
- 我们实体类中比表单多一个属性,那么这个属性就没有被赋上值,为0
7丶乱码问题解决
- get请求乱码:get请求数据是跟随url传输,所以在tomcat的server.xml文件上加上urlEncoding=utf-8就行,tomcat8以上默认utf-8
- post请求乱码:
- 必须在我们前端控制器创建之前,也就是servlet生成之前设置编码
- 过滤器在servlet之前生成
- 配置在web.xml的过滤器
    <filter>
        <filter-name>CharacterEncodingFilter</filter-name>
        <filter-class>org.springframework.web.filter.CharacterEncodingFilter</filter-class>
    <init-param>
        <param-name>encoding</param-name>
        <param-value>UTF-8</param-value>
    </init-param>
        <init-param>
            <param-name>forceResponseEncoding</param-name>
            <param-value>true</param-value>
        </init-param>
    </filter>
    <filter-mapping>
        <filter-name>CharacterEncodingFilter</filter-name>
        <url-pattern>/*</url-pattern>
    </filter-mapping>
-
过滤器源码分析
-
点开CharacterEncodingFilter类,看到三个参数
//envoding可以为空 @Nullable private String encoding; private boolean forceRequestEncoding; private boolean forceResponseEncoding; -
设置encoding为UTF-8
-
找到方法doFilterInternal,因为它有参数FilterChain filterChain
    protected void doFilterInternal(HttpServletRequest request, HttpServletResponse response, FilterChain filterChain) throws ServletException, IOException {
        String encoding = this.getEncoding();
       //我们上面设置了encoding
        if (encoding != null) {
            //isForceRequestEncoding的参数就是forceRequestEncoding构造器默认给了false,而request.getCharacterEncoding() == null成立为true,所以设置了请求过滤器
            if (this.isForceRequestEncoding() || request.getCharacterEncoding() == null) {
                request.setCharacterEncoding(encoding);
            }
//this.isForceResponseEncoding()默认为false,所以我们要设置				forceResponseEncoding为true开启响应过滤器
            if (this.isForceResponseEncoding()) {
                response.setCharacterEncoding(encoding);
            }
        }

        filterChain.doFilter(request, response);
    }
-
6.域对象共享数据
1丶有哪些域对象
- request请求域: 在service 方法调用前由服务器创建,传入service方法。整个请求结束,request生命结束
- application域(ServletContext):服务器开启到关闭
- session:浏览器会话开启到关闭
- 钝化和活化
- 钝化:当服务器关闭,浏览器没有关,就会将session序列化到硬盘
- 活化:当浏览器再次开启,就会反序列化重写读取session
- pagecontext:jsp页面
2丶使用serveltApi获取request域
请求域的范围就是一整个请求的过程中,所以转发到success页面同样,能共享这个请求对象
  @RequestMapping("/api")
    public String api(HttpServletRequest request){
        request.setAttribute("user","hello,api");
        return "success";
    }
<p th:text="${user}"></p>
3、使用ModelAndView向request域对象共享数据(重)
-
必须作为返回值
-
无论是使用原始api还是model,map,modelMap底层都是会将数据封装成ModelAndView类型

-
model用来向请求域共享数据
-
view用来设置视图名称,完成跳转
 @RequestMapping("/modelAndView")
    public ModelAndView modelAndView(){
        ModelAndView mav = new ModelAndView();
//        模型和视图
//        model用来向请求域共享数据
        mav.addObject("user","hello,modelAndView");
//        view用来设置视图名称,完成跳转
        mav.setViewName("success");
        return mav;
    }
4、使用Model向request域对象共享数据
 @RequestMapping("/model")
    public String model(Model model){
       model.addAttribute("user","hello,model");
       return "success";
    }
6、使用map向request域对象共享数据
   @RequestMapping("/map")
    public String map(Map map){
        map.put("user","hello,map");
        return "success";
    }
7、使用ModelMap向request域对象共享数据
@RequestMapping("/ModelMap")
    public String ModelMap(ModelMap map){
//        map.put("user","hello,map");
//        addAttribute底层也就是封装了put方法
        map.addAttribute("user","hello,ModelMap");
        return "success";
    }
8 、Model、ModelMap、Map的关系
-
通过反射我们看到他们的运行时的类都是org.springframework.validation.support.BindingAwareModelMap
System.out.println(model.getClass().getName()); System.out.println(map.getClass().getName()); System.out.println(modelMap.getClass().getName()); -
看看他们的类关系
public interface Model{}
public class ModelMap extends LinkedHashMap<String, Object> {}
public class ExtendedModelMap extends ModelMap implements Model {}
public class BindingAwareModelMap extends ExtendedModelMap {}
9、向session域共享数据
-
作用时间:浏览器开启到关闭
@RequestMapping("/session") public String session(HttpSession session){ session.setAttribute("sessionCode","hello,session"); return "success"; }<p th:text="${session.sessionCode}"></p>
10、向application域共享数据
   @RequestMapping("/application")
    public String application(HttpSession session,HttpServletRequest request){
//        1.用session获取
        ServletContext application = session.getServletContext();
        application.setAttribute("user1","hello,application");
//       2.用request获取session再获取
        ServletContext application2 = request.getSession().getServletContext();
        application2.setAttribute("user2","hello,application2");
//        3.发现两个类是一样的,application是全局唯一只有一个的
        System.out.println(application.getClass().getName());
        System.out.println(application2.getClass().getName());
        return "success";
    }
7.SpringMvc视图
SpringMVC中的视图是View接口,视图的作用渲染数据,将模型Model中的数据展示给用户 SpringMVC视图的种类很多,默认有转发视图和重定向视图 当工程引入jstl的依赖,转发视图会自动转换为JstlView 若使用的视图技术为Thymeleaf,在SpringMVC的配置文件中配置了Thymeleaf的视图解析器,由此视 图解析器解析之后所得到的是ThymeleafView
-
当没有前缀才会去走我们配置的视图解析器
-
调试进入现在调试器找到这个方法就会进入前端控制器那个类
1、ThymeleafView
当控制器方法中所设置的视图名称没有任何前缀时,此时的视图名称会被SpringMVC配置文件中所配置 的视图解析器解析,视图名称拼接视图前缀和视图后缀所得到的最终路径,会通过转发的方式实现跳转
-
找到processDispatchResult方法打断点,再点进去
-
找到render方法(执行,渲染),点进去,看到下面源码
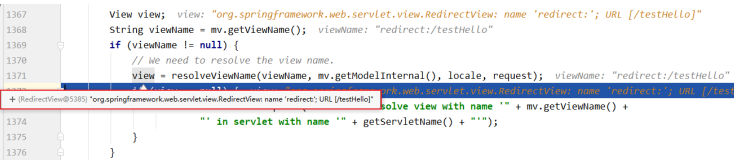
protected void render(ModelAndView mv, HttpServletRequest request, HttpServletResponse response) throws Exception {
    //获取地区
        Locale locale = this.localeResolver != null ? this.localeResolver.resolveLocale(request) : request.getLocale();
        response.setLocale(locale);
    //获取我们设置的视图名称
        String viewName = mv.getViewName();
        View view;
    //如果视图名称不为空就
        if (viewName != null) {
            //解析我们的视图名称,mv.getModelInternal()点进去就看到是获取的model模型
            view = this.resolveViewName(viewName, mv.getModelInternal(), locale, request);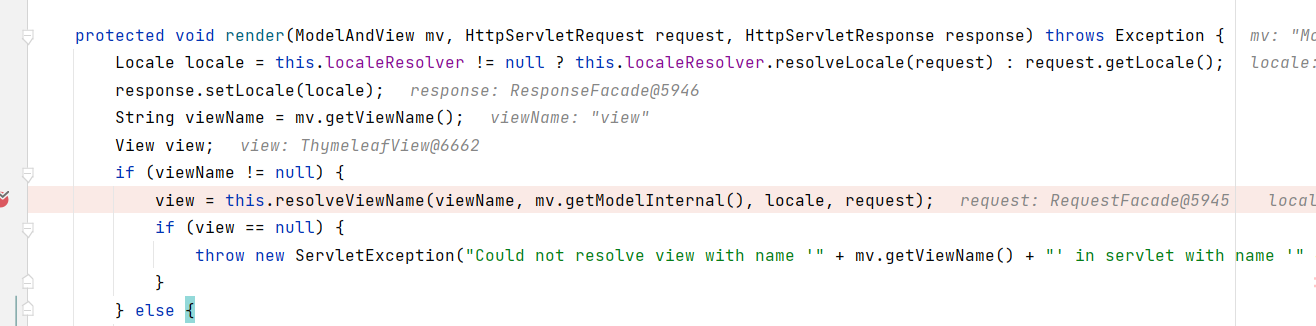
2、转发视图
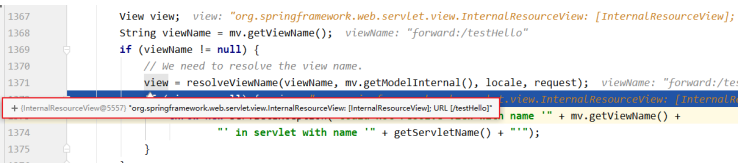
SpringMVC中默认的转发视图是InternalResourceView
SpringMVC中创建转发视图的情况: 当控制器方法中所设置的视图名称以"forward:"为前缀时,创建InternalResourceView视图,此时的视 图名称不会被SpringMVC配置文件中所配置的视图解析器解析,而是会将前缀"forward:"去掉,剩余部分作为最终路径通过转发的方式实现跳转
   @RequestMapping("/forward")
    public String forward(){
//用来跳转到其他请求上
        return "forward:/view";
    }
- 前面跳转过程跟上面一样,最后都要到render这个渲染方法里
3、重定向视图
-
重定向和转发的区别(重点)
- 重定向:
- 浏览器发送两次请求,第一次到servlet,第二次到重定向的地址
- 地址是第二次重定向的地址
- 不能使用请求域,因为第二次是第二个请求,不是同一个请求域不能共享
- 不能访问WEB-INF下的资源(因为WEB-INF下的资源具有安全性,只能通过服务器内部访问,不能通过浏览器访问)
- 可以跨域(浏览器发送两次请求,可以访问外部资源,比如重定向可以访问百度,转发不行)
- 当我们登录的时候,或者跳转重新到一个页面的时候,我们用重定向,因为这个时候地址会改变
- 转发:
- 浏览器发送一次请求(发生在服务器内部)
- 地址就是第一次发送请求的地址
- 可以使用请求域
- 能访问WEB-INF下的资源
- 不能跨域(转发发生在服务器内部,只能访问服务器内部资源)
- 重定向:
-
SpringMVC中默认的重定向视图是RedirectView 当控制器方法中所设置的视图名称以"redirect:"为前缀时,创建RedirectView视图,此时的视图名称不 会被SpringMVC配置文件中所配置的视图解析器解析,而是会将前缀"redirect:"去掉,剩余部分作为最 终路径通过重定向的方式实现跳转 例如"redirect:/","redirect:/employee"
@RequestMapping("/redirect")
    public String redirect(){
        return "redirect:/view";
    }
4、视图控制器view-controller
控制器方法中,仅仅用来实现页面跳转(不处理数据),即只需要设置视图名称时,可以将处理器方法使用view-controller标签进行表示
path:设置处理的请求地址
view-name:设置请求地址所对应的视图名称
<mvc:view-controller path="/" view-name="index"/>
    //这里index可能爆红,但是运行是没有问题的
注: 当SpringMVC中设置任何一个view-controller时,其他控制器中的请求映射将全部失效,此时需 要在SpringMVC的核心配置文件中设置开启mvc注解驱动的标签:
<mvc:annotation-driven />
5丶InternalResourceViewResolver
也就是使用jsp时的视图解析器配置
这个时候默认“index”=forward:“/index”
<bean  class="org.springframework.web.servlet.view.InternalResourceViewResolver">
        <property name="prefix" value="/WEB-INF/templates/"/>
        <property name="suffix" value=".jsp"/>
    </bean>
8.RESTful
1、RESTful简介
REST:Representational State Transfer,表现层资源状态转移。
a>资源
资源是一种看待服务器的方式,即,将服务器看作是由很多离散的资源组成。每个资源是服务器上一个 可命名的抽象概念。因为资源是一个抽象的概念,所以它不仅仅能代表服务器文件系统中的一个文件、 数据库中的一张表等等具体的东西,可以将资源设计的要多抽象有多抽象,只要想象力允许而且客户端 应用开发者能够理解。与面向对象设计类似,资源是以名词为核心来组织的,首先关注的是名词。一个 资源可以由一个或多个URI来标识。URI既是资源的名称,也是资源在Web上的地址。对某个资源感兴 趣的客户端应用,可以通过资源的URI与其进行交互。
b>资源的表述
资源的表述是一段对于资源在某个特定时刻的状态的描述。可以在客户端-服务器端之间转移(交 换)。资源的表述可以有多种格式,例如HTML/XML/JSON/纯文本/图片/视频/音频等等。资源的表述格 式可以通过协商机制来确定。请求-响应方向的表述通常使用不同的格式。
c>状态转移
状态转移说的是:在客户端和服务器端之间转移(transfer)代表资源状态的表述。通过转移和操作资 源的表述,来间接实现操作资源的目的。
2、RESTful的实现
具体说,就是 HTTP 协议里面,四个表示操作方式的动词:GET、POST、PUT、DELETE。
它们分别对应四种基本操作:GET 用来获取资源,POST 用来新建资源,PUT 用来更新资源,DELETE 用来删除资源。
REST 风格提倡 URL 地址使用统一的风格设计,从前到后各个单词使用斜杠分开,不使用问号键值对方 式携带请求参数,而是将要发送给服务器的数据作为 URL 地址的一部分,以保证整体风格的一致性。
| 操作 | 传统方式 | REST风格 |
|---|---|---|
| 查询操作 | getUserById?id=1 | user/1-->get请求方式 |
| 保存操作 | saveUser | user-->post请求方式 |
| 删除操作 | deleteUser?id=1 | user/1-->delete请求方式 |
| 更新操作 | updateUser | user-->put请求方式 |
3、HiddenHttpMethodFilter(请求过滤器)
由于浏览器只支持发送get和post方式的请求,那么该如何发送put和delete请求呢?(ajax其实也可以,但是ajax的这两请求有部分浏览器不支持)
SpringMVC 提供了 HiddenHttpMethodFilter 帮助我们将 POST 请求转换为 DELETE 或 PUT 请求 HiddenHttpMethodFilter 处理put和delete请求的条件:
a>当前请求的请求方式必须为post
b>当前请求必须传输请求参数_method _
_满足以上条件,HiddenHttpMethodFilter 过滤器就会将当前请求的请求方式转换为请求参数 _method的值,因此请求参数_method的值才是最终的请求方式 在web.xml中注册HiddenHttpMethodFilter
<filter>
	<filter-name>HiddenHttpMethodFilter</filter-name>
	<filter-class>org.springframework.web.filter.HiddenHttpMethodFilter</filterclass>
</filter>
<filter-mapping>
	<filter-name>HiddenHttpMethodFilter</filter-name>
	<url-pattern>/*</url-pattern>
</filter-mapping>
源码分析
-
点进HiddenHttpMethodFilter类
-
找到doFilterInternal方法,因为这个方法有FilterChain参数,可以为过滤器放行
private static final List<String> ALLOWED_METHODS; public static final String DEFAULT_METHOD_PARAM = "_method"; private String methodParam = "_method"; protected void doFilterInternal(HttpServletRequest request, HttpServletResponse response, FilterChain filterChain) throws ServletException, IOException { //1.首先将我们的请求用自己定义的存储起来 HttpServletRequest requestToUse = request; //2.判断当前请求是否为POst,后面那个判断为null恒成立 if ("POST".equals(request.getMethod()) && request.getAttribute("javax.servlet.error.exception") == null) { //3.根据methodParam的“_method”定义我们自己请求的参数 String paramValue = request.getParameter(this.methodParam); //4.此时我们的请求参数不为空进入 if (StringUtils.hasLength(paramValue)) { //5.将我们的请求参数变为大写 String method = paramValue.toUpperCase(Locale.ENGLISH); //6.在ALLOWED_METHODS里看有没有当前请求 // ALLOWED_METHODS在下面静态代码块定义了,有put,delete,PATCH if (ALLOWED_METHODS.contains(method)) { //7.点进 HttpMethodRequestWrapper 方法 requestToUse = new HiddenHttpMethodFilter.HttpMethodRequestWrapper(request, method); } } } //10.根据新的请求设置放行 filterChain.doFilter((ServletRequest)requestToUse, response); } static { ALLOWED_METHODS = Collections.unmodifiableList(Arrays.asList(HttpMethod.PUT.name(), HttpMethod.DELETE.name(), HttpMethod.PATCH.name())); } private static class HttpMethodRequestWrapper extends HttpServletRequestWrapper { private final String method; public HttpMethodRequestWrapper(HttpServletRequest request, String method) { //8.根据请求和方法得到一个新的请求 super(request); this.method = method; } //9.并返回一个新的方法,也就是我们后面都用的这个方法 public String getMethod() { return this.method; } } -
具体操作
-
首先配置好web.xml
-
前端,使用hideen隐藏域,定义好_method,值为请求的方式
<a th:href="@{/user}">查询所有用户</a> <br> <a th:href="@{/userID/1}">根据id查询用户</a> <br> post: <form th:action="@{/userpost}" method="post"> <input type="text" name="username"><br> <input type="password" name="password"><br> <input type="submit" value="添加"> </form> <br> put: <form th:action="@{/userput}" method="post"> <input type="hidden" name="_method" value="put"> <input type="text" name="username"><br> <input type="password" name="password"><br> <input type="submit" value="添加"> </form> -
controller
- 查询时使用url直接接收数据时,记得要用占位符
- 要根据是增删查改,来定义请求的方式
  @RequestMapping("/user")
    public String user(){
        System.out.println("查询所有用户");
        return "success";
    }

    @RequestMapping(value = "/userID/{id}",method = RequestMethod.GET)
    public String userID(@PathVariable("id") String id){
        System.out.println("id:"+id);
        System.out.println("根据有id查询用户");
        return "success";
    }

    @RequestMapping(value = "/userpost",method = RequestMethod.POST)
    public String userpost(String username,String password){
        System.out.println("username:"+username);
        System.out.println("password:"+password);
        System.out.println("保存用户信息");
        return "success";
    }

    @RequestMapping(value = "/userput",method = RequestMethod.PUT)
    public String userput(String username,String password){
        System.out.println("username:"+username);
        System.out.println("password:"+password);
        System.out.println("添加用户信息");
        return "success";
    }
注:如果出现乱码,可能是因为,你请求过滤器(获取了_method的请求参数),在编码过滤器前,编码过滤器只要之前有之前过滤器获取过请求参数就失效了
解决:改变顺序就可以了
-
9.RESTful案例
1、准备工作
和传统 CRUD 一样,实现对员工信息的增删改查。
- 搭建环境
- 准备实体类
public class Employee {
private Integer id;
private String lastName;
private String email;
//1 male, 0 female
private Integer gender;
//get,set方法
//有参无参构造器
}
- 准备dao模拟数据 库
@Repository
public class EmployeeDao {
private static Map<Integer, Employee> employees = null;
static{
employees = new HashMap<Integer, Employee>();
employees.put(1001, new Employee(1001, "E-AA", "aa@163.com", 1));
employees.put(1002, new Employee(1002, "E-BB", "bb@163.com", 1));
employees.put(1003, new Employee(1003, "E-CC", "cc@163.com", 0));
employees.put(1004, new Employee(1004, "E-DD", "dd@163.com", 0));
employees.put(1005, new Employee(1005, "E-EE", "ee@163.com", 1));
}
private static Integer initId = 1006;
public void save(Employee employee){
if(employee.getId() == null){
employee.setId(initId++);
}
employees.put(employee.getId(), employee);
}
public Collection<Employee> getAll(){
return employees.values();
}
public Employee get(Integer id){
return employees.get(id);
}
public void delete(Integer id){
employees.remove(id);
}
}
2、功能清单

3、具体功能:访问首页
a>配置view-controller
<mvc:view-controller path="/" view-name="index"/>
b>创建页面
<!DOCTYPE html>
<html lang="en" xmlns:th="http://www.thymeleaf.org">
<head>
<meta charset="UTF-8" >
<title>Title</title>
</head>
<body>
<h1>首页</h1>
<a th:href="@{/employee}">访问员工信息</a>
</body>
</html>
4、具体功能:查询所有员工数据
a>控制器方法
@RequestMapping(value = "/employee", method = RequestMethod.GET)
public String getEmployeeList(Model model){
Collection<Employee> employeeList = employeeDao.getAll();
model.addAttribute("employeeList", employeeList);
return "employee_list";
}
b>创建employee_list.html
<!DOCTYPE html>
<html lang="en" xmlns:th="http://www.thymeleaf.org">
<head>
<meta charset="UTF-8">
<title>Employee Info</title>
<script type="text/javascript" th:src="@{/static/js/vue.js}"></script>
</head>
    <body>
<table border="1" cellpadding="0" cellspacing="0" style="text-align:
center;" id="dataTable">
<tr>
<th colspan="5">Employee Info</th>
</tr>
<tr>
<th>id</th>
<th>lastName</th>
<th>email</th>
<th>gender</th>
<th>options(<a th:href="@{/toAdd}">add</a>)</th>
</tr>
<tr th:each="employee : ${employeeList}">
<td th:text="${employee.id}"></td>
<td th:text="${employee.lastName}"></td>
<td th:text="${employee.email}"></td>
<td th:text="${employee.gender}"></td>
<td>
<a class="deleteA" @click="deleteEmployee"
   // 这里拼接路径和参数
th:href="@{'/employee/'+${employee.id}}">delete</a>
<a th:href="@{'/employee/'+${employee.id}}">update</a>
</td>
</tr>
</table>
</body>
</html>
<!-- 作用:通过超链接控制表单的提交,将post请求转换为delete请求 -->
<form id="delete_form" method="post"
5、具体功能:删除
a>创建处理delete请求方式的表单
<!-- 作用:通过超链接控制表单的提交,将post请求转换为delete请求 -->
<form id="delete_form" method="post">
<!-- HiddenHttpMethodFilter要求:必须传输_method请求参数,并且值为最终的请求方式 -->
<input type="hidden" name="_method" value="delete"/>
</form>
b>删除超链接绑定点击事件
引入vue.js (也可以引入cdn)
<script type="text/javascript" th:src="@{/static/js/vue.js}"></script>
删除超链接
<a class="deleteA" @click="deleteEmployee"
th:href="@{'/employee/'+${employee.id}}">delete</a>
通过vue处理点击事件
<script type="text/javascript">
var vue = new Vue({
el:"#dataTable",

methods:{
//event表示当前事件
deleteEmployee:function (event) {
//通过id获取表单标签
var delete_form = document.getElementById("delete_form");
//将触发事件的超链接的href属性为表单的action属性赋值
delete_form.action = event.target.href;
//提交表单
delete_form.submit();
//阻止超链接的默认跳转行为
event.preventDefault();
}
}
});
</script>
c>控制器方法 (delete请求)
@RequestMapping(value = "/employee/{id}", method = RequestMethod.DELETE)
public String deleteEmployee(@PathVariable("id") Integer id){
employeeDao.delete(id);
return "redirect:/employee";
}
注:这里要是是使用的引入vue.js到/static/js/vue.js,可能会出现,这个static包没有导进war包下
还有可能前端控制器会找不到这个静态资源,而出错
需要在核心配置文件中 开放对静态资源的访问
6、具体功能:保存
在最初的表达的操作上加一个超链接,跳转到保存的位置,这个时候只需要跳转不需要操作数据,所以用视图控制器
<th>操作 <a th:href="@{/toadd}">add</a></th>
a>配置view-controller (视图控制器)
mvc:view-controller path="/toAdd" view-name="employee_add"></mvc:viewcontroller>
b>创建employee_add.html
<!DOCTYPE html>
<html lang="en" xmlns:th="http://www.thymeleaf.org">
<head>
<meta charset="UTF-8">
<title>Add Employee</title>
</head>
<body>
<form th:action="@{/employee}" method="post">
lastName:<input type="text" name="lastName"><br>
email:<input type="text" name="email"><br>
gender:<input type="radio" name="gender" value="1">male
<input type="radio" name="gender" value="0">female<br>
<input type="submit" value="add"><br>
</form>
</body>
</html
c>控制器方法
@RequestMapping(value = "/employee", method = RequestMethod.POST)
public String addEmployee(Employee employee){
employeeDao.save(employee);
return "redirect:/employee";
}
7丶修改
回显数据
a>修改超链接
<a th:href="@{'/employee/'+${employee.id}}">update</a>
b>控制器方法
@RequestMapping(value = "/employee/{id}", method = RequestMethod.GET)
public String getEmployeeById(@PathVariable("id") Integer id, Model model){
Employee employee = employeeDao.get(id);
model.addAttribute("employee", employee);
return "employee_update";
}
c>创建employee_update.html
<form th:action="@{/employee}" method="post">
<input type="hidden" name="_method" value="put">
<input type="hidden" name="id" th:value="${employee.id}">
lastName:<input type="text" name="lastName" th:value="${employee.lastName}">
<br>
email:<input type="text" name="email" th:value="${employee.email}"><br>
<!--
th:field="${employee.gender}"可用于单选框或复选框的回显
若单选框的value和employee.gender的值一致,则添加checked="checked"属性
-->
gender:<input type="radio" name="gender" value="1"
th:field="${employee.gender}">male
<input type="radio" name="gender" value="0"
th:field="${employee.gender}">female<br>
<input type="submit" value="update"><br>
</form>
更新跳转 (PUT请求)
@RequestMapping(value = "/employee", method = RequestMethod.PUT)
public String updateEmployee(Employee employee){
employeeDao.save(employee);
return "redirect:/employee";
}
8丶对静态资源的总结
-
Tomcat中的web.xml和项目中的web.xml,项目中有默认的defult控制器,当项目中有前端控制器时,会有就近原则,走前端控制器
-
首先我们得前端控制器处理资源,是通过在Ioc容器的控制器再与请求地址匹配,那么静态资源我们没有这个映射这个地址,所以这个时候就访问不到,所以加上注解
-
反正没事下面注解都加上就可以了
    <!--  开启对静态资源的访问(当前端控制器找不到,会再走默认的控制器)  -->
        <mvc:default-servlet-handler/>
    // 如果不加   开启mvc注解驱动的标签 就只会走默认的控制器了
    // 只有两个都加,才会在 前端控制器 找不到 的情况下走 默认控制器
    <!--    开启mvc注解驱动的标签-->
    <mvc:annotation-driven/>
10.HttpMessageConverter
-
HttpMessageConverter,报文信息转换器,将请求报文转换为Java对象,或将Java对象转换为响应报文
-
HttpMessageConverter提供了两个注解和两个类型:
-
@RequestBody,
-
@ResponseBody
-
RequestEntity
-
ResponseEntity
1、@RequestBody
@RequestBody可以获取请求体,需要在控制器方法设置一个形参,使用@RequestBody进行标识,当 前请求的请求体就会为当前注解所标识的形参赋值
<form th:action="@{/testRequestBody}" method="post">
用户名:<input type="text" name="username"><br>
密码:<input type="password" name="password"><br>
<input type="submit">
</form>
@RequestMapping("/testRequestBody")
public String testRequestBody(@RequestBody String requestBody){
System.out.println("requestBody:"+requestBody);
return "success";
}
输出结果: requestBody:username=admin&password=123456
2、RequestEntity (常用)
RequestEntity封装请求报文的一种类型,需要在控制器方法的形参中设置该类型的形参,当前请求的 请求报文就会赋值给该形参,可以通过getHeaders()获取请求头信息,通过getBody()获取请求体信息
@RequestMapping("/testRequestEntity")
public String testRequestEntity(RequestEntity<String> requestEntity){
System.out.println("requestHeader:"+requestEntity.getHeaders());
System.out.println("requestBody:"+requestEntity.getBody());
return "success";
}
3、@ResponseBody(常)
-
请求和响应
- 当请求或者响应时,请求头和响应头是一些配置等,而请求体和响应体才是我们前后台互传的数据
- 转发和重定向到一个页面,也就是,响应体里有一个页面
-
之前我们是使用HttpServletResponse 往前台响应
ResponseBody.getwriter().print()等等 -
@ResponseBody用于标识一个控制器方法,可以将该方法的返回值直接作为响应报文的响应体响应到 浏览器 ,也就是说,不会走thy视图解析器了,会直接把数据响应过去
@RequestMapping("/Respond")
    @ResponseBody
    public String Respond() throws IOException {
      return "hello,ResponseBody";
    }
4、@RestController注解(常)
@RestController注解是springMVC提供的一个复合注解,标识在控制器的类上,就相当于为类添加了 @Controller注解,并且为其中的每个方法添加了@ResponseBody注解
5、ResponseEntity
ResponseEntity用于控制器方法的返回值类型,该控制器方法的返回值就是响应到浏览器的响应报文 ,用来做下载文件
11.文件的上传和下载
1丶下载
- 使用ResponseEntity实现下载文件的功能
- 我们要做的就改改文件的路径
@RequestMapping("/testDown")
    public ResponseEntity<byte[]> testResponseEntity(HttpSession session) throws
            IOException {
//获取ServletContext对象
        ServletContext servletContext = session.getServletContext();
//获取服务器中文件的真实路径
        String realPath = servletContext.getRealPath("/static/js/1.png");
//创建输入流
        InputStream is = new FileInputStream(realPath);
//创建字节数组
        byte[] bytes = new byte[is.available()];
//将流读到字节数组中
        is.read(bytes);
//创建HttpHeaders对象设置响应头信息
        MultiValueMap<String, String> headers = new HttpHeaders();
//设置要下载方式以及下载文件的名字
        headers.add("Content-Disposition", "attachment;filename=1.png");
//设置响应状态码
        HttpStatus statusCode = HttpStatus.OK;
//创建ResponseEntity对象
        ResponseEntity<byte[]> responseEntity = new ResponseEntity<>(bytes, headers,
                statusCode);
//关闭输入流
        is.close();
        return responseEntity;
    }
2、文件上传
文件上传要求form表单的请求方式必须为post,并且添加属性enctype="multipart/form-data" SpringMVC中将上传的文件封装到MultipartFile对象中,通过此对象可以获取文件相关信息
上传步骤:
a>添加依赖:
<!-- https://mvnrepository.com/artifact/commons-fileupload/commons-fileupload --
>
<dependency>
<groupId>commons-fileupload</groupId>
<artifactId>commons-fileupload</artifactId>
<version>1.3.1</version>
</dependency>
b>在SpringMVC的配置文件中添加配置:
<!--必须通过文件解析器的解析才能将文件转换为MultipartFile对象-->
<bean id="multipartResolver"
class="org.springframework.web.multipart.commons.CommonsMultipartResolver">
</bean>
c>前端
<form th:action="@{/testUp}" method="post" enctype="multipart/form-data">
    <input type="file" name="photo">
    <input type="submit" value="上传">
</form>
d>控制器方法:
@RequestMapping("/testUp")
public String testUp(MultipartFile photo, HttpSession session) throws
IOException {
//获取上传的文件的文件名
String fileName = photo.getOriginalFilename();
//处理文件重名问题
String hzName = fileName.substring(fileName.lastIndexOf("."));
fileName = UUID.randomUUID().toString() + hzName;
//获取服务器中photo目录的路径
ServletContext servletContext = session.getServletContext();
String photoPath = servletContext.getRealPath("photo");
File file = new File(photoPath);
if(!file.exists()){
file.mkdir();
}
String finalPath = photoPath + File.separator + fileName;
//实现上传功能
photo.transferTo(new File(finalPath));
return "success";
}
11.JSON
1丶什么是JSON
- JSON(JavaScript Object Notation, JS 对象标记) 是一种轻量级的数据交换格式,目前使用特别广泛。
- 采用完全独立于编程语言的文本格式来存储和表示数据。
- 简洁和清晰的层次结构使得 JSON 成为理想的数据交换语言。
- 易于人阅读和编写,同时也易于机器解析和生成,并有效地提升网络传输效率。
2丶JavaScript里的JSON
- 花括号,键值对,逗号隔开,冒号隔开键和值,除了键也是字符串,其他跟js对象一样
- stringify:对象转字符串
- parse:字符串转对象
    <script type="text/javascript">
        let jj={
            name:"lc",
            age:20,
            id:22
        }
        console.log(jj);
       //对象转字符串
       let st=JSON.stringify(jj)
        console.log(st)
       // 字符串转对象
       let jj2 =JSON.parse(st)
    </script>
3丶在java中的JSON
1丶使用Springmvc时json
a>导入jackson的依赖
b>在SpringMVC的核心配置文件中开启mvc的注解驱动,此时在HandlerAdaptor中会自动装配一个消 息转换器:MappingJackson2HttpMessageConverter,可以将响应到浏览器的Java对象转换为Json格 式的字符串
<mvc:annotation-driven />
c>在处理器方法上使用@ResponseBody注解进行标识
d>将Java对象直接作为控制器方法的返回值返回,就会自动转换为Json格式的字符串
@RequestMapping("/testResponseUser")
@ResponseBody
public User testResponseUser(){
return new User(1001,"admin","123456",23,"男");
}
浏览器的页面中展示的结果: {"id":1001,"username":"admin","password":"123456","age":23,"sex":"男"}
2丶使用jackson
- 1.导入jackson的包

  ```xml
  <dependency>
              <groupId>org.projectlombok</groupId>
              <artifactId>lombok</artifactId>
              <version>1.18.12</version>
              <scope>provided</scope>
          </dependency>
  ```
- 2.使用注解:**@ResponseBody**使用后,这个方法返回的值就**不会经过视图解析器**,就单纯**返回一个字符串**

- 3.创建jackson对象

- 4.使用jackson方法并将需要传入的对象(集合也可以)转换成json字符串

- 5.处理json字符串的乱码

  - 单独处理:@RequestMapping(value = "/json1",produces = "application/json;charset=utf-8")
  - 统一处理:

  ```xml
  <mvc:annotation-driven>
     <mvc:message-converters register-defaults="true">
         <bean class="org.springframework.http.converter.StringHttpMessageConverter">
             <constructor-arg value="UTF-8"/>
         </bean>
         <bean class="org.springframework.http.converter.json.MappingJackson2HttpMessageConverter">
             <property name="objectMapper">
                 <bean class="org.springframework.http.converter.json.Jackson2ObjectMapperFactoryBean">
                     <property name="failOnEmptyBeans" value="false"/>
                 </bean>
             </property>
         </bean>
     </mvc:message-converters>
  </mvc:annotation-driven>
  ```
  ```java
  @Controller
  //@RestController,当使用@RestController时下面的所有方法都会返回字符串不经过视图解析器,不需要@ResponseBody
  public class JsonController {
  //@ResponseBody使用后,这个方法返回的值就不会经过视图解析器,就单纯返回一个字符串
       @ResponseBody
       @RequestMapping(value = "/json1",produces = "application/json;charset=utf-8")
      public String json1() throws JsonProcessingException {
  //        创建一个jackson的对象映射器,用来解析数据
          ObjectMapper mapper = new ObjectMapper();
  //        创建传入的对象
          User user = new User(1,"刘超","123");
       //日期格式   Date d = new data();
  //        将我们的对象解析成json格式
          String s = mapper.writeValueAsString(user);
           String s = mapper.writeValueAsString(d);
          return s;
      }
  }

  ```
  6.提取成工具类

  ```java
  public class ControllerUtlis {
      public String json(User user){
          return json(user,null);
      }

      public String json(User user,String dateFormat){
  //        创建一个jackson的对象映射器,用来解析数据
          ObjectMapper mapper = new ObjectMapper();
          Date date = new Date();
          SimpleDateFormat format = new SimpleDateFormat(dateFormat);
          mapper.setDateFormat(format);
  //        创建传入的对象
          user = new User(1,"刘超","123");
  //        将我们的对象解析成json格式
          String s = null;
          try {
              return mapper.writeValueAsString(user);
          } catch (JsonProcessingException e) {
              e.printStackTrace();
          }
          return null;
      }
  }
  ```
3丶使用 FastJson (阿里巴巴)
- 导包

- astjson 三个主要的类:

  **JSONObject  代表 json 对象**

  - JSONObject实现了Map接口, 猜想 JSONObject底层操作是由Map实现的。
  - JSONObject对应json对象,通过各种形式的get()方法可以获取json对象中的数据,也可利用诸如size(),isEmpty()等方法获取"键:值"对的个数和判断是否为空。其本质是通过实现Map接口并调用接口中的方法完成的。

  **JSONArray  代表 json 对象数组**

  - 内部是有List接口中的方法来完成操作的。

  **JSON代表 JSONObject和JSONArray的转化**

  - JSON类源码分析与使用
  - 仔细观察这些方法,主要是实现json对象,json对象数组,javabean对象,json字符串之间的相互转化。
-
常用方法:
- toJSONString:Java对象 转 JSON字符串
- parseObject:JSON字符串 转 Java对象
- toJSON:Java对象 转 JSON对象
- toJavaObject:JSON对象 转 Java对象
public class FastJsonDemo {
   public static void main(String[] args) {
       //创建一个对象
       User user1 = new User("1号", 3, "男");
       User user2 = new User("2号", 3, "男");
       User user3 = new User("3号", 3, "男");
       User user4 = new User("4号", 3, "男");
       List<User> list = new ArrayList<User>();
       list.add(user1);
       list.add(user2);
       list.add(user3);
       list.add(user4);

       System.out.println("*******Java对象 转 JSON字符串*******");
       String str1 = JSON.toJSONString(list);
       System.out.println("JSON.toJSONString(list)==>"+str1);
       String str2 = JSON.toJSONString(user1);
       System.out.println("JSON.toJSONString(user1)==>"+str2);

       System.out.println("\n****** JSON字符串 转 Java对象*******");
       User jp_user1=JSON.parseObject(str2,User.class);
       System.out.println("JSON.parseObject(str2,User.class)==>"+jp_user1);

       System.out.println("\n****** Java对象 转 JSON对象 ******");
       JSONObject jsonObject1 = (JSONObject) JSON.toJSON(user2);
       System.out.println("(JSONObject) JSON.toJSON(user2)==>"+jsonObject1.getString("name"));

       System.out.println("\n****** JSON对象 转 Java对象 ******");
       User to_java_user = JSON.toJavaObject(jsonObject1, User.class);
       System.out.println("JSON.toJavaObject(jsonObject1, User.class)==>"+to_java_user);
  }
}
12.SpringMVC处理ajax
a>请求超链接:
<div id="app">
<a th:href="@{/testAjax}" @click="testAjax">testAjax</a><br>
</div
b>通过vue和axios处理点击事件:
<script type="text/javascript" th:src="@{/static/js/vue.js}"></script>
<script type="text/javascript" th:src="@{/static/js/axios.min.js}"></script>
<script type="text/javascript">
var vue = new Vue({
el:"#app",
methods:{
testAjax:function (event) {
axios({
method:"post",
url:event.target.href,
params:{
username:"admin",
password:"123456"
}
}).then(function (response) {
alert(response.data);
});
event.preventDefault();
}
}
});
</script>
c>控制器方法:
@RequestMapping("/testAjax")
@ResponseBody
public String testAjax(String username, String password){
System.out.println("username:"+username+",password:"+password);
return "hello,ajax";
}
13.拦截器
1丶过滤器与拦截器的区别:
拦截器是AOP思想的具体应用。
过滤器
- servlet规范中的一部分,任何java web工程都可以使用
- 在url-pattern中配置了/*之后,可以对所有要访问的资源进行拦截
拦截器
- 拦截器是SpringMVC框架自己的,只有使用了SpringMVC框架的工程才能使用
- 拦截器只会拦截访问的控制器方法, 如果访问的是jsp/html/css/image/js是不会进行拦截的
2、拦截器的配置
- SpringMVC中的拦截器用于拦截控制器方法的执行
- SpringMVC中的拦截器需要实现HandlerInterceptor ,并重写方法
public class myIntercepter implements HandlerInterceptor {
//    控制器方法执行之前
    @Override
    public boolean preHandle(HttpServletRequest request, HttpServletResponse response, Object handler) throws Exception {
        System.out.println("preHandle");
        return true;
    }
//控制器方法之后
    @Override
    public void postHandle(HttpServletRequest request, HttpServletResponse response, Object handler, ModelAndView modelAndView) throws Exception {
        System.out.println("postHandle");
        HandlerInterceptor.super.postHandle(request, response, handler, modelAndView);
    }
//渲染视图后执行
    @Override
    public void afterCompletion(HttpServletRequest request, HttpServletResponse response, Object handler, Exception ex) throws Exception {
        System.out.println("afterCompletion");
        HandlerInterceptor.super.afterCompletion(request, response, handler, ex);
    }
}
- SpringMVC的拦截器必须在SpringMVC的配置文件中进行配置:
<!--    配置拦截器-->
    <mvc:interceptors>
<!--        <bean class="com.LiuDeHen.interceptors.myIntercepter"/>-->
<!--    <ref bean="myIntercepter"/>-->
        <!-- 以上两种配置方式都是对DispatcherServlet所处理的所有的请求进行拦截 -->
        <mvc:interceptor>
            <mvc:mapping path="/**"/>
<!--         /** 是所有请求   -->
            <mvc:exclude-mapping path="/lanjieq"/>
            <ref bean="myIntercepter"/>
        </mvc:interceptor>
        <!--
以上配置方式可以通过ref或bean标签设置拦截器,通过mvc:mapping设置需要拦截的请求,通过
mvc:exclude-mapping设置需要排除的请求,即不需要拦截的请求
-->
    </mvc:interceptors>
- 此时我们运行结果结论
- 当我们自己定义的拦截器返回为true时,为放行
- 此时我们配置的xml文件,/对所有的文件都放行**,也就是都会把拦截器三个都输出来
- 排除/lanjieq这一个路径,这个路径就不会放行,三句话就会输出第一句
- 为什么返回值为true为放行,false为拦截
3丶源码分析
-
进入DispatcherServlet类
-
找到
if (!mappedHandler.applyPreHandle(processedRequest, response)) { return; } -
再点进applyPreHandle方法
boolean applyPreHandle(HttpServletRequest request, HttpServletResponse response) throws Exception { for(int i = 0; i < this.interceptorList.size(); this.interceptorIndex = i++) { HandlerInterceptor interceptor = (HandlerInterceptor)this.interceptorList.get(i); if (!interceptor.preHandle(request, response, this.handler)) { //拦截器的preHandle(控制器之前执行的方法),当返回为false时才会进入,并且返回false,这个返回的结果再丢到if (!mappedHandler.applyPreHandle(processedRequest, response)) { return; } //此时return直接返回结束,所以拦截器的preHandle返回为false会直接返回 this.triggerAfterCompletion(request, response, (Exception)null); return false; } } -
得出结论,false为拦截,true为放行
4、拦截器的三个抽象方法
SpringMVC中的拦截器有三个抽象方法:
preHandle:控制器方法执行之前执行preHandle(),其boolean类型的返回值表示是否拦截或放行,返 回true为放行,即调用控制器方法;返回false表示拦截,即不调用控制器方法
postHandle:控制器方法执行之后执行postHandle()
afterComplation:处理完视图和模型数据,渲染视图完毕之后执行afterComplation( )
5、多个拦截器的执行顺序
a>若每个拦截器的preHandle()都返回true 此时多个拦截器的执行顺序和拦截器在SpringMVC的配置文件的配置顺序有关: preHandle()会按照配置的顺序执行,而postHandle()和afterComplation()会按照配置的反序执行
b>若某个拦截器的preHandle()返回了false , preHandle()返回false和它之前的拦截器的preHandle()都会执行,postHandle()都不执行,返回false 的拦截器之前的拦截器的afterComplation()会执行
6丶源码分析
-
断点打到控制器方法的返回页面上
-
调试,浏览器发送的请求进入到那个断点的方法上
-
找到方法栈上,doDispatch,进入,到了DispatcherServlet类
-
分别将这几个方法打上断点
// prehandel控制器处理前的方法 //mappedHandler 映射处理器,也就是我们当前的控制方法 if (!mappedHandler.applyPreHandle(processedRequest, response)) { return; } // 会将请求和响应的数据封装到model,跳转到view (modelAndview) mv = ha.handle(processedRequest, response, mappedHandler.getHandler()); // PostHandle控制器处理后方法 mappedHandler.applyPostHandle(processedRequest, response, mv); // 渲染视图方法 this.processDispatchResult(processedRequest, response, mappedHandler, mv, (Exception)dispatchException); if (mappedHandler != null) { mappedHandler.triggerAfterCompletion(request, response, ex); } -
首先进入applyPreHandle
boolean applyPreHandle(HttpServletRequest request, HttpServletResponse response) throws Exception { //循环遍历我们的拦截器 for(int i = 0; i < this.interceptorList.size(); this.interceptorIndex = i++) { HandlerInterceptor interceptor = (HandlerInterceptor)this.interceptorList.get(i); if (!interceptor.preHandle(request, response, this.handler)) { //如果拦截器的prehandel返回值的false就结束,所以就拦截成功了,不会执行传modelAndview,控制器后的PostHandle,和渲染方法 this.triggerAfterCompletion(request, response, (Exception)null); return false; } } -
退出上一个方法,进入applyPostHandle
void applyPostHandle(HttpServletRequest request, HttpServletResponse response, @Nullable ModelAndView mv) throws Exception { //反向遍历,所以才会有多个拦截器时,先执行的PreHandle的拦截器就会比其他拦截器后执行PostHandle for(int i = this.interceptorList.size() - 1; i >= 0; --i) { HandlerInterceptor interceptor = (HandlerInterceptor)this.interceptorList.get(i); interceptor.postHandle(request, response, this.handler, mv); } -
再进入processDispatchResult(渲染视图)
private void processDispatchResult(HttpServletRequest request, HttpServletResponse response, @Nullable HandlerExecutionChain mappedHandler, @Nullable ModelAndView mv, @Nullable Exception exception) throws Exception
    //会讲请求,响应,和modelAndview 等作为参数渲染视图
14.异常处理器
1、基于配置的异常处理
SpringMVC提供了一个处理控制器方法执行过程中所出现的异常的接口:HandlerExceptionResolver HandlerExceptionResolver接口的实现类有:DefaultHandlerExceptionResolver和 SimpleMappingExceptionResolver
SpringMVC提供了自定义的异常处理器SimpleMappingExceptionResolver,使用方式:
- 定义出现什么异常
- 跳转到那个视图
- 传异常参数到请求域
 <bean class="org.springframework.web.servlet.handler.SimpleMappingExceptionResolver">
        <property name="exceptionMappings" >
            <props>
     <!--
			properties的键表示处理器方法执行过程中                   出现的异常(全类名)
			properties的值表示若出现指定异常时,设置一个新的视图名称,   跳转到指定页面(会经过视图解析器)
-->
                <prop key="java.lang.ArithmeticException">error</prop>
            </props>
        </property>
     <!--
			exceptionAttribute属性设置一个属性名,将出现的异常信息在     请求域中进行共享(可以在错误页面拿到这个异常信息)
-->

        <property name="exceptionAttribute" value="error"></property>
    </bean>
2、基于注解的异常处理
@ControllerAdvice
//点进去看到 这个注解里有@Component,所以是一个扩展注解,也能将我们的类注册为bean组件
public class errController {

    @ExceptionHandler(ArithmeticException.class)
    public String err(Exception ex, Model model){
                //ex表示当前请求处理中出现的异常对象
        model.addAttribute("ex",ex);
        return "error";
    }
}
15.注解配置SpringMVC
使用配置类和注解代替web.xml和SpringMVC配置文件的功能
1、创建初始化类,代替web.xml
在Servlet3.0环境中,容器会在类路径中查找实现javax.servlet.ServletContainerInitializer接口的类, 如果找到的话就用它来配置Servlet容器。 Spring提供了这个接口的实现,名为 SpringServletContainerInitializer,这个类反过来又会查找实现WebApplicationInitializer的类并将配 置的任务交给它们来完成。Spring3.2引入了一个便利的WebApplicationInitializer基础实现,名为 AbstractAnnotationConfigDispatcherServletInitializer,当我们的类扩展了 AbstractAnnotationConfigDispatcherServletInitializer并将其部署到Servlet3.0容器的时候,容器会自 动发现它,并用它来配置Servlet上下文。
- webInit类
public class WebInit extends
AbstractAnnotationConfigDispatcherServletInitializer {
/**
* 指定spring的配置类
* @return
*/
@Override
protected Class<?>[] getRootConfigClasses() {
return new Class[]{SpringConfig.class};
}
/**
* 指定SpringMVC的配置类
* @return
*/
@Override
protected Class<?>[] getServletConfigClasses() {
return new Class[]{WebConfig.class};
}
/**
* 指定DispatcherServlet的映射规则,即url-pattern
* @return
*/
@Override
protected String[] getServletMappings() {
return new String[]{"/"};
}
/**
* 添加过滤器
* @return
*/
@Override
protected Filter[] getServletFilters() {
CharacterEncodingFilter encodingFilter = new CharacterEncodingFilter();
encodingFilter.setEncoding("UTF-8");
encodingFilter.setForceRequestEncoding(true);
HiddenHttpMethodFilter hiddenHttpMethodFilter = new
HiddenHttpMethodFilter();
return new Filter[]{encodingFilter, hiddenHttpMethodFilter};
}
}
2、创建SpringConfig配置类,代替spring的配置文件
@Configuration
public class SpringConfig {
//ssm整合之后,spring的配置信息写在此类中
}
3、创建WebConfig配置类
代替springMVC 的配置文件:
-
扫描组件
-
视图解析器
-
view-controller视图控制器
-
default-servlet-handlerI(静态资源处理)
-
mvc注解驱动
-
文件上传解析器
-
异常处理
-
拦截器
@Configuration
//扫描组件
@ComponentScan("com.LiuDeHen.controller")
//开启MVC注解驱动
@EnableWebMvc
 class WebConfig implements WebMvcConfigurer {
    //使用默认的servlet处理静态资源

     //**default-servlet-handlerI(静态资源处理)**
    @Override
    public void configureDefaultServletHandling(DefaultServletHandlerConfigurer configurer) {
        configurer.enable();
    }
    //配置文件上传解析器
    @Bean
    public CommonsMultipartResolver multipartResolver(){
        return new CommonsMultipartResolver();
    }
    //配置拦截器
    @Override
    public void addInterceptors(InterceptorRegistry registry) {
        FirstInterceptor firstInterceptor = new FirstInterceptor();
        registry.addInterceptor(firstInterceptor).addPathPatterns("/**");
    }

//配置视图控制
@Override
public void addViewControllers(ViewControllerRegistry registry) {
    registry.addViewController("/").setViewName("index");
}

//配置异常映射
@Override
public void
configureHandlerExceptionResolvers(List<HandlerExceptionResolver> resolvers) {
SimpleMappingExceptionResolver exceptionResolver = new SimpleMappingExceptionResolver();
Properties prop = new Properties();
prop.setProperty("java.lang.ArithmeticException", "error");
//设置异常映射
exceptionResolver.setExceptionMappings(prop);
//设置共享异常信息的键
exceptionResolver.setExceptionAttribute("ex");
resolvers.add(exceptionResolver);
}

//配置生成模板解析器
@Bean
public ITemplateResolver templateResolver() {
    WebApplicationContext webApplicationContext =
            ContextLoader.getCurrentWebApplicationContext();
// ServletContextTemplateResolver需要一个ServletContext作为构造参数,可通过WebApplicationContext 的方法获得
    ServletContextTemplateResolver templateResolver = new
            ServletContextTemplateResolver(
            webApplicationContext.getServletContext());
    templateResolver.setPrefix("/WEB-INF/templates/");
    templateResolver.setSuffix(".html");
    templateResolver.setCharacterEncoding("UTF-8");
    templateResolver.setTemplateMode(TemplateMode.HTML);
    return templateResolver;
}
    //生成模板引擎并为模板引擎注入模板解析器
    @Bean
    public SpringTemplateEngine templateEngine(ITemplateResolver
                                                       templateResolver) {
        SpringTemplateEngine templateEngine = new SpringTemplateEngine();
        templateEngine.setTemplateResolver(templateResolver);
        return templateEngine;
    }
    //生成视图解析器并未解析器注入模板引擎
    @Bean
    public ViewResolver viewResolver(SpringTemplateEngine templateEngine) {
        ThymeleafViewResolver viewResolver = new ThymeleafViewResolver();
        viewResolver.setCharacterEncoding("UTF-8");
        viewResolver.setTemplateEngine(templateEngine);
        return viewResolver;
    }

    private class FirstInterceptor implements HandlerInterceptor {
    }
}
16.SpringMVC执行流程
1、SpringMVC常用组件
- DispatcherServlet:
- 前端控制器,不需要工程师开发,由框架提供
- 作用:统一处理请求和响应,整个流程控制的中心,由它调用其它组件处理用户的请求
- HandlerMapping
- 处理器映射器,不需要工程师开发,由框架提供
- 用处:根据请求url和请求的方式method查找相对应的Handler(处理器/我们定义的控制方法)进行映射
- Handler
- 处理器,需要工程师开发 ,就是我们定义的控制方法
- 作用:在DispatcherServlet的控制下Handler对具体的用户请求进行处理
- HandlerAdapter
- 处理器适配器,不需要工程师开发,由框架提供
- 作用:通过HandlerAdapter对处理器(控制器方法)进行执行,也就是执行我们控制器里的方法,把数据和跳转视图封装成modelAndView
- 我们在前面源码多次看到的 mv = ha.handle(processedRequest, response, mappedHandler.getHandler()); 这ha就是HandlerAdapter
- ViewResolver
- 视图解析器,不需要工程师开发,由框架提供
- 作用:进行视图解析,得到相应的视图,例如:ThymeleafView、InternalResourceView(默认转发视图)、 RedirectView (默认重定向视图),跟据是否有前缀来判断是哪个视图,然后进行页面渲染
- View:
- 视图
- 作用:页面渲染完毕后,将模型数据通过页面展示给用户
2、DispatcherServlet初始化过程
DispatcherServlet 本质上是一个 Servlet,所以天然的遵循 Servlet 的生命周期。所以宏观上是 Servlet 生命周期来进行调度。
-
初始化流程的继承关系(最后GenericServlet实现了Servlet接口)

-
执行的方法流程

-
a>初始化WebApplicationContext
org.springframework.web.servlet.FrameworkServlet 里的initServletBean里我们可以看到整个初始化方法initWebApplicationContext()
this.webApplicationContext = this.initWebApplicationContext(); this.initFrameworkServlet(); -
点进去
protected WebApplicationContext initWebApplicationContext() { WebApplicationContext rootContext = WebApplicationContextUtils.getWebApplicationContext(this.getServletContext()); WebApplicationContext wac = null; //1.由于是第一次进来,所以肯定为null if (this.webApplicationContext != null) { wac = this.webApplicationContext; if (wac instanceof ConfigurableWebApplicationContext) { ConfigurableWebApplicationContext cwac = (ConfigurableWebApplicationContext)wac; if (!cwac.isActive()) { if (cwac.getParent() == null) { cwac.setParent(rootContext); } this.configureAndRefreshWebApplicationContext(cwac); } } } //2.==null执行findWebApplicationContext也找不到,因为没有创建过 if (wac == null) { wac = this.findWebApplicationContext(); } //3.创建WebApplicationContext if (wac == null) { wac = this.createWebApplicationContext(rootContext); } //4.刷新WebApplicationContext if (!this.refreshEventReceived) { synchronized(this.onRefreshMonitor) { this.onRefresh(wac); } } //5.创建ServletContext应用上下文,将IOC容器在应用域共享 if (this.publishContext) { String attrName = this.getServletContextAttributeName(); this.getServletContext().setAttribute(attrName, wac); } return wac; } -
b>创建WebApplicationContext
点进创建WebApplicationContext的方法createWebApplicationContext
protected WebApplicationContext createWebApplicationContext(@Nullable
ApplicationContext parent) {
Class<?> contextClass = getContextClass();
if (!ConfigurableWebApplicationContext.class.isAssignableFrom(contextClass))
{
throw new ApplicationContextException(
"Fatal initialization error in servlet with name '" +
getServletName() +
"': custom WebApplicationContext class [" + contextClass.getName() +
"] is not of type ConfigurableWebApplicationContext");
}
// 通过反射创建 IOC 容器对象
ConfigurableWebApplicationContext wac =
(ConfigurableWebApplicationContext)
BeanUtils.instantiateClass(contextClass);
wac.setEnvironment(getEnvironment());
// 将spring的IOC设置成Springmvc的Ioc的父容器
wac.setParent(parent);
String configLocation = getContextConfigLocation();
if (configLocation != null) {
wac.setConfigLocation(configLocation);
}
configureAndRefreshWebApplicationContext(wac);
return wac;
}
-
c>DispatcherServlet初始化策略
FrameworkServlet创建WebApplicationContext后,刷新容器,调用onRefresh(wac),此方法在 DispatcherServlet中进行了重写,调用了initStrategies(context)方法,初始化策略,即初始化 DispatcherServlet的各个组件
所在类:org.springframework.web.servlet.DispatcherServlet
protected void initStrategies(ApplicationContext context) {
initMultipartResolver(context);
initLocaleResolver(context);
initThemeResolver(context);
initHandlerMappings(context);
initHandlerAdapters(context);
initHandlerExceptionResolvers(context);
initRequestToViewNameTranslator(context);
initViewResolvers(context);
initFlashMapManager(context);
}
3、DispatcherServlet调用组件处理请求
流程跟初始化一样,从Servlet接口开始找service()执行方法
- 找到FrameworkServlet里的service()时
   protected void service(HttpServletRequest request, HttpServletResponse response) throws ServletException, IOException {
        HttpMethod httpMethod = HttpMethod.resolve(request.getMethod());
        if (httpMethod != HttpMethod.PATCH && httpMethod != null) {
            super.service(request, response);
        } else {
            this.processRequest(request, response);
        }
-
进入processRequest()执行请求
-
找到里面的这句代码
this.doService(request, response); -
进入doService()执行服务
-
然后到了DispatcherServlet里的doService()方法
-
向下看,找到doDispatch方法
doDispatch(request, response) -
这里是不是很熟悉了,点进去
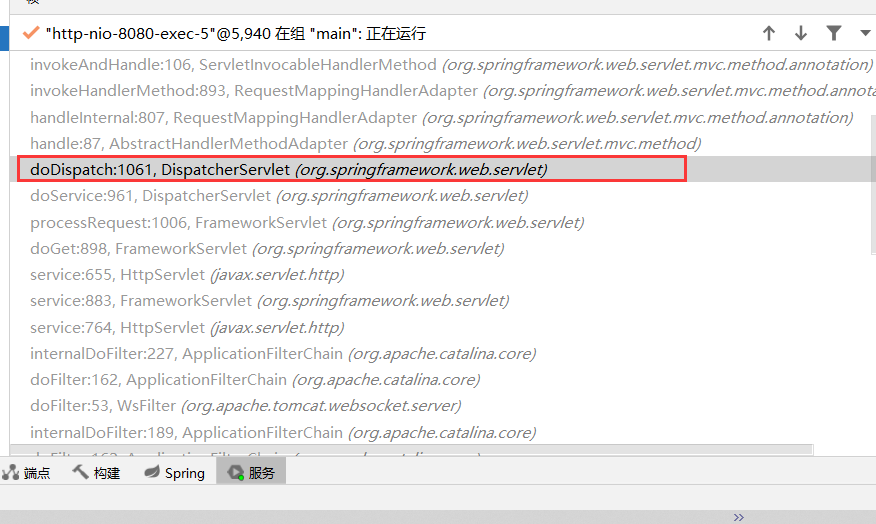
protected void doDispatch(HttpServletRequest request, HttpServletResponse response) throws Exception { HttpServletRequest processedRequest = request; HandlerExecutionChain mappedHandler = null; boolean multipartRequestParsed = false; WebAsyncManager asyncManager = WebAsyncUtils.getAsyncManager(request); try { ModelAndView mv = null; Exception dispatchException = null; try { processedRequest = checkMultipart(request); multipartRequestParsed = (processedRequest != request); // Determine handler for the current request. /* mappedHandler:调用链 包含handler、interceptorList、interceptorIndex handler:浏览器发送的请求所匹配的控制器方法 interceptorList:处理控制器方法的所有拦截器集合 interceptorIndex:拦截器索引,控制拦截器afterCompletion()的执行 */ mappedHandler = getHandler(processedRequest); if (mappedHandler == null) { noHandlerFound(processedRequest, response); return; } // Determine handler adapter for the current request. // 通过控制器方法创建相应的处理器适配器,调用所对应的控制器方法 HandlerAdapter ha = getHandlerAdapter(mappedHandler.getHandler()); // Process last-modified header, if supported by the handler. String method = request.getMethod(); boolean isGet = "GET".equals(method); if (isGet || "HEAD".equals(method)) { long lastModified = ha.getLastModified(request, mappedHandler.getHandler()); if (new ServletWebRequest(request, response).checkNotModified(lastModified) && isGet) { return; } } // 调用拦截器的preHandle() if (!mappedHandler.applyPreHandle(processedRequest, response)) { return; } // Actually invoke the handler. // 由处理器适配器调用具体的控制器方法,最终获得ModelAndView对象 mv = ha.handle(processedRequest, response, mappedHandler.getHandler()); if (asyncManager.isConcurrentHandlingStarted()) { return; } applyDefaultViewName(processedRequest, mv); // 调用拦截器的postHandle() mappedHandler.applyPostHandle(processedRequest, response, mv); } catch (Exception ex) { dispatchException = ex; } catch (Throwable err) { // As of 4.3, we're processing Errors thrown from handler methods as well, // making them available for @ExceptionHandler methods and other scenarios. dispatchException = new NestedServletException("Handler dispatch failed", err); } // 后续处理:处理模型数据和渲染视图 processDispatchResult(processedRequest, response, mappedHandler, mv, dispatchException); } catch (Exception ex) { triggerAfterCompletion(processedRequest, response, mappedHandler, ex); } catch (Throwable err) { triggerAfterCompletion(processedRequest, response, mappedHandler, new NestedServletException("Handler processing failed", err)); } finally { if (asyncManager.isConcurrentHandlingStarted()) { // Instead of postHandle and afterCompletion if (mappedHandler != null) { mappedHandler.applyAfterConcurrentHandlingStarted(processedRequest, response); } } else { // Clean up any resources used by a multipart request. if (multipartRequestParsed) { cleanupMultipart(processedRequest); } } } } -
进processDispatchResult() 方法
private void processDispatchResult(HttpServletRequest request,
HttpServletResponse response,
@Nullable HandlerExecutionChain
mappedHandler, @Nullable ModelAndView mv,
@Nullable Exception exception) throws
Exception {
boolean errorView = false;
if (exception != null) {
if (exception instanceof ModelAndViewDefiningException) {
logger.debug("ModelAndViewDefiningException encountered",
exception);
mv = ((ModelAndViewDefiningException) exception).getModelAndView();
}
else {
Object handler = (mappedHandler != null ? mappedHandler.getHandler()
: null);
mv = processHandlerException(request, response, handler, exception);
errorView = (mv != null);
}
}
// Did the handler return a view to render?
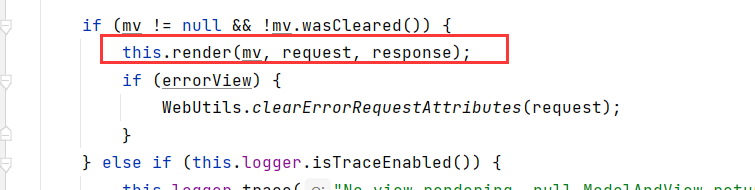
if (mv != null && !mv.wasCleared()) {
// 处理模型数据和渲染视图
render(mv, request, response);
if (errorView) {
WebUtils.clearErrorRequestAttributes(request);
}
}
else {
if (logger.isTraceEnabled()) {
logger.trace("No view rendering, null ModelAndView returned.");
}
}
if (WebAsyncUtils.getAsyncManager(request).isConcurrentHandlingStarted()) {
// Concurrent handling started during a forward
return;
}
if (mappedHandler != null) {
// Exception (if any) is already handled..
// 调用拦截器的afterCompletion()
mappedHandler.triggerAfterCompletion(request, response, null);
}
}
4、SpringMVC的执行流程
-
用户向服务器发送请求,请求被SpringMVC 前端控制器 DispatcherServlet捕获。
-
DispatcherServlet对请求URL进行解析,得到请求资源标识符(URI),判断请求URI对应的映射(@RequestMapping):
a) **不存在**
i. 再判断是否配置了mvc:default-servlet-handler(静态资源过滤器)
ii. 如果没配置,则控制台报映射查找不到,客户端展示404错误

b) 存在则执行下面的流程
- 根据该URI,调用HandlerMapping获得该Handler配置的所有相关的对象(包括Handler对象以及 Handler对象对应的拦截器的集合和index),最后以HandlerExecutionChain执行链对象的形式返回。
4. DispatcherServlet 根据获得的Handler,选择一个合适的HandlerAdapter(适配器)。
5. 如果成功获得HandlerAdapter,此时将开始执行拦截器的preHandler(…)方法【正向】
- 提取Request中的模型数据,填充Handler入参,开始执行Handler(Controller)方法,处理请求。 在填充Handler的入参过程中,根据你的配置,Spring将帮你做一些额外的工作:
a) HttpMessageConveter: 将请求消息(如Json、xml等数据)转换成一个对象,将对象转换为指定 的响应信息
b) 数据转换:对请求消息进行数据转换。如String转换成Integer、Double等
c) 数据格式化:对请求消息进行数据格式化。 如将字符串转换成格式化数字或格式化日期等
d) 数据验证: 验证数据的有效性(长度、格式等),验证结果存储到BindingResult或Error中
-
Handler执行完成后,向DispatcherServlet 返回一个ModelAndView对象。
-
此时将开始执行拦截器的postHandle(...)方法【逆向】。
    9. 根据返回的**ModelAndView**(此时会判断**是否存在异常**:如果**存在异常,则执行 HandlerExceptionResolver进行异常处理**)选择一个**适合的ViewResolver进行视图解析**,**根据Model 和View,来渲染视图。**
    10.   渲染视图完毕执行拦截器的**afterCompletion**(…)方法【逆向】。
    11.  **将渲染结果返回给客户端。**
17.整合SSM
1丶mybatis层
-
数据库搭建
-
环境的配置
<!-- 导入junit,mysql,数据库连接池,servlet,jsp,,mybatis,mybatis-spring,spring--> <dependencies> <!--Junit--> <dependency> <groupId>junit</groupId> <artifactId>junit</artifactId> <version>4.12</version> </dependency> <!--数据库驱动--> <dependency> <groupId>mysql</groupId> <artifactId>mysql-connector-java</artifactId> <version>5.1.47</version> </dependency> <!-- 数据库连接池 --> <dependency> <groupId>com.mchange</groupId> <artifactId>c3p0</artifactId> <version>0.9.5.2</version> </dependency> <!--Servlet - JSP --> <dependency> <groupId>javax.servlet</groupId> <artifactId>servlet-api</artifactId> <version>2.5</version> </dependency> <dependency> <groupId>javax.servlet.jsp</groupId> <artifactId>jsp-api</artifactId> <version>2.2</version> </dependency> <dependency> <groupId>javax.servlet</groupId> <artifactId>jstl</artifactId> <version>1.2</version> </dependency> <!--Mybatis--> <dependency> <groupId>org.mybatis</groupId> <artifactId>mybatis</artifactId> <version>3.5.2</version> </dependency> <dependency> <groupId>org.mybatis</groupId> <artifactId>mybatis-spring</artifactId> <version>2.0.2</version> </dependency> <!--Spring--> <dependency> <groupId>org.springframework</groupId> <artifactId>spring-webmvc</artifactId> <version>5.1.9.RELEASE</version> </dependency> <dependency> <groupId>org.springframework</groupId> <artifactId>spring-jdbc</artifactId> <version>5.1.9.RELEASE</version> </dependency> <dependency> <groupId>org.projectlombok</groupId> <artifactId>lombok</artifactId> <version>1.18.12</version> </dependency> </dependencies> <!--资源过滤器--> <build> <resources> <resource> <directory>src/main/java</directory> <includes> <include>**/*.properties</include> <include>**/*.xml</include> </includes> <filtering>false</filtering> </resource> <resource> <directory>src/main/resources</directory> <includes> <include>**/*.properties</include> <include>**/*.xml</include> </includes> <filtering>false</filtering> </resource> </resources> </build> -
基本框架的构建
- Dao
- pojo
- Service
- controller
- resource下:
- mybatis的xml文件
- spring的xml文件
- 连接数据库的propertis文件
-
mybatis层的编写
-
Dao层
-
mapper接口
public interface bookMapper { // 增加一本书 int addBook(Books books); // 删除一本书 int deleteBook(@Param("bookID") int id); // 修改一本书 int updateBook(Books books); // 查询一本书 Books selectBook(@Param("bookName") String Bookname); // 查询所有书 List<Books> selectBooks(); } -
mapper.xml文件(别忘记注册)
<?xml version="1.0" encoding="UTF-8" ?> <!DOCTYPE mapper PUBLIC "-//mybatis.org//DTD Config 3.0//EN" "http://mybatis.org/dtd/mybatis-3-mapper.dtd"> <!--一共mapper对应一个接口--> <mapper namespace="com.LiuDeHen.Dao.bookMapper"> <insert id="addBook" parameterType="Books"> insert into ssmbuild.books values(#{bookID},#{bookName},#{bookCounts},#{detail}) </insert> <delete id="deleteBook" parameterType="Int"> delete from ssmbuild.books where bookID=#{bookID}; </delete> <update id="updateBook" parameterType="Books"> update ssmbuild.books set bookName=#{bookName} where bookID=#{bookID}; </update> <select id="selectBook" resultType="Books"> select * from ssmbuild.books where bookID=#{bookID} </select> <select id="selectBooks" resultType="Books"> select * from ssmbuild.books </select> <!-- 写完别忘了注册Mapper--> </mapper> -
-
service层
-
service接口(跟mapper接口差不多)
public interface bookService { // 增加一本书 int addBook(Books books); // 删除一本书 int deleteBook(int id); // 修改一本书 int updateBook(Books books); // 查询一本书 Books selectBook(String Bookname); // 查询所有书 List<Books> selectBooks(); } -
service的实现类(调用Dao层)
public class bookServiceIplm implements bookService{
//    业务层调用Dao层
    private bookMapper bm;
    public bookServiceIplm(bookMapper bookMapper){
        bm=bookMapper;
    }
    @Override
    public int addBook(Books books) {
        return bm.addBook(books);
    }

    @Override
    public int deleteBook(int id) {
        return bm.deleteBook(id);
    }

    @Override
    public int updateBook(Books books) {
        return bm.updateBook(books);
    }

    @Override
    public Books selectBook(String Bookname) {
        return bm.selectBook(Bookname);
    }

    @Override
    public List<Books> selectBooks() {
        return bm.selectBooks();
    }
}
-
-
resource层
-
mybatis.xml(起别名和注册mapper)
<?xml version="1.0" encoding="UTF-8" ?>
<!DOCTYPE configuration
    PUBLIC "-//mybatis.org//DTD Config 3.0//EN"
        "http://mybatis.org/dtd/mybatis-3-config.dtd">
-
-
jdbc.driver=com.mysql.jdbc.Driver
  jdbc.url=jdbc:mysql://localhost:3306/ssmbuild?useSSL=true&useUnicode=true&characterEncoding=utf8
  jdbc.username=root
  jdbc.password=123
- **pojo层**
  - 实体类
    @Data
    @AllArgsConstructor
    @NoArgsConstructor
    public class Books {
        private int bookID;
        private String bookName;
        private int bookCounts;
        private String detail;
    }
```
10.2丶Spirng层
-
spring-dao.xml(spring整合mybatis,这里使用数据源cp30)
<?xml version="1.0" encoding="UTF-8"?> <beans xmlns="http://www.springframework.org/schema/beans" xmlns:xsi="http://www.w3.org/2001/XMLSchema-instance" xmlns:context="http://www.springframework.org/schema/context" xsi:schemaLocation="http://www.springframework.org/schema/beans http://www.springframework.org/schema/beans/spring-beans.xsd"> <!--1.关联数据库配置文件 --> <context:property-placeholder location="classpath:datesource.properties"/> <!--2.连接池 dbcp:半自动操作,不能自动连接 cp30:自动化操作 druid: hikari(springboot默认数据源): --> <bean id="dataSource" class="com.mchange.v2.c3p0.ComboPooledDataSource"> <property name="driverClass" value="${jdbc.driver}"/> <property name="jdbcUrl" value="${jdbc.url}"/> <property name="user" value="${jdbc.username}"/> <property name="password" value="${jdbc.password}"/> </bean> <!--3.sqlSessionFactory --> <bean id="sqlSessionFactory" class="org.mybatis.spring.SqlSessionFactoryBean"> <property name="dataSource" ref="dataSource"/> <!--绑定mybatis的配置文件--> <property name="configLocation" value="classpath:mybatis-config.xml"/> </bean> <!--配置dao接口扫描包,动态的实现Dao接口可以注入到Spring容器中--> <bean class="org.mybatis.spring.mapper.MapperScannerConfigurer"> <!--注入sqlSessionFactory--> <property name="sqlSessionFactoryBeanName" value="dataSource"/> <!--扫描dao包--> <property name="basePackage" value="com.LiuDeHen.Dao"/> </bean> </beans> -
spring.service.xml
<?xml version="1.0" encoding="UTF-8"?>
<beans xmlns="http://www.springframework.org/schema/beans"
       xmlns:xsi="http://www.w3.org/2001/XMLSchema-instance"
       xmlns:context="http://www.springframework.org/schema/context"
       xsi:schemaLocation="http://www.springframework.org/schema/beans
       http://www.springframework.org/schema/beans/spring-beans.xsd">
<!--1.扫描包-->
<context:component-scan base-package="com.LiuDeHen.service"/>
<!--2.将我们的业务类,注入到spring中,可以通过配置或注解实现-->
    <bean id="bookServiceIplm" class="com.LiuDeHen.service.bookServiceIplm">
        <property name="bm" ref="bookMapper"/>
    </bean>

<!--3.声明事务-->
    <bean id="TransactionManager" class="org.springframework.jdbc.datasource.DataSourceTransactionManager">
<!-- 注入数据源-->
    <property name="dataSource" ref="dataSource"/>
    </bean>

<!-- 4.事务支持-->
</beans>
10.3丶SpringMVC层
-
添加框架支持
-
添加DispathServlet和乱码过滤配置(web.xml)
<?xml version="1.0" encoding="UTF-8"?> <web-app xmlns="http://xmlns.jcp.org/xml/ns/javaee" xmlns:xsi="http://www.w3.org/2001/XMLSchema-instance" xsi:schemaLocation="http://xmlns.jcp.org/xml/ns/javaee http://xmlns.jcp.org/xml/ns/javaee/web-app_4_0.xsd" version="4.0"> <!--DispathServlet--> <servlet> <servlet-name>springmvc</servlet-name> <servlet-class>org.springframework.web.servlet.DispatcherServlet</servlet-class> <init-param> <param-name>contextConfigLocation</param-name> <param-value>classpath:springmvc-servlet.xml</param-value> </init-param> <load-on-startup>1</load-on-startup> </servlet> <servlet-mapping> <servlet-name>springmvc</servlet-name> <url-pattern>/</url-pattern> </servlet-mapping> <!-- 乱码过滤 --> <filter> <filter-name>fileter</filter-name> <filter-class>org.springframework.web.filter.CharacterEncodingFilter</filter-class> <init-param> <param-name>encoding</param-name> <param-value>utf-8</param-value> </init-param> </filter> <filter-mapping> <filter-name>fileter</filter-name> <url-pattern>/*</url-pattern> </filter-mapping> <!--Session--> <session-config> <session-timeout>15</session-timeout> </session-config> </web-app> -
springmvc-servlet.xml
<?xml version="1.0" encoding="UTF-8"?> <beans xmlns="http://www.springframework.org/schema/beans" xmlns:xsi="http://www.w3.org/2001/XMLSchema-instance" xmlns:context="http://www.springframework.org/schema/context" xmlns:mvc="http://www.springframework.org/schema/mvc" xsi:schemaLocation="http://www.springframework.org/schema/beans http://www.springframework.org/schema/beans/spring-beans.xsd"> <!--1.注解驱动 --> <mvc:annotation-driven/> <!--2.静态资源的过滤 --> <mvc:default-servlet-handler/> <!--3.扫描包:controller --> <context:component-scan base-package="com.LiuDeHen.controller"/> <!--4.视图解析器--> <bean class="org.springframework.web.servlet.view.InternalResourceViewResolver"> <property name="prefix" value="/WEB-INF/jsp/"/> <property name="suffix" value=".jsp"/> </bean> </beans> -
controller控制层
@Controller @RequestMapping("/book") public class BookController { @Autowired @Qualifier("BookServiceImpl") private BookService bookService; // 查询全部书籍 @RequestMapping("/allBook") public String list(Model model){ List<Books> list = bookService.queryAllBook(); model.addAttribute("list",list); return "allBook"; } // 跳转到增加书籍页面 @RequestMapping("/toAddBook") public String add(){ return "addBook"; } // 添加书籍的请求 @RequestMapping("/toAddBook2") public String add2(Books books,Model model){ int i = bookService.addBook(books); if (i>0){ return "redirect:/book/allBook"; } return null; } // 跳转到修改书籍 @RequestMapping("/toUpdateBook") public String toUpdateBook(Model model, int id) { Books books = bookService.queryBookById(id); System.out.println(books); model.addAttribute("Books",books ); return "UpBook"; } // 修改书籍的请求 @RequestMapping("/toUpdate") public String update2(Books books){ bookService.updateBook(books); return "redirect:/book/allBook"; } // 删除 @RequestMapping("/del") public String deleteBook(int id){ bookService.deleteBookById(id); return "redirect:/book/allBook"; } } -
前端

-
addBook
<%@ taglib prefix="c" uri="http://java.sun.com/jsp/jstl/core" %> <%@ page contentType="text/html;charset=UTF-8" language="java" %> <html> <head> <title>新增书籍</title> <meta name="viewport" content="width=device-width, initial-scale=1.0"> <!-- 引入 Bootstrap --> <link href="https://cdn.bootcss.com/bootstrap/3.3.7/css/bootstrap.min.css" rel="stylesheet"> <style type="text/css"> .container{ margin-left: 400px; margin-top: 100px; width: 300px; } </style> </head> <body> <div class="container"> <div class="row clearfix"> <div class="col-md-12 column"> <div class="page-header"> <h1> <small>新增书籍</small> </h1> </div> </div> </div> <form action="${pageContext.request.contextPath}/book/toAddBook2" method="post"> 书籍名称:<input type="text" name="bookName" required><br><br><br> 书籍数量:<input type="text" name="bookCounts" required><br><br><br> 书籍详情:<input type="text" name="detail" required><br><br><br> <input type="submit" value="添加" style="margin-left: 100px"> </form> </div> </body> </html> -
allBook
<%@ taglib prefix="c" uri="http://java.sun.com/jsp/jstl/core" %> <%@ page contentType="text/html;charset=UTF-8" language="java" %> <html> <head> <title>书籍列表</title> <meta name="viewport" content="width=device-width, initial-scale=1.0"> <!-- 引入 Bootstrap --> <link href="https://cdn.bootcss.com/bootstrap/3.3.7/css/bootstrap.min.css" rel="stylesheet"> </head> <body> <div class="container"> <div class="row clearfix"> <div class="col-md-12 column"> <div class="page-header"> <h1> <small>书籍列表 —— 显示所有书籍</small> </h1> </div> </div> </div> <div class="row"> <div class="col-md-4 column"> <a class="btn btn-primary" href="${pageContext.request.contextPath}/book/toAddBook">新增</a> </div> </div> <div class="row clearfix"> <div class="col-md-12 column"> <table class="table table-hover table-striped"> <thead> <tr> <th>书籍编号</th> <th>书籍名字</th> <th>书籍数量</th> <th>书籍详情</th> <th>操作</th> </tr> </thead> <tbody> <c:forEach var="book" items="${requestScope.get('list')}"> <tr> <td>${book.getBookID()}</td> <td>${book.getBookName()}</td> <td>${book.getBookCounts()}</td> <td>${book.getDetail()}</td> <td> <a href="${pageContext.request.contextPath}/book/toUpdateBook?id=${book.getBookID()}">更改</a> | <a href="${pageContext.request.contextPath}/book/del/?id=${book.getBookID()}">删除</a> </td> </tr> </c:forEach> </tbody> </table> </div> </div> </div> </body> </html> -
UpBook
<%@ taglib prefix="c" uri="http://java.sun.com/jsp/jstl/core" %>
<%@ page contentType="text/html;charset=UTF-8" language="java" %>
<html>
<head>
    <title>书籍列表</title>
    <meta name="viewport" content="width=device-width, initial-scale=1.0">
    <!-- 引入 Bootstrap -->
    <link href="https://cdn.bootcss.com/bootstrap/3.3.7/css/bootstrap.min.css" rel="stylesheet">
</head>
<body>

<div class="container">

    <div class="row clearfix">
        <div class="col-md-12 column">
            <div class="page-header">
                <h1>
                    <small>书籍列表 —— 显示所有书籍</small>
                </h1>
            </div>
        </div>
    </div>

    <div class="row">
        <div class="col-md-4 column">
            <a class="btn btn-primary" href="${pageContext.request.contextPath}/book/toAddBook">新增</a>
        </div>
    </div>

    <div class="row clearfix">
        <div class="col-md-12 column">
            <table class="table table-hover table-striped">
                <thead>
                <tr>
                    <th>书籍编号</th>
                    <th>书籍名字</th>
                    <th>书籍数量</th>
                    <th>书籍详情</th>
                    <th>操作</th>
                </tr>
                </thead>

                <tbody>
                <c:forEach var="book" items="${requestScope.get('list')}">
                    <tr>
                        <td>${book.getBookID()}</td>
                        <td>${book.getBookName()}</td>
                        <td>${book.getBookCounts()}</td>
                        <td>${book.getDetail()}</td>
                        <td>
                            <a href="${pageContext.request.contextPath}/book/toUpdateBook?id=${book.getBookID()}">更改</a> |
                            <a href="${pageContext.request.contextPath}/book/del/?id=${book.getBookID()}">删除</a>
                        </td>
                    </tr>
                </c:forEach>
                </tbody>
            </table>
        </div>
    </div>
</div>
</body>
</html>
-


【推荐】国内首个AI IDE,深度理解中文开发场景,立即下载体验Trae
【推荐】编程新体验,更懂你的AI,立即体验豆包MarsCode编程助手
【推荐】抖音旗下AI助手豆包,你的智能百科全书,全免费不限次数
【推荐】轻量又高性能的 SSH 工具 IShell:AI 加持,快人一步
· DeepSeek 开源周回顾「GitHub 热点速览」
· 记一次.NET内存居高不下排查解决与启示
· 物流快递公司核心技术能力-地址解析分单基础技术分享
· .NET 10首个预览版发布:重大改进与新特性概览!
· .NET10 - 预览版1新功能体验(一)