

- 显示子路由组件的界面
<router-view></router-view> - 声明式导航
<router-link to="跳转的相对路径"></router-link> 相当于 <a href="跳转的路径"></a> - 编程式导航
this.$router.push(path) 用法类似于原生中的 window.location.href="路径"
this.$router.replace(path) 用法类似于原生中的 window.location.href="路径"
this.$router.back() 用法类似于 window.history.back()
一个是路由跳转,一个是页面跳转
push与replace的区别:
push 返回的时候是逐层返回
replace 返回的时候是直接返回到根目录
-
路由通过name携带params参数进行页面的跳转
-
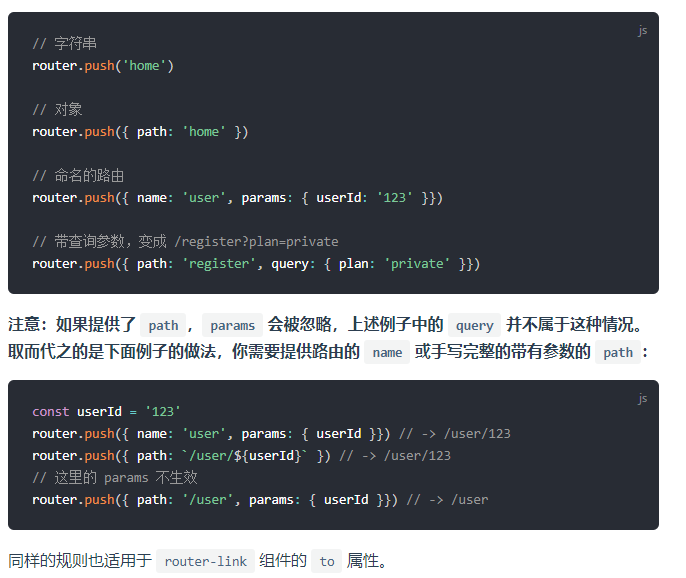
字符串传参形式
router.push('home')
比如:router.push("/user/login?username=zhangsan&password=123456"); -
对象传参形式
1、路由通过name携带params参数进行页面的跳转this.$router.push({ name: "forgetPassword", params: {name: 'yuanyaun'} })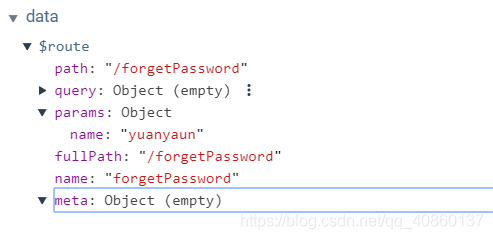
2、路由通过path携带query参数进行页面的跳转
this.$router.push({
	path: "forgetPassword",
    query: {name: 'yuanyaun'}
})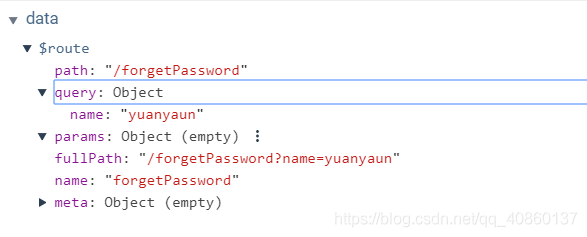
总结:
1无论使用name还是path跳转,路由都会有 匹配到router.js文件中相应的path和 name。
2使用name跳转,并且携带参数,这个参数不在fullPath中显示,通过this.$route.params获取该参数对象。
3使用path跳转,并且携带参数,这个参数会拼接到fullpath中,通过this.$route.query获取该对象参数。
-

 浙公网安备 33010602011771号