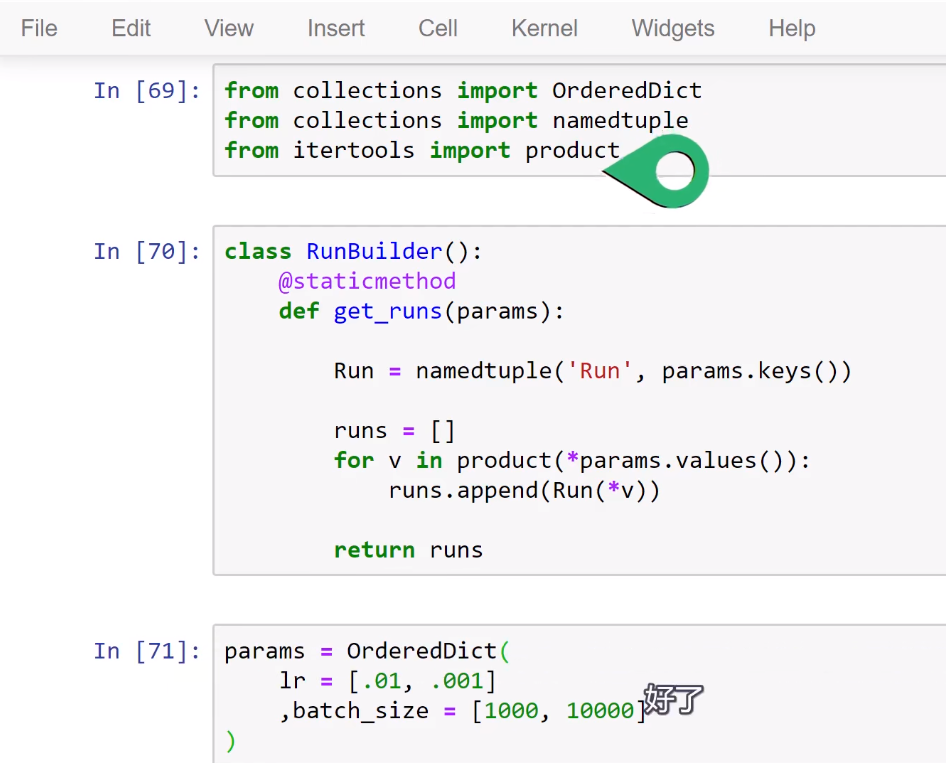
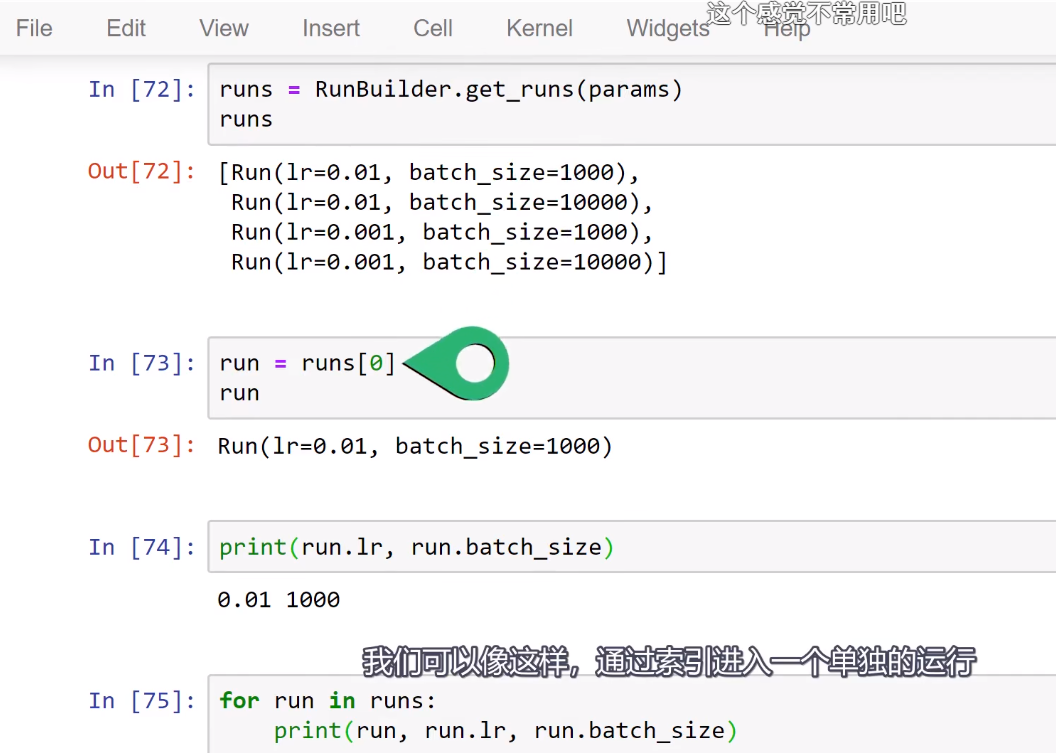
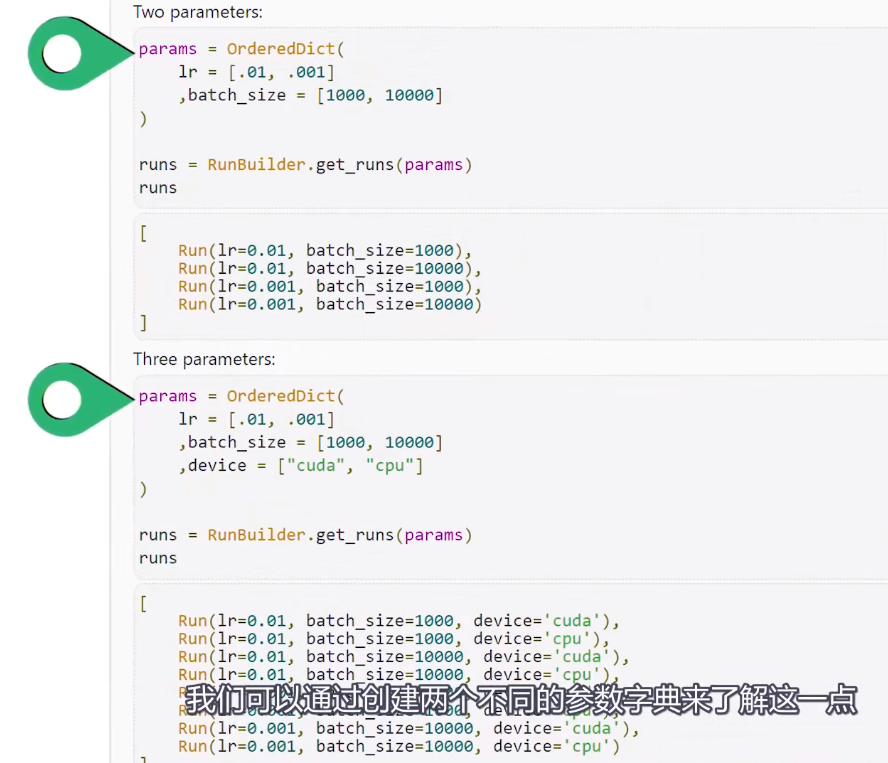
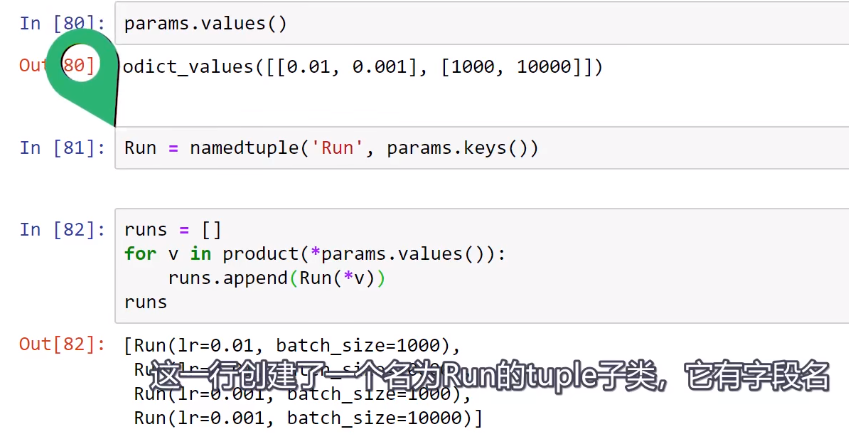
Training loop Run Builder和namedtuple()函数
namedtuple()函数见:https://www.runoob.com/note/25726和https://www.cnblogs.com/os-python/p/6809467.html
namedtuple:
namedtuple类位于collections模块,有了namedtuple后通过属性访问数据能够让我们的代码更加的直观更好维护。
namedtuple能够用来创建类似于元祖的数据类型,除了能够用索引来访问数据,能够迭代,还能够方便的通过属性名来访问数据。

在python中,传统的tuple类似于数组,只能通过下表来访问各个元素,我们还需要注释每个下表代表什么数据。通过使用namedtuple,每哥元素有了自己的名字。类似于C语言中的struct,这样数据的意义就可以一目了然。
生命namedtuple是非常简单方便的。
from collections import namedtuple

Friend = namedtuple("Friend", ['name', 'age', 'email'])

f1 = Friend('xiaowang', 33, 'xiaowang@163.com')
print(f1)
print(f1.name)
print(f1.age)
print(f1.email)
f2 = Friend(name='xiaozhang', email='xiaozhang@sina.com', age=30)
print(f2)
name, age, email = f2
print(name, age, email)

输出为:
Friend(name='xiaowang', age=33, email='xiaowang@163.com')
xiaowang
33
xiaowang@163.com
Friend(name='xiaozhang', age=30, email='xiaozhang@sina.com')
xiaozhang 30 xiaozhang@sina.com
以下参考:https://www.runoob.com/note/25726,并加上自己的一部分理解。
Python元组的升级版本 -- namedtuple(具名元组)
因为元组的局限性:不能为元组内部的数据进行命名,所以往往我们并不知道一个元组所要表达的意义,所以在这里引入了 collections.namedtuple 这个工厂函数,来构造一个带字段名的元组。
具名元组的实例和普通元组消耗的内存一样多,因为字段名都被存在对应的类里面。这个类跟普通的对象实例比起来也要小一些,因为 Python 不会用 __dict__ 来存放这些实例的属性。
namedtuple 对象的定义如以下格式:
collections.namedtuple(typename, field_names, verbose=False, rename=False)
返回一个具名元组子类 typename,其中参数的意义如下:
- typename:元组名称
- field_names: 元组中元素的名称
- rename: 如果元素名称中含有 python 的关键字,则必须设置为 rename=True
- verbose: 默认就好
例:
import collections
# 两种方法来给 namedtuple 定义方法名
User = collections.namedtuple('User', ['name', 'age', 'id'])
# User = collections.namedtuple('User', 'name age id')
user = User('tester', '22', '464643123')

print(user)

输出为:
User(name='tester', age='22', id='464643123')

import collections
# 两种方法来给 namedtuple 定义方法名
# User = collections.namedtuple('User', ['name', 'age', 'id'])
User = collections.namedtuple('User', 'name age id')
user = User('tester', '22', '464643123')
print(user)

输出为:
User(name='tester', age='22', id='464643123')
collections.namedtuple('User', 'name age id') 创建一个具名元组,需要两个参数,一个是类名,另一个是类的各个字段名。
后者可以是有多个字符串组成的可迭代对象,或者是有空格分隔开的字段名组成的字符串(比如本示例)。
具名元组可以通过字段名或者位置来获取一个字段的信息。
输出结果:
User(name='tester', age='22', id='464643123')
具名元组的特有属性:
类属性 _fields:包含这个类所有字段名的元组 类方法 _make(iterable):接受一个可迭代对象来生产这个类的实例 实例方法 _asdict():把具名元组以 collections.OrdereDict 的形式返回,可以利用它来把元组里的信息友好的展示出来.
from collections import namedtuple

# 定义一个namedtuple类型User,并包含name,sex和age属性。
User = namedtuple('User', ['name', 'sex', 'age'])

# 创建一个User对象
user = User(name='Runoob', sex='male', age=12)

# 获取所有字段名
print( user._fields )

输出为:
('name', 'sex', 'age')
from collections import namedtuple

# 定义一个namedtuple类型User,并包含name,sex和age属性。
User = namedtuple('User', ['name', 'sex', 'age'])
user = User._make(['Runoob', 'male', 12])
print(user)
# User(name='user1', sex='male', age=12)
# 获取用户的属性
print(user.name)
print(user.sex)
print(user.age)
输出结果为:
User(name='Runoob', sex='male', age=12)
Runoob
male
12
from collections import namedtuple

# 定义一个namedtuple类型User,并包含name,sex和age属性。
User = namedtuple('User', ['name', 'sex', 'age'])
user = User._make(['Runoob', 'male', 12])
# 修改对象属性,注意要使用"_replace"方法
user = user._replace(age=22)
print(user)
输出结果为:
User(name='Runoob', sex='male', age=22)
from collections import namedtuple

# 定义一个namedtuple类型User,并包含name,sex和age属性。
User = namedtuple('User', ['name', 'sex', 'age'])
user = User._make(['Runoob', 'male', 12])
# 修改对象属性,注意要使用"_replace"方法
# user = user._replace(age=22)
# print(user)
# User(name='user1', sex='male', age=21)
# 将User对象转换成字典,注意要使用"_asdict"
print(user._asdict())

输出结果为:
{'name': 'Runoob', 'sex': 'male', 'age': 12}
from collections import namedtuple
from collections import OrderedDict
# 定义一个namedtuple类型User,并包含name,sex和age属性。
# User = namedtuple('User', ['name', 'sex', 'age'])
# user = User._make(['Runoob', 'male', 12])
# 修改对象属性,注意要使用"_replace"方法
# user = user._replace(age=22)
# print(user)
# User(name='user1', sex='male', age=21)
# 将User对象转换成字典,注意要使用"_asdict"
# print(user._asdict())
orderdict=OrderedDict([('name', 'Runoob'), ('sex', 'male'), ('age', 22)])
print(orderdict)
for key,value in orderdict.items():
    print(key,value)

输出结果为:
OrderedDict([('name', 'Runoob'), ('sex', 'male'), ('age', 22)])
name Runoob
sex male
age 22
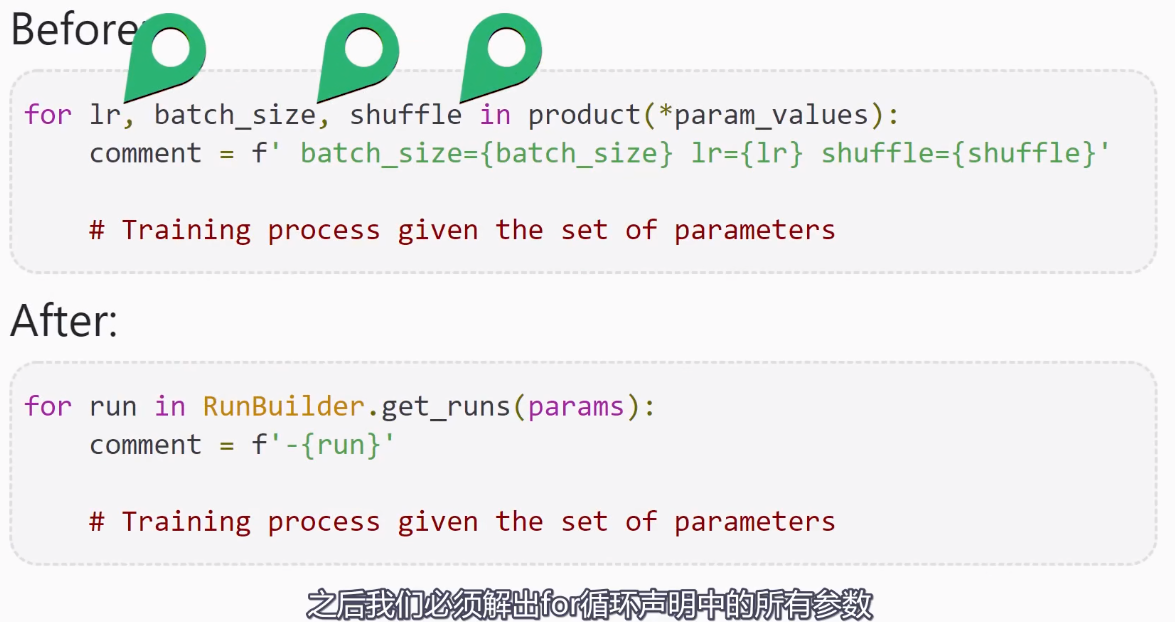
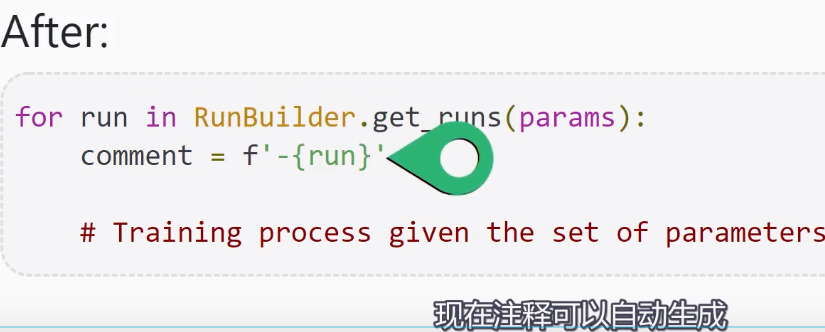
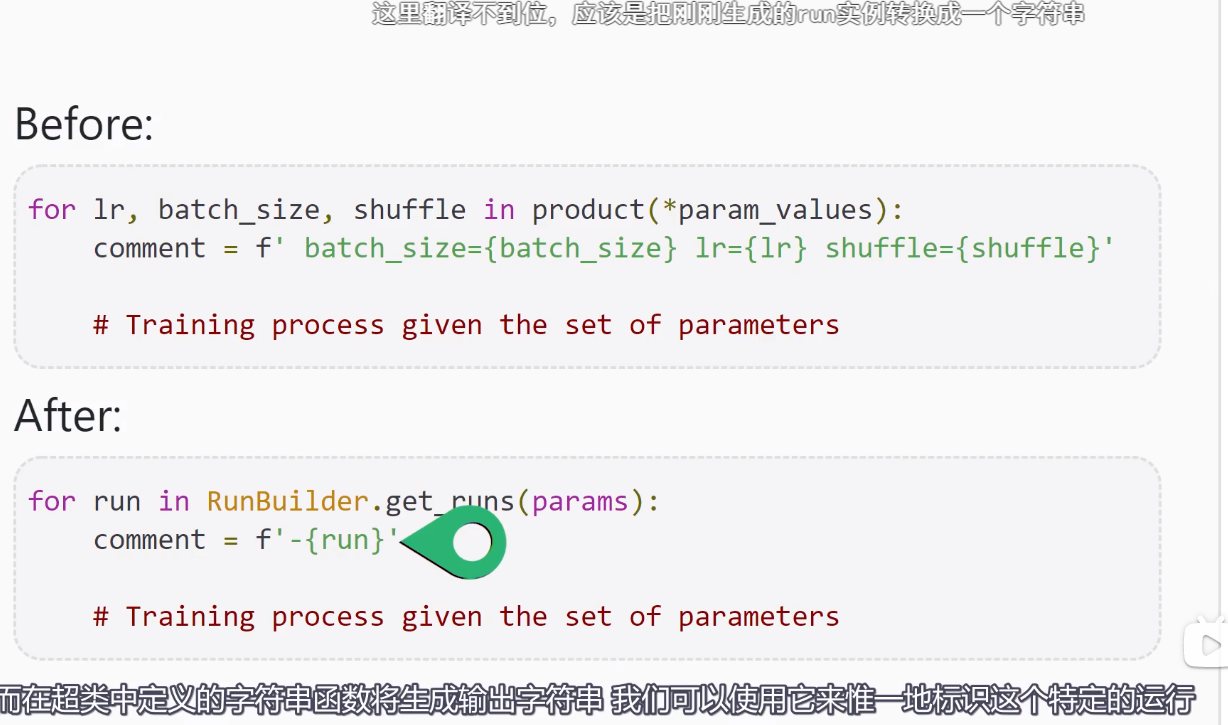
以下内容来自deeplizard pyorch_P31







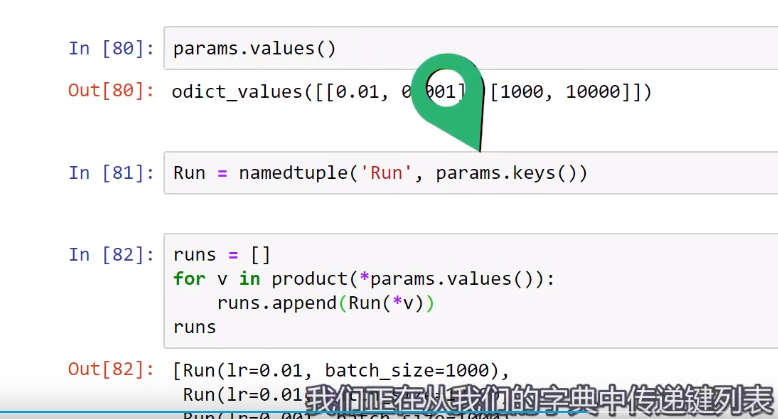
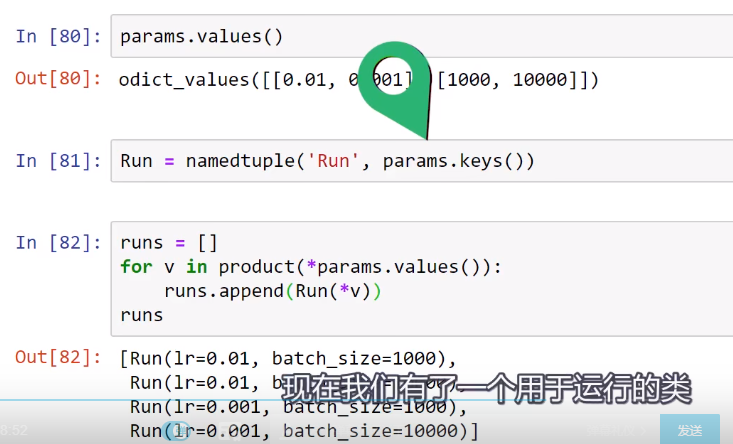
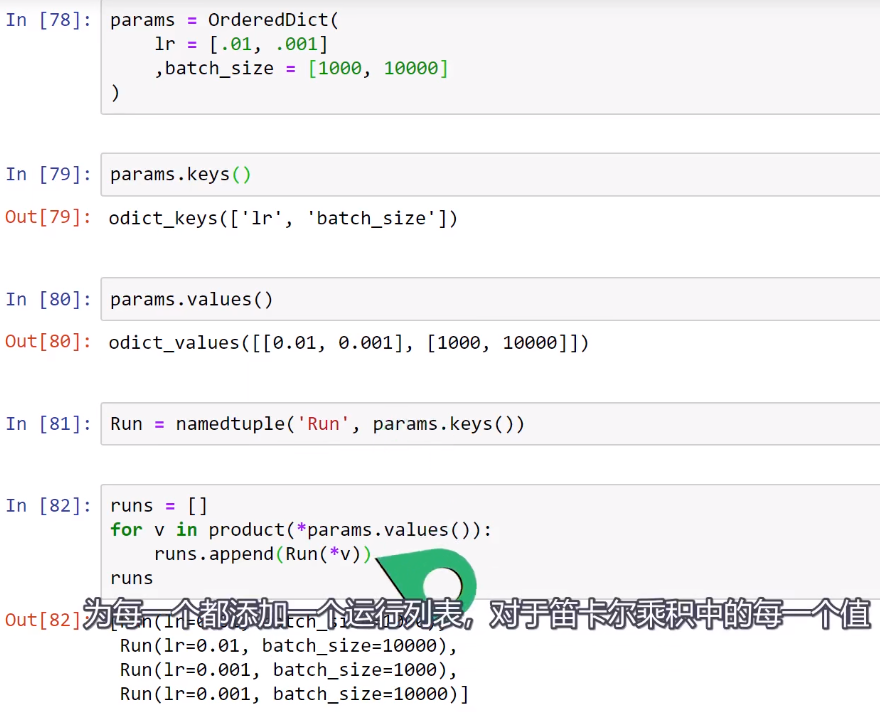


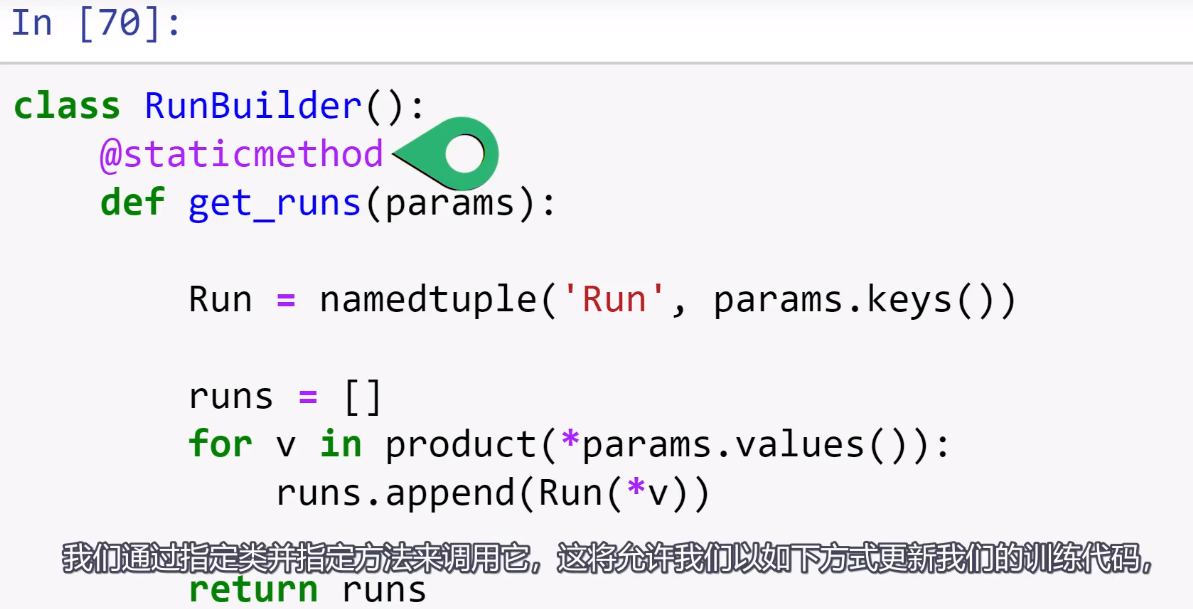




 浙公网安备 33010602011771号