

重拾C,一天一点点_10
来博客园今天刚好两年了,两年前开始学编程。
忙碌近两个月,项目昨天上线了,真心不容易,也不敢懈怠,接下来的问题会更多。这两天调试服务器,遇到不少麻烦。
刚出去溜达了一下,晚上天凉了,现在手感觉凉的有点不灵活了都。大伙多注意身体!
继续我的C。发现个问题,自己的文章排版很丑,以后也要多注意。
printf("hello world");
printf接受的是一个指向字符数组第一个字符的指针。也就是说,字符串常量可通过一个指向其第一个元素的指针访问。
char *p;
p = "hello world"; //将一个指向字符串数组的指针赋值给p。该过程没有进行字符串的复制,只是涉及到指针的操作。C语言没有提供将整个字符串作为一个整体进行处理的运算符。
char s[] = "hello world"; //定义一个字符数组
char *p = "hello world"; //定义一个指针
两种声明的区别:
s是一个仅足以存放初始化字符串及空字符'\0'的一维数组,数组中的单个字符可以修改。
p始终指向同一个存储位置,其初始值指向一个字符串常量,之后它可以被修改以指向其他地址,如果试图修改字符串的内宅,结果是没有定义的。
//复制字符串

 1 #include <stdio.h>
 2 void strcpy1(char *s, char *t);
 3
 4 main(){
 5     char t[] = "hello world";
 6     char s[] = "";
 7     strcpy1(s,t);
 8     printf("%s\n",s);    //hello world
 9 }
10 /******将指针t指向的字符串复制到指针s指向的位置,使用数组下标实现***/
11 void strcpy1(char *s, char *t){
12     int i = 0;
13     while((s[i] = t[i]) != '\0'){
14         i++;
15     }
16 }
 1 #include <stdio.h>
 2 void strcpy2(char *s, char *t);
 3
 4 main(){
 5     char t[] = "hello world";
 6     char s[] = "";
 7     strcpy2(s,t);
 8     printf("%s\n",s);    //hello world
 9 }
10 /******将指针t指向的字符串复制到指针s指向的位置,使用指针实现***/
11 void strcpy2(char *s, char *t){
12     while((*s = *t) != '\0'){
13         s++;
14         t++;
15     }
16     /**
17     //简写
18     while((*s++=*t++) != '\0')
19         ;
20     **/
21     /**
22     //再简写
23     while(*s++=*t++)
24         ;
25     **/
26 }
刚遇到这个警告:conflicting types for built-in function 'strcpy'
函数命名冲突了
//比较两字符串
 1 #include <stdio.h>
 2 int strcmp(char *s, char *t);
 3
 4 main(){
 5     char t[] = "hello world";
 6     char s[] = "helloabc";
 7     printf("%d\n",strcmp(s,t));        //65
 8 }
 9 /****比较两字符串顺序***/
10 int strcmp(char *s, char *t){
11     int i;
12     for(i=0; s[i]==t[i]; i++){
13         if(s[i] == '\0'){
14             return 0;
15         }
16     }
17     return s[i] - t[i];
18 }
|
1
2
3
4
5
6
7
8
9
10
11
12
13
14
15
16
17
|
#include <stdio.h>int strcmp(char *s, char *t);main(){ char t[] = "hello world"; char s[] = "helloabc"; printf("%d\n",strcmp(s,t)); //65}/****比较两字符串顺序***/int strcmp(char *s, char *t){ for(; *s==*t; s++,t++) { if(*s == '\0'){ return 0; } } return *s - *t;} |
一个函数实现或一种算法的实现,还是需要用数据去模拟,然后找出规律。就上例,作简单分析:
s1 "hello world";
s2 "helloabc";
for循环,i=0,s[0]=t[0],依此类推,s[4]=t[4],当i=5时,s[5]是一个空格,t[5]=a,s[5]!=t[5],跳出for循环,返回a字符与空格字符的差,97-32=65。假如t[5]也是一个空格的话,继续下一个比较,如果s[6]==‘\0’的话,说明s[5]还是等于t[5],返回0。
以后尽量都要去多分析原理,加深记忆。
指针数组及指向指针的指针
指针本身也是变量,所以它也可以其他变量一样存储在数组中。
二维数组
今天是2013年的第300天,今年只剩65天,大家多多珍惜吧!很巧的是,之前的测试中字符a-空格刚好也是65。
 1 #include <stdio.h>
 2 int day_of_year(int year, int month, int day);
 3 void month_day(int year, int yearday, int *pmonth, int *pday);
 4
 5 static char daytab[2][13] = {
 6     {0,31,28,31,30,31,30,31,31,30,31,30,31},
 7     {0,31,29,31,30,31,30,31,31,30,31,30,31}
 8 };
 9 main(){
10     printf("%d\n", day_of_year(2013, 10, 27));    //300
11     int pmonth = 0;
12     int pday = 0;
13     int year = 2013;
14     int yearday = 300;
15     month_day(year, yearday, &pmonth, &pday);
16     printf("%d年第%d天是%d月%d日\n",year, yearday,pmonth,pday);        //2013年第300天是10月27日
17     return 0;
18 }
19
20 int day_of_year(int year, int month, int day){
21     int i, leap;
22     leap = (year%4 == 0 && year%100 != 0) || (year %400 == 0);
23     for(i=1; i<month; i++){
24         day += daytab[leap][i];
25     }
26     return day;
27 }
28
29 void month_day(int year, int yearday, int *pmonth, int *pday){
30     int i, leap;
31     leap = (year%4 == 0 && year%100 != 0) || (year %400 == 0);
32     for(i=1; yearday>daytab[leap][i]; i++){
33         yearday -= daytab[leap][i];
34     }
35     *pmonth = i;
36     *pday = yearday;
37 }
附:
一个人晚上出去打了10斤酒,回家的路上碰到了一个朋友,恰巧这个朋友也是去打酒的。不过,酒家已经没有多余的酒了,且此时天色已晚,别的酒家也都已经打烊了,朋友看起来十分着急。于是,这个人便决定将自己的酒分给他一半,可是朋友手中只有一个7斤和3斤的酒桶,两人又都没有带称,如何才能将酒平均分开呢?
一天,小赵的店里来了一位顾客,挑了20元的货,顾客拿出50元,小赵没零钱找不开,就到隔壁小韩的店里把这50元换成零钱,回来给顾客找了30元零钱。过一会,小韩来找小赵,说刚才的是假钱,小赵马上给小李换了张真钱。问:在这一过程中小赵赔了多少钱?
原文作者:lltong,博客园地址:http://www.cnblogs.com/lltong/
GCC 中零长数组与变长数组
前两天看程序,发现在某个函数中有下面这段程序:
int n;              //define a variable n
int array[n];       //define an array with length n
在我所学的C语言知识中,这种数组的定义在编译时就应该有问题的,因为定义数组时,数组的长度必须要是一个大于0的整型字面值或定义为 const 的常量。例如下面这样
int array1[10];     //valid
int const N = 10;
int array2[N];      //valid
int n = 10;
int array3[n];      //invalid
但从上面看第三种定义数组的方法也是正确的,于是,我用 gcc 去编译这段程序,发现确实没报错,而且我对此数组进行一些操作,结果也都是正确!这简直颠覆了我的知识框架!难道大学老师教我的、我平时看的书,都是错误的吗?!我开始寻找答案...
C 语言中变长数组
最官方的解释应该是 C 语言的规范和编译器的规范说明了。
- 在 ISO/IEC9899 标准的 6.7.5.2 Array declarators 中明确说明了数组的长度可以为变量的,称为变长数组(VLA,variable length array)。(注:这里的变长指的是数组的长度是在运行时才能决定,但一旦决定在数组的生命周期内就不会再变。)
- 在 GCC 标准规范的 6.19 Arrays of Variable Length 中指出,作为编译器扩展,GCC 在 C90 模式和 C++ 编译器下遵守 ISO C99 关于变长数组的规范。
这下,终于安心了,原来这种语法确实是 C 语言规范,GCC 非常完美的支持了 ISO C99。但令人遗憾的是,我们的大学老师教给我们的还是老一套,虽然关系不是很大,但这也从侧面反映了我们的教育是多么地滞后!而且我们读的 C 语言书,在不加任何限定的条件下,就说某某语法是不对的,读书的人只能很痛苦地记下!小小吐槽一下,下面继续...
这种变长数组有什么好处呢?你可以使用 alloca 函数达到类似的动态分配数组的效果,但 alloca 函数分配的空间在函数退出时还依然存在,你需要手动地去释放所分配的空间;VLA 就不一样了,在数组名生命周期结束之后,所分配的空间也就随之释放。
当然,关于 VLA 还有很多限制,例如 ISO/IEC9899 给出了下面这个例子:
extern int n;
int A[n];                           // invalid: file scope VLA
extern int (*p2)[n];                // invalid: file scope VM
int B[100];                         // valid: file scope but not VM
void fvla(int m, int C[m][m]);      // valid: VLA with prototype scope
void fvla(int m, int C[m][m])       // valid: adjusted to auto pointer to VLA
{
    typedef int VLA[m][m];          // valid: block scope typedef VLA
    struct tag {
        int (*y)[n];                // invalid: y not ordinary identifier
        int z[n];                   // invalid: z not ordinary identifier
    };
    int D[m];                       // valid: auto VLA
    static int E[m];                // invalid: static block scope VLA
    extern int F[m];                // invalid: F has linkage and is VLA
    int (*s)[m];                    // valid: auto pointer to VLA
    extern int (*r)[m];             // invalid: r has linkage and points to VLA
    static int (*q)[m] = &B;        // valid: q is a static block pointer to VLA
    }
至于上面语法的原因,请参考 ISO/IEC9899 。
GCC 中零长数组
GCC 中允许使用零长数组,把它作为结构体的最后一个元素非常有用,下面例子出自 gcc 官方文档。
struct line {
    int length;
    char contents[0];
};

struct line *thisline = (struct line *) malloc (sizeof (struct line) + this_length);
thisline->length = this_length;
从上例就可以看出,零长数组在有固定头部的可变对象上非常适用,我们可以根据对象的大小动态地去分配结构体的大小。
在 Linux 内核中也有这种应用,例如由于 PID 命名空间的存在,每个进程 PID 需要映射到所有能看到其的命名空间上,但该进程所在的命名空间在开始并不确定(但至少为 init 命名空间),需要在运行是根据 level 的值来确定,所以在该结构体后面增加了一个长度为 1 的数组(因为至少在一个init命名空间上),使得该结构体 pid 是个可变长的结构体,在运行时根据进程所处的命名空间的 level 来决定 numbers 分配多大。(注:虽然不是零长度的数组,但用法是一样的)
struct pid
{
    atomic_t count;
    unsigned int level;
    /* lists of tasks that use this pid */
    struct hlist_head tasks[PIDTYPE_MAX];
    struct rcu_head rcu;
    struct upid numbers[1];
};
参考资料
- ISO/IEC9899
- GCC Online Documents
一、引言
最近摆弄了一段时间的Arduino,发现Arduino做一些电子类项目、监控、机器人、电子玩具比较容易,并且Arduino与.NET程序集成也不难。接下来介绍一个简单的小程序,C#做的一个Windows Form程序,通过.NET串口编程与Arduino通信,来控制LED灯的状态,以此演示C#与Arduino串口通信的方法。
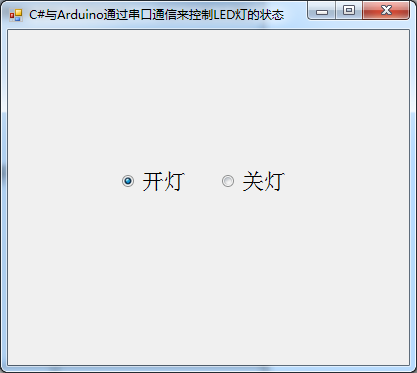
二、功能演示
这个小程序功能极其简单,运行Windows Form程序,点击“开灯”单选框则点亮与Arduino相连的LED灯,点击“关灯”单选框则熄灭LED灯,图下2图所示:
三、实现机制
- C#程序向Arduino使用的串口COM4(可通过操作系统的控制面板查看Arduino使用的串口号)输出命令字符:1—表示点亮,0—表示熄灭;
- Arduino读取串口接收到的命令字符,如果读到的字符为1则向LED所在针脚pin 13输出高电平点亮LED灯,如果读到的字符为0则输出低电平熄灭LED灯。
四、开发环境
- Arduino 1.0.5 IDE
- Visual studio 2010
五、所需元件
- Arduino UNO板1块(必需)
- Arduino UNO板与电脑相连的USB线1根(必需)
- LED灯1个(可选)
- 面包板1块(可选)
- 10K电阻1个(可选)
- 跳线2根(可选)
注:Arduino UNO板在pin 13自带了1个LED灯,可以用此灯代替单独的LED灯,所以面包板、LED灯等为可选元件。
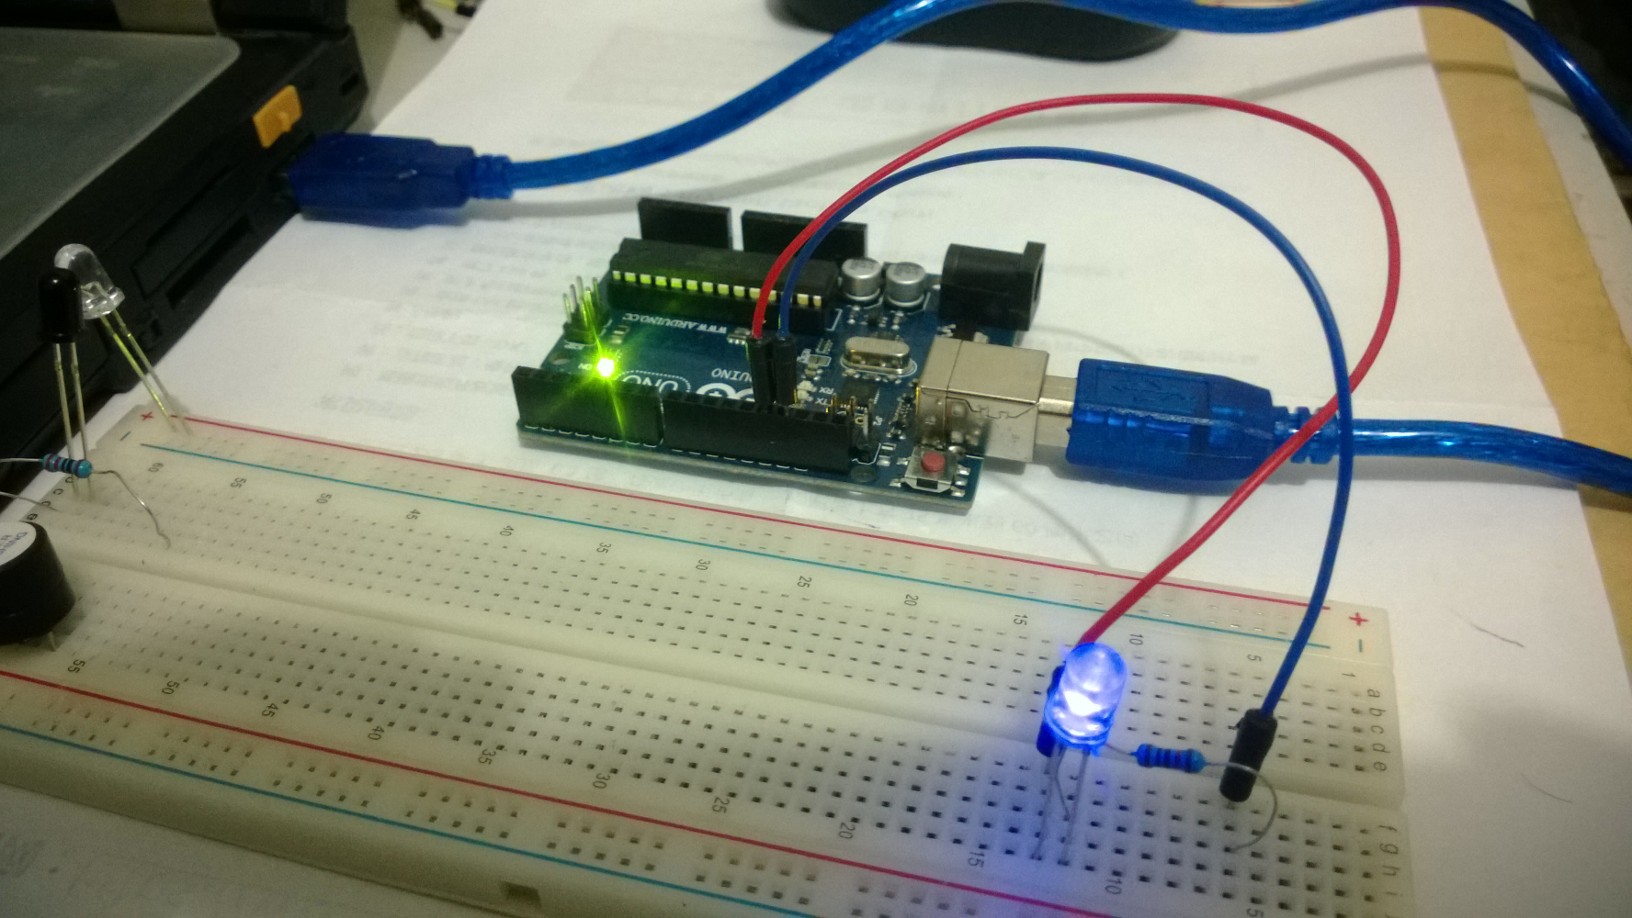
六、元件连接
元件连接很简单:LED灯的正极与Arduino的数字针脚pin 13相连,电阻与LED串联,然后接回Arduino的GND,最后用USB线把Arduino板与电脑相连,如上图所示。
七、C#实现代码
创建一个Windows Form,拖放2个单选框,编写Windows Form后台代码,利用.NET的SerialPort类进行串口操作:
 1 public partial class Form1 : Form
 2     {
 3         SerialPort port;
 4
 5         public Form1()
 6         {
 7             InitializeComponent();
 8
 9             this.FormClosed += new FormClosedEventHandler(Form1_FormClosed);
10
11             if (port == null)
12             {
13                 //COM4为Arduino使用的串口号,需根据实际情况调整
14                 port = new SerialPort("COM4", 9600);
15                 port.Open();
16             }
17         }
18
19         void Form1_FormClosed(object sender, FormClosedEventArgs e)
20         {
21             if (port != null && port.IsOpen)
22             {
23                 port.Close();
24             }
25         }
26
27         //点亮
28         private void rbOpen_CheckedChanged(object sender, EventArgs e)
29         {
30             if (this.rbOpen.Checked)
31             {
32                 PortWrite("1");
33             }
34         }
35
36         //熄灭
37         private void rbClose_CheckedChanged(object sender, EventArgs e)
38         {
39             if (this.rbClose.Checked)
40             {
41                 PortWrite("0");
42             }
43         }
44
45         //向串口输出命令字符
46         private void PortWrite(string message)
47         {
48             if (port != null && port.IsOpen)
49             {
50                 port.Write(message);
51                 //port.WriteLine(message);
52             }
53         }
54     }
八、Arduino Sketch代码
读取串口接收到的字符,并根据字符向pin 13输出高电平或低电平,对LED灯进行点亮或熄灭控制:
const int LedPin = 13;
int ledState = 0;

void setup()
{
  pinMode(LedPin, OUTPUT);

  Serial.begin(9600);
}

void loop()
{
    char receiveVal;

    if(Serial.available() > 0)
    {
        receiveVal = Serial.read();

       if(receiveVal == '1')
          ledState = 1;
       else
          ledState = 0;
    }

    digitalWrite(LedPin, ledState);

    delay(50);
}
九、总结
本文通过一个简单的例子,演示了C#与Arduino通过串口通信来控制LED灯状态的机制,总共几十行代码就搞定,体现了Arduino开发简单的宗旨。当然本例子只实现了C#程序向Arduino发数据的单向通信,真实的系统还可根据需要实现Arduino向C#发送数据的双向通信。
Arduino与.NET两者集成可以发挥两个平台的长处:Arduino擅长控制硬件设备与各类传感器;而.NET则拥有强大的数据处理能力、通信功能、以及美观的程序界面。当然,通过USB线实现Arduino与PC之间的串口通信,由于需要与PC连线且USB线的长度往往有限,所以这些因素制约了其应用。但是,Arduino与PC之间还有其他的通信方式,比如以太网线、Wifi、蓝牙等,极大的提高了Arduino的应用范围。
写文章真的比较耗时间,所以一直就不怎么喜欢写文章。今天就写到这,后面有时间的话会陆陆续续写一些关于Arduino应用与开发等各个方面的文章。
十、参考资料
- Arduino官网
- Arduino Cookbook
- Arduino in Action
- Beginning Arduino
- Arduino Internals
- Arduino Workshop: A Hands-On Introduction with 65 Projects
- Exploring Arduino: Tools and Techniques for Engineering Wizardry
- Pro Arduino
- Arduino Robotics
- Building Wireless Sensor Networks: with ZigBee, XBee, Arduino, and Processing
- Arduino and Kinect Projects: Design, Build, Blow Their Minds
- Arduino Wearables

 浙公网安备 33010602011771号