

简单微服务架构(开源)
前言
本篇仅作引导,内容较多,如果阅读不方便,可以使用电脑打开我们的文档官网进行阅读。如下图所示:

文档官网地址:https://docs.xin-lai.com/
目录
总体介绍
- 微服务架构的好处
- 微服务架构的不足(这个时候就需要用到服务发现)
- 传统模式
- Ocelot(网关)模式
- 集成IdentityService(认证)
- 集成consul(服务发现)
基于Ocelot搭建一个简单的微服务架构
- Ocelot
- 基本集成
- 添加Ocelot
- 添加测试API项目
- 配置项目的上游请求对象(ocelot.json)
- 启动结果
- 聚合API文档(SwaggerUI)
- ConfigureServices
- Configure
- appsettings.json
- 配置Swagger的上游请求对象(ocelot.json)
- 启动结果
- IdentityServer 集成
- 添加授权服务项目
- 配置appsetting.json
- 添加IdentityServerConfig类
定义API资源
定义身份资源
定义测试客服端
- 配置Startup
- ConfigureServices
- Configure
- 启动结果
- 配置ApiGateway网关项目
- 调用Ocelot管理API
- API方法
- Consul(服务发现)
- 本地部署
- 安装
- 添加服务配置
- 添加检查配置
- docker部署(腾讯云)
- 配置Ocelot 网关
- 集成消息队列——CAP
- 简介
- 环境准备
- .Net Core 集成 CAP
Cap 发布
Cap 订阅(接收)
最后——附上总体代码
总体介绍
随着业务需求的快速发展变化,需求不断增长,迫切需要一种更加快速高效的软件交付方式。微服务可以弥补单体应用不足,是一种更加快速高效软件架构风格。单体应用被分解成多个更小的服务,每个服务有自己的独立模块,单独部署,然后共同组成一个应用程序。把范围限定到单个独立业务模块功能。分布式部署在各台服务器上。本篇我们将介绍如何使用.NET Core打造自己的微服务架构。
注意:微服务架构不是万能药,本篇仅供参考和探讨。对于大部分小项目来说,请不要为了微服务而微服务。毕竟技术不是万能的,技术是为业务服务的。
微服务架构的好处
- 单个服务很容易开发、理解和维护。
- 每个服务都可以有专门开发团队来开发。
- 每个微服务独立的部署。
- 每个服务独立扩展。
微服务架构的不足(这个时候就需要用到服务发现)
- 微服务应用是分布式系统,由此会带来固有的复杂性。
- 服务地址目录,服务健康度,部署困难,服务依赖问题,数据库分区问题。
传统模式

Ocelot(网关)模式

集成IdentityService(认证)

集成consul(服务发现)

基于Ocelot搭建一个简单的微服务架构
Ocelot
Ocelot 是一个仅适用于 .Net Core 的网关组件。Ocelot
中间件使用非常简单,难的点在于如何去配置。它的功能包括了:路由、请求聚合、服务发现、认证、鉴权、限流熔断、并内置了负载均衡器等的集成,而这些功能都是通过配置实现。
Ocelot的开源地址:https://github.com/ThreeMammals/Ocelot
Ocelot官网地址:https://ocelot.readthedocs.io/en/latest/index.html
基本集成
添加Ocelot
新建一个 .Net core 2.2 web 项目(ApiGateway),添加以下Nuget包:
- Ocelot
- Ocelot.Administration Ocelot支持在运行时通过经过身份验证的HTTP
API更改配置。这可以通过两种方式进行身份验证:使用Ocelot的内部IdentityServer(仅用于验证对管理API的请求)或将管理API身份验证挂钩到您自己的IdentityServer中。 - Ocelot.Cache.CacheManager CacheManager.Net扩展包
- Ocelot.Provider.Polly Polly.NET扩展包
在项目根目录添加ocelot.json,名字可以自取。

前面说了,所有功能都是通过配置实现的,所以配置也相对复杂。配置有两个部分。一组ReRoutes和一个GlobalConfiguration。ReRoutes是告诉Ocelot如何处理上游请求的对象。GlobalConfiguration顾名思义是全局配置,具体配置请查看官网。下面列举简单配置

{

"GlobalConfiguration": {

//外部访问路径

"BaseUrl": "http://localhost:13000",

//限速配置

"RateLimitOptions": {

//白名单

"ClientWhitelist": [],

"EnableRateLimiting": true,

//限制时间段,例如1s,5m,1h,1d

"Period": "1s",

//重试等待的时间间隔(秒)

"PeriodTimespan": 1,

//限制

"Limit": 1,

//自定义消息

"QuotaExceededMessage": "单位时间内请求次数超过限制!",

"HttpStatusCode": 999

},

//熔断配置

"QoSOptions": {

"ExceptionsAllowedBeforeBreaking": 3,

"DurationOfBreak": 5,

//超时值(毫秒)

"TimeoutValue": 5000

}

},

"ReRoutes": []

}
配置文件初始化好之后,需要在Program.cs
文件中加载JSON配置,Ocelot支持根据环境变量使用配置文件。
public class Program{public static void Main(string[] args){CreateWebHostBuilder(args).Build().Run();}public static IWebHostBuilder CreateWebHostBuilder(string[] args) => new WebHostBuilder().UseKestrel((context, opt) =>{opt.AddServerHeader = false;////从配置文件读取配置//opt.Configure(context.Configuration.GetSection("Kestrel"));}).UseContentRoot(Directory.GetCurrentDirectory()).ConfigureAppConfiguration((hostingContext, config) =>{var env = hostingContext.HostingEnvironment;//根据环境变量加载不同的JSON配置config.AddJsonFile("appsettings.json", optional: true, reloadOnChange: true).AddJsonFile($"appsettings.{env.EnvironmentName}.json", optional: true, reloadOnChange: true).AddJsonFile("ocelot.json").AddEnvironmentVariables(); //从环境变量添加配置}).UseIISIntegration().ConfigureLogging((hostingContext, logging) =>{logging.AddConfiguration(hostingContext.Configuration.GetSection("Logging"));//添加控制台日志,Docker环境下请务必启用logging.AddConsole();//添加调试日志logging.AddDebug();}).UseStartup<Startup>();} |
然后在Startup.cs
文件ConfigureServices方法中注册服务时使用AddOcelot(),Configure
方法中使用app.UseOcelot().Wait(); 这样网关的配置就完成了。
services.AddOcelot(Configuration)app.UseOcelot().Wait(); |
添加测试API项目
新建两个 .Net core 2.2 web项目(vs 自建的那种就OK),并使用Swagger来做接口说明。


Nuget 添加 Swashbuckle.AspNetCore 和
Microsoft.Extensions.PlatformAbstractions 实现Swagger ui,代码如下
public void ConfigureServices(IServiceCollection services){services.AddMvc().SetCompatibilityVersion(CompatibilityVersion.Version_2_2);services.AddSwaggerGen(options =>{options.SwaggerDoc("SwaggerAPI1", new Info { Title = "API1", Version = "v1" });var basePath = PlatformServices.Default.Application.ApplicationBasePath;var xmlPath = Path.Combine(basePath, "Services.Test1.xml");options.IncludeXmlComments(xmlPath);});//服务注册//services.Configure<ServiceRegistrationOptions>}// This method gets called by the runtime. Use this method to configure the HTTP request pipeline.public void Configure(IApplicationBuilder app, IHostingEnvironment env){if (env.IsDevelopment()){app.UseDeveloperExceptionPage();}app.UseSwagger(c => { c.RouteTemplate = "{documentName}/swagger.json"; });app.UseSwaggerUI(c =>{c.SwaggerEndpoint("/SwaggerAPI1/swagger.json", "API1");});app.UseMvc();} |
项目.csproj文件中设置XML文档输出路径

Services.Test1 和 Services.Test2
一样的配置,略过。编译启动,页面如下,接口配置完成。

配置项目的上游请求对象(ocelot.json)
"ReRoutes": [//API1项目配置{"UpstreamPathTemplate": "/gateway/1/{url}","UpstreamHttpMethod": [ "Get", "Post", "Delete", "Put" ],"DownstreamPathTemplate": "/api1/{url}","DownstreamScheme": "http","ServiceName": "API1","UseServiceDiscovery": true,"LoadBalancer": "RoundRobin","DownstreamHostAndPorts": [{"Host": "119.29.50.115","Port": 80},{"Host": "localhost","Port": 13001}],"QoSOptions": {"ExceptionsAllowedBeforeBreaking": 3,"DurationOfBreak": 10,"TimeoutValue": 5000}//"AuthenticationOptions": {// "AuthenticationProviderKey": "Bearer",// "AllowedScopes": [// ]//}},//API2项目配置{"UpstreamPathTemplate": "/gateway/2/{url}","UpstreamHttpMethod": [ "Get", "Post", "Delete", "Put" ],"DownstreamPathTemplate": "/api2/{url}","DownstreamScheme": "http","ServiceName": "API2","UseServiceDiscovery": true,"LoadBalancer": "RoundRobin","DownstreamHostAndPorts": [{"Host": "111.230.160.62","Port": 80},{"Host": "localhost","Port": 13002}],"QoSOptions": {"ExceptionsAllowedBeforeBreaking": 3,"DurationOfBreak": 10,"TimeoutValue": 5000}//"AuthenticationOptions": {// "AuthenticationProviderKey": "Bearer",// "AllowedScopes": [// ]//}},] |
ReRoutes API对象模板配置节点解释如下:
|
UpstreamPathTemplate |
上游路径模板 |
|
UpstreamHttpMethod |
上游HTTP请求方法 |
|
DownstreamPathTemplate |
下游路径模板 |
|
DownstreamScheme |
下游协议Https/Http |
|
DownstreamHostAndPorts |
下游主机和端口号,允许配置多个 |
|
UseServiceDiscovery |
是否使用服务发现(True/False) |
|
ServiceName |
服务名称(结合服务发现使用) |
|
LoadBalancer |
指定一个负载均衡算法: RoundRobin:轮询 LeastConnection:最少连接数 NoLoadBalancer:不适用负载均衡 |
|
LoadBalancerOptions |
负载均衡器配置 |
|
QoSOptions |
熔断配置,在请求向下游服务时使用断路 |
|
AuthenticationOptions |
权限配置 |
启动结果
启动web
项目,web页面报错,但无妨,使用PostMan请求网关接口访问api1/TestOnes成功。

聚合API文档(SwaggerUI)
前面配置了网关接口上游,但是页面Swagger没有显示,这节主要是整合SwaggerUI。
首先需要配置ApiGateway项目的Swagger,在配置文件配置上面两个接口的SwaggerNames,代码中遍历添加到网关项目的SwaggerUI中,代码如下
ConfigureServices
services.AddSwaggerGen(options =>{options.SwaggerDoc(Configuration["Swagger:Name"], new Info { Title = Configuration["Swagger:Title"], Version = Configuration["Swagger:Version"] });}); |
Configure
public void Configure(IApplicationBuilder app, IHostingEnvironment env){var apis = Configuration["Apis:SwaggerNames"].Split(";").ToList();if (env.IsDevelopment()){app.UseDeveloperExceptionPage();}app.UseMvc().UseSwagger().UseSwaggerUI(options =>{apis.ToList().ForEach(key =>{options.SwaggerEndpoint($"/{key}/swagger.json", key);});options.DocumentTitle = "网关";});app.UseOcelot().Wait();} |
appsettings.json
"Swagger": {"Name": "ApiGateway","Title": "网关服务","Version": "v1"},"Apis": {"SwaggerNames": "SwaggerAPI1;SwaggerAPI2"} |
PS:SwaggerAPI1、SwaggerAPI2是前面两个接口的SwaggerName,这里需要对应上。
配置Swagger的上游请求对象(ocelot.json)
//swagger API1配置{"DownstreamPathTemplate": "/SwaggerAPI1/swagger.json","DownstreamScheme": "http","UpstreamPathTemplate": "/SwaggerAPI1/swagger.json","UpstreamHttpMethod": [ "GET", "POST", "DELETE", "PUT" ],"DownstreamHostAndPorts": [{"Host": "119.29.50.115","Port": 80},{"Host": "localhost","Port": 13001}]},//swagger API2配置{"DownstreamPathTemplate": "/SwaggerAPI2/swagger.json","DownstreamScheme": "http","UpstreamPathTemplate": "/SwaggerAPI2/swagger.json","UpstreamHttpMethod": [ "GET", "POST", "DELETE", "PUT" ],"DownstreamHostAndPorts": [{"Host": "111.230.160.62","Port": 80},{"Host": "localhost","Port": 13002}]} |
启动结果
使用SwaggerUI整合了API1和API2的接口文档。

IdentityServer 集成
官网文档地址:http://docs.identityserver.io/en/latest/index.html
IdentityServer4是一个基于OpenID Connect和 OAuth 2.0的针对 ASP .NET Core 2.0的框架。
IdentityServer是将规范兼容的OpenID Connect和OAuth 2.0终结点添加到任意ASP .NET
Core应用程序的中间件。你构建包含登录和注销页面的应用程序,IdentityServer中间件会向其添加必要的协议头,以便客户端应用程序可以使用这些标准协议与其对话。

添加授权服务项目
新建 .Net core 2.2 web项目,添加以下Nuget包:
- IdentityServer4.AspNetIdentity
- IdentityServer4.EntityFramework 使用数据存储机制

配置appsetting.json
配置测试环境下的客服端信息和Identity API
资源配置,具体配置需要按照自己的逻辑定义,这里只是为了结合我下面的IdentityServerConfig文件所定义,代码如下,
为了结合我下面的IdentityServerConfig文件所定义,代码如下,
"IdentityServer": {"ApiName": "default-api","ApiSecret": "secret","Clients": [{"ClientId": "client","AllowedGrantTypes": ["password"],"ClientSecrets": [{"Value": "def2edf7-5d42-4edc-a84a-30136c340e13"}],"AllowedScopes": ["default-api"]},{"ClientId": "demo","ClientName": "MVC Client Demo","AllowedGrantTypes": ["hybrid","client_credentials"],"RequireConsent": "true","ClientSecrets": [{"Value": "def2edf7-5d42-4edc-a84a-30136c340e13"}],"RedirectUris": ["http://openidclientdemo.com:8001/signin-oidc"],"PostLogoutRedirectUris": ["http://openidclientdemo.com:8001/signout-callback-oidc"],"AllowedScopes": ["openid","profile","default-api"],"AllowOfflineAccess": "true"}]} |
添加IdentityServerConfig类
IdentityServerConfig 类分为三个方法:
定义API资源:
public static IEnumerable<ApiResource> GetApiResources(){return new List<ApiResource>{new ApiResource("default-api", "Default (all) API"){Description = "AllFunctionalityYouHaveInTheApplication",ApiSecrets= {new Secret("secret") }}};} |
定义身份资源:
public static IEnumerable<IdentityResource> GetIdentityResources(){return new List<IdentityResource>{new IdentityResources.OpenId(),new IdentityResources.Profile(),new IdentityResources.Email(),new IdentityResources.Phone(),new IdentityResources.Address()};}public static IEnumerable<IdentityResource> GetIdentityResources(){var customProfile = new IdentityResource(name: "custom.profile",displayName: "Custom profile",claimTypes: new[] { "name", "email", "status" });return new List<IdentityResource>{new IdentityResources.OpenId(),new IdentityResources.Profile(),customProfile};} |
IdentityResource 具体属性
Enabled
指示此资源是否已启用且可以请求。默认为true。
Name
标识资源的唯一名称。这是客户端将用于授权请求中的scope参数的值。
DisplayName
显示名称。
Description
描述。
Required
默认为false。(暂未深究理解)
Emphasize
默认为false。(暂未深究理解)
ShowInDiscoveryDocument
指定此范围是否显示在发现文档中。默认为true。
UserClaims
应包含在身份令牌中的关联用户声明类型的列表。
定义测试客服端
此处则是通过appsetting.json 文件获取配置
public static IEnumerable<Client> GetClients(IConfiguration configuration){var clients = new List<Client>();foreach (var child in configuration.GetSection("IdentityServer:Clients").GetChildren()){clients.Add(new Client{ClientId = child["ClientId"],ClientName = child["ClientName"],AllowedGrantTypes = child.GetSection("AllowedGrantTypes").GetChildren().Select(c => c.Value).ToArray(),RequireConsent = bool.Parse(child["RequireConsent"] ?? "false"),AllowOfflineAccess = bool.Parse(child["AllowOfflineAccess"] ?? "false"),ClientSecrets = child.GetSection("ClientSecrets").GetChildren().Select(secret => new Secret(secret["Value"].Sha256())).ToArray(),AllowedScopes = child.GetSection("AllowedScopes").GetChildren().Select(c => c.Value).ToArray(),RedirectUris = child.GetSection("RedirectUris").GetChildren().Select(c => c.Value).ToArray(),PostLogoutRedirectUris = child.GetSection("PostLogoutRedirectUris").GetChildren().Select(c => c.Value).ToArray(),});}return clients;} |
配置Startup
ConfigureServices
这里只是用作测试,所以没有在数据库中读取配置,而是在内存中获取。相应的数据库读取方法也有说明。
public void ConfigureServices(IServiceCollection services){//var connectionString = Configuration.GetConnectionString("Default");//services.AddDbContext<MagicodesAdminContext>(options => options.UseSqlServer(connectionString));//services.AddIdentity<AbpUsers, AbpRoles>()// .AddEntityFrameworkStores<MagicodesAdminContext>()// .AddDefaultTokenProviders();services.AddIdentityServer().AddDeveloperSigningCredential().AddInMemoryPersistedGrants().AddInMemoryIdentityResources(IdentityServerConfig.GetIdentityResources()).AddInMemoryApiResources(IdentityServerConfig.GetApiResources()).AddInMemoryClients(IdentityServerConfig.GetClients(Configuration))//.AddAspNetIdentity<AbpUsers>()//从数据库读取配置等内容(clients, resources)//.AddConfigurationStore(options =>//{// options.ConfigureDbContext = b =>// b.UseSqlServer(connectionString);//})// this adds the operational data from DB (codes, tokens, consents)//.AddOperationalStore(options =>//{// options.ConfigureDbContext = b =>// b.UseSqlServer(connectionString);// options.PersistedGrants.Name = "AbpPersistedGrants";// //options.DeviceFlowCodes.Name =// // this enables automatic token cleanup. this is optional.// options.EnableTokenCleanup = true;//});//.AddAspNetIdentity()//.AddAbpPersistedGrants<AdminDbContext>()//.AddAbpIdentityServer<User>();;} |
Configure
public void Configure(IApplicationBuilder app, IHostingEnvironment env){if (env.IsDevelopment()){app.UseDeveloperExceptionPage();}app.UseIdentityServer();} |
启动结果
就这样可以启动服务了,浏览器启动会显示如下页面,因为没有任何页面启动,所为显示为404。

但无妨,我们可以使用PostMan 访问:
http://localhost:13004/.well-known/openid-configuration

你会看到官方所谓的发现文档。客户端和API将使用它来下载必要的配置数据。到此为止IdentityServer服务已经搭建成功!
首次启动时,IdentityServer将为您创建一个开发人员签名密钥,它是一个名为的文件。您不必将该文件检入源代码管理中,如果该文件不存在,将重新创建该文件。tempkey.rsa
配置ApiGateway网关项目
在前面Ocelot章节中,配置了ocelot.json,这里继续修改ocelot.json文件,启用权限认证
{"UpstreamPathTemplate": "/gateway/1/{url}","UpstreamHttpMethod": [ "Get", "Post", "Delete", "Put" ],"DownstreamPathTemplate": "/api1/{url}","DownstreamScheme": "http","ServiceName": "API1","UseServiceDiscovery": true,"LoadBalancer": "RoundRobin","DownstreamHostAndPorts": [{"Host": "119.29.50.115","Port": 80},{"Host": "localhost","Port": 13001}],"QoSOptions": {"ExceptionsAllowedBeforeBreaking": 3,"DurationOfBreak": 10,"TimeoutValue": 5000}//启用权限认证"AuthenticationOptions": {"AuthenticationProviderKey": "IdentityBearer","AllowedScopes": []}} |
然后还需要在ApiGateway项目中修改appsetting.json文件,添加IdentityService服务配置。
"IdentityService": {"Uri": "http://localhost:13004",//认证服务IP"DefaultScheme": "IdentityBearer","UseHttps": false,"ApiName": "default-api","ApiSecret": "def2edf7-5d42-4edc-a84a-30136c340e13"} |
接下来就是配置 ApiGateway项目 Startup文件了。
需要引入Nuget包:IdentityServer4.AccessTokenValidation
public void ConfigureServices(IServiceCollection services){//Identity Server Bearer TokensAction<IdentityServerAuthenticationOptions> isaOpt = option =>{option.Authority = Configuration["IdentityService:Uri"];option.RequireHttpsMetadata = Convert.ToBoolean(Configuration["IdentityService:UseHttps"]);option.ApiName = Configuration["IdentityService:ApiName"];option.ApiSecret = Configuration["IdentityService:ApiSecret"];option.SupportedTokens = SupportedTokens.Both;};services.AddAuthentication().AddIdentityServerAuthentication(Configuration["IdentityService:DefaultScheme"], isaOpt);services.AddOcelot(Configuration)//启用缓存.AddCacheManager(x => { x.WithDictionaryHandle(); }).AddPolly()services.AddMvc().SetCompatibilityVersion(CompatibilityVersion.Version_2_2); ;services.AddSwaggerGen(options =>{options.SwaggerDoc(Configuration["Swagger:Name"], new Info { Title = Configuration["Swagger:Title"], Version = Configuration["Swagger:Version"] });});} |
配置完成后启用Service.Test1、Service.Test2、ApiGateway、IdentityService项目。使用SwaggerUI请求会提示401
Unauthorized,这个时候IdentityService就起到作用了。
使用PostMan去请求IdentityService获取token

使用token访问接口,数据返回正常

调用Ocelot管理API
通过IdentityServer 身份验证来调用Ocelot 管理接口。
首先需要做的是引入相关的NuGet包:Install-Package Ocelot.Administration
修改 ApiGateway项目 Startup文件
添加代码.AddAdministration(“/administration”, isaOpt);路径名称可自取。
public void ConfigureServices(IServiceCollection services){//Identity Server Bearer TokensAction<IdentityServerAuthenticationOptions> isaOpt = option =>{option.Authority = Configuration["IdentityService:Uri"];option.RequireHttpsMetadata = Convert.ToBoolean(Configuration["IdentityService:UseHttps"]);option.ApiName = Configuration["IdentityService:ApiName"];option.ApiSecret = Configuration["IdentityService:ApiSecret"];option.SupportedTokens = SupportedTokens.Both;};services.AddAuthentication().AddIdentityServerAuthentication(Configuration["IdentityService:DefaultScheme"], isaOpt);services.AddOcelot(Configuration)//启用缓存.AddCacheManager(x => { x.WithDictionaryHandle(); }).AddPolly().AddAdministration("/administration", isaOpt);services.AddMvc().SetCompatibilityVersion(CompatibilityVersion.Version_2_2); ;services.AddSwaggerGen(options =>{options.SwaggerDoc(Configuration["Swagger:Name"], new Info { Title = Configuration["Swagger:Title"], Version = Configuration["Swagger:Version"] });});} |
API方法
POST {adminPath} / connect / token
获取token
请求的主体是表单数据,如下所示
client_id 设为管理员
client_secret 设置为设置管理服务时使用的任何内容。
scope 设为管理员
grant_type 设置为client_credentials
获取{adminPath} /configuration
获得当前的Ocelot配置。
POST {adminPath} / configuration
这会覆盖现有配置。
请求的主体是JSON,它与我们用于在文件系统上设置Ocelot.json格式相同。
如果要使用此API,则运行Ocelot的进程必须具有写入ocelot.json或ocelot.{environment}
.json所在磁盘的权限。这是因为Ocelot会在保存时覆盖它们。
删除{adminPath} / outputcache / {region}
清除所有缓存区域
Consul(服务发现)
Consul包含多个组件,但是作为一个整体,提供服务发现和服务配置的工具。
主要特性:
- 服务发现
组件记录了分布式系统中所有服务的信息,其它服务可以据此找到这些服务。 - 健康检查 Consul 客户端可用提供任意数量的健康检查。
- Key/Value存储 应用程序可用根据自己的需要使用 Consul 的层级的 Key/Value
存储。 - 多数据中心
Consul支持开箱即用的多数据中心。这意味着用户不需要担心需要建立额外的抽象层让业务扩展到多个区域。
这里框架主要介绍服务发现和健康检查。
本地部署
下载相应版本consul
软件包,下载地址:https://www.consul.io/downloads.html,以下内容为windows讲解。承接上面的网关项目,整合Consul。
安装

解压完成,只有一个consul.exe,别慌,确实就只有一个文件。

管理员运行CMD ,CD 到consul 文件夹,直接运行 consul
命令,出现如下页面,则配置成功

添加服务配置
添加服务注册配置文件,在consul.exe同级目录下添加config
(名字可自取)文件夹,在config
文件夹中创建service.json(名字可自取)文件,用来注册服务和服务检查配置。如图所示:


配置service.json,代码如下:
{"services": [{"id": "API1",//唯一标识"name": "API1",//服务名称"tags": [ "API1" ],//服务标签"address": "172.0.0.1",//我随便配的IP,注意配置服务的真实IP和port"port": 80},{"id": "API2","name": "API2","tags": [ "API2" ],"address": "172.0.0.1",//我随便配的IP,注意配置服务的真实IP和port"port": 81}]} |
这样服务注册配置就OK了,接下来使用配置启动Consul,下面是几种形式启动consul,详细的命令参数可以移步到官方文档查看。
- 以开发模式启动 consul agent -dev -config-dir=./config
- 以服务方式启动 consul agent -server -bootstrap-expect 2 -data-dir
./tmp/consul -node=n1 -bind=192.168.109.241 -ui-dir ./dist -dc=dc1 - 以客户端方式启动 consul agent -data-dir ./tmp/consul -ui-dir ./dist
-bind=192.168.109.204 -dc=dc1
开发模式启动如下,在输出窗口中可以看到consul ui HTTP 启动路径为
127.0.0.1:8500 ,注册了API 和 API2 两个服务。

浏览器访问 127.0.0.1:8500 ,可以看到Consul UI页面

添加检查配置
需要查看服务的运行状态是否健康,就需要配置检查。具体检查配置移步官方文档。
检查定义有一下几种:
脚本检查:
{"check": {"id": "mem-util","name": "Memory utilization","args": ["/usr/local/bin/check_mem.py", "-limit", "256MB"],"interval": "10s","timeout": "1s"}} |
HTTP检查:
{"check": {"id": "api","name": "HTTP API on port 5000","http": "https://localhost:5000/health","tls_skip_verify": false,"method": "POST","header": {"x-foo":["bar", "baz"]},"interval": "10s","timeout": "1s"}} |
TCP检查:
{"check": {"id": "ssh","name": "SSH TCP on port 22","tcp": "localhost:22","interval": "10s","timeout": "1s"}} |
TTL检查:
{"check": {"id": "web-app","name": "Web App Status","notes": "Web app does a curl internally every 10 seconds","ttl": "30s"}} |
Docker检查:
{"check": {"id": "mem-util","name": "Memory utilization","docker_container_id": "f972c95ebf0e","shell": "/bin/bash","args": ["/usr/local/bin/check_mem.py"],"interval": "10s"}} |
gRPC检查:
{"check": {"id": "mem-util","name": "Service health status","grpc": "127.0.0.1:12345","grpc_use_tls": true,"interval": "10s"}} |
本地服务的别名检查:
{"check": {"id": "web-alias","alias_service": "web"}} |
我这边简单使用了TCP检查, 继续修改service.json文件,检测 tcp为
“172.0.0.1:80”的服务,修改为如下代码:
{"services": [{"id": "API1",//唯一标识"name": "API1",//服务名称"tags": [ "API1" ],//服务标签"address": "172.0.0.1",//我随便配的IP,注意配置服务的真实IP和port"port": 80},{"id": "API2","name": "API2","tags": [ "API2" ],"address": "172.0.0.1",//我随便配的IP,注意配置服务的真实IP和port"port": 81}],"check": [{"id": "APICheck","name": "APICheck","tcp": "119.29.50.115:80","interval": "10s","timeout": "1s"}]} |
check
定义为service同级节点则是为所有服务使用同一个检查规则,定义在services节点内则是具体为某一个服务定义检查规则
启动如下图,很明显多了一个名叫APICheck 的代理。

启动页面也有不同,checks 为2了,说明check
配置成功了。点击某个服务进去可以查看详细信息


docker部署(腾讯云)
前面说的是本地部署,现在说一下基于腾讯云docker
部署。首先拉去docker镜像创建服务。
Docker Hub(镜像文件库) 里包含Consul
的镜像文件,只需要在Docker创建服务使用镜像就可以了。


设置容器端口为8500,服务端口为80,通过Ingress进行路由转发。

访问服务外网,结果如下,配置成功

配置Ocelot 网关
首先修改前面的网关项目ApiGateway Startup.cs 文件里的 ConfigureServices方法,添加
.AddConsul()方法代码如下:
public void ConfigureServices(IServiceCollection services){//Identity Server Bearer TokensAction<IdentityServerAuthenticationOptions> isaOpt = option =>{option.Authority = Configuration["IdentityService:Uri"];option.RequireHttpsMetadata = Convert.ToBoolean(Configuration["IdentityService:UseHttps"]);option.ApiName = Configuration["IdentityService:ApiName"];option.ApiSecret = Configuration["IdentityService:ApiSecret"];option.SupportedTokens = SupportedTokens.Both;};services.AddAuthentication().AddIdentityServerAuthentication(Configuration["IdentityService:DefaultScheme"], isaOpt);services.AddOcelot(Configuration).AddConsul()//启用缓存.AddCacheManager(x => { x.WithDictionaryHandle(); }).AddPolly().AddAdministration("/administration", isaOpt);services.AddMvc().SetCompatibilityVersion(CompatibilityVersion.Version_2_2); ;services.AddSwaggerGen(options =>{options.SwaggerDoc(Configuration["Swagger:Name"], new Info { Title = Configuration["Swagger:Title"], Version = Configuration["Swagger:Version"] });});} |
接下来配置ocelot.json 文件,在GlobalConfiguration
节点下添加服务发现提供程序配置
//服务发现提供程序"ServiceDiscoveryProvider": {"Host": "111.230.118.59","Port": 80,"Type": "PollConsul","PollingInterval": 1000} |
项目上游配置添加ServiceName 和 UseServiceDiscovery属性,代码如下:
{"UpstreamPathTemplate": "/gateway/2/{url}","UpstreamHttpMethod": [ "Get", "Post", "Delete", "Put" ],"DownstreamPathTemplate": "/api2/{url}","DownstreamScheme": "http","ServiceName": "API2","UseServiceDiscovery": true,"LoadBalancer": "RoundRobin","DownstreamHostAndPorts": [{"Host": "111.230.160.62","Port": 80},{"Host": "localhost","Port": 13002}],"QoSOptions": {"ExceptionsAllowedBeforeBreaking": 3,"DurationOfBreak": 10,"TimeoutValue": 5000}"AuthenticationOptions": {"AuthenticationProviderKey": "IdentityBearer","AllowedScopes": []}} |
启动OcelotGateway,API001,API002项目,通过http://localhost:13000/gateway/1/values,和http://localhost:13000/gateway/2/values访问;因为Ocelot配置了Consul的服务治理,所以可以通过配置的服务名称和GlobalConfiguratin的Consul
http
api接口查找到对应服务的地址,进行访问,这些都是Ocelot帮我们做,这点很容易证明,可以修改Consul配置文件中服务的address为错误IP,就会发现通过13000端口访问不成功。
集成消息队列——CAP
简介
CAP 是一个基于 .NET Standard 的 C#
库,它是一种处理分布式事务的解决方案,同样具有 EventBus
的功能,它具有轻量级、易使用、高性能等特点。
微服务系统的过程中,通常需要使用事件来对各个服务进行集成,在这过程中简单的使用消息队列并不能保证数据的最终一致性,
CAP
采用的是和当前数据库集成的本地消息表的方案来解决在分布式系统互相调用的各个环节可能出现的异常,它能够保证任何情况下事件消息都是不会丢失的。
Github 地址:https://github.com/dotnetcore/CAP
支持消息队列:
- Kafka
- RabbitMQ
- AzureServiceBus
数据库存储:
- Sql Server
- MySql
- PostgreSQL
- MongoDB
环境准备
我们以RabbitMQ 与Sql Server来讲解。
首先我们需要安装RabbitMQ 服务,很简单,官方下载最新的安装包。

但是在安装RabbitMQ
时会提示安装Erlang,Erlang是一种通用的面向并发的编程语言,Erlang来编写分布式应用要简单的多。RabbitMQ是用Erlang实现的一个高并发高可靠AMQP消息队列服务器。
官方下载对应的Erlang 安装程序,建议RabbitMQ和Erlang都安装最新版本

安装完成之后,会多了以下几个程序,安装包帮我生成了start、remove、stop等命令程序。我们拿来直接用就可以了,当然你也可以配置环境变量,使用命令启动。先运行start
程序运行起来。


.Net Core 集成 CAP
Nuget 包下载:
- DotNetCore.CAP 核心包
- DotNetCore.CAP.RabbitMQ CAP RabbitMQ 包
- DotNetCore.CAP.SqlServer CAP Sql Server 扩展包
继续修改测试项目Service.Test1项目,使用CodeFirst生成数据库:

新建测试类Test:
public class Test{public int Id { get; set; }public string Name { get; set; }public string Title { get; set; }} |
添加AppDbContext 数据库上下文 文件,代码如下:
public class AppDbContext:DbContext{public AppDbContext(DbContextOptions<AppDbContext> options)base(options){}public virtual DbSet<Test> Tests { get; set; }protected override void OnModelCreating(ModelBuilder modelBuilder){base.OnModelCreating(modelBuilder);}} |
配置数据库连接字符串:
"ConnectionStrings": {"Default": "Server=(localdb)\\MSSQLLocalDB; Database=Service_test1; Trusted_Connection=True;"} |
Program.cs 文件配置读取appsettings.json文件。
public static IWebHostBuilder CreateWebHostBuilder(string[] args) =>WebHost.CreateDefaultBuilder(args).ConfigureAppConfiguration((hostingContext, config) =>{config.AddJsonFile("appsettings.json", optional: true, reloadOnChange: true).AddEnvironmentVariables();}).UseStartup<Startup>(); |
Startup.cs 文件ConfigureServices添加数据访问配置
services.AddDbContext<AppDbContext>(options =>options.UseSqlServer(Configuration.GetConnectionString("Default")));services.AddMvc().SetCompatibilityVersion(CompatibilityVersion.Version_2_2); |
到这里正常的CodeFirst
项目配置已经完成了,直接运行数据迁移命令就可以创建数据库了。
但是我这里需要集成CAP,肯定这样是不行的。需要进行CAP的配置,继续在ConfigureServices
添加如下代码:
services.AddDbContext<AppDbContext>(options =>options.UseSqlServer(Configuration.GetConnectionString("Default")));services.AddMvc().SetCompatibilityVersion(CompatibilityVersion.Version_2_2);Action<CapOptions> capOptions = option =>{option.UseEntityFramework<AppDbContext>();option.UseSqlServer(Configuration.GetConnectionString("Default"));option.UseRabbitMQ("localhost");//UseRabbitMQ 服务器地址配置,支持配置IP地址和密码option.UseDashboard();//CAP2.X版本以后官方提供了Dashboard页面访问。if (Convert.ToBoolean(Configuration["Cap:UseConsul"])){option.UseDiscovery(discovery =>{discovery.DiscoveryServerHostName = Configuration["Cap:DiscoveryServerHostName"];discovery.DiscoveryServerPort = Convert.ToInt32(Configuration["Cap:DiscoveryServerPort"]);discovery.CurrentNodeHostName = Configuration["Cap:CurrentNodeHostName"];discovery.CurrentNodePort = Convert.ToInt32(Configuration["Cap:CurrentNodePort"]);discovery.NodeId = Convert.ToInt32(Configuration["Cap:NodeId"]);discovery.NodeName = Configuration["Cap:NodeName"];discovery.MatchPath = Configuration["Cap:MatchPath"];});}};services.AddCap(capOptions); |
RabbitMQ 也是支持配置options
option.UseRabbitMQ(cfg =>{cfg.HostName = Configuration["MQ:Host"];cfg.VirtualHost = Configuration["MQ:VirtualHost"];cfg.Port = Convert.ToInt32(Configuration["MQ:Port"]);cfg.UserName = Configuration["MQ:UserName"];cfg.Password = Configuration["MQ:Password"];}); |
CAP 内置集成了Consul
服务注册,注册的同时默认携带了简况检查,但是只支持HTTP检查,所以我们需要在接口中定义health
路径提供给检查访问。

在appsetting.json 文件中添加相应的配置节点:
"Cap": {"UseConsul": true,//是否开启"CurrentNodeHostName": "localhost",//当前节点IP"CurrentNodePort": 13001,//当前节点Port"DiscoveryServerHostName": "127.0.0.1",//发现服务主机IP"DiscoveryServerPort": 8500,//发现服务主机Port"NodeId": 1,//节点标识"NodeName": "CAP_API1",//节点名称"MatchPath": "/api1/TestOnes"//健康检查根路劲 最终的路径为api1/TestOnes/health} |
|
|
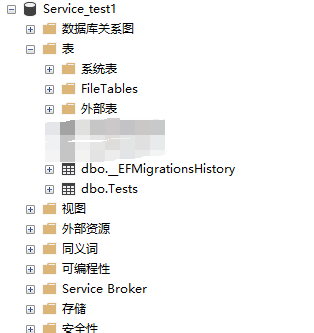
进行数据迁移创建数据库,表结构如下:
Cap 发布
接下来就是去使用Cap 发布了,修改Controller代码
public class TestOnesController : ControllerBase{private readonly ICapPublisher _capBus;public TestOnesController(ICapPublisher capPublisher){_capBus = capPublisher;}[HttpGet]public ActionResult<IEnumerable<string>> Get(){_capBus.Publish("services.test1.show.time", DateTime.Now);return new string[] { "TestOnes_value1", "TestOnes_value2" };}//定义路由为health提供给服务检查使用[HttpGet][Route("health")]public ActionResult<string> Health(){return "Health!!!!!";}} |
因为启用的Consul ,所以要按照前面说过的consul 教程来启动consul

访问http://127.0.0.1:8500,页面如下

接下来启动项目,还是老样子直接看到如下页面。

但是我们集成了CAP,所以可以访问呢http://localhost:13001/cap 访问cap
Dashboard页面查看详细

这里一般启动的话发出的时不存在,也是因为前面有测试过,数据库里存在了。我们调用api1/TestOnes方法
发出消息。

请求成功,在来看看数据库。数据库多了两张表,以张是接收数据表,一张是发布数据表。

再来看看里面的数据,也是就是发布的消息,因为之前请求过四次,我这边就多了四条数据。

cap Dashboard也能看到一些统计和数据列表


再来看看consul 页面,一个CAP_API1 的服务已经被注册进来了

如果前面 MatchPath
路径没有配置对的话,就会出现下面的情况,导致无法通过健康检查。


Cap 订阅(接收)
使用API订阅消息,为了方便,使用同一个项目的另一个接口实现订阅
[Route("api1/[controller]")][ApiController]public class ValuesController : ControllerBase{[HttpGet("Received")][CapSubscribe("services.test1.show.time")]//配置发布时填写的Namepublic ActionResult<string> GetReceivedMessage(DateTime datetime){Console.WriteLine("订阅:"+datetime);return "订阅:" + datetime;}} |
这样就OK了,但是如果你时在不同的项目,还是需要像前面一样配置CAP。
启动项目请求一次CAP发布接口,查看http://localhost:13001/cap
可以看到接收的里面有1条数据

订阅列表中也有了一条数据

在来看数据库也添加一条数据

最后——附上总体代码
整个实践代码已托管到Github,具体如下所示:https://github.com/magicodes/Magicodes.Simple.Services

 浙公网安备 33010602011771号