# 导入相关包
import cv2
import numpy
import matplotlib.pyplot as plt
%matplotlib inline
plt.rcParams['figure.dpi'] = 200
思路:
    1、读取图片
    2、将图片转换为 RGB格式
    3、构造Haar检测器
    4、检测人脸,并调整参数(需要传入灰度图)
    5、绘制人脸
# 公共对象

# 颜色
color = (0,255,0)

# 线宽
thinkness = 5

# 读取图片
img = cv2.imread('./images/faces1.jpg')

# 将 BGR 转为  RGB
img_fixed = cv2.cvtColor(img,cv2.COLOR_BGR2RGB)

# 将img转为灰度图
img_gray = cv2.cvtColor(img_fixed,cv2.COLOR_BGR2GRAY)
一、人脸检测器之 Haar
依赖包:opencv(cv2)

   conda install -c conda-forge opencv-python

   pip install opencv-python

优点:速度快,效率高,部署简单。

缺点:只能识别正脸,准确率低
# 复制一份图片,不污染原图
img_fixed_copy = img_fixed.copy()

# 构造Haar检测器
face_detector = cv2.CascadeClassifier('./cascades/haarcascade_frontalface_default.xml')

# 检测结果
'''
scaleFactor : 调整人脸尺寸,默认指1.1 scaleFactor = 1.2
minSize 最小尺寸  minSize = (45,45)
maxSize 最大尺寸 maxSize = (80,80)
'''
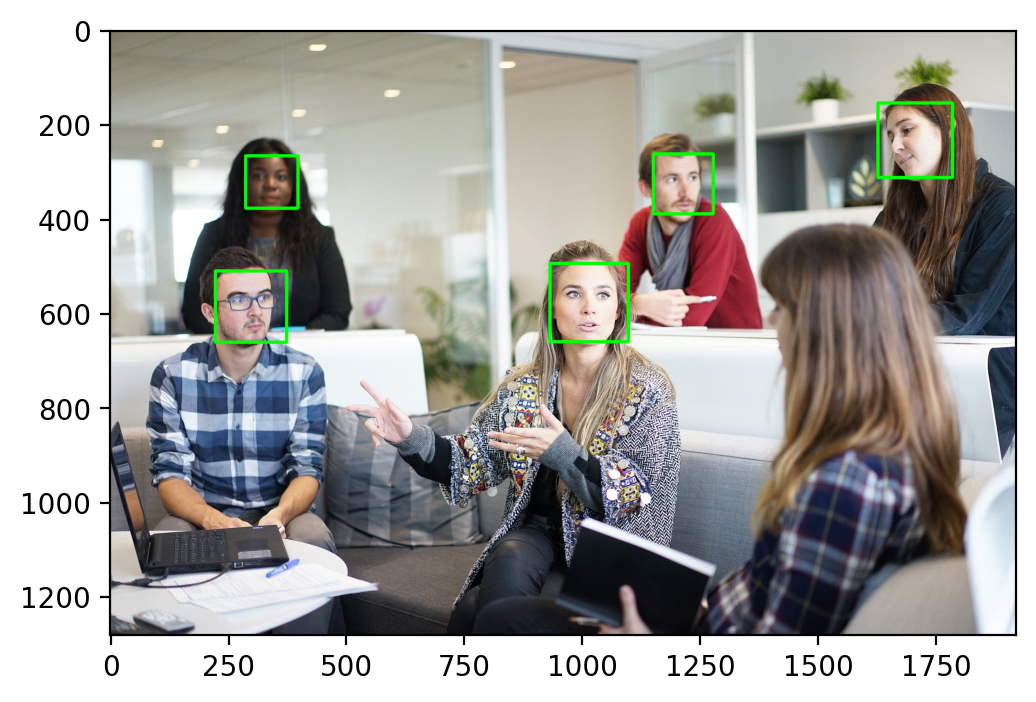
detections = face_detector.detectMultiScale(img_gray,scaleFactor=1.3)

# 绘制检测结果
for (x,y,w,h) in detections:
    cv2.rectangle(img_fixed_copy,(x,y),(x+w,y+h),color,thinkness)
plt.imshow(img_fixed_copy)
<matplotlib.image.AxesImage at 0x1edb98d8af0>

二、人脸识别之 Hog
依赖包:dlib

    conda install -c conda-forge dlib

    pip install dlib

优点:速度快,效率高,部署简单。

缺点:只能识别正脸,准确率略高于 Haar,速度低于 Haar
import dlib
# 复制一份图片,不污染原图
img_fixed_copy = img_fixed.copy()

# 构造HOG人脸检测器
hog_face_detetor = dlib.get_frontal_face_detector()

# 人脸检测,此处不需要传递灰度图
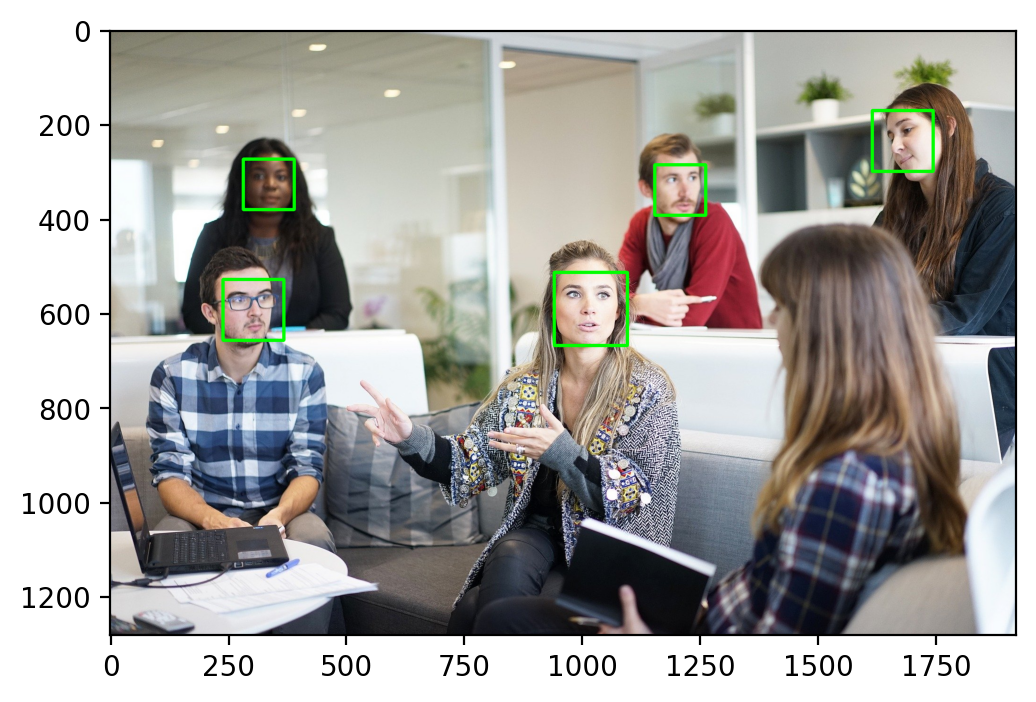
detections  = hog_face_detetor(img_fixed_copy,1)

# 绘制检测结果
for face in detections:
    x = face.left()
    y = face.top()
    r = face.right()
    b = face.bottom()
    cv2.rectangle(img_fixed_copy,(x,y),(r,b),color,thinkness)
plt.imshow(img_fixed_copy)
<matplotlib.image.AxesImage at 0x1edba788dc0>

三、人脸识别之 CNN
依赖包:dlib

    conda install -c conda-forge dlib

    pip install dlib

优点:准确率高

缺点:速度慢,计算量大
# 复制一份图片,不污染原图
img_fixed_copy = img_fixed.copy()

# 构造CNN人脸检测器
cnn_face_detector = dlib.cnn_face_detection_model_v1('./weights/mmod_human_face_detector.dat')

# 检测人脸
detections = cnn_face_detector(img_fixed_copy,1)

# 解析矩形结果
for face in detections:
    x = face.rect.left()
    y = face.rect.top()
    r = face.rect.right()
    b = face.rect.bottom()
    #置信度
    c = face.confidence
    print(c)

    cv2.rectangle(img_fixed_copy,(x,y),(r,b),color,thinkness)
plt.imshow(img_fixed_copy)
四、人脸识别之 MTCNN
依赖包:dlib

    conda install -c conda-forge mtcnn

    pip install mtcnn

优点:准确率高

缺点:速度慢,计算量大,依赖 tensorflow
# 导入MTCNN
from mtcnn.mtcnn import MTCNN
# 复制一份图片,不污染原图
img_fixed_copy = img_fixed.copy()

# 加载模型
face_detetor = MTCNN()

# 检测人脸
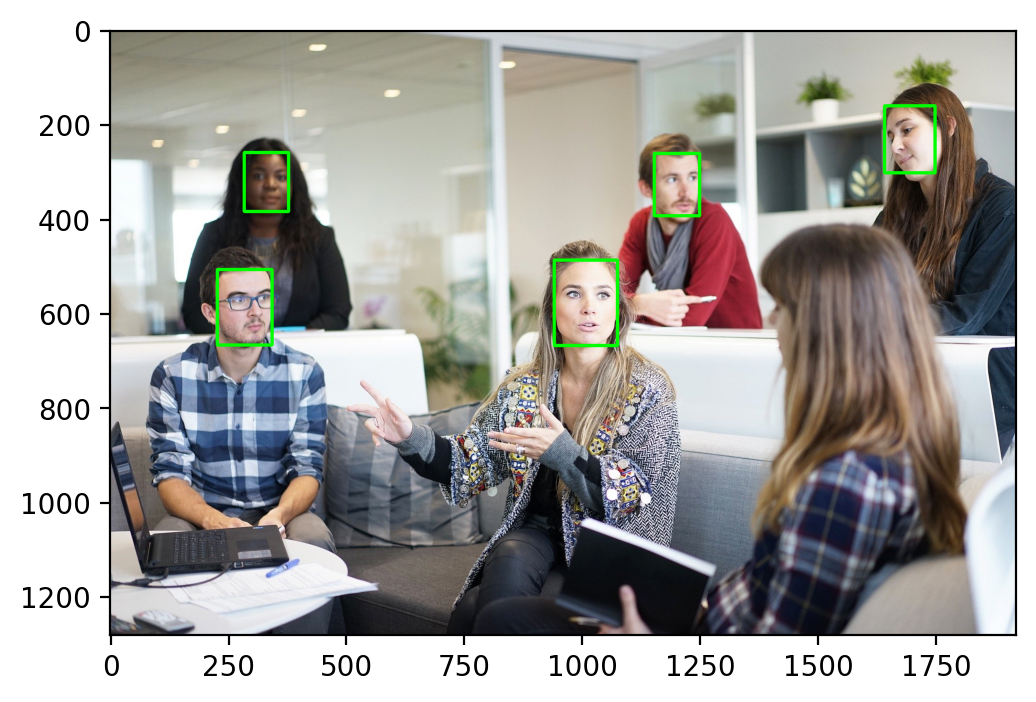
detections = face_detetor.detect_faces(img_fixed_copy)
for face in detections:
    (x, y, w, h) = face['box']
    cv2.rectangle(img_fixed_copy, (x, y), (x + w, y + h), (0,255,0), 5)
plt.imshow(img_fixed_copy)
1/1 [==============================] - 0s 114ms/step
1/1 [==============================] - 0s 132ms/step
1/1 [==============================] - 0s 35ms/step
1/1 [==============================] - 0s 30ms/step
1/1 [==============================] - 0s 31ms/step
1/1 [==============================] - 0s 27ms/step
1/1 [==============================] - 0s 26ms/step
1/1 [==============================] - 0s 26ms/step
1/1 [==============================] - 0s 27ms/step
1/1 [==============================] - 0s 26ms/step
1/1 [==============================] - 0s 26ms/step
1/1 [==============================] - 0s 29ms/step
1/1 [==============================] - 0s 27ms/step
18/18 [==============================] - 0s 5ms/step
2/2 [==============================] - 0s 12ms/step


<matplotlib.image.AxesImage at 0x1edc8068700>


 浙公网安备 33010602011771号