若依界面修改
********* 专栏略长 ==== 爆肝万字 ==== 细节狂魔 ==== 请准备好一键三连 *********
运行成功后: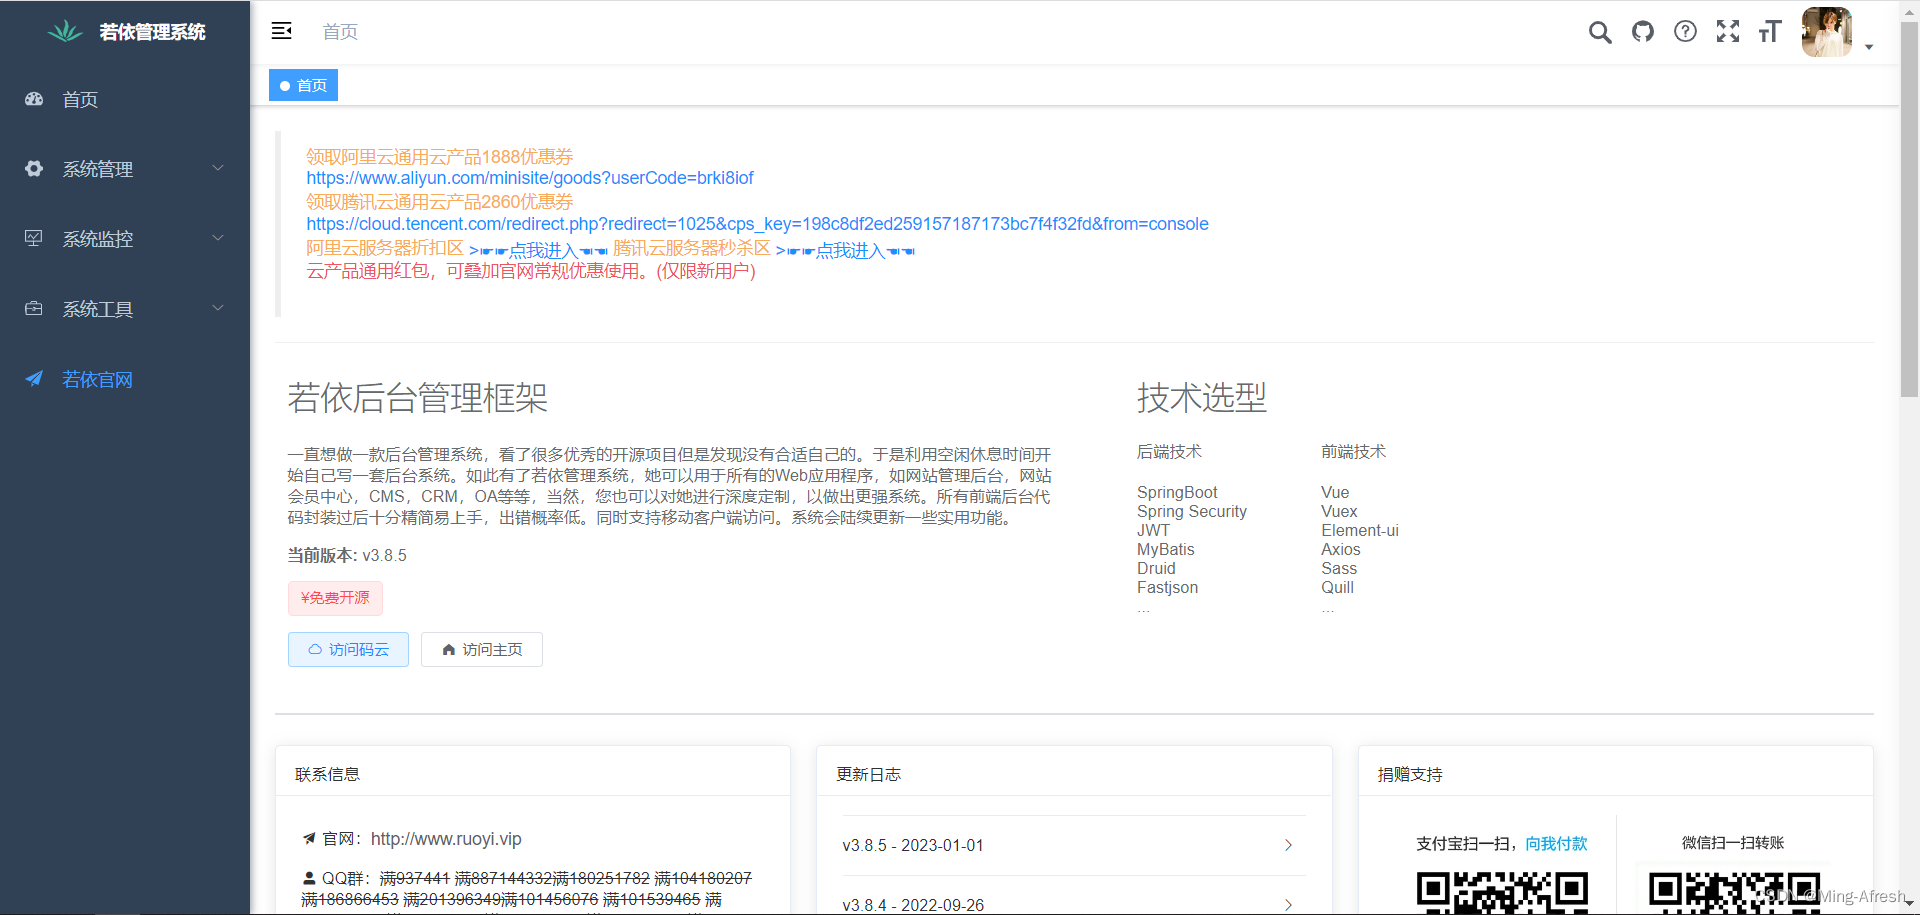
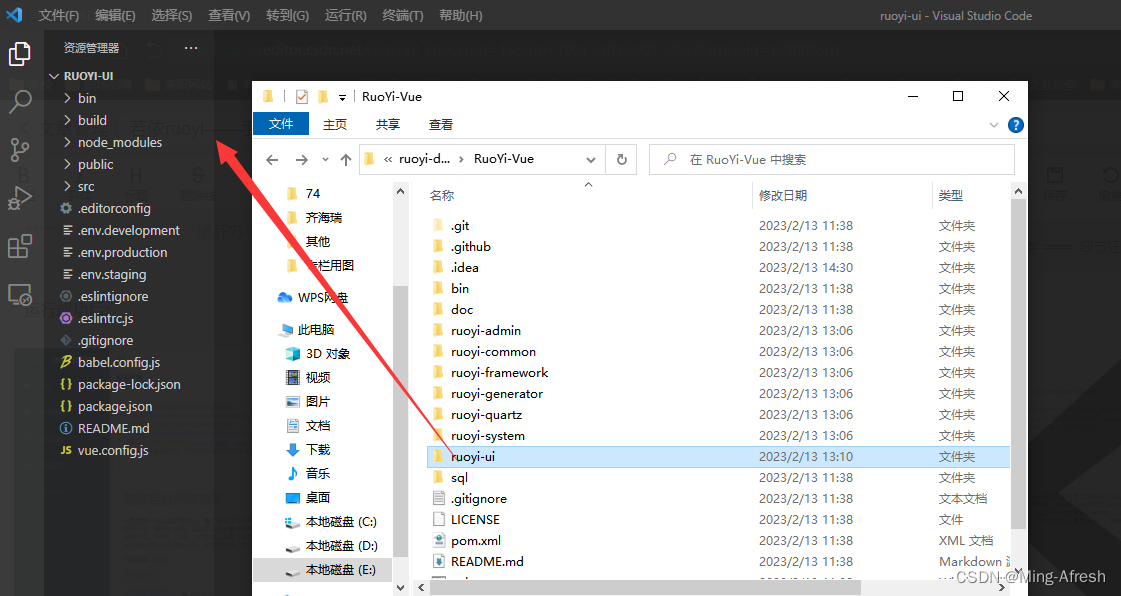
idea后台正常先挂着 我习惯用VScode操作 当然如果有两台机子 一个挂后台一个改前端就更好了
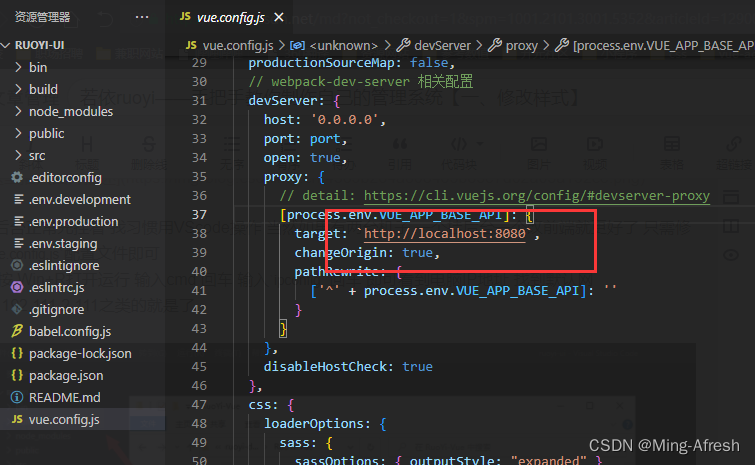
只需修改vue.config.js配置文件即可
eg:按Win+R打开运行 输入cmd 回车 输入ipconfig回车 即可看到电脑IP地址
找到IPv4 地址:192.111.0.111之类的就是了 替换掉本地运行的http://localhost:8080
或者一台电脑运行前后端 那就无需VScode了 一个idea运行足以
当然 若依也会替我们想到这些 所以有更好的方法 只运行前端无需后端(仅适用于修改样式) 把http://localhost:8080改为http://vue.ruoyi.vip/prod-api/
重启项目npm run dev
一ヽ(✿゚▽゚)ノ 清理一下ヽ(✿゚▽゚)ノ
①.首页(先删改掉一会再处理 源码字太多 看着头疼)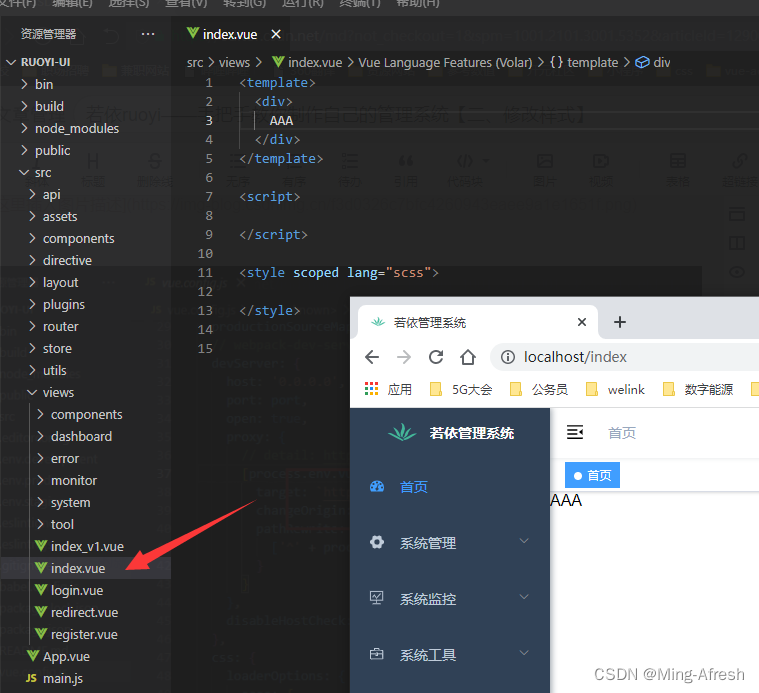
②.若依官网导航栏隐藏下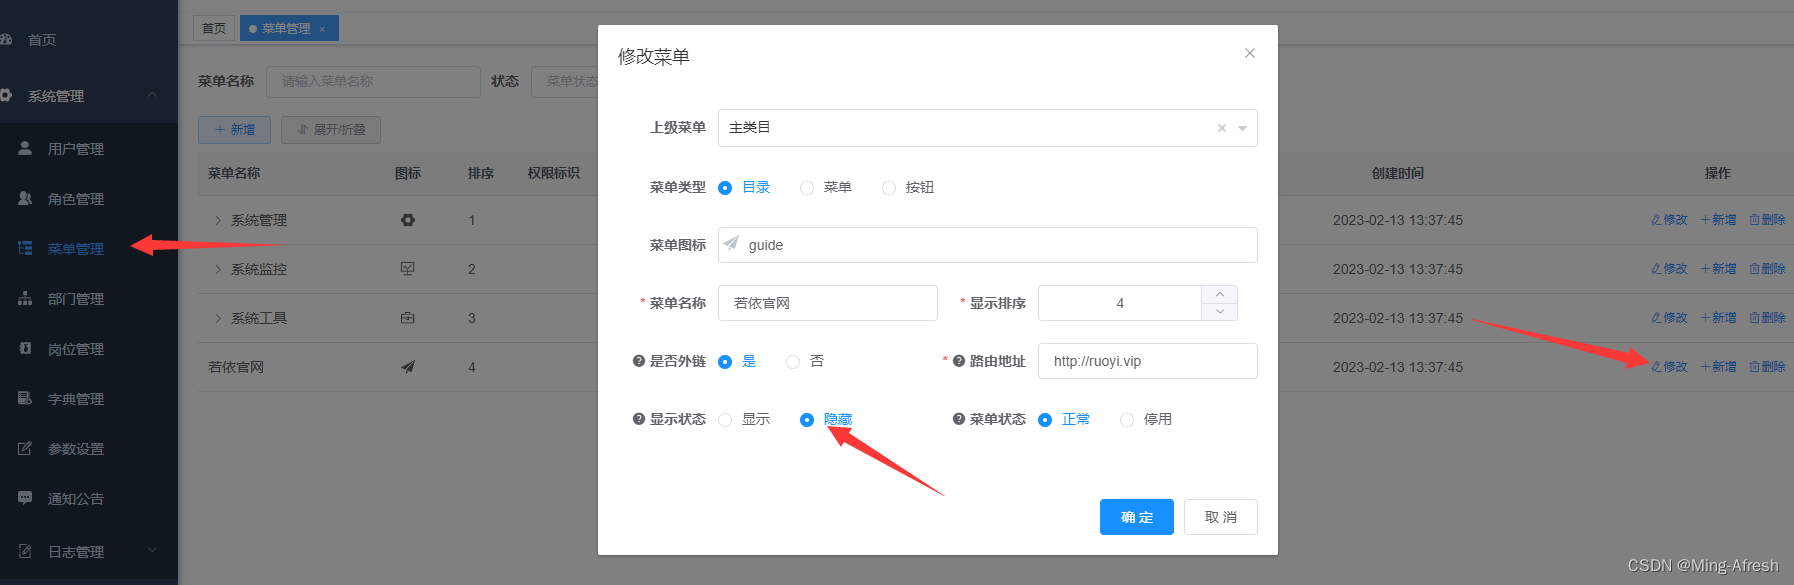
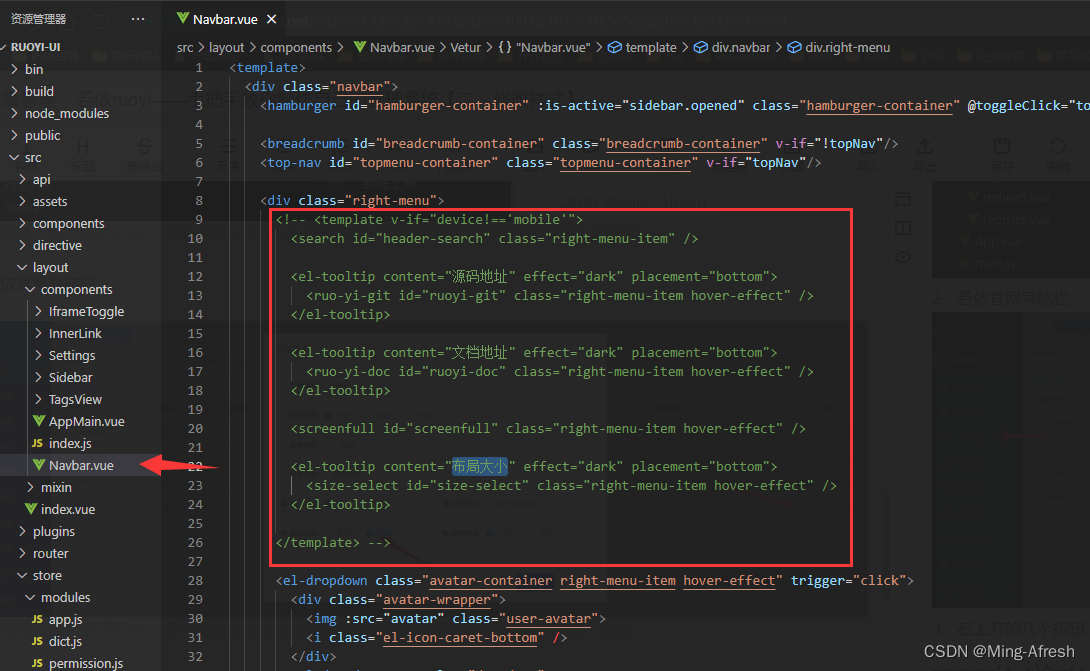
③.右上方的几个按钮工具栏 全局搜 布局大小 找到 Navbar.vue 按需注释即可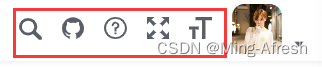
一一一一( •̀ .̫ •́ )✧一( •̀ .̫ •́ )✧一正片开始一( •̀ .̫ •́ )✧一( •̀ .̫ •́ )✧一一一一
1、换个背景和头像:
找到图片存放位置E:\ruoyi-demo\RuoYi-Vue\ruoyi-ui\src\assets\images 注意图片格式 .jpg
2、修改网页标题:
五处全部替换 重启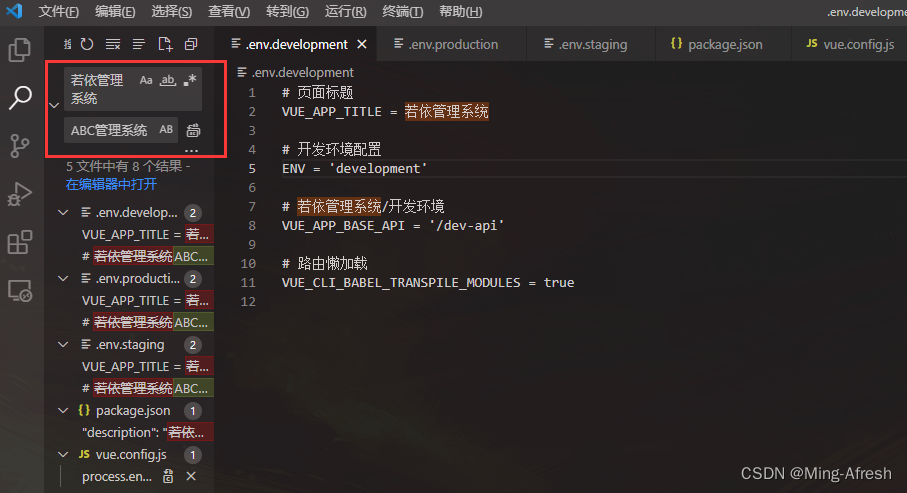
捎带手改下登录页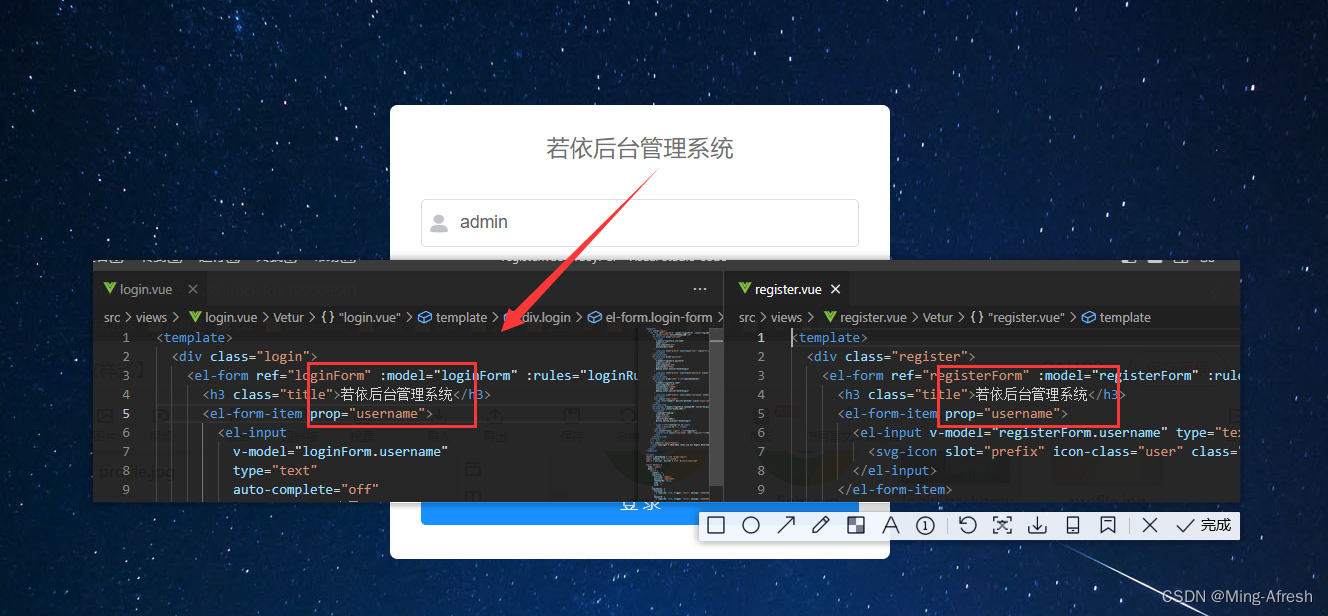
3、修改侧面导航栏样式:
搜索关键字logoImg
更改文字title: '若依管理系统',
不要图标logo: logoImg 改成 logo: false
更换图标 找到RuoYi-Vue\ruoyi-ui\src\assets\logo 方法同上
修改颜色 搜索关键字$base-logo-title-color 注释我写完了 自定义修改 看个人喜好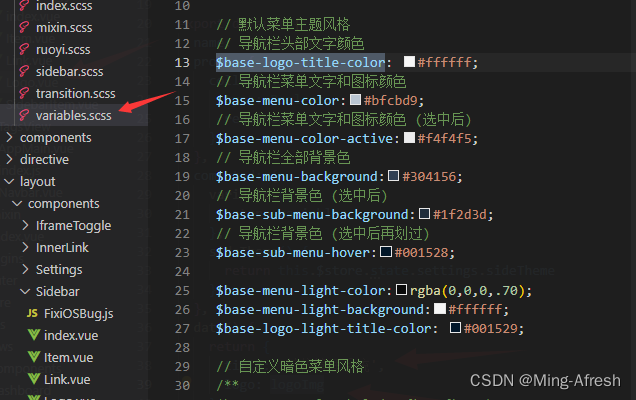
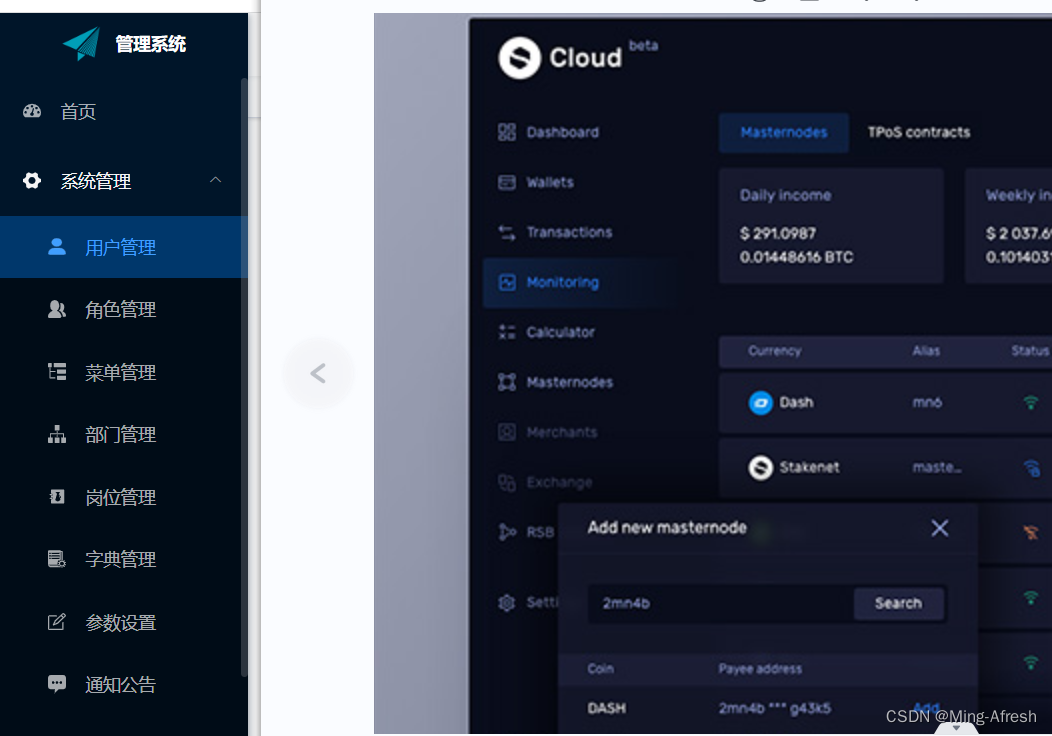
我按照右侧UI简单修改的样式:($base-sidebar-width 为导航栏宽度)
$base-menu-color:hsla(0,0%,100%,.65);
$base-menu-color-active:#f4f4f5;
$base-menu-background:#001529;
$base-logo-title-color: #ffffff;
$base-menu-light-color:rgba(0,0,0,.70);
$base-menu-light-background:#ffffff;
$base-logo-light-title-color: #001529;
$base-sub-menu-background:#000c17;
$base-sub-menu-hover:#004688b0;
$base-sidebar-width: 200px;- 1
- 2
- 3
- 4
- 5
- 6
- 7
- 8
- 9
- 10
4、修改顶部导航栏标签页及面包屑样式:
原标签页及面包屑样式: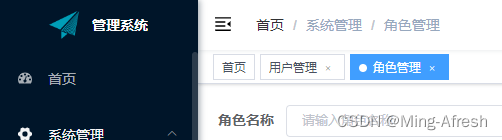
关闭标签页:全局搜 tagsView 找到 settings.js中的tagsView 改为 false 即可(还有导航栏及其他开关也可更改)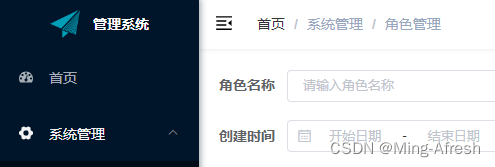
修改标签页:按照UI改
修改面包屑:具体看UI的设计不过可以基于Element写
自定义添加可在 Navbar.vue 中修改添加变换 <breadcrumb id="breadcrumb-container" class="breadcrumb-container" /> 以及它的 CSS 比如我把它们的父级元素 .navbar 换个背景色 当然也可以把它注释掉采用标签页的方式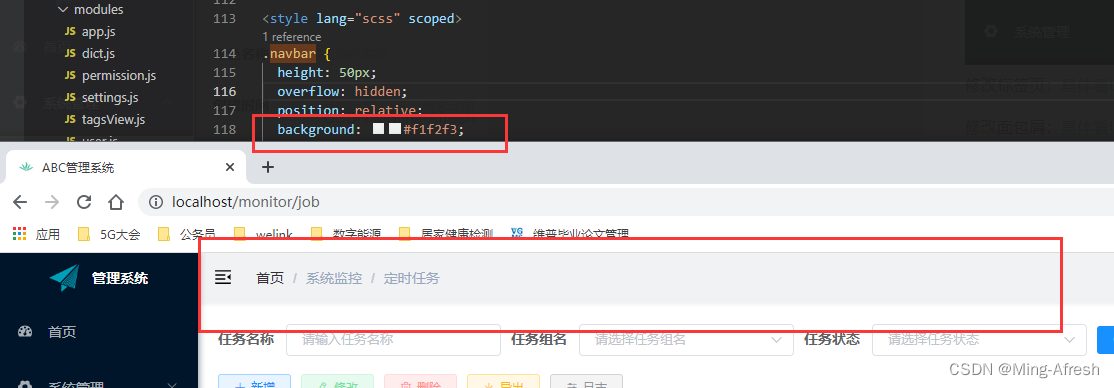
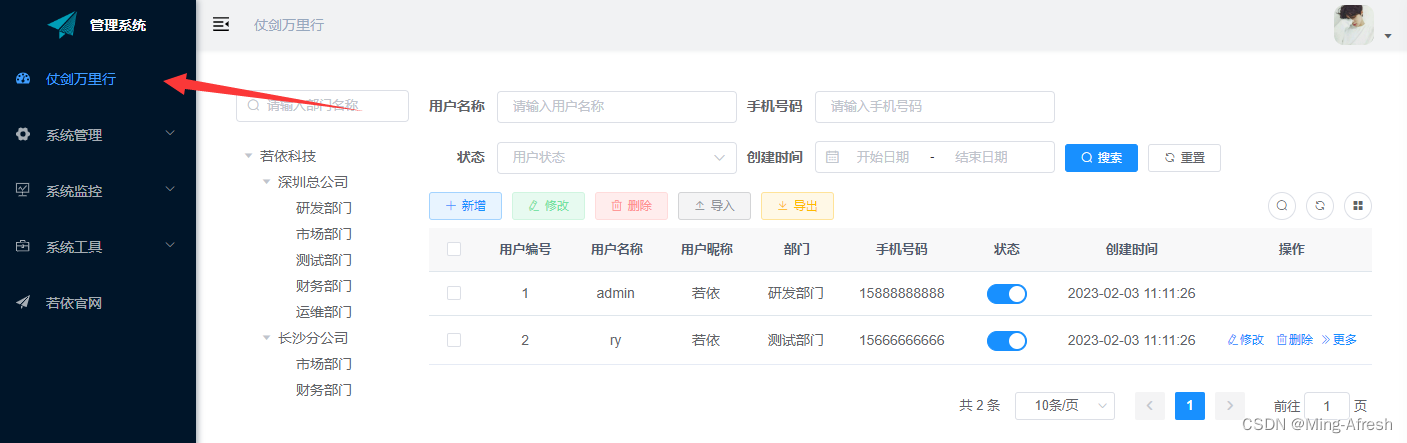
5、导航分页:
①.修改首页文字
全局搜 首页 找到 RuoYi-Vue\ruoyi-ui\src\router\index.js 和 RuoYi-Vue\ruoyi-ui\src\components\Breadcrumb\index.vue 对应关系如下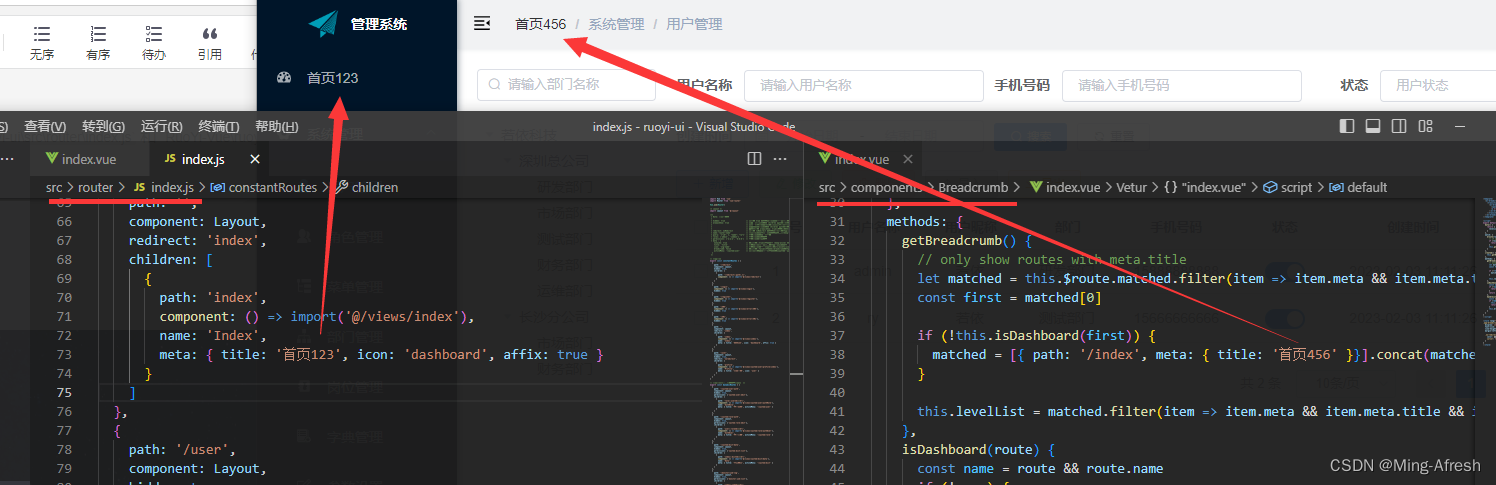
②.首页显示内容
若依源码首页显示的是链接和文字 我们文章上面已经给他先换掉成AAA了(字多的我看着迷糊)现在我们来改首页
一般需求 比如首页大屏可视化 或 首页即菜单分页 都可以实现的哈
Ⅰ.单页面首页
直接操作 RuoYi-Vue\ruoyi-ui\src\views\index.vue 可以插入Demo试一试 推荐两个我自己写的静态页面哈
Ⅱ.Vue引入子页
当我们没有明确的首页内容时就看菜单 比如我有两个菜单 A菜单的重要性略大 我把A菜单排名放第一位 A菜单下有a、b两个子页 我登陆进来直接就想跳转到A-a子页面怎么做?
还是 RuoYi-Vue\ruoyi-ui\src\views\index.vue 页面 替换下方代码 我这里用 系统管理一用户管理 views/system/user/index.vue (@/views/system/user/index.vue) 举例子 效果如下(其他菜单或分页同理):
<template>
  <div class="app-container">
    <Table></Table>
  </div>
</template>
<script>

import Table from "@/views/system/user/index.vue"

export default {

components: { Table },

}

</script>
- 1
- 2
- 3
- 4
- 5
- 6
- 7
- 8
- 9
- 10
- 11
- 12
6、修改登录页: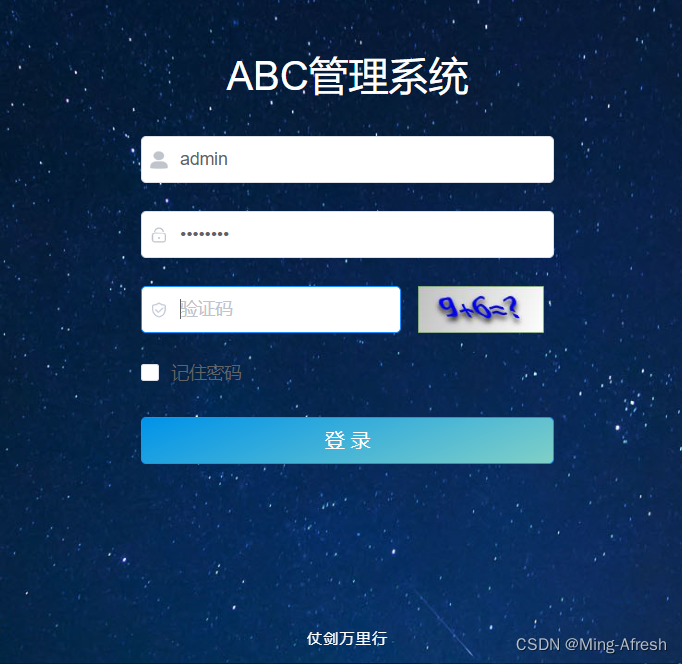
<template> <div class="login"> <el-form ref="loginForm" :model="loginForm" :rules="loginRules" class="login-form"> <h3 class="title">ABC管理系统</h3> <el-form-item prop="username"> <el-input v-model="loginForm.username" type="text" auto-complete="off" placeholder="账号" > <svg-icon slot="prefix" icon-class="user" class="el-input__icon input-icon" /> </el-input> </el-form-item> <el-form-item prop="password"> <el-input v-model="loginForm.password" type="password" auto-complete="off" placeholder="密码" @keyup.enter.native="handleLogin" > <svg-icon slot="prefix" icon-class="password" class="el-input__icon input-icon" /> </el-input> </el-form-item> <el-form-item prop="code" v-if="captchaEnabled"> <el-input v-model="loginForm.code" auto-complete="off" placeholder="验证码" style="width: 63%" @keyup.enter.native="handleLogin" > <svg-icon slot="prefix" icon-class="validCode" class="el-input__icon input-icon" /> </el-input> <div class="login-code"> <img :src="codeUrl" @click="getCode" class="login-code-img"/> </div> </el-form-item> <el-checkbox v-model="loginForm.rememberMe" style="margin:0px 0px 25px 0px;">记住密码</el-checkbox> <el-form-item style="width:100%;"> <el-button :loading="loading" size="medium" type="primary" style="width:100%;" @click.native.prevent="handleLogin" class="login-btn" > <span v-if="!loading">登 录</span> <span v-else>登 录 中...</span> </el-button> <div style="float: right;" v-if="register"> <router-link class="link-type" :to="'/register'">立即注册</router-link> </div> </el-form-item> </el-form> <!-- 底部 --> <div class="el-login-footer"> <span>仗剑万里行</span> </div> </div> </template><script>
import { getCodeImg } from "@/api/login";
import Cookies from "js-cookie";
import { encrypt, decrypt } from '@/utils/jsencrypt'export default {
name: "Login",
data() {
return {
codeUrl: "",
loginForm: {
username: "admin",
password: "admin123",
rememberMe: false,
code: "",
uuid: ""
},
loginRules: {
username: [
{ required: true, trigger: "blur", message: "请输入您的账号" }
],
password: [
{ required: true, trigger: "blur", message: "请输入您的密码" }
],
code: [{ required: true, trigger: "change", message: "请输入验证码" }]
},
loading: false,
// 验证码开关
captchaEnabled: true,
// 注册开关
register: false,
redirect: undefined
};
},
watch: {
$route: {
handler: function(route) {
this.redirect = route.query && route.query.redirect;
},
immediate: true
}
},
created() {
this.getCode();
this.getCookie();
},
methods: {
getCode() {
getCodeImg().then(res => {
this.captchaEnabled = res.captchaEnabled === undefined ? true : res.captchaEnabled;
if (this.captchaEnabled) {
this.codeUrl = "data:image/gif;base64," + res.img;
this.loginForm.uuid = res.uuid;
}
});
},
getCookie() {
const username = Cookies.get("username");
const password = Cookies.get("password");
const rememberMe = Cookies.get('rememberMe')
this.loginForm = {
username: username === undefined ? this.loginForm.username : username,
password: password === undefined ? this.loginForm.password : decrypt(password),
rememberMe: rememberMe === undefined ? false : Boolean(rememberMe)
};
},
handleLogin() {
this.$refs.loginForm.validate(valid => {
if (valid) {
this.loading = true;
if (this.loginForm.rememberMe) {
Cookies.set("username", this.loginForm.username, { expires: 30 });
Cookies.set("password", encrypt(this.loginForm.password), { expires: 30 });
Cookies.set('rememberMe', this.loginForm.rememberMe, { expires: 30 });
} else {
Cookies.remove("username");
Cookies.remove("password");
Cookies.remove('rememberMe');
}
this.$store.dispatch("Login", this.loginForm).then(() => {
this.$router.push({ path: this.redirect || "/" }).catch(()=>{});
}).catch(() => {
this.loading = false;
if (this.captchaEnabled) {
this.getCode();
}
});
}
});
}
}
};
</script><style rel="stylesheet/scss" lang="scss">
.login {
display: flex;
justify-content: center;
align-items: center;
height: 100%;
background-image: url("../assets/images/login-background.jpg");
background-size: cover;
}
.title {
margin: 0px auto 30px auto;
text-align: center;
color: #fff;
font-size: 32px;
font-weight: 500;
}.login-form {
border-radius: 6px;
background: rgba(0,0,0,0);
width: 380px;
padding: 25px 25px 5px 25px;
.el-input {
height: 38px;
input {
height: 38px;
}
}
.input-icon {
height: 39px;
width: 14px;
margin-left: 2px;
}
}
.login-tip {
font-size: 13px;
text-align: center;
color: #bfbfbf;
}
.login-code {
width: 33%;
height: 38px;
float: right;
img {
cursor: pointer;
vertical-align: middle;
}
}
.el-login-footer {
height: 40px;
line-height: 40px;
position: fixed;
bottom: 0;
width: 100%;
text-align: center;
color: #fff;
font-family: Arial;
font-size: 12px;
letter-spacing: 1px;
}
.login-code-img {
height: 38px;
}
.login-btn{
background-image: linear-gradient(160deg, #0093E9 0%, #80D0C7 100%);
font-size: 16px;
}
</style>

 浙公网安备 33010602011771号