部署JumpServer
今天刚好部署了JunmpServer ,记录一下过程。
一、准备三台虚拟机
| 主机 | IP | 用途 | 系统 |
| MySQL | 10.10.10.250 | Redis的MySQL服务器 | Ubuntu 18.04.6 LTS |
| JunmpServer | 10.10.10.240 | jumpserver服务器 | Ubuntu 20.04.4 LTS |
| 文件服务器 | 10.0.9.4 | 用于文件存放 | Windows server 2019 |
二、在10.10.10.250上部署安装MySQL及Redis
1、用root账号登陆,安装mysql数据库:
apt install mysql-server
2、安装完成后,使用root进入到mysql中创建数据库及授权:
root@Mysql:~# mysql -uroot
Welcome to the MySQL monitor. Commands end with ; or \g.
Your MySQL connection id is 963
Server version: 5.7.37-0ubuntu0.18.04.1 (Ubuntu)
Copyright (c) 2000, 2022, Oracle and/or its affiliates.
Oracle is a registered trademark of Oracle Corporation and/or its
affiliates. Other names may be trademarks of their respective
owners.
Type 'help;' or '\h' for help. Type '\c' to clear the current input statement.
mysql>create database jumpserver default charset 'utf8';
Query OK, 1 row affected (0.00 sec)
mysql> set global validate_password_policy=LOW;
Query OK, 0 rows affected (0.00 sec)
mysql> create user 'jumpserver'@'%' identified by 'passw0rd';
Query OK, 0 rows affected (0.00 sec)
mysql> grant all on jumpserver.* to 'jumpserver'@'%';
Query OK, 0 rows affected, 1 warning (0.00 sec)
mysql> flush privileges;
Query OK, 0 rows affected (0.00 sec)
mysql> exit
Bye
3、防火墙允许3306端口通过
ufw allow 3306/tcp
4、安装Redis
apt install redis-server
5、配置/etc/redis/redis.conf
sed -i "s/bind 127.0.0.1/bind 0.0.0.0/g" /etc/redis.conf
sed -i "561i maxmemory-policy allkeys-lru" /etc/redis.conf
sed -i "481i requirepass passw0rd" /etc/redis.conf
6、防火墙允许6379端口通过
ufw allow 6379/tcp
7、将mysql和redis服务开启
root@Mysql:~# systemctl restart mysql redis-server
三、10.10.10.240部署
1、先在10.10.10.240上安装mysql-client, 测试连接10.10.10.250上的mysql
root@jumpserver:~# apt install mysql-client-core-8.0
root@jumpserver:~# mysql -ujumpserver -ppassw0rd -h10.10.10.250
mysql: [Warning] Using a password on the command line interface can be insecure.
Welcome to the MySQL monitor. Commands end with ; or \g.
Your MySQL connection id is 56
Server version: 5.7.37-0ubuntu0.18.04.1 (Ubuntu)
Copyright (c) 2000, 2022, Oracle and/or its affiliates.
Oracle is a registered trademark of Oracle Corporation and/or its
affiliates. Other names may be trademarks of their respective
owners.
Type 'help;' or '\h' for help. Type '\c' to clear the current input statement.
mysql> exit
Bye
2、在10.240上测试连接redis
root@jumpserver:~# redis-cli -h 10.10.10.250 -a passw0rd
Warning: Using a password with '-a' or '-u' option on the command line interface may not be safe.
10.10.10.250:6379>
以上连接成功后,即可安装JumpServer。如测试不成功,可检查防火墙是否允许通过或重启mysql服务器。
3、下载JunmpServer安装包。
cd /opt
wget https://github.com/jumpserver/installer/releases/download/v2.21.4/jumpserver-installer-v2.21.4.tar.gz
tar -xf jumpserver-installer-v2.21.4.tar.gz
cd jumpserver-installer-v2.21.4
4、备份config-example.txt.backup,并配置config-example.txt
cp config-example.txt config-example.txt.backup
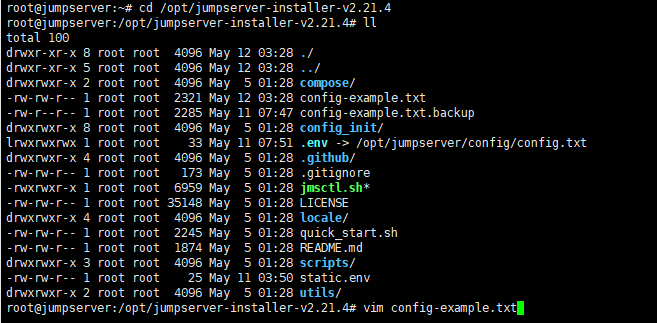
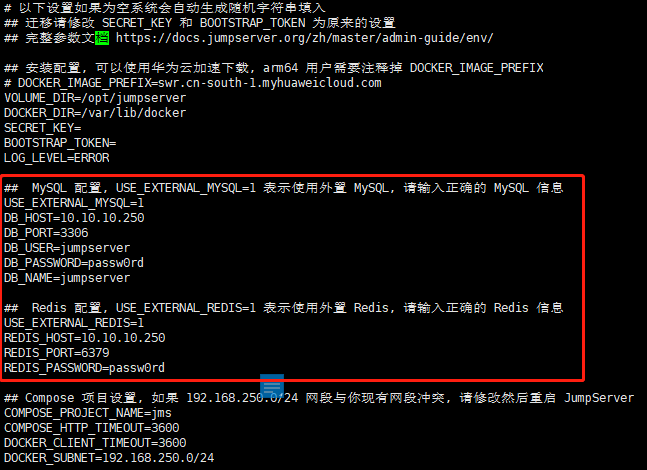
只修改这两处信息,将mysql及redis指向10.10.10.250服务器,修改后保存退出。
5、开始安装JunmpServer
root@jumpserver:/opt/jumpserver-installer-v2.21.4# ./jmsctl.sh install
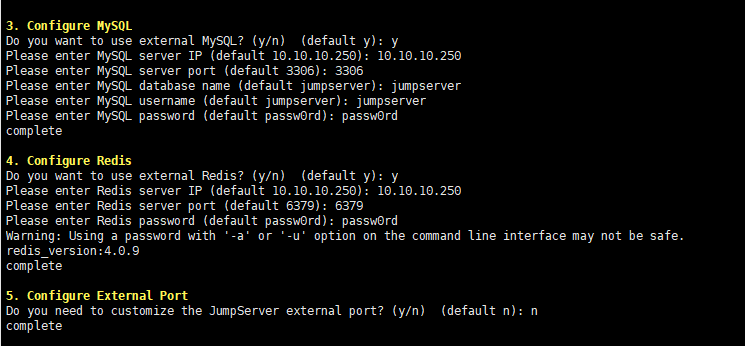
等待安装完成,将//10.0.9.4/JMSDATA 挂载到10.10.10.240服务器的 /opt/jumpserver/core/data 上
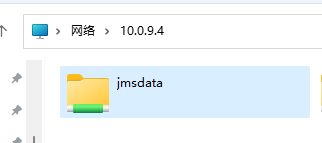
因10.0.9.4是通过域控账号登陆,所以,需要创建一个域控账号进行挂载登陆。
在10.10.10.240服务器上进行挂载:

6、切换到/opt/jumpserver-installer-v2.21.4 目录下,将JumpServer服务启动。

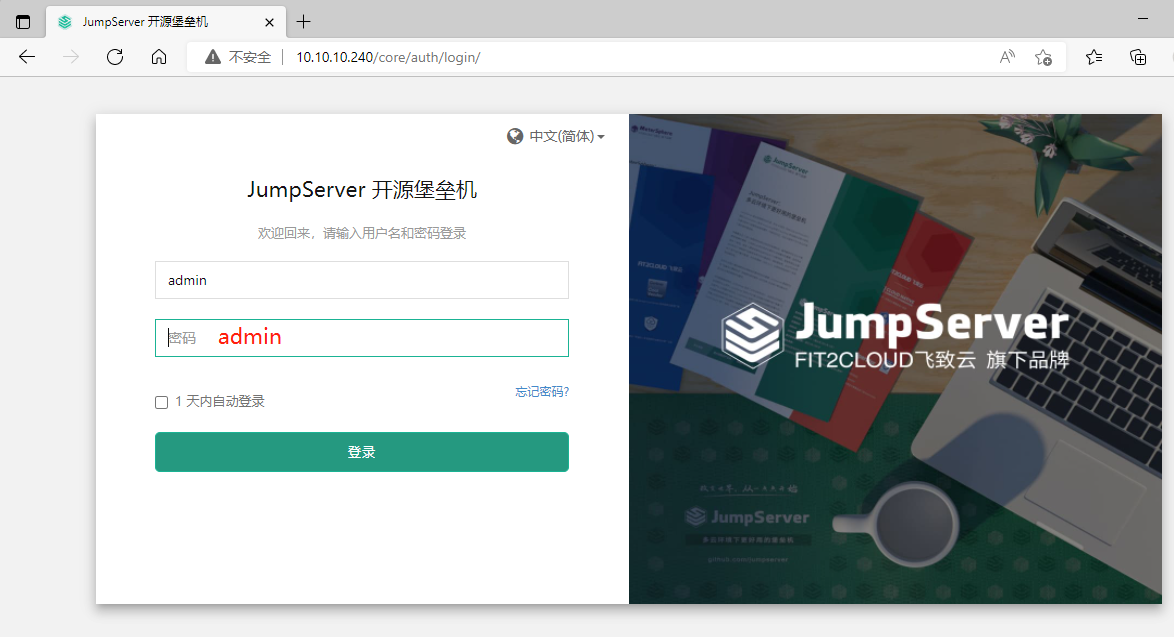
7、在网页输入10.10.10.240即可打开JumpServer。


 浙公网安备 33010602011771号