
Spring Boot学习笔记二
Spring Boot入门第二篇
第一天的详见:https://www.cnblogs.com/LBJLAKERS/p/12001253.html
- 同样是新建一个pring Initializer快速创建Spring Boot项目.
- 在resource的目录下新建两个application-dev.properties/application-pro.properties属性文件分别代表开发环境和生产环境。如图:
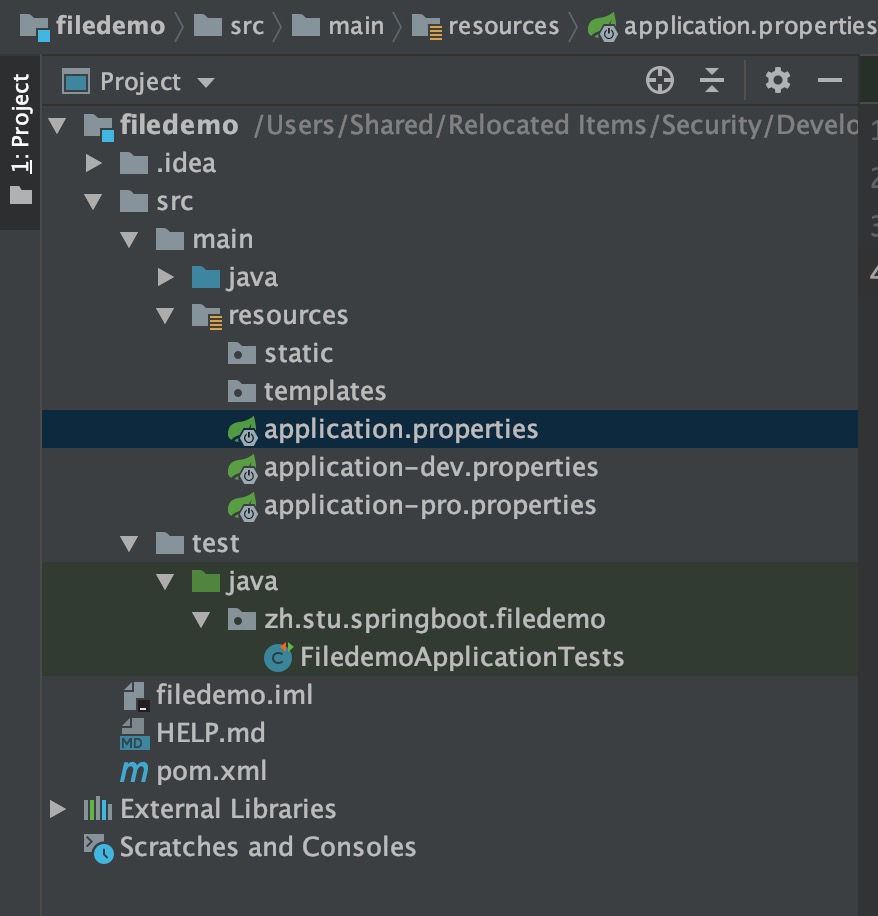
指定使用的属性配置文件
一:通过默认的application.properties指定。
- 可以在默认的application.properties的文件中激活某个文件:
#正式环境 #表示激活的是哪一个属性文件 spring.profiles.active=pro - 在dev的属性文件可以配置端口为:
1 #开发环境
2 server.port=8081
- 在Pro的属性文件可以配置端口号为:
#生产环境
server.port=8082
使用以上的方式如果去运行程序的话,在控制台就会显示激活pro的属性文件,使用的pro的端口
二:如果没有application.properties的属性文件,那么可以通过配置的方式来配置。虚拟机参数;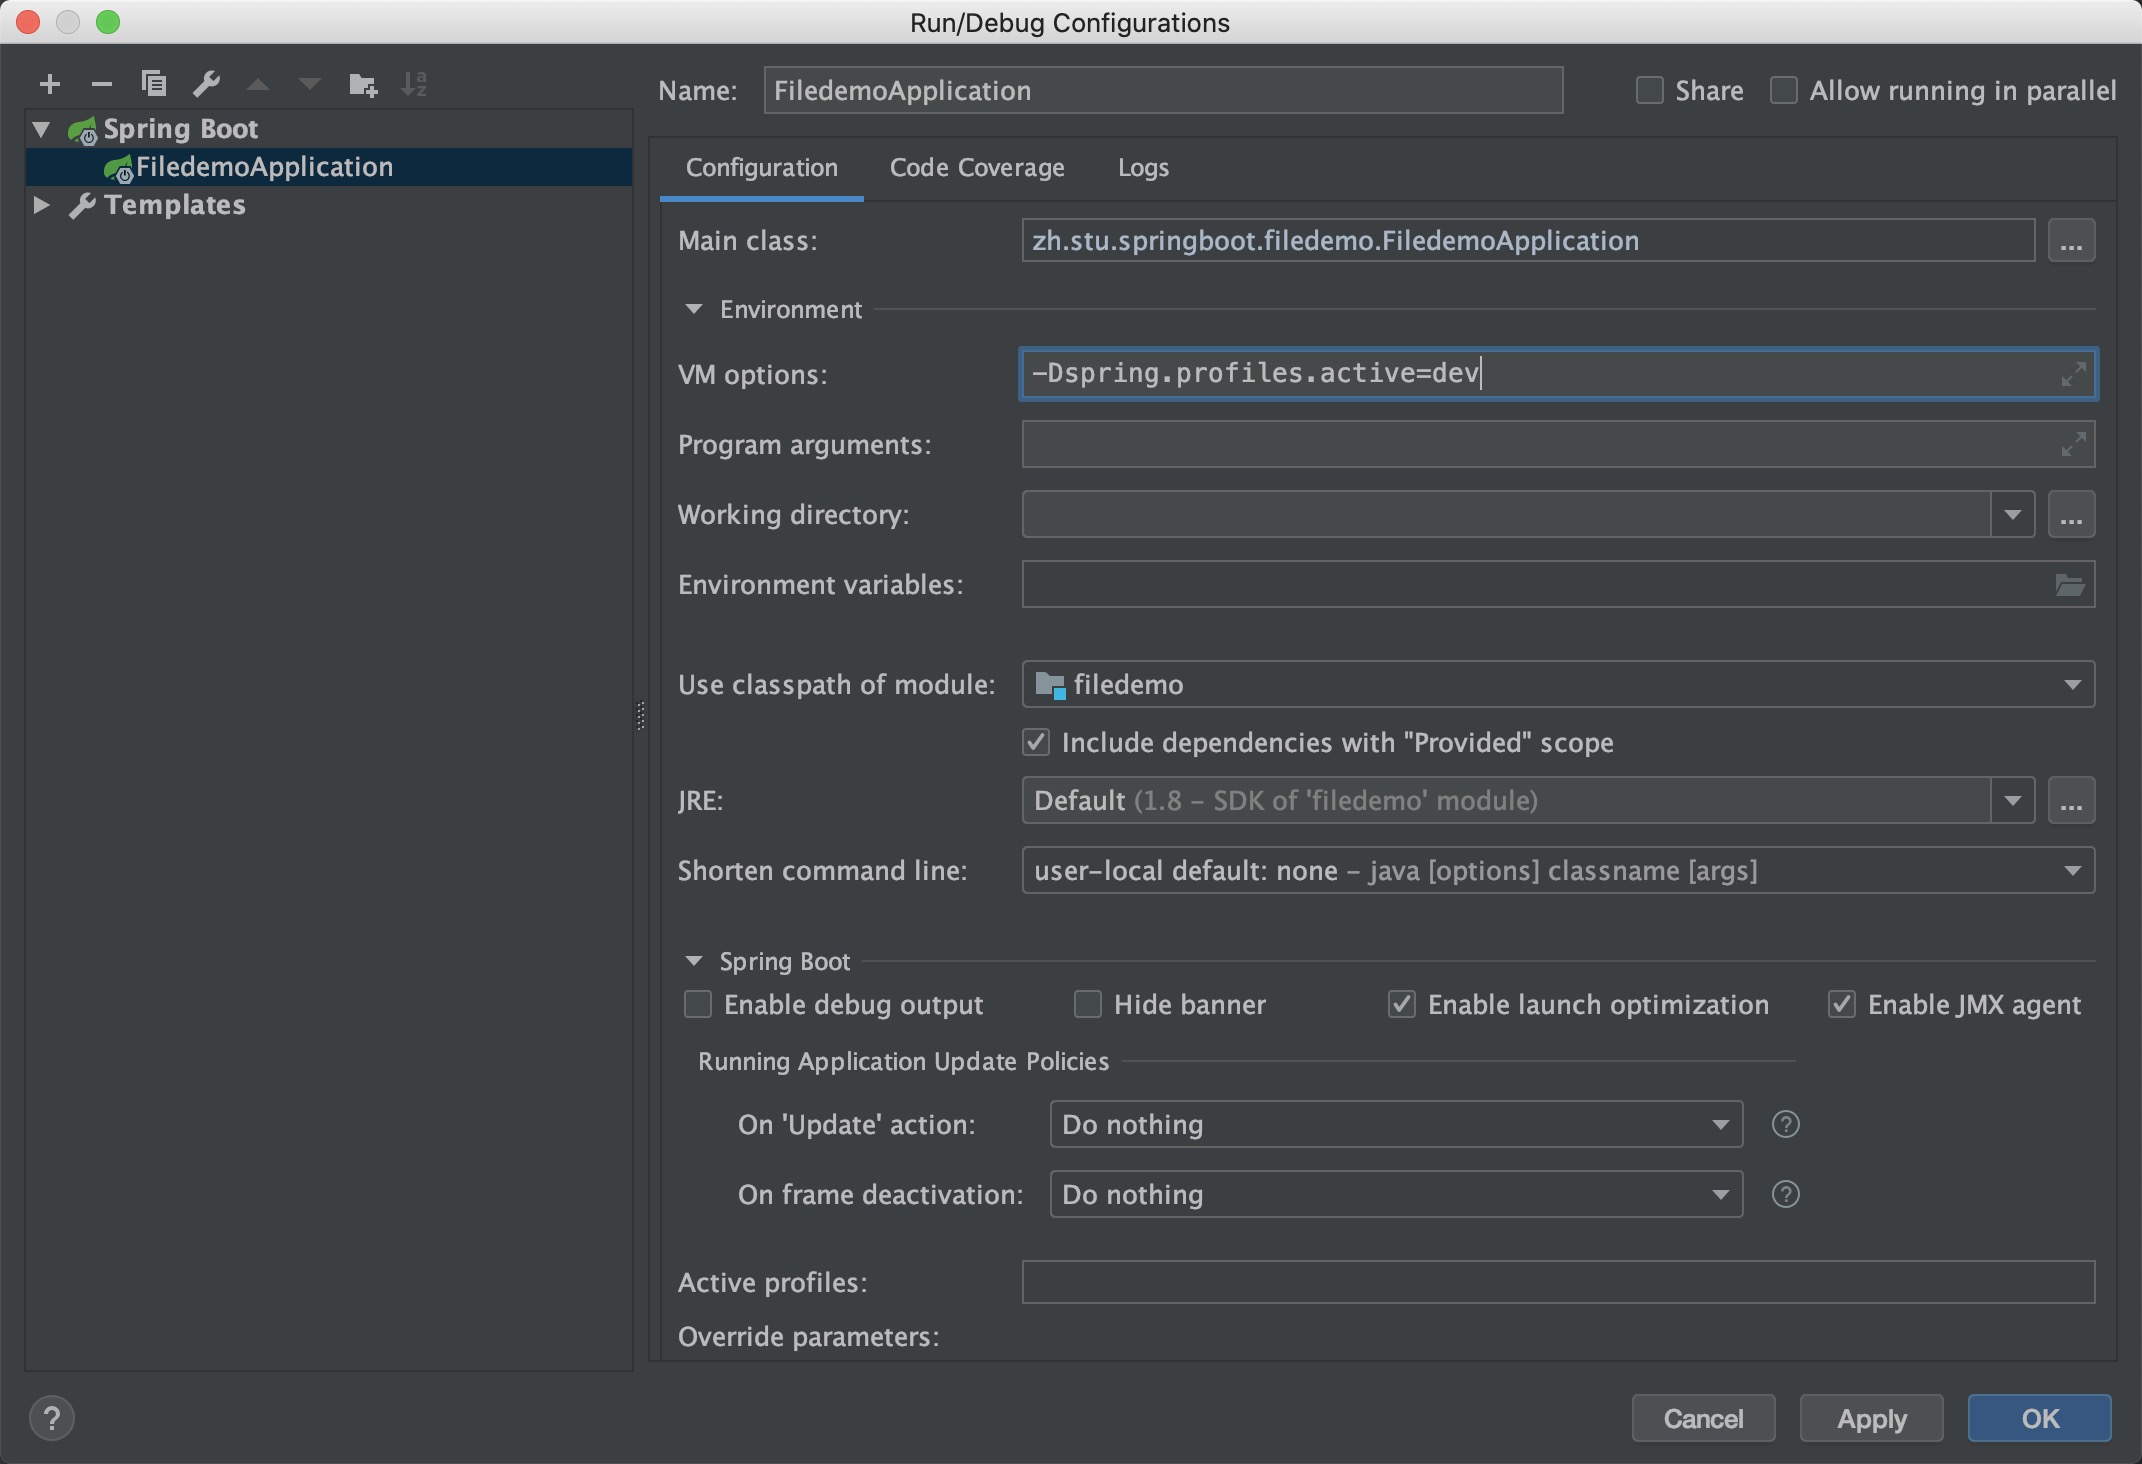
如上图所示的VM options的配置即可。
三、使用命令行的方式激活使用的属性配置文件。
- 打包项目为jar包,在cmd的命令窗口切换到jar包的目录,使用命令:
java -jar spring-boot-config-0.0.1-SNAPSHOT.jar --spring.profiles.active=dev;
yml支持的多文档模块方式。
使用(---)两个横线的方式将文档分割成三个文档的模式。使用这种方式可以激活dev模块的文档
 1 spring:
 2   profiles:
 3     active: dev
 4 ---
 5 server:
 6   port: 8080
 7 spring:
 8   profiles: dev
 9
10 ---
11 server:
12   port: 8081
13 spring:
14   profiles: pro
配置文件加载位置
springboot 启动会扫描以下位置的application.properties或者application.yml文件作为Spring boot的默认配置文。
在项目中加载的顺序为:(优先级由高到底,高优先级的配置会覆盖低优先级的配置;SpringBoot会从这四个位置全部加载主配置文件;互补配置;)
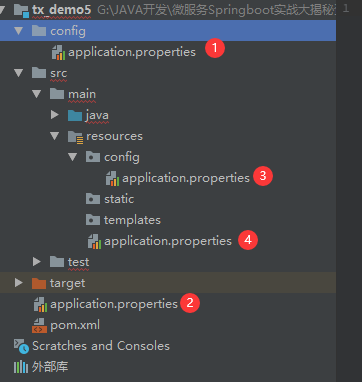
le:./config/
–file:./
–classpath:/config/
–classpath:/
注意:一般将配置文件放在resources目录下,这样在打包的时候就直接会将配置文件一同打包,否则不能够将配置文件一起打包为jar。并且所有的配置都可以在命令行上进行指定,
例如在cmd的命令窗口下:java -jar spring-boot-02-config-02-0.0.1-SNAPSHOT.jar
如果非要将application.properties的配置文件放到非resources的目录下,在cmd的命令窗口可以这样指定:
java -jar spring-boot-02-config-02-0.0.1-SNAPSHOT.jar --spring.config.location=配置文件存放的位置 --配置文件中的配置
这样才能生效
自动配置文件的原理:
- SpringBoot启动的时候加载主配置类,开启了自动配置功能 @EnableAutoConfiguration
- @EnableAutoConfiguration 作用:
- 利用EnableAutoConfigurationImportSelector给容器中导入一些组件?
- 可以查看selectImports()方法的内容;
- List configurations = getCandidateConfigurations(annotationMetadata, attributes);获取候选的配置
- 可以在在项目的External Libraries中下的spring.factories文件中查看配置。
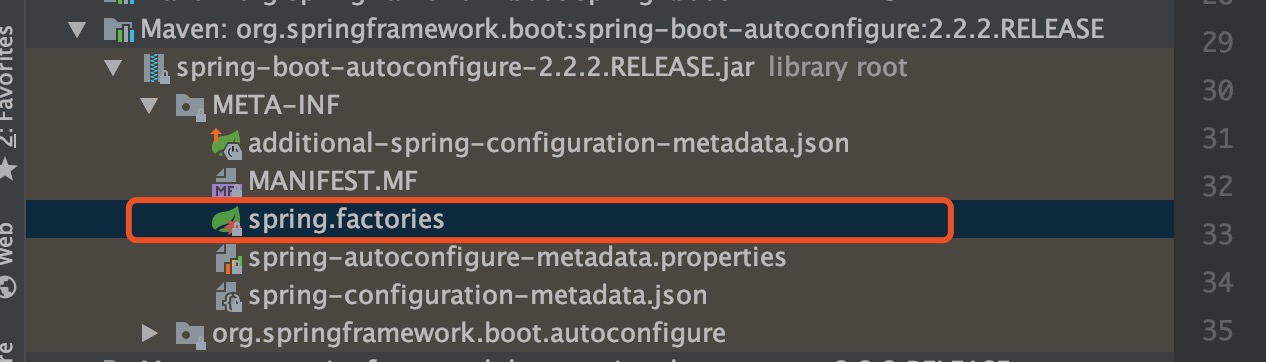
例如找到其中以下的:
org.springframework.boot.autoconfigure.web.servlet.HttpEncodingAutoConfiguration,\
解读配置文件
@Configuration //表示这是一个配置类,以前编写的配置文件一样,也可以给容器中添加组件
@EnableConfigurationProperties(HttpEncodingProperties.class) //启动指定类的
ConfigurationProperties功能;将配置文件中对应的值和HttpEncodingProperties绑定起来;并把
HttpEncodingProperties加入到ioc容器中
@ConditionalOnWebApplication //Spring底层@Conditional注解(Spring注解版),根据不同的条件,如果
满足指定的条件,整个配置类里面的配置就会生效; 判断当前应用是否是web应用,如果是,当前配置类生效
@ConditionalOnClass(CharacterEncodingFilter.class) //判断当前项目有没有这个类
CharacterEncodingFilter;SpringMVC中进行乱码解决的过滤器;
@ConditionalOnProperty(prefix = "spring.http.encoding", value = "enabled", matchIfMissing =
true) //判断配置文件中是否存在某个配置 spring.http.encoding.enabled;如果不存在,判断也是成立的
//即使我们配置文件中不配置pring.http.encoding.enabled=true,也是默认生效的;
public class HttpEncodingAutoConfiguration {
      //他已经和SpringBoot的配置文件映射了
      private final HttpEncodingProperties properties;
      //只有一个有参构造器的情况下,参数的值就会从容器中拿
      public HttpEncodingAutoConfiguration(HttpEncodingProperties properties) {
         this.properties = properties;
      }
 @Bean //给容器中添加一个组件,这个组件的某些值需要从properties中获取
@ConditionalOnMissingBean(CharacterEncodingFilter.class) //判断容器没有这个组件?
public CharacterEncodingFilter characterEncodingFilter() {
       CharacterEncodingFilter filter = new OrderedCharacterEncodingFilter();
       filter.setEncoding(this.properties.getCharset().name());
       filter.setForceRequestEncoding(this.properties.shouldForce(Type.REQUEST));
       filter.setForceResponseEncoding(this.properties.shouldForce(Type.RESPONSE));
       return filter;
}
Spring boot整合springMVC
学习链接:https://docs.spring.io/spring-boot/docs/2.0.2.RELEASE/reference/htmlsingle/#boot-features-spring-mvc
springMVC的自动解管理
- 中央转发器
- 控制器
- 视图解析器
- 静态资源访问
- 消息转换器
- 格式化
- 静态资源管理
中央转发器:
xml无需配置:
1 <servlet>
2     <servlet-name>chapter2</servlet-name>
3     <servlet-class>org.springframework.web.servlet.DispatcherServlet</servlet-class>
4     <load-on-startup>1</load-on-startup>
5 </servlet>
6 <servlet-mapping>
7     <servlet-name>chapter2</servlet-name>
8     <url-pattern>/</url-pattern>
9 </servlet-mapping>
中央转发器被springboot自动接管,不在需要我们在xml文件配置,而且现在的项目也不是web项目,也不存在xml的文件配置。
org.springframework.boot.autoconfigure.web.servlet.DispatcherServletAutoConfiguration,\
控制器:
控制器Controller在springboot的注解扫描范围内自动管理
视图解析器的管理:
Inclusion of ContentNegotiatingViewResolver and BeanNameViewResolver beans.
ContentNegotiatingViewResolver:组合所有的视图解析器的;
使用以前的方式是需要在配置文件中添加配置,现在就不需要配置文件,以前的配置方式:
1 <bean id="de" class="org.springframework.web.servlet.view.InternalResourceViewResolver">
2     <property name="prefix" value="/WEB-INF/jsp/"></property>
3     <property name="suffix" value="*.jsp"></property>
4 </bean>
在源码:
public ContentNegotiatingViewResolver viewResolver(BeanFactory beanFactory) {
    ContentNegotiatingViewResolver resolver = new ContentNegotiatingViewResolver();
 resolver.setContentNegotiationManager((ContentNegotiationManager)beanFactory.getBean(ContentNegotiationManager.class));
    resolver.setOrder(-2147483648);
    return resolver;
}
当我们做文件上传的时候我们也会发现multipartResolver是自动被配置好的
例如在页面上
<form action="/upload" method="post" enctype="multipart/form-data">
    <input name="pic" type="file">
    <input type="submit">
</form>
Controller中
 1 @ResponseBody
 2 @RequestMapping("/upload")
 3 public String upload(@RequestParam("pic")MultipartFile file, HttpServletRequest request){
 4     String contentType = file.getContentType();
 5     String fileName = file.getOriginalFilename();
 6     /*System.out.println("fileName-->" + fileName);
 7     System.out.println("getContentType-->" + contentType);*/
 8     //String filePath = request.getSession().getServletContext().getRealPath("imgupload/");
 9     String filePath = "D:/imgup";
10     try {
11         this.uploadFile(file.getBytes(), filePath, fileName);
12     } catch (Exception e) {
13         // TODO: handle exception
14     }
15
16     return "success";
17 }
18
19
20 public static void uploadFile(byte[] file, String filePath, String fileName) throws Exception {
21     File targetFile = new File(filePath);
22     if(!targetFile.exists()){
23         targetFile.mkdirs();
24     }
25     FileOutputStream out = new FileOutputStream(filePath+fileName);
26     out.write(file);
27     out.flush();
28     out.close();
29 }
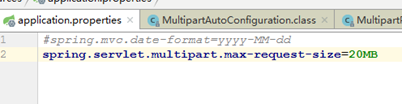
其中上传的文件的大小可以通过配置文件的方式配置
application.properties, 默认限制是10MB,我们可以任意修改
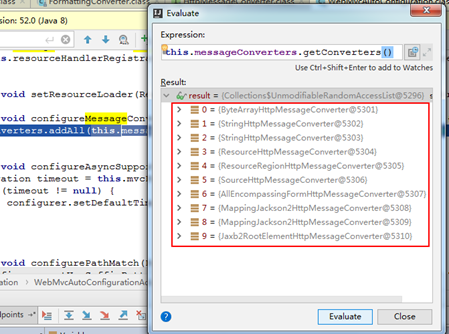
消息转换和格式化
Springboot自动配置了消息转换器
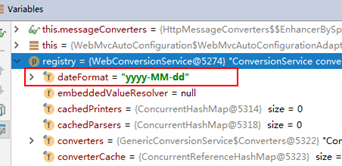
格式化转换器的自动注册
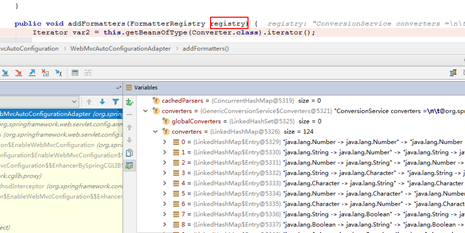
时间类型我们可以在这里修改
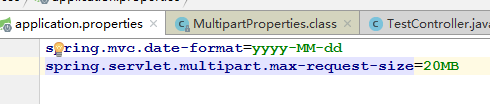
在配置文件中指定好时间的模式我们就可以输入了
springboot扩展springmvc
其实springboot并非是完全自动化的,很多跟业务相关的仍然需要我们自己扩展,springboot给我们提供了接口。
我们可以通过实现WebMvcConfigurer的接口来扩展。
 1 public interface WebMvcConfigurer {
 2     default void configurePathMatch(PathMatchConfigurer configurer) {
 3     }
 4
 5     default void configureContentNegotiation(ContentNegotiationConfigurer configurer) {
 6     }
 7
 8     default void configureAsyncSupport(AsyncSupportConfigurer configurer) {
 9     }
10
11     default void configureDefaultServletHandling(DefaultServletHandlerConfigurer configurer) {
12     }
13
14     default void addFormatters(FormatterRegistry registry) {
15     }
16
17     default void addInterceptors(InterceptorRegistry registry) {
18     }
19
20     default void addResourceHandlers(ResourceHandlerRegistry registry) {
21     }
22
23     default void addCorsMappings(CorsRegistry registry) {
24     }
25
26     default void addViewControllers(ViewControllerRegistry registry) {
27     }
28
29     default void configureViewResolvers(ViewResolverRegistry registry) {
30     }
31
32     default void addArgumentResolvers(List<HandlerMethodArgumentResolver> resolvers) {
33     }
34
35     default void addReturnValueHandlers(List<HandlerMethodReturnValueHandler> handlers) {
36     }
37
38     default void configureMessageConverters(List<HttpMessageConverter<?>> converters) {
39     }
40
41     default void extendMessageConverters(List<HttpMessageConverter<?>> converters) {
42     }
43
44     default void configureHandlerExceptionResolvers(List<HandlerExceptionResolver> resolvers) {
45     }
46
47     default void extendHandlerExceptionResolvers(List<HandlerExceptionResolver> resolvers) {
48     }
49
50     @Nullable
51     default Validator getValidator() {
52         return null;
53     }
54
55     @Nullable
56     default MessageCodesResolver getMessageCodesResolver() {
57         return null;
58     }
59 }
例如在容器中住注册视图控制器:
需求:创建一个MyMVCCofnig实现WebMvcConfigurer接口,实现一下addViewControllers方法,我们完成通过/tx访问,转发到success.html的工作
1 @Configuration
2 public class MyMVCCofnig implements WebMvcConfigurer{
3
4
5     @Override
6     public void addViewControllers(ViewControllerRegistry registry) {
7         registry.addViewController("/tx").setViewName("success");
8     }
Springboot的数据层开发:
数据源自动管理:
引入jdbc的依赖和springboot的应用场景
 1 <dependency>
 2    <groupId>org.springframework.boot</groupId>
 3    <artifactId>spring-boot-starter-jdbc</artifactId>
 4 </dependency>
 5 <dependency>
 6    <groupId>org.apache.commons</groupId>
 7    <artifactId>commons-dbcp2</artifactId>
 8 </dependency>
 9
10 <dependency>
11    <groupId>mysql</groupId>
12    <artifactId>mysql-connector-java</artifactId>
13    <scope>runtime</scope>
14 </dependency>
使用yaml的方式配置,配置如下:
1 spring:
2   datasource:
3     username: root
4     password: root
5     url: jdbc:mysql://localhost:3306/boot_demo
6     driver-class-name: com.mysql.jdbc.Driver
7     type: com.zaxxer.hikari.HikariDataSource
我们可以自己指定数据源配置,通过type来选取使用哪种数据源
# type: org.apache.commons.dbcp2.BasicDataSource
配置druid的数据源
引入druid的依赖
<dependency>
   <groupId>com.alibaba</groupId>
   <artifactId>druid</artifactId>
   <version>1.0.9</version>
</dependency>
<dependency>
   <groupId>log4j</groupId>
   <artifactId>log4j</artifactId>
   <version>1.2.15</version>
</dependency>
修改 spring.datasource.type=com.alibaba.druid.pool.DruidDataSource
在application.yaml中加入
 1 spring:
 2   datasource:
 3     username: root
 4     password: root
 5     url: jdbc:mysql://localhost:3306/boot_demo
 6     driver-class-name: com.mysql.jdbc.Driver
 7     type: com.alibaba.druid.pool.DruidDataSource
 8     initialSize: 5
 9     minIdle: 5
10     maxActive: 20
11     maxWait: 60000
12     timeBetweenEvictionRunsMillis: 60000
13     minEvictableIdleTimeMillis: 300000
14     validationQuery: SELECT 1 FROM DUAL
15     testWhileIdle: true
16     testOnBorrow: false
17     testOnReturn: false
18     poolPreparedStatements: true
19     filters: stat,wall,log4j
20     maxPoolPreparedStatementPerConnectionSize: 20
21     useGlobalDataSourceStat: true
22     connectionProperties: druid.stat.mergeSql=true;druid.stat.slowSqlMillis=500
创建数据源注册类
@Configuration
public class DruidConfig {

    @ConfigurationProperties(prefix = "spring.datasource")
    @Bean
    public DataSource dataSource(){
        return new DruidDataSource();
    }
}
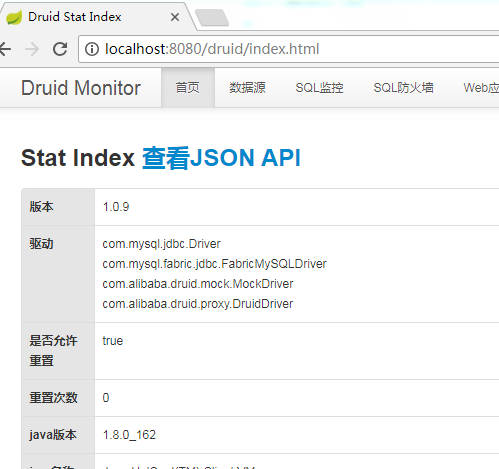
配置druid运行期监控
@Configuration
public class DruidConfig {

    @ConfigurationProperties(prefix = "spring.datasource")
    @Bean
    public DataSource dataSource(){
        return new DruidDataSource();
    }

    @Bean
    public ServletRegistrationBean statViewServlet(){
        ServletRegistrationBean bean = new ServletRegistrationBean(new StatViewServlet(),
                "/druid/*");
        Map<String,String> initParams = new HashMap<>();
        initParams.put("loginUsername","root");
        initParams.put("loginPassword","root");
        initParams.put("allow","");//默认就是允许所有访问
        initParams.put("deny","192.168.15.21");
        bean.setInitParameters(initParams);
        return bean;
    }

    //2、配置一个web监控的filter
    @Bean
    public FilterRegistrationBean webStatFilter(){
        FilterRegistrationBean bean;
        bean = new FilterRegistrationBean();
        bean.setFilter(new WebStatFilter());
        Map<String,String> initParams = new HashMap<>();
        initParams.put("exclusions","*.js,*.css,/druid/*");
        bean.setInitParameters(initParams);
        bean.setUrlPatterns(Arrays.asList("/*"));
        return bean;
    }
}
打开监控页面
http://localhost:8080/druid
springboot整合jdbctemplate
创建一个新的项目,同时引入开发的坐标依赖
 1     <dependencies>
 2         <dependency>
 3             <groupId>org.springframework.boot</groupId>
 4             <artifactId>spring-boot-starter-web</artifactId>
 5         </dependency>
 6
 7         <dependency>
 8             <groupId>org.springframework.boot</groupId>
 9             <artifactId>spring-boot-starter-test</artifactId>
10             <scope>test</scope>
11             <exclusions>
12                 <exclusion>
13                     <groupId>org.junit.vintage</groupId>
14                     <artifactId>junit-vintage-engine</artifactId>
15                 </exclusion>
16             </exclusions>
17         </dependency>
18
19         <dependency>
20             <groupId>org.springframework.boot</groupId>
21             <artifactId>spring-boot-starter-web</artifactId>
22         </dependency>
23
24         <dependency>
25             <groupId>org.springframework.boot</groupId>
26             <artifactId>spring-boot-starter-test</artifactId>
27             <scope>test</scope>
28         </dependency>
29
30         <dependency>
31             <groupId>org.springframework.boot</groupId>
32             <artifactId>spring-boot-devtools</artifactId>
33             <optional>true</optional>
34         </dependency>
35         <dependency>
36             <groupId>org.springframework.boot</groupId>
37             <artifactId>spring-boot-starter-thymeleaf</artifactId>
38         </dependency>
39         <dependency>
40             <groupId>org.webjars</groupId>
41             <artifactId>jquery</artifactId>
42             <version>3.3.1</version>
43         </dependency>
44         <dependency>
45             <groupId>org.mybatis.spring.boot</groupId>
46             <artifactId>mybatis-spring-boot-starter</artifactId>
47             <version>1.3.1</version>
48         </dependency>
49
50         <dependency>
51             <groupId>com.alibaba</groupId>
52             <artifactId>druid</artifactId>
53             <version>1.0.9</version>
54         </dependency>
55         <!-- https://mvnrepository.com/artifact/log4j/log4j -->
56         <dependency>
57             <groupId>log4j</groupId>
58             <artifactId>log4j</artifactId>
59             <version>1.2.17</version>
60         </dependency>
61
62
63         <dependency>
64             <groupId>mysql</groupId>
65             <artifactId>mysql-connector-java</artifactId>
66             <scope>runtime</scope>
67         </dependency>
68
69     </dependencies>
在resource的目录下新建一个application.yaml文件,存入你要链接的数据库可相应的配置
 1 spring:
 2   datasource:
 3     username: root
 4     password: zhanghao22333
 5     url: jdbc:mysql://localhost:3306/boot_demo(注意使用的数据库)
 6     driver-class-name: com.mysql.cj.jdbc.Driver
 7     type: com.alibaba.druid.pool.DruidDataSource
 8     initialSize: 5
 9     minIdle: 5
10     maxActive: 20
11     maxWait: 60000
12     timeBetweenEvictionRunsMillis: 60000
13     minEvictableIdleTimeMillis: 300000
14     validationQuery: SELECT 1 FROM DUAL
15     testWhileIdle: true
16     testOnBorrow: false
17     testOnReturn: false
18     poolPreparedStatements: true
19     filters: stat,wall,log4j
20     maxPoolPreparedStatementPerConnectionSize: 20
21     useGlobalDataSourceStat: true
22     connectionProperties: druid.stat.mergeSql=true;druid.stat.slowSqlMillis=500
23   mvc:
24     date-format: yyyy-MM-dd
可以在Spring-boot-autoconfiguration下的spring:factory中的:
org.springframework.boot.autoconfigure.jdbc.JdbcTemplateAutoConfiguration,\
查看它的源码
@Configuration(
    proxyBeanMethods = false
)
@ConditionalOnClass({DataSource.class, JdbcTemplate.class})
@ConditionalOnSingleCandidate(DataSource.class)
@AutoConfigureAfter({DataSourceAutoConfiguration.class})
@EnableConfigurationProperties({JdbcProperties.class})
@Import({JdbcTemplateConfiguration.class, NamedParameterJdbcTemplateConfiguration.class})
public class JdbcTemplateAutoConfiguration {
    public JdbcTemplateAutoConfiguration() {
    }
}
解析:在注解 JdbcTemplateConfiguration.class进去可以看出对jdbcTemplate做的封装,并注意它的主注解@Bean存放到容器中
@ConditionalOnMissingBean({JdbcOperations.class})
class JdbcTemplateConfiguration {
    JdbcTemplateConfiguration() {
    }

    @Bean
    @Primary
    JdbcTemplate jdbcTemplate(DataSource dataSource, JdbcProperties properties) {
        JdbcTemplate jdbcTemplate = new JdbcTemplate(dataSource);
        Template template = properties.getTemplate();
        jdbcTemplate.setFetchSize(template.getFetchSize());
        jdbcTemplate.setMaxRows(template.getMaxRows());
        if (template.getQueryTimeout() != null) {
            jdbcTemplate.setQueryTimeout((int)template.getQueryTimeout().getSeconds());
        }

        return jdbcTemplate;
    }
}
最后在测试使用jdbctemplate查询数据库的操作,在测试中编写
 1 package zh.stu.springboot.test;
 2
 3 import org.junit.jupiter.api.Test;
 4 import org.junit.runner.RunWith;
 5 import org.springframework.beans.factory.annotation.Autowired;
 6 import org.springframework.boot.test.context.SpringBootTest;
 7 import org.springframework.jdbc.core.JdbcTemplate;
 8 import org.springframework.test.context.junit4.SpringRunner;
 9
10 import java.util.List;
11 import java.util.Map;
12
13 @RunWith(SpringRunner.class)
14 @SpringBootTest
15 class TestApplicationTests {
16
17     @Autowired
18     JdbcTemplate jdbcTemplate;
19     @Test
20    public void contextLoads() {
21         System.out.println(1);
22         List<Map<String, Object>> maps = jdbcTemplate.queryForList("select * from tx_person");
23         System.out.println(maps);
24
25     }
26
27 }
最终在控制台输出数据库中的数据
[{pid=1, username=张浩, password=123, gender=1, p_addr=杭州1, birth=2020-09-07, pname=222}, {pid=2, username=jj, password=jj, gender=1, p_addr=jj, birth=2012-11-10, pname=jj}]
springboot整合mybatis
导入开发的坐标
 <dependency>
            <groupId>org.mybatis.spring.boot</groupId>
            <artifactId>mybatis-spring-boot-starter</artifactId>
            <version>1.3.1</version>
 </dependency>
新建一个实体类,提供get和set的方法
package zh.stu.springboot.test.model;

import java.util.Date;

public class TxPerson {

    private int pid;
    private String username;
    private String password;
    private String pAddr;
    private String pname;
    private int gender;
    private Date birth;

    public int getPid() {
        return pid;
    }

    public void setPid(int pid) {
        this.pid = pid;
    }

    public String getUsername() {
        return username;
    }

    public void setUsername(String username) {
        this.username = username;
    }

    public String getPassword() {
        return password;
    }

    public void setPassword(String password) {
        this.password = password;
    }

    public String getpAddr() {
        return pAddr;
    }

    public void setpAddr(String pAddr) {
        this.pAddr = pAddr;
    }

    public String getPname() {
        return pname;
    }

    public void setPname(String pname) {
        this.pname = pname;
    }

    public int getGender() {
        return gender;
    }

    public void setGender(int gender) {
        this.gender = gender;
    }

    public Date getBirth() {
        return birth;
    }

    public void setBirth(Date birth) {
        this.birth = birth;
    }

    @Override
    public String toString() {
        return "TxPerson{" +
                "pid=" + pid +
                ", username='" + username + '\'' +
                ", password='" + password + '\'' +
                ", pAddr='" + pAddr + '\'' +
                ", pname='" + pname + '\'' +
                ", gender=" + gender +
                ", birth=" + birth +
                '}';
    }
}
然后新建一个mapper接口
 1 package zh.stu.springboot.test.mapper;
 2
 3 import org.apache.ibatis.annotations.Insert;
 4 import org.apache.ibatis.annotations.Mapper;
 5 import org.apache.ibatis.annotations.Options;
 6 import org.apache.ibatis.annotations.Select;
 7 import zh.stu.springboot.test.model.TxPerson;
 8
 9 import java.util.List;
10
11 /**
12  * @Mapper:可以给mapper借口自动生成一个实现类,让Spring对mapper接口的bean进行管理,并且可以省略复杂的xml文件的配置
13  */
14 @Mapper
15 public interface TxPersonMapper {
16     @Select("select * from tx_person")
17     public List<TxPerson> selectPersons();
18
19     /**
20      *     @Options(useGeneratedKeys = true, keyProperty = "pid")
21      *     数据库表中的pid是自动增长的,使用@Opetions的注解
22      * @param p
23      */
24     @Options(useGeneratedKeys = true, keyProperty = "pid")
25     @Insert("insert into tx_person(pid, username ,password,pname, p_addr, gender, birth)" +
26             "values(#{pid},#{username},#{password},#{pname},#{pAddr},#{gender},#{birth})")
27     public void insert(TxPerson p);
28
29 }
注意:我在数据库中表tx_person的表中的字段p_add的形式存在(中间有一个下划线),而我在生成实体类的时候是:pAddr的形式,所以要添加一个类,将字段更改为驼峰的形式
 1 package zh.stu.springboot.test;
 2
 3 import org.mybatis.spring.boot.autoconfigure.ConfigurationCustomizer;
 4 import org.springframework.context.annotation.Bean;
 5 import org.springframework.context.annotation.Configuration;
 6
 7 /**
 8  * 将数据库中的字段下划线更改为大写的方式例如p_add>>pAdd
 9  */
10 @Configuration
11 public class MyBatisConfig {
12
13     @Bean
14     public ConfigurationCustomizer getCustomizer(){
15         return new ConfigurationCustomizer() {
16             @Override
17             public void customize(org.apache.ibatis.session.Configuration configuration) {
18                 configuration.setMapUnderscoreToCamelCase(true);
19             }
20         };
21     }
22
23 }
最后在测试中测试
注入mapper
    @Autowired
    TxPersonMapper txPersonMapper;
在方法中对Txperson对象操作
 1 // 查询
 2 List<TxPerson> txPeople = txPersonMapper.selectPersons();
 3         System.out.println(txPeople);
 4 //新增
 5         TxPerson txPerson=new TxPerson();
 6         txPerson.setBirth(new Date());
 7         txPerson.setGender(1);
 8         txPerson.setpAddr("洛杉矶");
 9         txPerson.setPassword("123");
10         txPerson.setPname("123");
11         txPerson.setUsername("123");
12         txPersonMapper.insert(txPerson);
