

SpringBoot
1. SrpingBoot入门及原理
Spring是如何简化Java开发的
为了降低Java开发的复杂性,Spring采用了以下4种关键策略:
- 基于POJO的轻量级和最小侵入性编程,所有东西都是bean;
- 通过IOC,依赖注入(DI)和面向接口实现松耦合;
- 基于切面(AOP)和惯例进行声明式编程;
- 通过切面和模版减少样式代码,RedisTemplate,xxxTemplate;
什么是SpringBoot
为了提高开发效率,嫌弃原先的各类配置过于麻烦,于是开始提倡“约定大于配置”,进而衍生出一些一站式的解决方案。
多数 Spring Boot 应用只需要很少的 Spring 配置。同时它集成了大量常用的第三方库配置(例如 Redis、MongoDB、Jpa、RabbitMQ、Quartz 等等),Spring
Boot 应用中这些第三方库几乎可以零配置的开箱即用。
Spring Boot的主要优点:
- 为所有Spring开发者更快的入门
- 开箱即用,提供各种默认配置来简化项目配置
- 内嵌式容器简化Web项目
- 没有冗余代码生成和XML配置的要求
2. HelloWorld
创建基础项目说明
项目创建方式一:使用Spring Initializr 的 Web页面创建项目
- 打开 https://start.spring.io/
- 填写项目信息
- 点击”Generate Project“按钮生成项目;下载此项目
- 解压项目包,并用IDEA以Maven项目导入,一路下一步即可,直到项目导入完毕。
项目结构分析:
通过上面步骤完成了基础项目的创建。就会自动生成以下文件
- 程序的主启动类
- 一个 application.properties 配置文件
- 一个 测试类
- 一个 pom.xml
pom.xml 分析
打开 pom.xml ,看看Spring Boot项目的依赖:
<?xml version="1.0" encoding="UTF-8"?>
<project xmlns="http://maven.apache.org/POM/4.0.0" xmlns:xsi="http://www.w3.org/2001/XMLSchema-instance"
	xsi:schemaLocation="http://maven.apache.org/POM/4.0.0 https://maven.apache.org/xsd/maven-4.0.0.xsd">
	<modelVersion>4.0.0</modelVersion>
	<parent>
		<groupId>org.springframework.boot</groupId>
		<artifactId>spring-boot-starter-parent</artifactId>
		<version>3.1.5</version>
		<relativePath/> <!-- lookup parent from repository -->
	</parent>
	<groupId>com.example.springboot.study</groupId>
	<artifactId>springboot</artifactId>
	<version>0.0.1-SNAPSHOT</version>
	<name>springboot</name>
	<description>Demo project for Spring Boot</description>
	<properties>
		<java.version>17</java.version>
	</properties>
	<dependencies>
		<dependency>
			<groupId>org.springframework.boot</groupId>
			<artifactId>spring-boot-starter</artifactId>
		</dependency>

		<dependency>
			<groupId>org.springframework.boot</groupId>
			<artifactId>spring-boot-starter-test</artifactId>
			<scope>test</scope>
		</dependency>
	</dependencies>

	<build>
		<!-- 打包插件 -->
		<plugins>
			<plugin>
				<groupId>org.springframework.boot</groupId>
				<artifactId>spring-boot-maven-plugin</artifactId>
			</plugin>
		</plugins>
	</build>

</project>
编写HTTP接口
- 在主程序的同级目录下,新建一个controller包,一定要在同级目录下,否则识别不到
- 在包中新建一个HelloController类
@RestController
public class HelloController {
    @RequestMapping("/hello")
    public String hello() {
        return "Hello World";
    }
}
@RestController 是@controller和@ResponseBody 的结合
@Controller 将当前修饰的类注入SpringBoot IOC容器,使得从该类所在的项目跑起来的过程中,这个类就被实例化。
@ResponseBody 它的作用简短截说就是指该类中所有的API接口返回的数据,甭管你对应的方法返回Map或是其他Object,它会以Json字符串的形式返回给客户端
- 编写完毕后,从主程序启动项目,浏览器发起请求,看页面返回;控制台输出了 Tomcat 访问的端口号!

将项目打成jar包,点击 maven的 package
如果打包成功,则会在target目录下生成一个 jar 包
打成了jar包后,就可以在任何地方运行了! java -jar xxx.jar
如何更改启动时显示的字符拼成的字母,SpringBoot呢? 也就是 banner 图案;
只需一步:到项目下的 resources 目录下新建一个banner.txt 即可。
图案可以到:https://www.bootschool.net/ascii 这个网站生成,然后拷贝到文件中即可!
3. 运行原理探究
3.1 Pom.xml
父依赖
其中它主要是依赖一个父项目,主要是管理项目的资源过滤及插件!
<parent>
    <groupId>org.springframework.boot</groupId>
    <artifactId>spring-boot-starter-parent</artifactId>
    <version>2.2.5.RELEASE</version>
    <relativePath/> <!-- lookup parent from repository -->
</parent>
启动器 spring-boot-starter
<dependency>
    <groupId>org.springframework.boot</groupId>
    <artifactId>spring-boot-starter-web</artifactId>
</dependency>
springboot-boot-starter-xxx:就是spring-boot的场景启动器
spring-boot-starter-web:帮我们导入了web模块正常运行所依赖的组件;
3.2 主启动类
默认的主启动类
@SpringBootApplication
public class SpringbootApplication {

	public static void main(String[] args) {
		//以为是启动了一个方法,没想到启动了一个服务
		SpringApplication.run(SpringbootApplication.class, args);
	}

}
@SpringBootApplication
作用:标注在某个类上说明这个类是SpringBoot的主配置类 , SpringBoot就应该运行这个类的main方
法来启动SpringBoot应用;
进入这个注解:可以看到上面还有很多其他注解!
@SpringBootConfiguration
@EnableAutoConfiguration
@ComponentScan(
    excludeFilters = {@Filter(
    type = FilterType.CUSTOM,
    classes = {TypeExcludeFilter.class}
), @Filter(
    type = FilterType.CUSTOM,
    classes = {AutoConfigurationExcludeFilter.class}
)}
)
public @interface SpringBootApplication {
    //......
}
@ComponentScan
这个注解在Spring中很重要 ,它对应XML配置中的元素。
作用:自动扫描并加载符合条件的组件或者bean , 将这个bean定义加载到IOC容器中
@SpringBootConfiguration
作用:SpringBoot的配置类 ,标注在某个类上 , 表示这是一个SpringBoot的配置类;
我们继续进去这个注解查看
@Configuration
public @interface SpringBootConfiguration {
}

@Component
public @interface Configuration {
}
这里的 @Configuration,说明这是一个配置类 ,配置类就是对应Spring的xml 配置文件;
里面的 @Component 这就说明,启动类本身也是Spring中的一个组件而已,负责启动应用!
我们回到 SpringBootApplication 注解中继续看。
@EnableAutoConfiguration
@EnableAutoConfiguration :开启自动配置功能
以前我们需要自己配置的东西,而现在SpringBoot可以自动帮我们配置 ; @EnableAutoConfiguration
告诉SpringBoot开启自动配置功能,这样自动配置才能生效;
点进注解接续查看:
@AutoConfigurationPackage : 自动配置包
@Import({AutoConfigurationPackages.Registrar.class})
public @interface AutoConfigurationPackage {
}
@import :Spring底层注解@import , 给容器中导入一个组件
Registrar.class 作用:将主启动类的所在包及包下面所有子包里面的所有组件扫描到Spring容器 ;
这个分析完了,退到上一步,继续看
@Import({AutoConfigurationImportSelector.class}) :给容器导入组件 ;
AutoConfigurationImportSelector : 自动配置导入选择器,那么它会导入哪些组件的选择器呢?
spring.factories
全局搜索 spring.factories
我们根据源头打开spring.factories , 看到了很多自动配置的文件;这就是自动配置根源所在!

我们在上面的自动配置类随便找一个打开看看,比如 : WebMvcAutoConfiguration

可以看到这些一个个的都是JavaConfig配置类,而且都注入了一些Bean,可以找一些自己认识的类,看
着熟悉一下!
所以,自动配置真正实现是从classpath中搜寻所有的META-INF/spring.factories配置文件 ,并将其中
对应的 org.springframework.boot.autoconfigure. 包下的配置项,通过反射实例化为对应标注了
@Configuration的JavaConfig形式的IOC容器配置类 , 然后将这些都汇总成为一个实例并加载到IOC容
器中。
结论:
- SpringBoot在启动的时候从类路径下的META-INF/spring.factories中获取EnableAutoConfiguration指定的值
- 将这些值作为自动配置类导入容器 , 自动配置类就生效 , 帮我们进行自动配置工作
- 整个J2EE的整体解决方案和自动配置都在springboot-autoconfigure的jar包中;
- 它会给容器中导入非常多的自动配置类 (xxxAutoConfiguration), 就是给容器中导入这个场景需要的所有组件 , 并配置好这些组件 ;
- 有了自动配置类 , 免去了我们手动编写配置注入功能组件等的工作;
现在大家应该大概的了解了下,SpringBoot的运行原理,后面我们还会深化一次!
3.3 SpringApplication
不简单的方法
我最初以为就是运行了一个main方法,没想到却开启了一个服务;
@SpringBootApplication
public class SpringbootApplication {
	public static void main(String[] args) {
		SpringApplication.run(SpringbootApplication.class, args);
	}
}
SpringApplication.run分析
分析该方法主要分两部分,一部分是SpringApplication的实例化,二是run方法的执行;
SpringApplication
这个类主要做了以下四件事情:
- 推断应用的类型是普通的项目还是Web项目
- 查找并加载所有可用初始化器 , 设置到initializers属性中
- 找出所有的应用程序监听器,设置到listeners属性中
- 推断并设置main方法的定义类,找到运行的主类
查看构造器:
public SpringApplication(ResourceLoader resourceLoader, Class<?>... primarySources) {
        // ......
        this.webApplicationType = WebApplicationType.deduceFromClasspath();

        this.setInitializers(this.getSpringFactoriesInstances(ApplicationContextInitializer.class));
        this.setListeners(this.getSpringFactoriesInstances(ApplicationListener.class));
        this.mainApplicationClass = this.deduceMainApplicationClass();
    }
run方法

3.4 Yaml语法学习
配置文件
SpringBoot使用一个全局的配置文件 , 配置文件名称是固定的
- application.properties
- 语法结构 : key=value
- application.yml
- 语法结构 :key:空格 value
配置文件的作用 :修改SpringBoot自动配置的默认值,因为SpringBoot在底层都给我们自动配置好了;
比如我们可以在配置文件中修改Tomcat 默认启动的端口号!测试一下!
server.port=8081
yaml 概述
YAML是 "YAML Ain't a Markup Language" (YAML不是一种标记语言)的递归缩写。
这种语言以数据做为中心,而不是以标记语言为重点!
以前的配置文件,大多数都是使用xml来配置;比如一个简单的端口配置,我们来对比下yaml和xml传统xml配置:
<server>
	<port>8081<port>
</server>
yaml配置:
server:
    prot: 8080
yml基础语法
说明:语法要求严格!
1、空格不能省略
2、以缩进来控制层级关系,只要是左边对齐的一列数据都是同一个层级的。
3、属性和值的大小写都是十分敏感的。
字面量:普通的值 [ 数字,布尔值,字符串 ]
字面量直接写在后面就可以 , 字符串默认不用加上双引号或者单引号;
k: v
注意:
- “ ” 双引号,不会转义字符串里面的特殊字符 , 特殊字符会作为本身想表示的意思; 比如 : name: "kuang \n shen" 输出 : kuang 换行 shen
- '' 单引号,会转义特殊字符 , 特殊字符最终会变成和普通字符一样输出 比如 : name: ‘kuang \n shen’ 输出 : kuang \n shen
对象、Map(键值对)
#对象、Map格式
k:
 v1:
 v2:
在下一行来写对象的属性和值得关系,注意缩进;比如:
student:
	name: qinjiang
	age: 3
行内写法
student: {name: qinjiang,age: 3}
数组( List、set )
用 - 值表示数组中的一个元素,比如:
pets:
 - cat
 - dog
 - pig
行内写法
pets: [cat,dog,pig]
修改SpringBoot的默认端口号
配置文件中添加,端口号的参数,就可以切换端口;
server:
	port: 8082
3.5 注入配置文件
yaml文件更强大的地方在于,他可以给我们的实体类直接注入匹配值!
Yaml注入配置文件
- 在springboot项目中的resources目录下新建一个文件 application.yml
- 编写一个实体类 Dog;
package com.example.springboot.study.springboot.entity;

import lombok.Data;
import org.springframework.beans.factory.annotation.Value;
import org.springframework.stereotype.Component;

@Component
@Data
public class Dog {
    @Value("阿黄")
    private String name;
    @Value("18")
    private Integer age;
}
3、在SpringBoot的测试类下注入狗狗输出一下;
@SpringBootTest
class SpringbootApplicationTests {
	@Autowired
	Dog dog;

	@Test
	void contextLoads() {
		System.out.println(dog);
	}
}

4、我们在编写一个复杂一点的实体类:Person 类
package com.example.springboot.study.springboot.entity;

import lombok.Data;
import org.springframework.boot.context.properties.ConfigurationProperties;
import org.springframework.stereotype.Component;

import java.util.Date;
import java.util.List;
import java.util.Map;
/*
@ConfigurationProperties作用:
将配置文件中配置的每一个属性的值,映射到这个组件中;
告诉SpringBoot将本类中的所有属性和配置文件中相关的配置进行绑定
参数 prefix = “person” : 将配置文件中的person下面的所有属性一一对应
*/
@Data
@Component
@ConfigurationProperties(prefix = "person")
public class Person {
    private String name;
    private Integer age;
    private Boolean happy;
    private Date birth;
    private Map<String,Object> maps;
    private List<Object> lists;
    private Dog dog;
}
5、我们来使用yaml配置的方式进行注入,大家写的时候注意区别和优势,我们编写一个yaml配置
person:
  name: qinjiang
  age: 3
  happy: false
  birth: 2000/01/01
  maps: {k1: v1,k2: v2}
  lists:
    - code
    - girl
    - music
  dog:
    name: 旺财
    age: 1
7、我们刚才已经把person这个对象的所有值都写好了,我们现在来注入到我们的类中!
package com.example.springboot.study.springboot;

import com.example.springboot.study.springboot.entity.Person;
import org.junit.jupiter.api.Test;
import org.springframework.beans.factory.annotation.Autowired;
import org.springframework.boot.test.context.SpringBootTest;

@SpringBootTest
class SpringbootApplicationTests {
	@Autowired
	Person person;

	@Test
	void contextLoads() {
		System.out.println(person);
	}
}

yaml配置注入到实体类完全OK!
课堂测试:
1、将配置文件的key 值 和 属性的值设置为不一样,则结果输出为null,注入失败
2、在配置一个person2,然后将 @ConfigurationProperties(prefix = "person2") 指向我们的
person2;
加载指定配置文件
@PropertySource :加载指定的配置文件;
@configurationProperties:默认从全局配置文件中获取值;
1、我们去在resources目录下新建一个person.properties文件
name=kuangshen
2、然后在我们的代码中指定加载person.properties文件
package com.example.springboot.study.springboot.entity;

import lombok.Data;
import org.springframework.beans.factory.annotation.Value;
import org.springframework.boot.context.properties.ConfigurationProperties;
import org.springframework.context.annotation.PropertySource;
import org.springframework.stereotype.Component;

import java.util.Date;
import java.util.List;
import java.util.Map;

@Data
@Component
//@ConfigurationProperties(prefix = "person2")
@PropertySource(value = "classpath:person.properties")
public class Person {
    @Value("${name}")
    private String name;
    private Integer age;
    private Boolean happy;
    private Date birth;
    private Map<String,Object> maps;
    private List<Object> lists;
    private Dog dog;
}

配置文件占位符
person:
  name: qinjiang${random.uuid} # 随机uuid
  age: ${random.int} # 随机int
  happy: false
  birth: 2000/01/01
  maps: {k1: v1,k2: v2}
  lists:
    - code
    - girl
    - music
  dog:
    # 引用person.hello 的值,如果不存在就用 :后面的值,即 other,然后拼接上_旺财
    name: ${person.hello:other}_旺财
    age: 1

回顾properties配置
【注意】properties配置文件在写中文的时候,会有乱码 , 我们需要去IDEA中设置编码格式为UTF-8;
settings-->File Encodings 中配置;
测试步骤:
1、新建一个实体类User
package com.example.springboot.study.springboot.entity;

import lombok.Data;
import org.springframework.stereotype.Component;

@Data
@Component
public class User {
    private String name;
    private int age;
    private String sex;
}
2、编辑配置文件 user.properties
user1.name=kuangshen
user1.age=18
user1.sex=男
3、我们在User类上使用@Value来进行注入!
package com.example.springboot.study.springboot.entity;

import lombok.Data;
import org.springframework.beans.factory.annotation.Value;
import org.springframework.context.annotation.PropertySource;
import org.springframework.stereotype.Component;

@Data
@Component
@PropertySource(value = "classpath:user.properties")
public class User {
    //直接使用@value
    @Value("${user.name}") //从配置文件中取值
    private String name;
    @Value("#{9*2}") // #{SPEL} Spring表达式
    private int age;
    @Value("男") // 字面量
    private String sex;
}
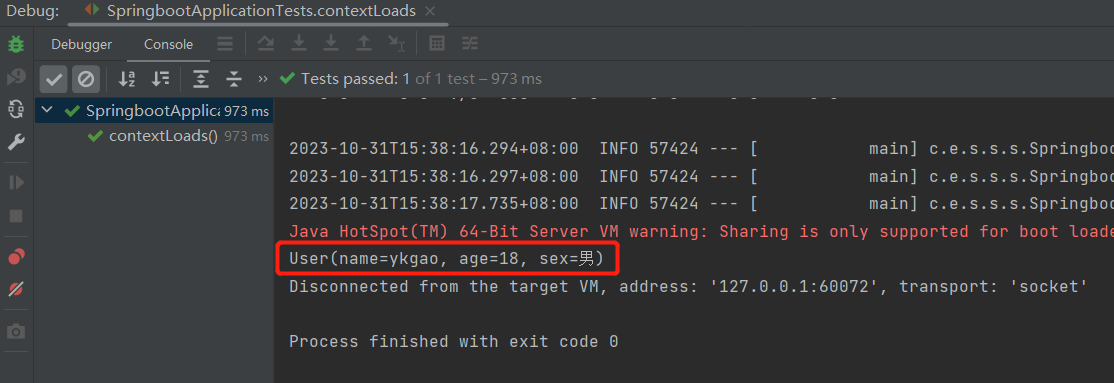
4、Springboot测试
package com.example.springboot.study.springboot;

import com.example.springboot.study.springboot.entity.User;
import org.junit.jupiter.api.Test;
import org.springframework.beans.factory.annotation.Autowired;
import org.springframework.boot.test.context.SpringBootTest;

@SpringBootTest
class SpringbootApplicationTests {
	@Autowired
	User user;

	@Test
	void contextLoads() {
		System.out.println(user);
	}
}
对比小结
@Value这个使用起来并不友好!我们需要为每个属性单独注解赋值,比较麻烦;我们来看个功能对比图

1、@ConfigurationProperties只需要写一次即可 , @Value则需要每个字段都添加 \
2、松散绑定:这个什么意思呢? 比如我的yml中写的last-name,这个和lastName是一样的, - 后面跟着的字母默认是大写的。这就是松散绑定。可以测试一下
3、JSR303数据校验 , 这个就是我们可以在字段是增加一层过滤器验证 , 可以保证数据的合法性
4、复杂类型封装,yml中可以封装对象 , 使用value就不支持
结论:
配置yml和配置properties都可以获取到值 , 强烈推荐 yml;
如果我们在某个业务中,只需要获取配置文件中的某个值,可以使用一下 @value;
如果说,我们专门编写了一个JavaBean来和配置文件进行一一映射,就直接@configurationProperties,不要犹豫!
JSR303数据校验
Springboot中可以用@validated来校验数据,如果数据异常则会统一抛出异常,方便异常中心统一处
理。我们这里来写个注解让我们的name只能支持Email格式;
@Email注解的使用方法
- 添加依赖
<dependency>
			<groupId>org.springframework.boot</groupId>
			<artifactId>spring-boot-starter-validation</artifactId>
</dependency>

使用数据校验,可以保证数据的正确性; 下面列出一些常见的使用
@NotNull(message="名字不能为空")
private String userName;
@Max(value=120,message="年龄最大不能查过120")
private int age;
@Email(message="邮箱格式错误")
private String email;

空检查
@Null 验证对象是否为null
@NotNull 验证对象是否不为null, 无法查检长度为0的字符串
@NotBlank 检查约束字符串是不是Null还有被Trim的长度是否大于0,只对字符串,且会去掉前后空
格.
@NotEmpty 检查约束元素是否为NULL或者是EMPTY.

Booelan检查
@AssertTrue 验证 Boolean 对象是否为 true
@AssertFalse 验证 Boolean 对象是否为 false

长度检查
@Size(min=, max=) 验证对象(Array,Collection,Map,String)长度是否在给定的范围之内
@Length(min=, max=) string is between min and max included.

日期检查
@Past 验证 Date 和 Calendar 对象是否在当前时间之前
@Future 验证 Date 和 Calendar 对象是否在当前时间之后
@Pattern 验证 String 对象是否符合正则表达式的规则

.......等等
除此以外,我们还可以自定义一些数据校验规则
3.6 多环境切换
profile是Spring对不同环境提供不同配置功能的支持,可以通过激活不同的环境版本,实现快速切换环境;
多配置文件
我们在主配置文件编写的时候,文件名可以是 application-{profile}.properties/yml , 用来指定多个环境版本;
例如:application-test.properties 代表测试环境配置 application-dev.properties 代表开发环境配置
但是Springboot并不会直接启动这些配置文件,它默认使用application.properties主配置文件;
Spring配置
在application.yml中添加配置
#选择要激活那个环境块
spring:
  profiles:
    active:
      - "@activated.profile@"
在application-dev.yml中添加配置
# application-dev.yml
server:
  port: 9001
在application-prod.yml中添加配置
# application-prod.yml
server:
  port: 9002
Maven 配置
<profiles>
		<profile>
			<id>dev</id>
			<properties>
				<activated.profile>dev</activated.profile>
			</properties>
		</profile>
		<profile>
			<id>test</id>
			<properties>
				<activated.profile>test</activated.profile>
			</properties>
		</profile>
		<profile>
			<id>pro</id>
			<properties>
				<activated.profile>pro</activated.profile>
			</properties>
			<!--默认开发环境-->
			<activation>
				<activeByDefault>true</activeByDefault>
			</activation>
		</profile>
	</profiles>
4. SpringData简介
对于数据访问层,无论是 SQL(关系型数据库) 还是 NOSQL(非关系型数据库),Spring Boot 底层都是采用 Spring Data 的方式进行统一处理。
Spring Boot 底层都是采用 Spring Data 的方式进行统一处理各种数据库,Spring Data 也是 Spring 中与 Spring Boot、Spring Cloud 等齐名的知名项目。
5. 集成 JDBC
导入测试数据库
CREATE DATABASE /*!32312 IF NOT EXISTS*/`springboot` /*!40100 DEFAULT
CHARACTER SET utf8 */;
USE `springboot`;
/*Table structure for table `department` */
DROP TABLE IF EXISTS `department`;
CREATE TABLE `department` (
`id` int(3) NOT NULL AUTO_INCREMENT COMMENT '部门id',
`department_name` varchar(20) NOT NULL COMMENT '部门名字',
PRIMARY KEY (`id`)
) ENGINE=InnoDB AUTO_INCREMENT=106 DEFAULT CHARSET=utf8;
/*Data for the table `department` */
insert into `department`(`id`,`department_name`) values (101,'技术部'),
(102,'销售部'),(103,'售后部'),(104,'后勤部'),(105,'运营部');
/*Table structure for table `employee` */
DROP TABLE IF EXISTS `employee`;
CREATE TABLE `employee` (
`id` int(5) NOT NULL AUTO_INCREMENT COMMENT '雇员id',
`last_name` varchar(100) NOT NULL COMMENT '名字',
`email` varchar(100) NOT NULL COMMENT '邮箱',
`gender` int(2) NOT NULL COMMENT '性别1 男, 0 女',
`department` int(3) NOT NULL COMMENT '部门id',
`birth` datetime NOT NULL COMMENT '生日',
PRIMARY KEY (`id`)
) ENGINE=InnoDB AUTO_INCREMENT=1006 DEFAULT CHARSET=utf8;

/*Data for the table `employee` */
insert into
`employee`(`id`,`last_name`,`email`,`gender`,`department`,`birth`) values
(1001,'张三','24736743@qq.com',1,101,'2020-03-06 15:04:33'),(1002,'李
四','24736743@qq.com',1,102,'2020-03-06 15:04:36'),(1003,'王
五','24736743@qq.com',0,103,'2020-03-06 15:04:37'),(1004,'赵
六','24736743@qq.com',1,104,'2020-03-06 15:04:39'),(1005,'孙
七','24736743@qq.com',0,105,'2020-03-06 15:04:45');
添加依赖
<dependency>
    <groupId>org.springframework.boot</groupId>
    <artifactId>spring-boot-starter-jdbc</artifactId>
</dependency>
<!--mysql 依赖-->
<dependency>
    <groupId>mysql</groupId>
    <artifactId>mysql-connector-java</artifactId>
    <version>8.0.33</version>
    <scope>runtime</scope>
</dependency>
编写yaml配置文件连接数据库
spring:
  datasource:
    username: root
    password: 123456
    #?serverTimezone=UTC解决时区的报错
    url: jdbc:mysql://localhost:3306/springboot?serverTimezone=UTC&useUnicode=true&characterEncoding=utf-8
    driver-class-name: com.mysql.cj.jdbc.Driver
测试类测试
package com.example.springboot.study.springboot;

import org.junit.jupiter.api.Test;
import org.springframework.beans.factory.annotation.Autowired;
import org.springframework.boot.test.context.SpringBootTest;
import javax.sql.DataSource;
import java.sql.Connection;
import java.sql.SQLException;

@SpringBootTest
class SpringbootApplicationTests {
	@Autowired
	DataSource dataSource;

	@Test
	void contextLoads() throws SQLException {
		//看一下默认数据源
		System.out.println(dataSource.getClass());
		//获得连接
		Connection connection = dataSource.getConnection();
		System.out.println(connection);
		//关闭连接
		connection.close();
	}
}
结果:我们可以看到他默认给我们配置的数据源为 : class com.zaxxer.hikari.HikariDataSource , 我们并没有手动配置

我们来全局搜索一下,找到数据源的所有自动配置都在 :HikariDataSource文件:
HikariDataSource 号称 Java WEB 当前速度最快的数据源,相比于传统的 C3P0 、DBCP、Tomcat、jdbc 等连接池更加优秀;
可以使用 spring.datasource.type 指定自定义的数据源类型,值为 要使用的连接池实现的完全限定名
JdbcTemplate
- 有了数据源(com.zaxxer.hikari.HikariDataSource),然后可以拿到数据库连接(java.sql.Connection),有了连接,就可以使用原生的 JDBC 语句来操作数据库;
- 即使不使用第三方第数据库操作框架,如 MyBatis等,Spring 本身也对原生的JDBC 做了轻量级的封装,即 JdbcTemplate 。
- 数据库操作的所有 CRUD 方法都在 JdbcTemplate 中。
- Spring Boot 不仅提供了默认的数据源,同时默认已经配置好了 JdbcTemplate 放在了容器中,程序员只需自己注入即可使用 。
- JdbcTemplate 的自动配置是依赖 org.springframework.boot.autoconfigure.jdbc 包下的JdbcTemplateConfiguration 类
JdbcTemplate主要提供以下几类方法:
- execute方法:可以用于执行任何SQL语句,一般用于执行DDL语句;
- update方法及batchUpdate方法:update方法用于执行新增、修改、删除等语句;batchUpdate方法用于执行批处理相关语句;
- query方法及queryForXXX方法:用于执行查询相关语句;
- call方法:用于执行存储过程、函数相关语句。
测试
编写一个Controller,注入 jdbcTemplate,编写测试方法进行访问测试;
package com.example.springboot.study.springboot.controller;

import org.springframework.beans.factory.annotation.Autowired;
import org.springframework.jdbc.core.JdbcTemplate;
import org.springframework.web.bind.annotation.GetMapping;
import org.springframework.web.bind.annotation.PathVariable;
import org.springframework.web.bind.annotation.RequestMapping;
import org.springframework.web.bind.annotation.RestController;

import java.util.Date;
import java.util.List;
import java.util.Map;
@RestController
@RequestMapping("/jdbc")
public class JdbcController {
    /**
     * Spring Boot 默认提供了数据源,默认提供了
     org.springframework.jdbc.core.JdbcTemplate
     * JdbcTemplate 中会自己注入数据源,用于简化 JDBC操作
     * 还能避免一些常见的错误,使用起来也不用再自己来关闭数据库连接
     */
    @Autowired
    JdbcTemplate jdbcTemplate;

    //查询employee表中所有数据
//List 中的1个 Map 对应数据库的 1行数据
//Map 中的 key 对应数据库的字段名,value 对应数据库的字段值
    @GetMapping("/list")
    public List<Map<String, Object>> userList(){
        String sql = "select * from employee";
        List<Map<String, Object>> maps = jdbcTemplate.queryForList(sql);
        return maps;
    }

    //新增一个用户
    @GetMapping("/add")
    public String addUser(){
    //插入语句,注意时间问题
        String sql = "insert into employee(last_name,email,gender,department,birth)" +
        " values ('狂神说','24736743@qq.com',1,101,'"+ new
                Date() +"')";
        jdbcTemplate.update(sql);
        //查询
        return "addOk";
    }

    //修改用户信息
    @GetMapping("/update/{id}")
    public String updateUser(@PathVariable("id") int id){
        //插入语句
        String sql = "update employee set last_name=?,email=? where id="+id;
        //数据
        Object[] objects = new Object[2];
        objects[0] = "秦疆";
        objects[1] = "24736743@sina.com";
        jdbcTemplate.update(sql,objects);
        //查询
        return "updateOk";
    }

    //删除用户
    @GetMapping("/delete/{id}")
    public String delUser(@PathVariable("id") int id){
        //插入语句
        String sql = "delete from employee where id=?";
        jdbcTemplate.update(sql,id);
        //查询
        return "deleteOk";
    }
}

6. 集成 Druid
Druid 是阿里巴巴开源平台上一个数据库连接池实现,结合了 C3P0、DBCP 等 DB 池的优点,同时加入了日志监控。
Druid 可以很好的监控 DB 池连接和 SQL 的执行情况,天生就是针对监控而生的 DB 连接池。
Druid已经在阿里巴巴部署了超过600个应用,经过一年多生产环境大规模部署的严苛考验。
配置数据源
1、添加上 Druid 数据源依赖。
<dependency>
<groupId>com.alibaba</groupId>
<artifactId>druid</artifactId>
<version>1.1.21</version>
</dependency>
2、切换数据源;之前已经说过 Spring Boot 2.0 以上默认使用 com.zaxxer.hikari.HikariDataSource 数
据源,但可以 通过 spring.datasource.type 指定数据源。
spring:
  datasource:
    username: root
    password: 123456
    url: jdbc:mysql://localhost:3306/springboot?serverTimezone=UTC&useUnicode=true&characterEncoding=utf-8
    driver-class-name: com.mysql.cj.jdbc.Driver
    type: com.alibaba.druid.pool.DruidDataSource # 自定义数据源
3、数据源切换之后,在测试类中注入 DataSource,然后获取到它,输出一看便知是否成功切换;
package com.example.springboot.study.springboot;

import org.junit.jupiter.api.Test;
import org.springframework.beans.factory.annotation.Autowired;
import org.springframework.boot.test.context.SpringBootTest;
import javax.sql.DataSource;
import java.sql.Connection;
import java.sql.SQLException;

@SpringBootTest
class SpringbootApplicationTests {
	@Autowired
	DataSource dataSource;

	@Test
	void contextLoads() throws SQLException {
		//看一下默认数据源
		System.out.println(dataSource.getClass());
		//获得连接
		Connection connection = dataSource.getConnection();
		System.out.println(connection);
		//关闭连接
		connection.close();
	}
}
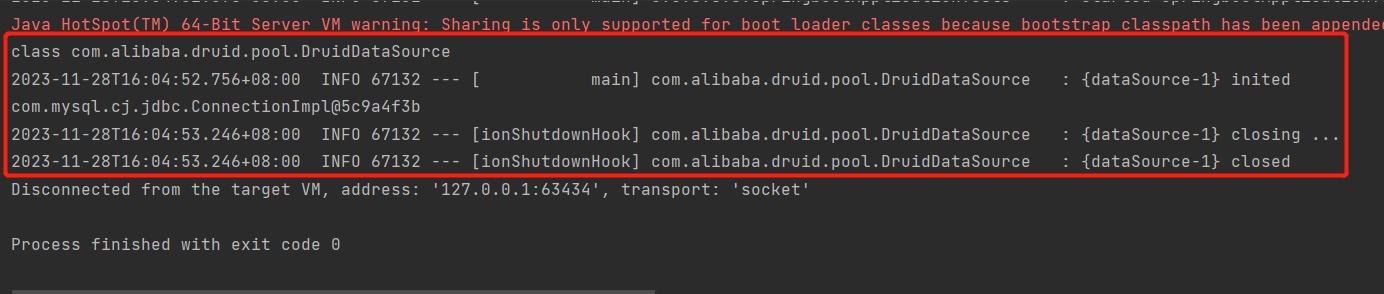
4、切换成功!既然切换成功,就可以设置数据源连接初始化大小、最大连接数、等待时间、最小连接数等设置项;可以查看源码
spring:
  datasource:
    username: root
    password: 123456
    url: jdbc:mysql://localhost:3306/springboot?serverTimezone=UTC&useUnicode=true&characterEncoding=utf-8
    driver-class-name: com.mysql.cj.jdbc.Driver
    type: com.alibaba.druid.pool.DruidDataSource # 自定义数据源

    #Spring Boot 默认是不注入这些属性值的,需要自己绑定
    #druid 数据源专有配置
    initialSize: 5
    minIdle: 5
    maxActive: 20
    maxWait: 60000
    timeBetweenEvictionRunsMillis: 60000
    minEvictableIdleTimeMillis: 300000
    validationQuery: SELECT 1 FROM DUAL
    testWhileIdle: true
    testOnBorrow: false
    testOnReturn: false
    poolPreparedStatements: true
    #配置监控统计拦截的filters,stat:监控统计、log4j:日志记录、wall:防御sql注入
    #如果允许时报错 java.lang.ClassNotFoundException:org.apache.log4j.Priority
    #则导入 log4j 依赖即可,Maven 地址:https://mvnrepository.com/artifact/log4j/log4j
    filters: stat,wall,log4j
    maxPoolPreparedStatementPerConnectionSize: 20
    useGlobalDataSourceStat: true
    connectionProperties: druid.stat.mergeSql=true;druid.stat.slowSqlMillis=500
5、导入Log4j 的依赖
<dependency>
    <groupId>log4j</groupId>
    <artifactId>log4j</artifactId>
    <version>1.2.17</version>
</dependency>
6、现在需要程序员自己为 DruidDataSource 绑定全局配置文件中的参数,再添加到容器中,而不再使
用 Spring Boot 的自动生成了;我们需要 自己添加 DruidDataSource 组件到容器中,并绑定属性;
package com.example.springboot.study.springboot.config;

import com.alibaba.druid.pool.DruidDataSource;
import org.springframework.boot.context.properties.ConfigurationProperties;
import org.springframework.context.annotation.Bean;
import org.springframework.context.annotation.Configuration;

import javax.sql.DataSource;

@Configuration
public class DruidConfig {
    /*将自定义的 Druid数据源添加到容器中,不再让SpringBoot自动创建绑定全局配置文件中的
     druid 数据源属性到 om.alibaba.druid.pool.DruidDataSource从而让它们生效
    @ConfigurationProperties(prefix = "spring.datasource"):作用就是
    将全局配置文件中前缀为 spring.datasource的属性值注入到 com.alibaba.druid.pool.DruidDataSource 的同名参数中*/

    @ConfigurationProperties(prefix = "spring.datasource")
    @Bean
    public DataSource druidDataSource() {
        return new DruidDataSource();
    }
}
7、去测试类中测试一下;看是否成功
package com.example.springboot.study.springboot;
import com.alibaba.druid.pool.DruidDataSource;
import org.junit.jupiter.api.Test;
import org.springframework.beans.factory.annotation.Autowired;
import org.springframework.boot.test.context.SpringBootTest;
import javax.sql.DataSource;
import java.sql.Connection;
import java.sql.SQLException;
@SpringBootTest
class SpringbootApplicationTests {
@Autowired
DataSource dataSource;
@Test
void contextLoads() throws SQLException {
//看一下默认数据源
System.out.println(dataSource.getClass());
//获得连接
Connection connection = dataSource.getConnection();
System.out.println(connection);
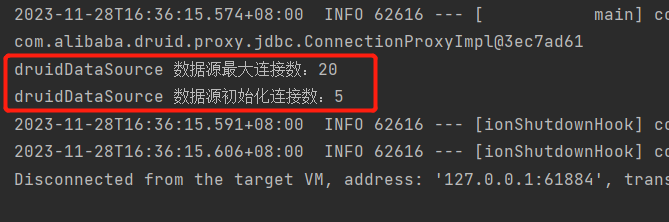
DruidDataSource druidDataSource = (DruidDataSource) dataSource;
System.out.println("druidDataSource 数据源最大连接数:" + druidDataSource.getMaxActive());
System.out.println("druidDataSource 数据源初始化连接数:" +druidDataSource.getInitialSize());
//关闭连接
connection.close();
}
}
输出结果 :可见配置参数已经生效!
配置 Druid 数据源监控
Druid 数据源具有监控的功能,并提供了一个 web 界面方便用户查看,类似安装 路由器 时,人家也提
供了一个默认的 web 页面。
可能因为springboot3.0用不了的原因 访问页面一直报错
7.整合MyBatis
整合测试
1、导入 MyBatis 所需要的依赖
<dependency>
    <groupId>org.mybatis.spring.boot</groupId>
    <artifactId>mybatis-spring-boot-starter</artifactId>
    <version>3.0.2</version>
</dependency>
2、创建实体类
package com.example.springboot.study.springboot.entity;

import lombok.AllArgsConstructor;
import lombok.Data;
import lombok.NoArgsConstructor;

@Data
@NoArgsConstructor
@AllArgsConstructor
public class Department {
    private Integer id;
    private String departmentName;
}
3、创建mapper目录以及对应的 Mapper 接口
package com.example.springboot.study.springboot.config.mapper;

import com.example.springboot.study.springboot.entity.Department;
import org.apache.ibatis.annotations.Mapper;
import org.springframework.stereotype.Repository;

import java.util.List;

@Mapper
@Repository
public interface DepartmentMapper {
    // 获取所有部门信息
    List<Department> getDepartments();
    // 通过id获得部门
    Department getDepartment(Integer id);
}
4、对应的Mapper映射文件
<?xml version="1.0" encoding="UTF-8" ?>
<!DOCTYPE mapper
        PUBLIC "-//mybatis.org//DTD Mapper 3.0//EN"
        "http://mybatis.org/dtd/mybatis-3-mapper.dtd">
<mapper namespace="com.example.springboot.study.springboot.config.mapper.DepartmentMapper">
    <select id="getDepartments" resultType="Department">
        select * from department;
    </select>
    <select id="getDepartment" resultType="Department" parameterType="int">
        select * from department where id = #{id};
    </select>
</mapper>
5、maven配置资源过滤问题
<resources>
	<resource>
		<directory>src/main/java</directory>
		<includes>
			<include>**/*.xml</include>
		</includes>
		<filtering>true</filtering>
	</resource>
</resources>
既然已经提供了 myBatis 的映射配置文件,自然要告诉 spring boot 这些文件的位置
#指定myBatis的核心配置文件与Mapper映射文件
mybatis:
  mapper-locations: classpath:mapper/*.xml
  # 注意:对应实体类的路径
  type-aliases-package: com.example.springboot.study.springboot.entity
6、编写部门的 DepartmentController 进行测试!
package com.example.springboot.study.springboot.controller;

import com.example.springboot.study.springboot.config.mapper.DepartmentMapper;
import com.example.springboot.study.springboot.entity.Department;
import org.springframework.beans.factory.annotation.Autowired;
import org.springframework.web.bind.annotation.GetMapping;
import org.springframework.web.bind.annotation.PathVariable;
import org.springframework.web.bind.annotation.RestController;

import java.util.List;

@RestController
public class DepartmentController {
    @Autowired
    DepartmentMapper departmentMapper;
    // 查询全部部门
    @GetMapping("/getDepartments")
    public List<Department> getDepartments(){
        return departmentMapper.getDepartments();
    }
    // 查询全部部门
    @GetMapping("/getDepartment/{id}")
    public Department getDepartment(@PathVariable("id") Integer id){
        return departmentMapper.getDepartment(id);
    }
}
启动项目访问进行测试!


【推荐】国内首个AI IDE,深度理解中文开发场景,立即下载体验Trae
【推荐】编程新体验,更懂你的AI,立即体验豆包MarsCode编程助手
【推荐】抖音旗下AI助手豆包,你的智能百科全书,全免费不限次数
【推荐】轻量又高性能的 SSH 工具 IShell:AI 加持,快人一步
· 阿里最新开源QwQ-32B,效果媲美deepseek-r1满血版,部署成本又又又降低了!
· 单线程的Redis速度为什么快?
· SQL Server 2025 AI相关能力初探
· AI编程工具终极对决:字节Trae VS Cursor,谁才是开发者新宠?
· 展开说说关于C#中ORM框架的用法!