科研画图:散点连接并平滑(基于Matlab和Python)
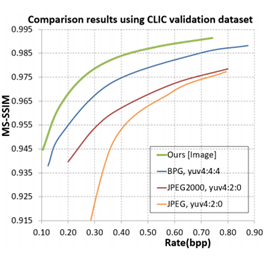
导师要求参照别人论文中的图(下图),将其论文中的图画美观些,网上关于科研画图相关的代码比较少,就自己鼓捣了下。

附上自己整合验证过的代码:
功能:将散点连接并平滑
1)Matlab
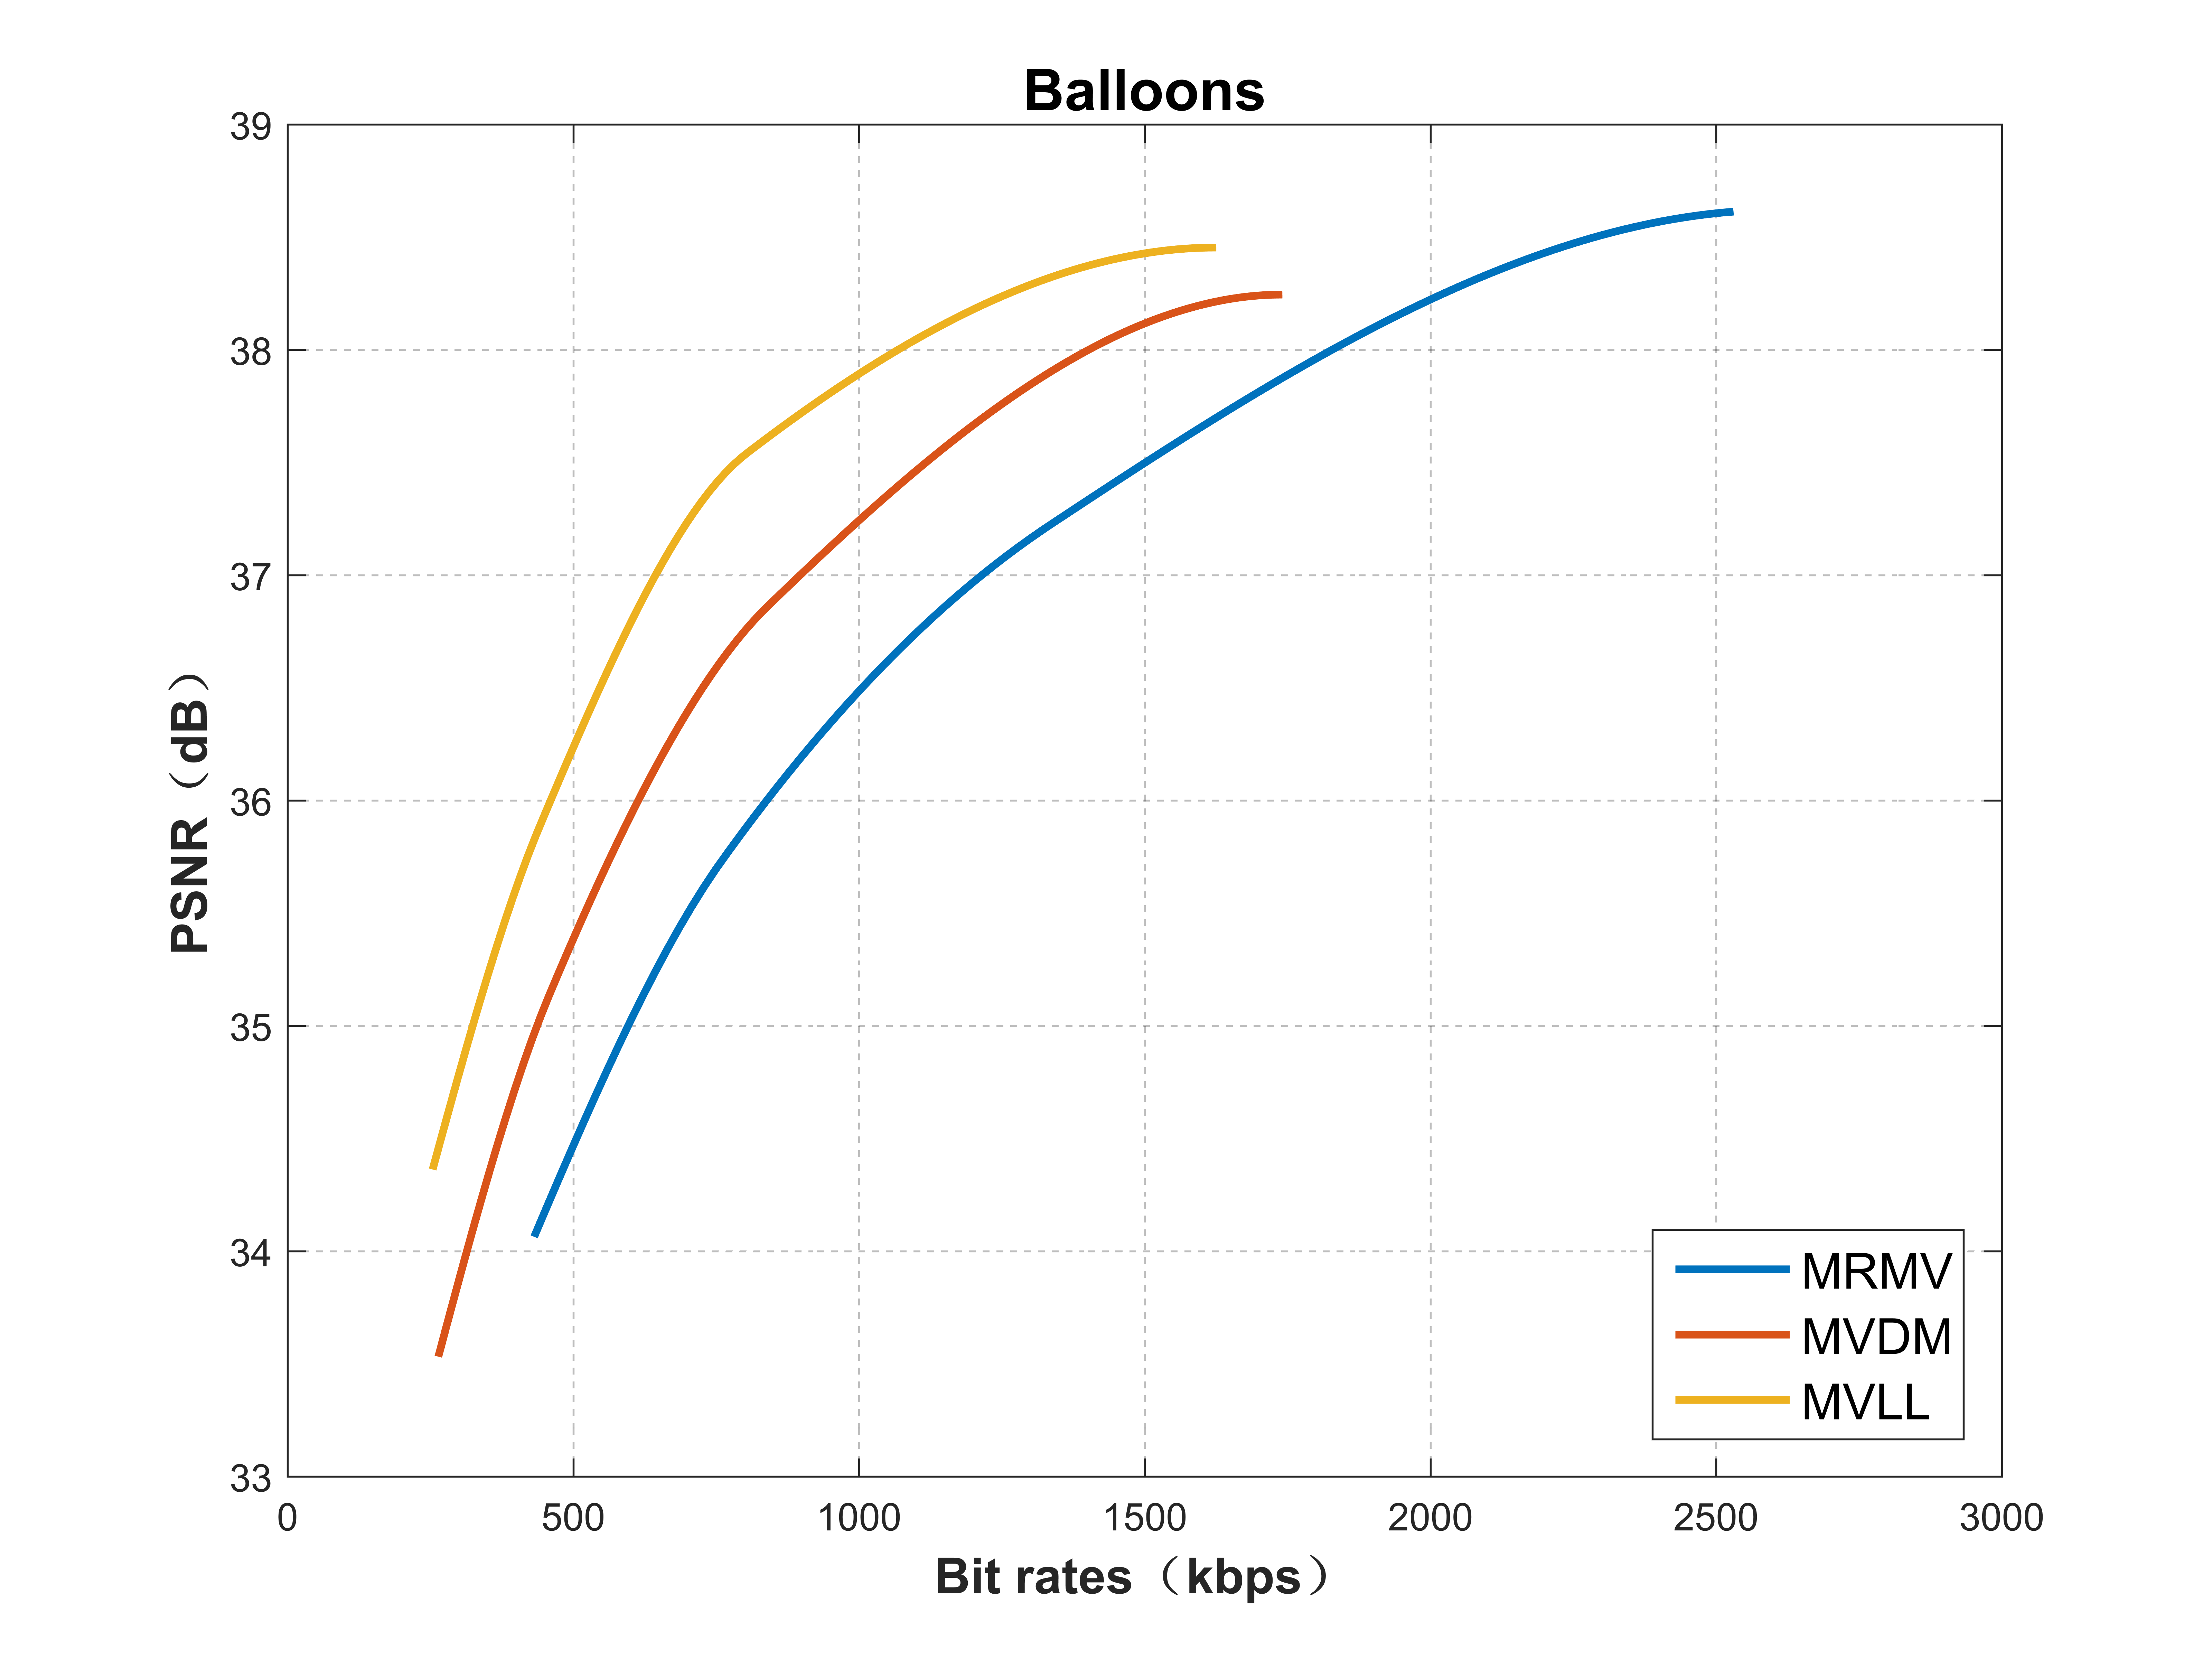
效果图:

x1=[431.50032,759.5552,1335.3736,2530.388] %输入以下三组数据
y1=[34.06366,35.73132,37.2244,38.61294]
x2=[263.8656,458.7952,839.6584,1740.9088]
y2=[33.5318074,35.1415668,36.8603528,38.244926]
x3=[253.91296,441.854,803.4116,1625.2548]
y3=[34.3625,35.88912,37.5403,38.45364]
a=linspace(min(x1),max(x1)); %插值后将散点连线平滑化
b=interp1(x1,y1,a,'cubic');
c=linspace(min(x2),max(x2));
d=interp1(x2,y2,c,'cubic');
e=linspace(min(x3),max(x3));
f=interp1(x3,y3,e,'cubic');
plot(a,b, 'LineWidth',2, 'LineSmoothing', 'on'); %画ab对应曲线,粗细,平滑
hold on
plot(c,d, 'LineWidth',2, 'LineSmoothing', 'on'); %画cd对应曲线,粗细,平滑
hold on
plot(e,f, 'LineWidth',2, 'LineSmoothing', 'on'); %画ef对应曲线,粗细,平滑
axis([0,3000,33,39])  %确定x轴与y轴框图大小
legend({'MRMV','MVDM','MVLL'},'FontSize',13,'Location','southeast','Orientation','vertical') %题注设置:名称,字号,位置,方向
xlabel('Bit rates(kbps)','FontSize',13,'FontWeight','bold') %x轴设置:标题,字号,字体粗细
ylabel('PSNR(dB)','FontSize',13,'FontWeight','bold') %y轴设置:名称,字号,字体粗细
title('Balloons','FontSize',15,'FontWeight','bold') %标题描述,名称,字号,字体粗细
set(gca,'ygrid','on','gridlinestyle','--','Gridalpha',0.3) %网格设置
grid on; %网格
print(gcf, '-dpng', '-r800', 'C:\Users\Administrator\Desktop\test.png') %保存图片,格式为png,分辨率800,保存路径
2)Python
小问题:翘尾问题需要解决

# author: Kobay time:2019/10/18
import matplotlib.pyplot as plt
import numpy as np
from scipy.interpolate import spline
x1 = np.array([431.50032,759.5552,1335.3736,2530.388])
y1 = np.array([34.06366,35.73132,37.2244,38.61294])
x2 = np.array([263.8656,458.7952,839.6584,1740.9088])
y2 = np.array([33.5318074,35.1415668,36.8603528,38.244926])
x3 = np.array([253.91296,441.854,803.4116,1625.2548])
y3 = np.array([34.3625,35.88912,37.5403,38.45364])
x1_new = np.linspace(x1.min(), x1.max())  # 300 represents number of points to make between T.min and T.max
y1_smooth = spline(x1, y1, x1_new)
x2_new = np.linspace(x2.min(), x2.max(), 3000)  # 300 represents number of points to make between T.min and T.max
y2_smooth = spline(x2, y2, x2_new)
x3_new = np.linspace(x3.min(), x3.max(), 3000)  # 300 represents number of points to make between T.min and T.max
y3_smooth = spline(x3, y3, x3_new)
# 散点图
plt.scatter(x1, y1, c='black', alpha=0.5)  # alpha:透明度) c:颜色
# 折线图
plt.plot(x1, y1, linewidth=1)  # 线宽linewidth=1matl
# 平滑后的折线图
plt.plot(x1_new, y1_smooth, c='blue',label='MRMV')
plt.plot(x2_new, y2_smooth, c='orange',label='MVDM')
plt.plot(x3_new, y3_smooth, c='gray',label='MVLL')
# 解决中文显示问题
# plt.rcParams['font.sans-serif'] = ['SimHei']  # SimHei黑体
# plt.rcParams['axes.unicode_minus'] = False
plt.title("Balloons", fontdict={'family' : 'Calibri', 'size': 16,'weight':'bold'})  # 标题及字号
plt.xlabel("Bit rates(kbps)", fontdict={'family' : 'Calibri', 'size': 14,'weight':'bold'})  # X轴标题及字号
plt.ylabel("PSNR(dB)", fontdict={'family' : 'Calibri', 'size': 14,'weight':'bold'})  # Y轴标题及字号
plt.tick_params(axis='both', labelsize=14)  # 刻度大小
plt.axis([0, 3000, 33, 39])#设置坐标轴的取值范围
plt.grid(linestyle='-.')
plt.legend(loc=4)
plt.show()
# plt.save('squares_plot.png'(文件名), bbox_inches='tight'(将图表多余的空白部分剪掉))
# 用它替换plt.show实现自动保存图表
码字不易,如果您觉得有帮助,麻烦点个赞再走呗~


