spring学习(01)之IOC
spring学习(01)之IOC
IOC:控制反转——Spring通过一种称作控制反转(IOC)的技术促进了低耦合。当应用了IOC,一个对象依赖的其它对象会通过被动的方式传递进来,而不是这个对象自己创建或者查找依赖对象。你可以认为IoC与JNDI相反——不是对象从容器中查找依赖,而是容器在对象初始化时不等对象请求就主动将依赖传递给它。
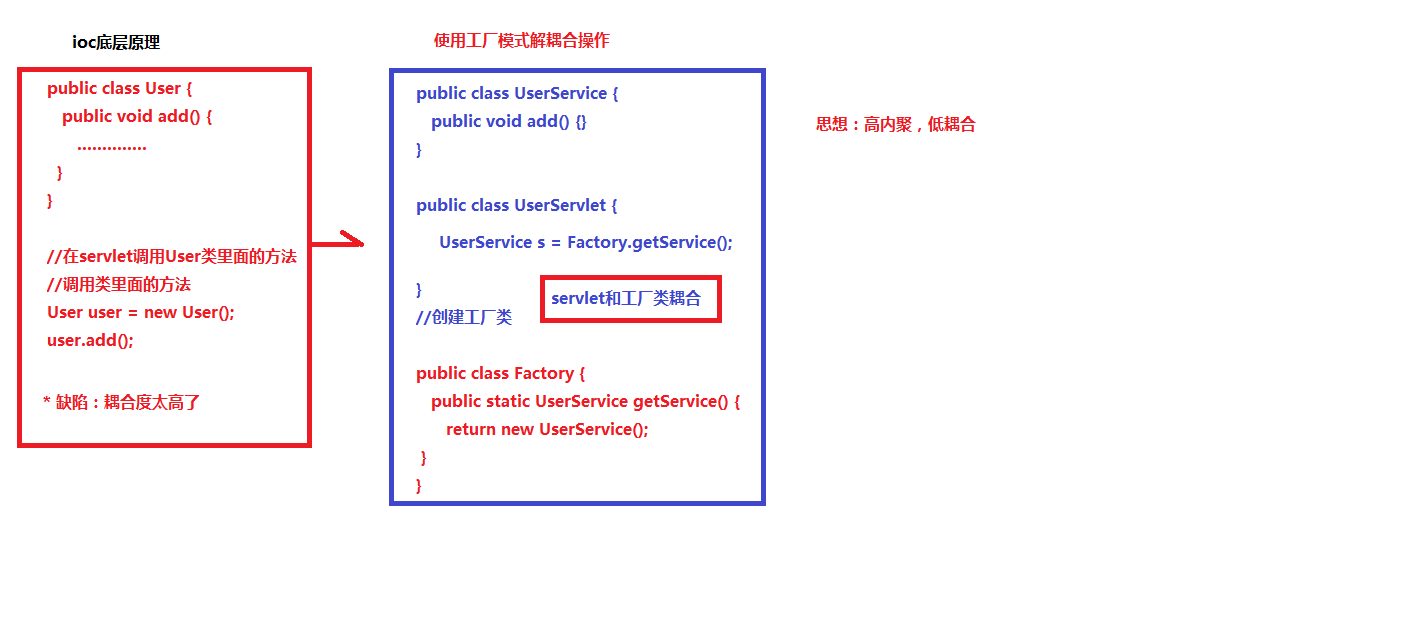
简单来说,- 比如有一个类,在类里面有方法(不是静态的方法),调用类里面的方法,创建类的对象,使用对象调用方法,创建类对象的过程,需要new出来对象
- 把对象的创建不是通过new方式实现,而是交给spring配置创建类对象
Spring的ioc操作
1 把对象的创建交给spring进行管理
2 ioc操作两部分:
(1)ioc的配置文件方式
(2)ioc的注解方式
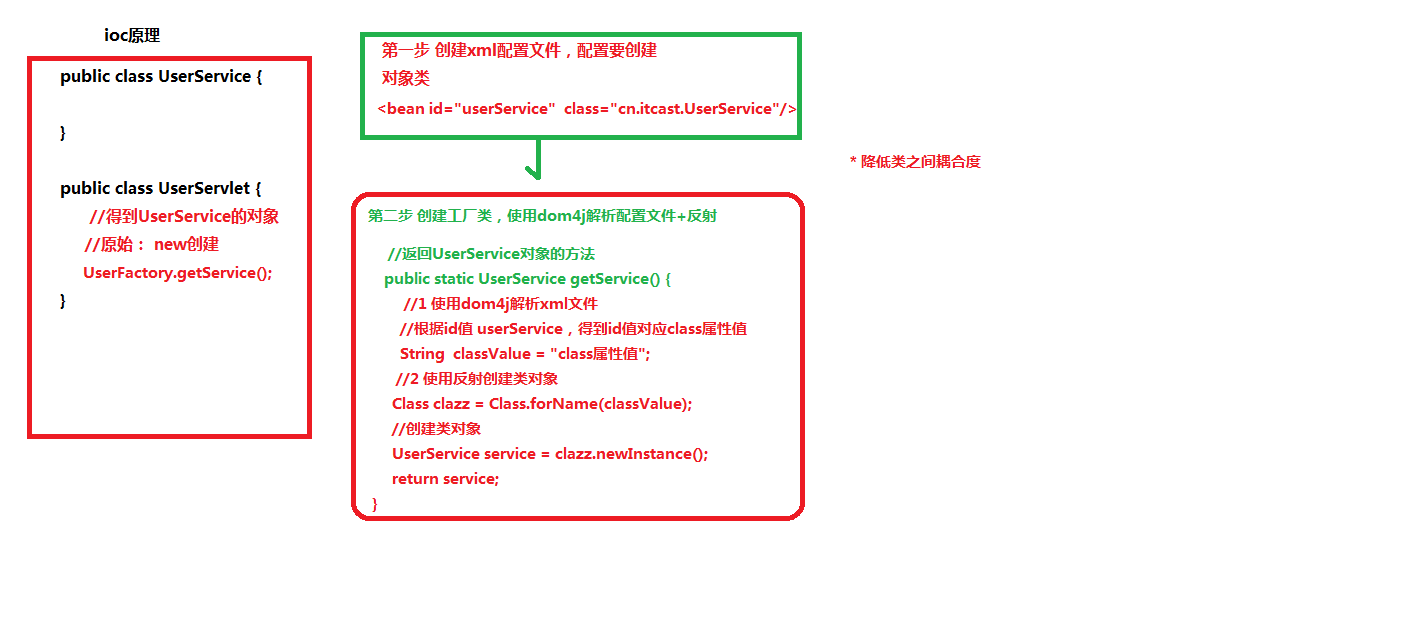
底层原理使用的技术
(1) xml配置文件
(2)dom4j解决xml
(3)工厂设计模式
(4 反射
IOC底层原理画图解析


Ioc入门案例
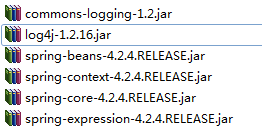
第一步 导入jar包
(1)解压资料zip文件
Jar特点:都有三个jar包


(2)做spring最基本功能时候,导入四个核心的jar包就可以了
(3)导入支持日志输出的jar包

第二步 创建类,在类里面创建方法
 1 package cn.lmn.ioc;
 2
 3 public class User {
 4     public void add(){
 5         System.out.println("add.........");
 6     }
 7
 8     public static void main(String[] args) {
 9         //原始做法
10         User user=new User();
11         user.add();
12     }
13 }
第三步 创建spring配置文件,配置创建类
(1)spring核心配置文件名称和位置不是固定的
- 建议放到src下面,官方建议applicationContext.xml
(2)引入schema约束

<beans xmlns="http://www.springframework.org/schema/beans"
    xmlns:xsi="http://www.w3.org/2001/XMLSchema-instance"
    xsi:schemaLocation="
        http://www.springframework.org/schema/beans http://www.springframework.org/schema/beans/spring-beans.xsd">
(3)配置对象创建
<?xml version="1.0" encoding="UTF-8"?>
<beans xmlns="http://www.springframework.org/schema/beans"
    xmlns:xsi="http://www.w3.org/2001/XMLSchema-instance"
    xsi:schemaLocation="
        http://www.springframework.org/schema/beans http://www.springframework.org/schema/beans/spring-beans.xsd">

    <bean id="user" class="cn.lmn.ioc.User"></bean>

</beans>
第四步 写代码测试对象创建
(1)这段代码在测试中使用
 1 package cn.lmn.test;
 2
 3 import org.junit.Test;
 4 import org.springframework.context.ApplicationContext;
 5 import org.springframework.context.support.ClassPathXmlApplicationContext;
 6
 7 import cn.lmn.ioc.User;
 8
 9 public class TestIOC {
10     @Test
11     public void testUser() {
12         // 1加载spring的配置文件,创建对象
13         ApplicationContext context = new ClassPathXmlApplicationContext("applicationContext.xml");
14         // 2得到配置创建的对象
15         User user = (User) context.getBean("user");
16         System.out.println(user);
17         user.add();
18     }
19 }
最后测试结果如下


