
基于C#语言的图片处理应用程序
基于C#语言的图片处理应用程序
1. 任务
编写一个既能为图片打码(添加马赛克)又能为图片添加晕影特效的图片处理应用程序。
2. 窗体设计
设计步骤:根据要实现的功能,设计如图1所示的用户界面,其具体设置如表1所示。

图1 最终用户界面
表1 主要控件的基本属性列表
|
控件类型 |
控件名称 |
触发事件 |
|
按钮 |
Button_Open |
Button_Open_Click |
|
Button_Save |
Button_Save_Click |
|
|
Button_Mosaic |
Button_Mosaic_Click |
|
|
Button_Vignetting |
Button_Vignetting_Click |
|
|
Button_Undo |
Button_Undo_Click |
|
|
Button_Reload |
Button_Reload_Click |
|
|
滑块 |
trackBar1 |
trackBar1_Scroll |
|
trackBar2 |
trackBar2_Scroll |
|
|
trackBar3 |
trackBar3_Scroll |
|
|
文本输入框 |
Bar1_Num |
Bar1_Num_TextChanged |
|
Bar2_Num |
Bar2_Num_TextChanged |
|
|
Bar3_Num |
Bar3_Num_TextChanged |
|
|
标签 |
… |
|
|
label10 |
label10_Click |
|
|
图片框 |
pictureBox |
pictureBox_MouseDown |
|
pictureBox_MouseUp |
||
|
pictureBox_MouseMove |
3. 程序设计
(1)打开图片:
①模块功能:
该模块主要要实现的功能是打开图片,并把图片里的信息写入bitmap中,如图2所示。
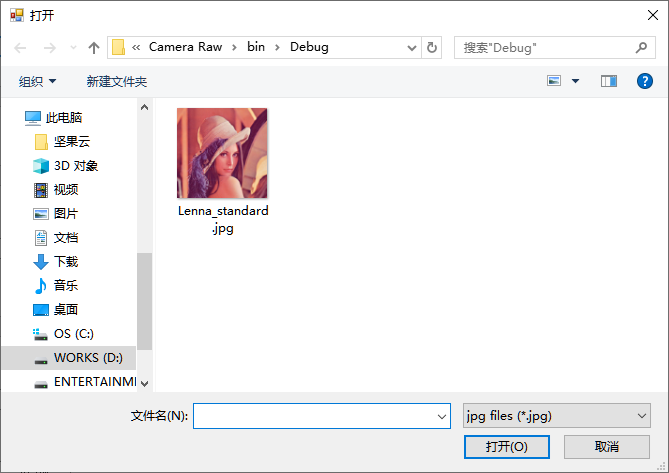
图2 打开图片
②实现方法:
该模块主要是通过OpenFileDialag这个类来实现的,并且通过Application.StartupPath使打开的地址始终为应用程序所在的地址。
③实现程序:
 1 //----------------------打开图片----------------------//
 2 private void Button_Open_Click(object sender, EventArgs e)
 3 {
 4     label10.Text = "请选择图片";
 5     using (OpenFileDialog openFileDialog = new OpenFileDialog())
 6     {
 7         string OpenFile_DIR = Application.StartupPath;
 8         openFileDialog.InitialDirectory = OpenFile_DIR;
 9         openFileDialog.Filter = "jpg files (*.jpg)|*.jpg|All files (*.*)|*.*";
10         openFileDialog.FilterIndex = 1;
11         openFileDialog.RestoreDirectory = true;
12         if (openFileDialog.ShowDialog() == DialogResult.OK)
13         {
14             string path = openFileDialog.FileName;
15             bitmap = (Bitmap)Image.FromFile(path);
16             pictureBox.Image = bitmap.Clone() as Image;
17             bitmap_Mosaic = bitmap.Clone() as Bitmap;
18             label10.Text = string.Format($"图片大小\r\n{pictureBox.Image.Width}x{pictureBox.Image.Height}");
19         }
20         else
21             label10.Text = "图片大小\r\n ";
22     }
23 }
该模块的主要功能是把处理后的pictureBox内的图片导出到电脑文件中,并用jpg,bmp或gif格式将其储存起来,如图3所示。
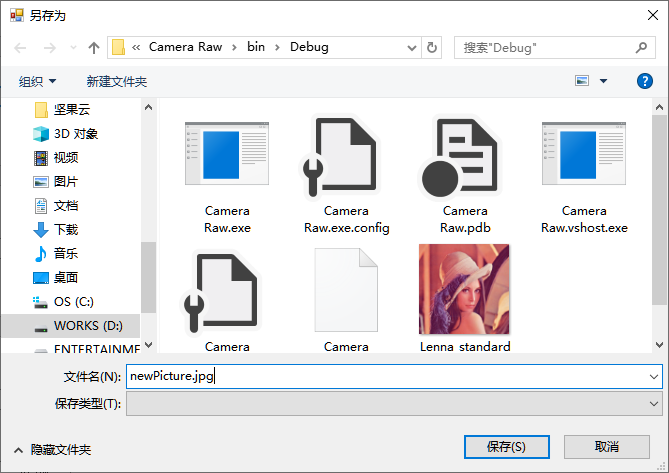
图3 保存图片
 1 //----------------------保存图片----------------------//
 2 private void Button_Save_Click(object sender, EventArgs e)
 3 {
 4     bool isSave = true;
 5     SaveFileDialog saveFileDialog1 = new SaveFileDialog();
 6     if (saveFileDialog1.ShowDialog() == DialogResult.OK)
 7     {
 8         string fileName = saveFileDialog1.FileName.ToString();
 9         if (fileName != "" && fileName != null)
10         {
11             string fileExtName = fileName.Substring(fileName.LastIndexOf(".") + 1).ToString();
12             System.Drawing.Imaging.ImageFormat imgformat = null;
13             if (fileExtName != "")
14             {
15                 switch (fileExtName)
16                 {
17                     case "jpg":
18                         imgformat = System.Drawing.Imaging.ImageFormat.Jpeg;
19                         break;
20                     case "bmp":
21                         imgformat = System.Drawing.Imaging.ImageFormat.Bmp;
22                         break;
23                     case "gif":
24                         imgformat = System.Drawing.Imaging.ImageFormat.Gif;
25                         break;
26                     default:
27                         MessageBox.Show("格式错误 只能存取为: jpg,bmp,gif 格式");
28                         isSave = false;
29                         break;
30                 }
31             }
32             if (imgformat == null)//默认保存为JPG格式
33             {
34                 imgformat = System.Drawing.Imaging.ImageFormat.Jpeg;
35             }
36             if (isSave)
37             {
38                 try
39                 {
40                     this.pictureBox.Image.Save(fileName, imgformat);
41                     //MessageBox.Show("图片已经成功保存!");
42                 }
43                 catch
44                 {
45                     MessageBox.Show("保存失败,你还没有打开图片");
46                 }
47             }
48         }
49     }
50 }
该模块要实现的功能是通过在pictureBox内点击并拖动鼠标来为pictureBox里的图片添加马赛克,同时用户可以通过滑动滑块trackBar1或更改文本输入框Bar1_Num的值来改变所要添加马赛克的大小,如图4所示。

图4 添加格子
首先用户单击Mosaic按钮会使按钮进入不可用状态,然后再通过判断Mosaic按钮是否为不可用状态程序即可知道用户当前所选择的模式是否为"格子模式"。
其次只要用户在pictureBox中按下鼠标,程序便会给mouse_down标志位置1,直至用户在pictureBox中松开鼠标,该标志位才会清0,而在标志位为1的过程中,只要用户在pictureBox中移动鼠标便会重复执行Add_Mosaic函数。
而Add_Mosaic函数首先需要做的是读取到当前鼠标所在位置的像素点坐标。而因为图片在pictureBox中是通过等比例缩放Zoom的方式打开的,所以鼠标当前所在的位置与像素点的坐标并不完全能对应上,因此在这里需要通过数学方法对此进行转换。如图4所示,具体的数学表达式如下:
$\begin{cases} y_p=y_m\times \frac{h_p}{h_m}\\ x_p=\left( x_m-\frac{w_m-\frac{h_m}{h_p}w_p}{2} \right) \times \frac{h_p}{h_m}\\\end{cases}$
其中$\left( x_p, y_p \right) $为像素点坐标,$\left( x_m, y_m \right) $为鼠标位置,$w_p\times h_p$为图片的大小,$w_m\times h_m$为pictureBox的大小。
之后再根据用户所设定的格子大小,对鼠标所在位置周围的一定像素点进行取均值处理,即可实现该模块的功能。
③实现程序:
 1 //----------------------格子模式----------------------//
 2 private void Button_Mosaic_Click(object sender, EventArgs e)
 3 {
 4     if (bitmap != null)
 5     {
 6         Button_Mosaic.Enabled = false;
 7         Button_Vignetting.Enabled = true;
 8     }
 9     else
10         MessageBox.Show("请先打开图片", "提示");
11 }
12
13 //----------------------添加格子----------------------//
14 private void Add_Mosaic(object sender, EventArgs e)
15 {
16     if (bitmap != null)
17     {
18         bitmap_Mosaic = pictureBox.Image as Bitmap;
19         Stopwatch sw = new Stopwatch();
20         sw.Reset();
21         sw.Restart();
22
23         double width = bitmap_Mosaic.Width;
24         double height = bitmap_Mosaic.Height;
25         double k, Dist_Side;
26         double centre_x, centre_y;
27         int red = 0, green = 0, blue = 0;//16777216=4096*4096
28         Color pixel;
29
30         if (width / height < 16f / 9f)
31         {
32             k = 657 / height;//缩放系数
33             Dist_Side = (1168 - k * width) / 2;//边框距离
34             centre_x = (mouse_x - Dist_Side) / k;
35             centre_y = mouse_y / k;
36         }
37         else
38         {
39             k = 1168 / width;//缩放系数
40             Dist_Side = (657 - k * height) / 2;//边框距离
41             centre_x = mouse_x / k;
42             centre_y = (mouse_y - Dist_Side) / k;
43         }
44
45         int x = (int)Math.Round(centre_x);
46         int y = (int)Math.Round(centre_y);
47         double size_Mosaic = width < height ? width / 10 : height / 10;
48         size_Mosaic = size_Mosaic * trackBar1.Value / trackBar1.Maximum;//格子大小
49         int count = 0;
50
51         for (int i = x - (int)size_Mosaic; i <= x + (int)size_Mosaic; i++)
52         {
53             if (i < 0) i = 0;
54             if (i > width - 1) break;
55             for (int j = y - (int)size_Mosaic; j <= y + (int)size_Mosaic; j++)
56             {
57                 if (j < 0) j = 0;
58                 if (j > height - 1) break;
59                 if ((i - x) * (i - x) + (j - y) * (j - y) <= size_Mosaic * size_Mosaic)
60                 {
61                     pixel = bitmap_Mosaic.GetPixel(i, j);
62                     red += pixel.R;
63                     green += pixel.G;
64                     blue += pixel.B;
65                     count++;
66                 }
67             }
68         }
69         if (count != 0)
70         {
71             red /= count;
72             green /= count;
73             blue /= count;
74         }
75
76         for (int i = x - (int)size_Mosaic; i <= x + (int)size_Mosaic; i++)
77         {
78             if (i < 0) i = 0;
79             if (i > width - 1) break;
80             for (int j = y - (int)size_Mosaic; j <= y + (int)size_Mosaic; j++)
81             {
82                 if (j < 0) j = 0;
83                 if (j > height - 1) break;
84                 if ((i - x) * (i - x) + (j - y) * (j - y) <= size_Mosaic * size_Mosaic)
85                 {
86                     try//为什么总是报错
87                     {
88                         bitmap_Mosaic.SetPixel(i, j, Color.FromArgb(red, green, blue));
89                     }
90                     catch { }
91                 }
92             }
93         }
94         sw.Stop();
95         tConsuming = sw.ElapsedMilliseconds;
96         label10.Text = string.Format($"处理时间\r\n{tConsuming / 1000}.{tConsuming % 1000 / 100}{tConsuming % 100 / 10}{tConsuming % 10}s");
97         pictureBox.Image = bitmap_Mosaic.Clone() as Image;
98     }
99 }
该功能所要实现的功能是为pictureBox里的图片添加晕影效果,同时用户可以通过滑块或文本输入框来更改光圈的大小和羽化的程度,此外用户还可以通过鼠标点击图片来改变所要添加晕影的中心,如图5所示。
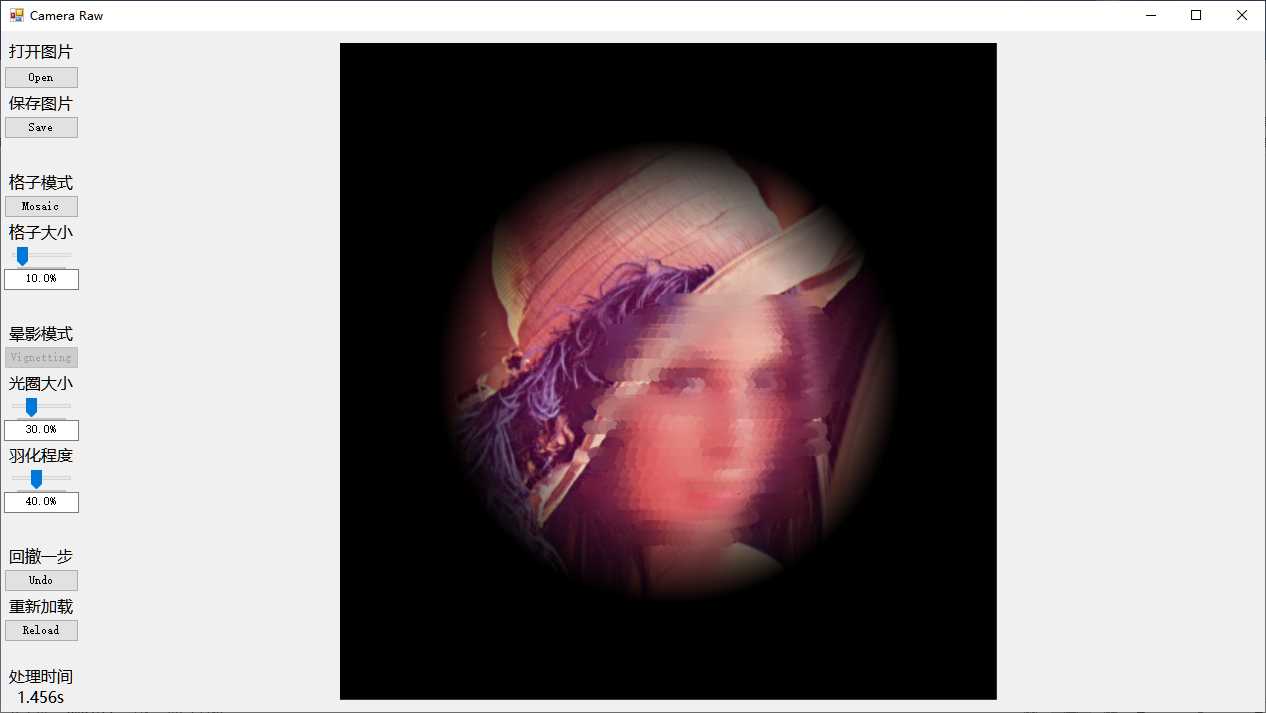
图5 添加晕影
首先用户单击Vignetting按钮会使按钮进入不可用状态,然后再通过判断Vignetting按钮是否为不可用状态程序即可知道用户当前所选择的模式是否为"晕影模式"。
其次只要用户在pictureBox中按下鼠标,程序便会执行Add_Vignetting函数。而Add_Mosaic函数首先需要做的是读取到当前鼠标所在位置的像素点坐标,方法同"添加格子"模块中所描述的一样。之后再根据用户所设定的光圈大小及羽化程度给图片中的每个像素乘上一个调整因数后即可得到最终的效果。
如图6所示,光圈大小其实控制的是图中小圆的大小,取值范围为[0,图片对角距离/2],而羽化程度控制的则是图中大圆的大小,取值范围为[小圆大小,+∞),同时小圆与大圆之间的灰度变化是线性的。根据以上要求并经过反复的试验可推导出以下公式:
$\begin{cases} r_0=\sqrt{\left( x_i-x_c \right) ^2+\left( y_j-y_c \right) ^2}\\ r_1=D_{\max}\times n_1\\ r_2=\frac{r_1}{1-n_2}\\ f\mathrm{ac}tor=\frac{r_2-r_0}{r_2-r_1}\\\end{cases}$
其中为像素点与中心点的距离,为小圆的半径,为图片对角距离/2,为文本框Bar2_Num的值(即光圈大小),为大圆的半径,为文本框Bar3_Num的值(即羽化程度),为最终的调整因数。
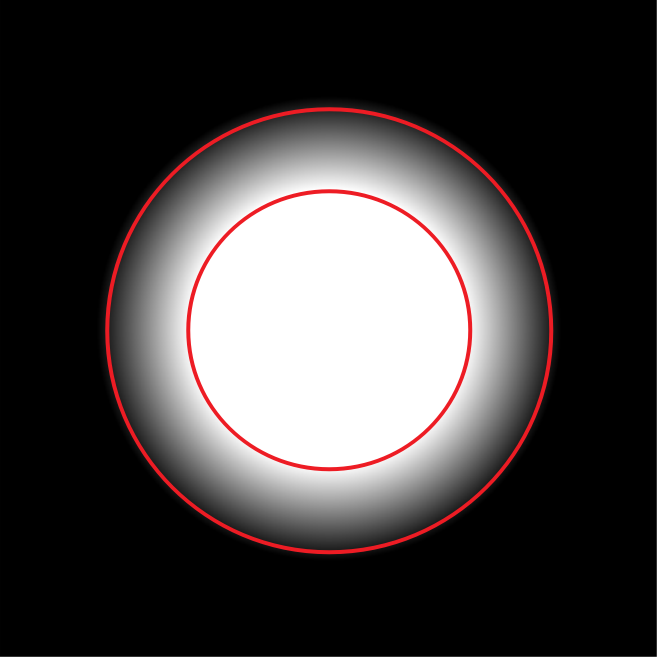
图6 晕影原理图示
③实现程序:
 1 //----------------------晕影模式----------------------//
 2 private void Button_Vignetting_Click(object sender, EventArgs e)
 3 {
 4     if (bitmap != null)
 5     {
 6         mouse_x = 584;
 7         mouse_y = 328;
 8         Button_Vignetting.Enabled = false;
 9         Button_Mosaic.Enabled = true;
10         Add_Vignetting(sender, e);
11     }
12     else
13         MessageBox.Show("请先打开图片", "提示");
14 }
15
16 //----------------------添加晕影----------------------//
17 private void Add_Vignetting(object sender, EventArgs e)
18 {
19     if (bitmap != null)
20     {
21         label10.Text = "请稍候...";
22         Application.DoEvents();
23         index_Undo++;
24         bitmap_Undo.Add(pictureBox.Image.Clone() as Bitmap);
25         Undo_Assist.Add(0);
26         bitmap_Vignetting = bitmap_Mosaic.Clone() as Bitmap;
27         Stopwatch sw = new Stopwatch();
28         sw.Reset();
29         sw.Restart();
30         double width = bitmap_Vignetting.Width;
31         double height = bitmap_Vignetting.Height;
32         double k, Dist_Side;
33         double centre_x, centre_y;
34         double MaxDist = Math.Sqrt(Math.Pow(width / 2, 2) + Math.Pow(height / 2, 2));
35         double CurrDist = 0;
36         double Dist_Dark, Dist_Darkest, factor;
37         int red, green, blue;
38         Color pixel;
39
40         if (width / height < 16f / 9f)
41         {
42             k = 657 / height;//缩放系数
43             Dist_Side = (1168 - k * width) / 2;//边框距离
44             centre_x = (mouse_x - Dist_Side) / k;
45             centre_y = mouse_y / k;
46         }
47         else
48         {
49             k = 1168 / width;//缩放系数
50             Dist_Side = (657 - k * height) / 2;//边框距离
51             centre_x = mouse_x / k;
52             centre_y = (mouse_y - Dist_Side) / k;
53         }
54
55         for (int i = 0; i < width; i++)
56         {
57             for (int j = 0; j < height; j++)
58             {
59                 CurrDist = Math.Sqrt(Math.Pow(i - centre_x, 2) + Math.Pow(j - centre_y, 2));
60                 Dist_Dark = MaxDist * trackBar2.Value / trackBar2.Maximum;//刚开始变暗的距离
61                 if (trackBar3.Value == trackBar3.Maximum)
62                     trackBar3.Value -= 1;
63                 Dist_Darkest = Dist_Dark / (1 - 1d * trackBar3.Value / trackBar3.Maximum);//最暗的距离
64                 if (Dist_Darkest == Dist_Dark)
65                     Dist_Darkest += 1;
66                 factor = (Dist_Darkest - CurrDist) / (Dist_Darkest - Dist_Dark);//调整因数
67                 pixel = bitmap_Vignetting.GetPixel(i, j);
68                 if (CurrDist > Dist_Dark)
69                 {
70                     red = (int)(pixel.R * factor);
71                     green = (int)(pixel.G * factor);
72                     blue = (int)(pixel.B * factor);
73                     if (red < 0) red = 0;
74                     if (green < 0) green = 0;
75                     if (blue < 0) blue = 0;
76                     if (red > 255) red = 255;
77                     if (green > 255) green = 255;
78                     if (blue > 255) blue = 255;
79                 }
80                 else
81                 {
82                     red = (int)(pixel.R);
83                     green = (int)(pixel.G);
84                     blue = (int)(pixel.B);
85                 }
86                 bitmap_Vignetting.SetPixel(i, j, Color.FromArgb(red, green, blue));
87             }
88         }
89
90         sw.Stop();
91         tConsuming = sw.ElapsedMilliseconds;
92         label10.Text = string.Format($"处理时间\r\n{tConsuming / 1000}.{tConsuming % 1000 / 100}{tConsuming % 100 / 10}{tConsuming % 10}s");
93         pictureBox.Image = bitmap_Vignetting.Clone() as Image;
94     }
95 }
该模块实现的功能是通过单击Undo按钮来撤回之前所执行过的相关操作,如图7和图8所示。
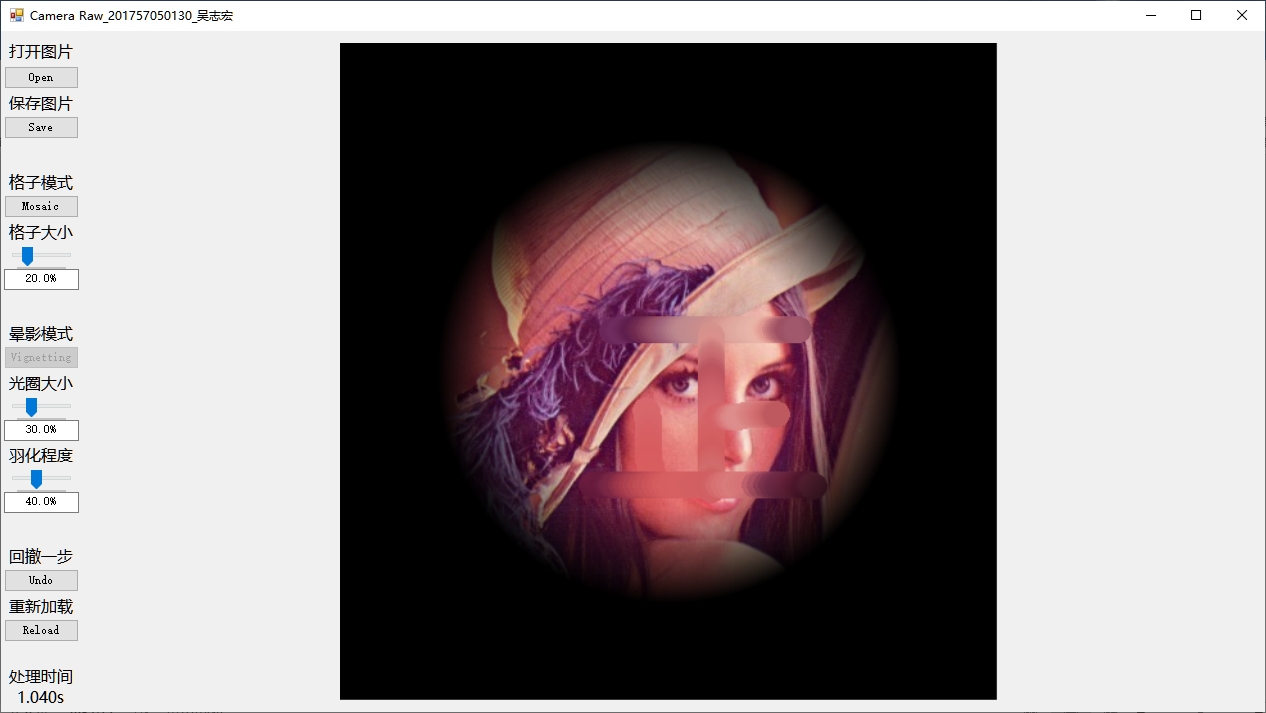
图7 回撤多步前
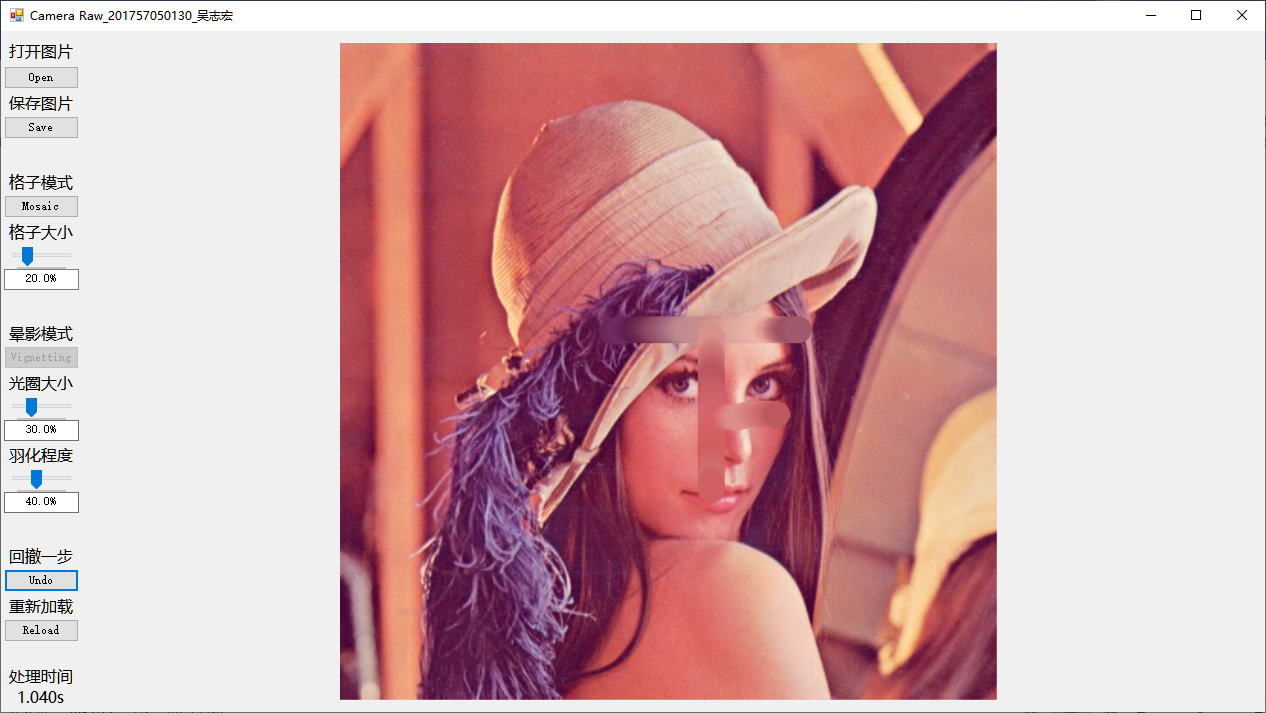
图8 回撤多步后
首先在程序的开头用List<Bitmap>来创建一个泛型集合bitmap_Undo,之后在每次操作之前都会先将图片框pictureBox中的图片添加到该泛型集合bitmap_Undo中,同时索引index_Undo加1,而在需要执行回撤时,即会拿出bitmap_Undo[index_Undo]放入图片框pictureBox中,并将其从泛型集合bitmap_Undo中删去,同时索引index_Undo减1。需要特别注意的是,由于晕影模式是以bitmap_Mosaic作为蓝本进行处理的,而非采用图片框中的图片,因此还需添加泛型集合Undo_Assist以便记录下用户对图片进行处理的顺序,以对bitmap_Mosaic进行还原。
③实现程序:
 1 //----------------------回撤一步----------------------//
 2 private void Button_Undo_Click(object sender, EventArgs e)
 3 {
 4     if (index_Undo > -1)
 5     {
 6         pictureBox.Image = bitmap_Undo[index_Undo].Clone() as Image;
 7         if (Undo_Assist[index_Undo] == 1)
 8             bitmap_Mosaic = bitmap_Undo[index_Undo].Clone() as Bitmap;
 9         bitmap_Undo.RemoveAt(index_Undo);
10         Undo_Assist.RemoveAt(index_Undo);
11         index_Undo--;
12     }
13 }
该模块主要是为用户提供一个快速一键复原图片的功能,也就是说用户可以通过单击Reload按钮来重新加载原始导入的图片,如图9所示。

图9 重新加载
通过将原始的bitmap替换图片框中的图片和bitmap_Mosaic即可完成对图片的重新加载。
③实现程序:
1 //----------------------重新加载----------------------//
2 private void Button_Reload_Click(object sender, EventArgs e)
3 {
4     pictureBox.Image = bitmap.Clone() as Image;
5     bitmap_Mosaic = bitmap.Clone() as Bitmap;
6 }
该模块主要是为用户提供相关的信息提示功能,如在图片处理的时候会有"请稍候…"的提示,同时用户可以通过单击该标签来查看图片大小及处理时间等相关的信息,如图10所示。
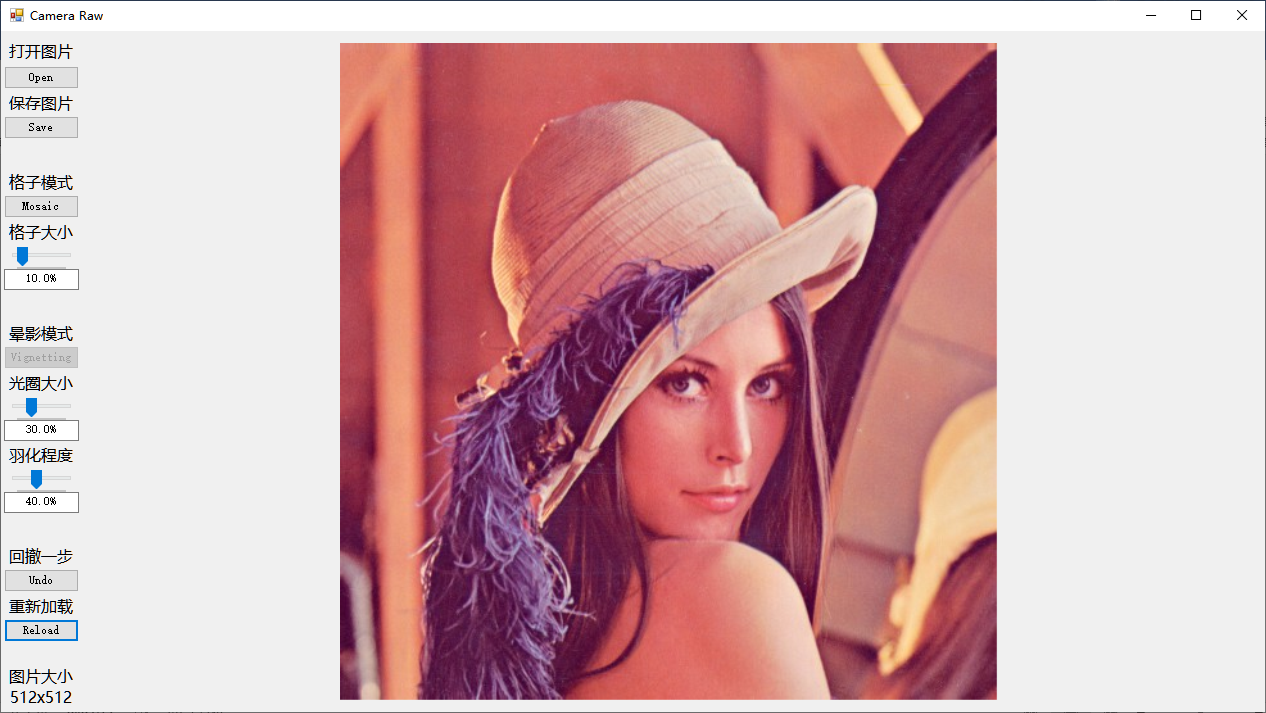
图10 信息提示
通过检测该标签中是否含有"图片大小",若是则更换成处理时间的信息,若否则更换成图片大小的信息即可。
③实现程序:
 1 //----------------------信息提示----------------------//
 2 private void label10_Click(object sender, EventArgs e)
 3 {
 4     if (label10.Text.Contains("图片大小"))
 5         if (tConsuming == 0)
 6             label10.Text = "处理时间\r\n ";
 7         else
 8             label10.Text = string.Format($"处理时间\r\n{tConsuming / 1000}.{tConsuming % 1000 / 100}{tConsuming % 100 / 10}{tConsuming % 10}s");
 9     else
10         try
11         {
12             label10.Text = string.Format($"图片大小\r\n{pictureBox.Image.Width}x{pictureBox.Image.Height}");
13         }
14         catch
15         {
16             label10.Text = "图片大小\r\n ";
17         }
18 }
