vue-router路由
简介
尽量的打开官方的文档:Vue Router
Vue Router是Vue.js官方的路由管理器。它和Vue.js的核心深度集成, 让构建单页面应用变得易如反掌。
功能
- 嵌套的路由/视图表
- 模块化的、基于组件的路由配置
- 路由参数、查询、通配符
- 基于
Vue js过渡系统的视图过渡效果 - 细粒度的导航控制
- 带有自动激活的CSS class的链接
HTML5历史模式或hash模式, 在IE 9中自动降级- 自定义的滚动行为
安装vue-router
vue-router是一个插件包, 所以我们还是需要用npm/cnpm来进行安装的。
打开命令行工具,进入你的项目目录,输入命令
npm uninstall vue-router //删除router插件
//npm自动下的是最新版,vue-router版本太高和vue2起冲突了
npm i vue-router@3.5.2	//安装指定的3.5.2版本vue-router
虽然router4.X的大部分的Vue Router API都没有变化,但vue-router 4.x只能结合vue3进行使用,vue-router 3.x只能结合vue2进行使用。
安装完之后去node_modules路径看看是否有vue-router信息 有的话则表明安装成功。
vue-router实例
- 将之前案例由
vue-cli生成的案例用idea打开 - 清理不用的东西
assert下的logo图片component定义的helloworld组件 - 在
components下,可以自己定义的组件,如:Content.vue,Main.vue
Content.vue和Main.vue内容一样的就只放一个示例代码了
<template>
  <!--内容-->
  <h1>内容</h1>
</template>

<script>
//导出
export default {
  name: "Content"
}
</script>

<!--scoped:作用域,使用后只在当前文档生效-->
<style scoped>

</style>
- 创建一个专门管理路由的目录
router,创建一个主配置index.js,叫index的不一定是主页,也可能是主配置
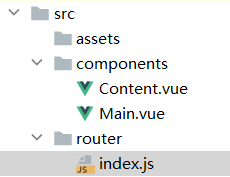
//导入
import Vue from 'vue'
import VueRouter from 'vue-router'
//导入自定义的组件
import Content from "../components/Content";
import Main from "../components/Main";

//安装路由
Vue.use(VueRouter);

//配置导出路由
export default new VueRouter({
  routes:[
    {
      //路由路径
      path: '/content',
      name: 'content',
      //跳转的组件
      component: Content
    },
    {
      //路由路径
      path: '/main',
      name: 'main',
      //跳转的组件
      component: Main
    }
  ]
});
- 在
main.js中配置路由
import Vue from 'vue'
import App from './App'
import router from './router' //自动扫描里面的路由配置

Vue.config.productionTip = false;
new Vue({
  el: '#app',
  //配置路由
  router,
  components: { App },
  template: '<App/>'
})
- 在
App.vue中使用路由
<template>
  <div id="app">
    <h1>克峰</h1>
    <router-link to="/main">首页</router-link>
    <router-link to="/content">内容</router-link>
    //展示模板
    <router-view></router-view>
  </div>
</template>

<script>

export default {
  name: 'App'
}
</script>

<style>
#app {
  font-family: 'Avenir', Helvetica, Arial, sans-serif;
  -webkit-font-smoothing: antialiased;
  -moz-osx-font-smoothing: grayscale;
  text-align: center;
  color: #2c3e50;
  margin-top: 60px;
}
</style>
- 启动项目,查看效果图
路由嵌套
嵌套路由又称子路由,在实际应用中,通常由多层嵌套的组件组合而成。

示例
-
创建一个组件
UserList<template> <h1>用户列表</h1> </template> <script> export default { name: "UserList" } </script> <style scoped> </style> -
编写路由(重点)
import Vue from "vue"; import Router from 'vue-router'; //导入组件 import Main from "../views/Main"; import Login from "../views/Login"; import UserList from "../views/user/UserList"; //使用 Vue.use(Router); //导出 export default new Router({ routes:[ { //首页 path:'/', component: Login },{ //初始页面 path:'/main', component: Main, children:[ //编写子路由 { path:"/user/list", component:UserList } ] },{ //登录页 path:'/Login', component: Login } ] }); -
编写主页面
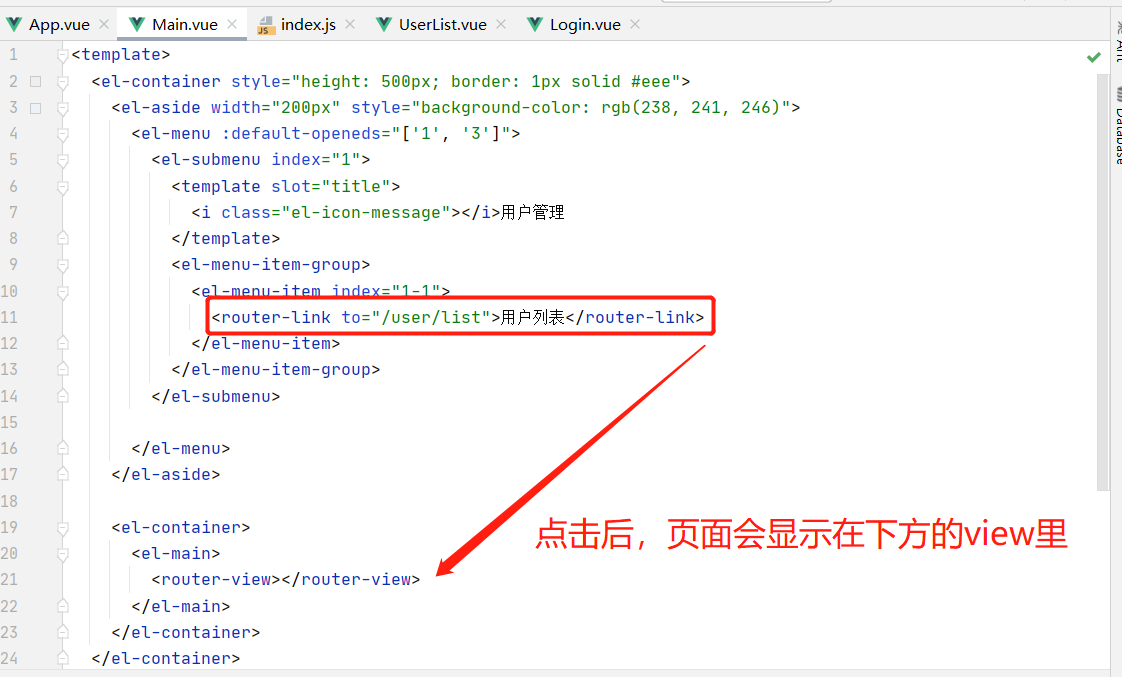
-
查看效果

参数传递
布尔模式
当 props 设置为 true 时,route.params 将被设置为组件的 props。
实现
index.js
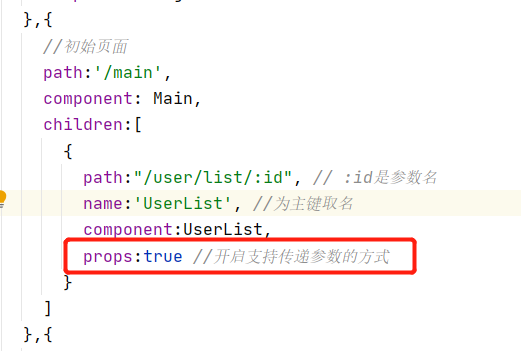
Main.vue

UserList.vue
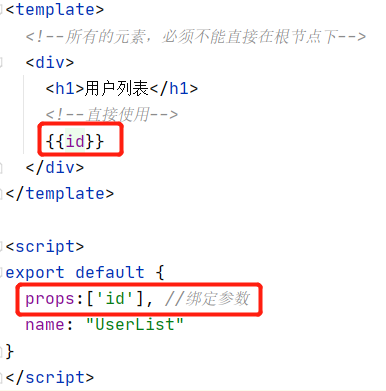
重定向
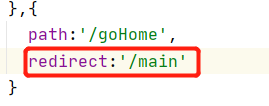
使用redirect关键字即可,值是重定向的目的地
index.js
Main.vue

404
定义一个主键NotFound,内容自定义
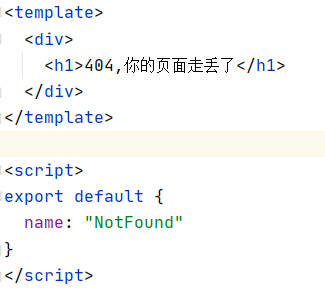
配置404路由(重点)
*号表示任何的请求

路由模式
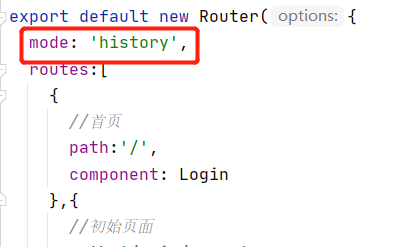
路由模式有两种
- hash:路径带#符号,如
http://localhost/#/login - history:路径不带#符号,如
http://localhost/login
模式在index.js里配置即可
路由钩子
beforeRouteEnter:在进入路由前执行beforeRouteLeave:在离开路由前执行
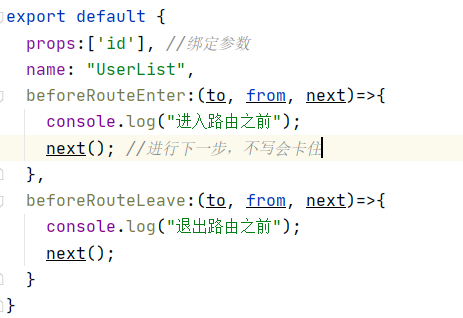
参数说明
to:路由将要跳转的路径信息from:路径跳转前的路径信息next:路由的控制参数next():跳转下个页面next('/path'):改变路由的跳转方向,使其跳到另一个路由next((vm)=>{}):仅在beforeRouteEnter中可用,vm是主键实例
在钩子函数中使用异步请求
-
安装
Axios:cnpm install axios -
main.js引用Axiosimport axios from 'axios'; import VueAxios from 'vue-axios' Vue.use(VueAxios,axios) -
准备数据:只有static目录下的文件是可以被访问到的,所以就把静态文件放入该目录下。
{ "name": "克峰同学", "url": "https://www.cnblogs.com/KeFeng/" } -
在
beforeRouteEnter中进行异步请求<script> export default { name: "UserList", beforeRouteEnter:(to, from, next)=>{ console.log("进入路由之前"); next(vm => { vm.getData(); //执行方法 }); }, beforeRouteLeave:(to, from, next)=>{ console.log("退出路由之前"); next(); }, methods:{ getData:function (){ this.axios({ //异步请求 method:"get", //请求方式 url: "http://localhost:8080/static/mock/data.json" //请求地址 }).then(function (response){//请求成功后 console.log(response) //输出请求到的内容 }) } } } </script>


