
深入理解系统调用
环境搭建:
安装开发工具:
1 sudo apt install build-essential
2 sudo apt install qemu
3 sudo apt install libncurses5-dev bison flex libssl-dev libelf-dev
4 sudo apt install axel
下载内核源码:
1 axel -n 20 https://mirrors.edge.kernel.org/pub/linux/kernel/v5.x/
2 linux-5.4.34.tar.xz
3 xz -d linux-5.4.34.tar.xz
4 tar -xvf linux-5.4.34.tar
5 cd linux-5.4.34
配置内核选项:
 1 make defconfig # Default configuration is based on 'x86_64_defconfig'
 2 make menuconfig
 3 # 打开debug相关选项
 4 Kernel hacking --->
 5     Compile-time checks and compiler options --->
 6     [*] Compile the kernel with debug info
 7     [*] Provide GDB scripts for kernel debugging
 8     [*] Kernel debugging
 9 # 关闭KASLR,否则会导致打断点失败
10     Processor type and features ---->
11     [] Randomize the address of the kernel image (KASLR)
编译和运行内核:
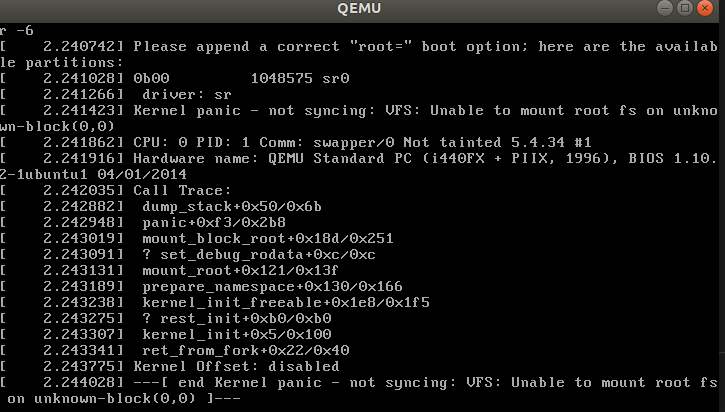
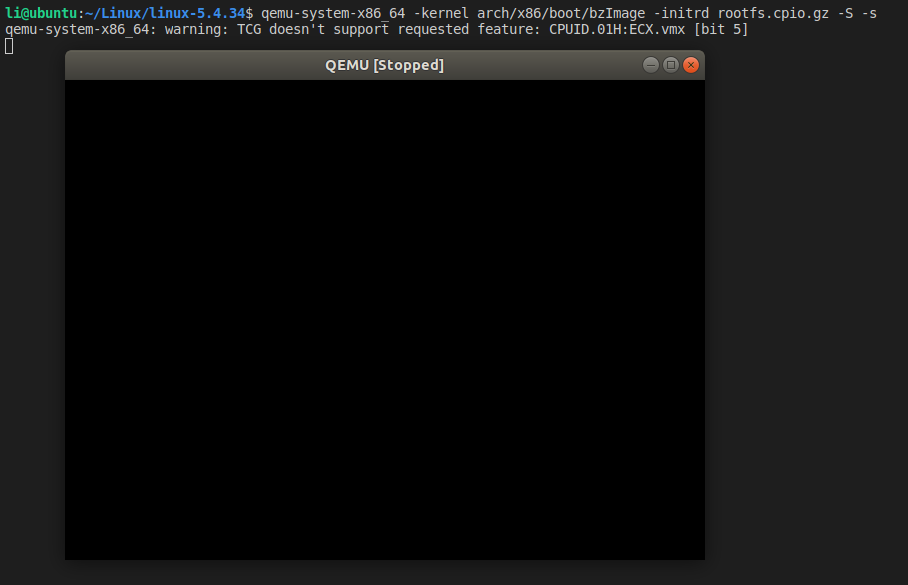
1 make -j$(nproc) # nproc gives the number of CPU cores/threads available
2 qemu-system-x86_64 -kernel arch/x86/boot/bzImage# 测试⼀下内核能不能正常加载运⾏,因为没有⽂件系统最终会kernel panic
结果:
制作内存根⽂件系统 :
 1 axel -n 20 https://busybox.net/downloads/busybox-1.31.1.tar.bz2
 2 tar -jxvf busybox-1.31.1.tar.bz2
 3 cd busybox-1.31.1
 4 make menuconfig
 5 #记得要编译成静态链接,不⽤动态链接库。
 6 Settings --->
 7     [*] Build static binary (no shared libs)
 8 #然后编译安装,默认会安装到源码⽬录下的 _install ⽬录中。
 9 make -j$(nproc)
10 make install
11 mkdir rootfs
12 cd rootfs
13 cp ../busybox-1.31.1/_install/* ./ -rf
14 mkdir dev proc sys home
15 sudo cp -a /dev/{null,console,tty,tty1,tty2,tty3,tty4} dev/
 1 #准备init脚本⽂件放在根⽂件系统跟⽬录下(rootfs/init),添加如下内容到init⽂件。
 2 #!/bin/sh
 3 mount -t proc none /proc
 4 mount -t sysfs none /sys
 5 echo "Wellcome MengningOS!"
 6 echo "--------------------"
 7 cd home
 8 /bin/sh
 9 #给init脚本添加可执⾏权限
10 chmod +x init
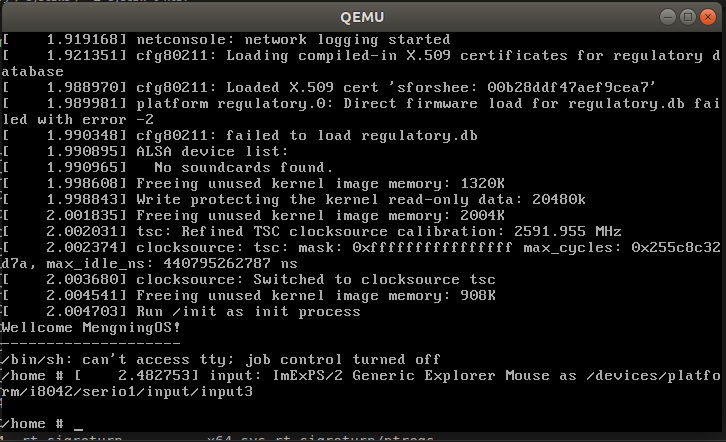
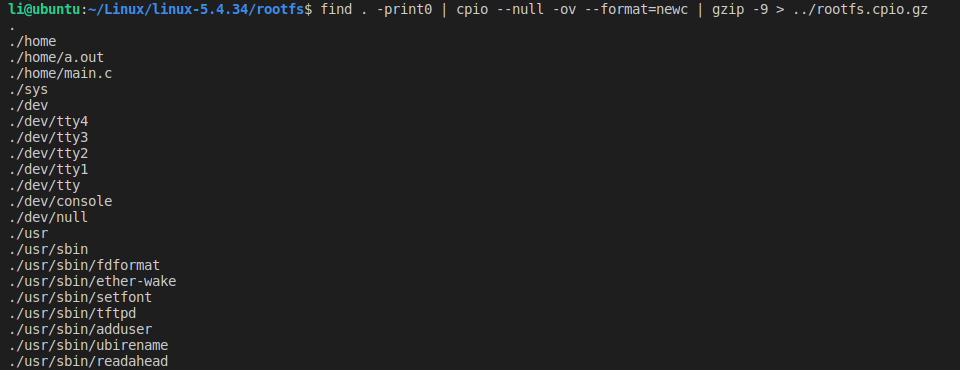
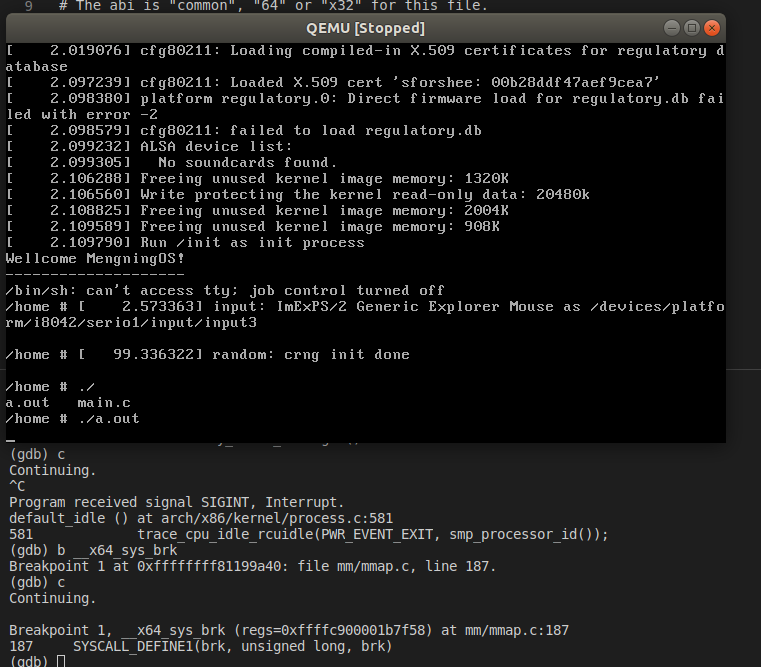
1 #打包成内存根⽂件系统镜像
2 find . -print0 | cpio --null -ov --format=newc | gzip -9 > ../rootfs.cpio.gz
3 #测试挂载根⽂件系统,看内核启动完成后是否执⾏init脚本
4 qemu-system-x86_64 -kernel linux-5.4.34/arch/x86/boot/bzImage -initrd rootfs.cpio.gz
结果:
跟踪调试Linux内核的基本⽅法 :
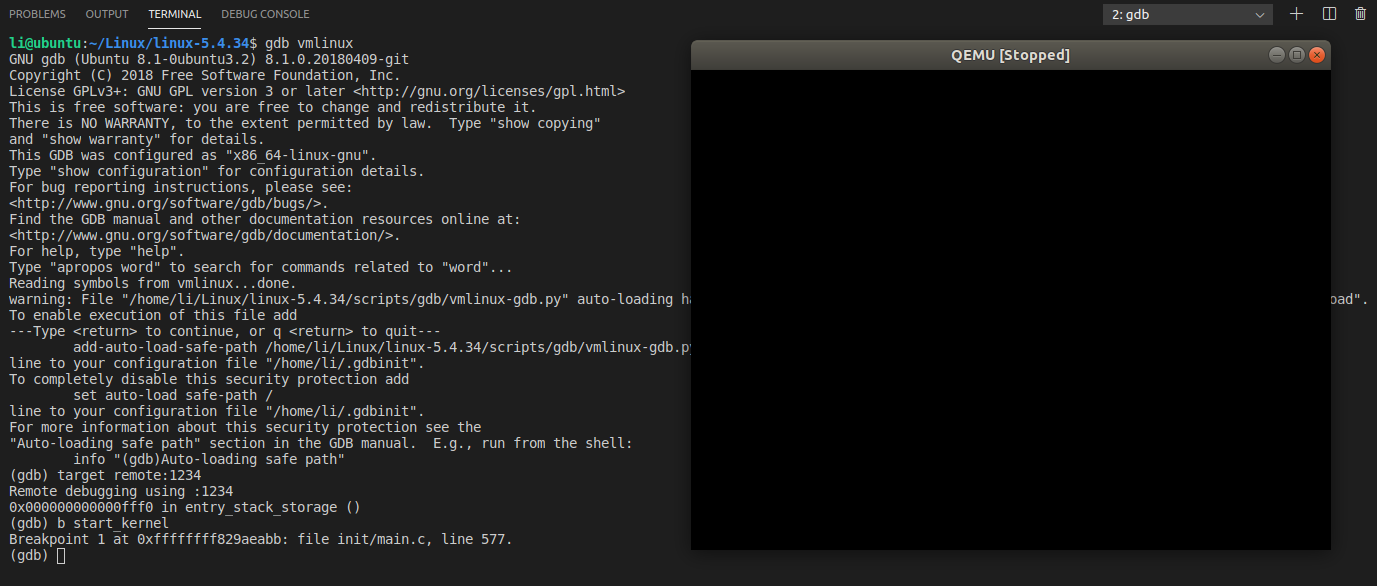
1 qemu-system-x86_64 -kernel linux-5.4.34/arch/x86/boot/bzImage -initrd rootfs.cpio.gz -S -s
2 # 纯命令⾏下启动虚拟机
3 qemu-system-x86_64 -kernel linux-5.4.34/arch/x86/boot/bzImage -initrd rootfs.cpio.gz -S -s -nographic -append "console=ttyS0"
4 #⽤以上命令先启动,然后可以看到虚拟机⼀启动就暂停了。加-nographic -append "console=ttyS0"参数启动不会弹出QEMU虚拟机窗⼝,可以在纯命令⾏下启动虚拟机,此时可以通过“killall qemu-system-x86_64”命令强⾏关闭虚拟机。
1 #再打开⼀个窗⼝,启动gdb,把内核符号表加载进来,建⽴连接:
2 cd linux-5.4.34/
3 gdb vmlinux
4 (gdb) target remote:1234
5 (gdb) b start_kernel
6 c、 bt、 list、 next、 step....
结果:

系统调用:
什么是系统调用:
简单来说,系统调用就是用户程序和硬件设备之间的桥梁。
用户程序在需要的时候,通过系统调用来使用硬件设备。
系统调用的存在,有以下重要的意义:
1)用户程序通过系统调用来使用硬件,而不用关心具体的硬件设备,这样大大简化了用户程序的开发。
比如:用户程序通过write()系统调用就可以将数据写入文件,而不必关心文件是在磁盘上还是软盘上,或者其他存储上。
2)系统调用使得用户程序有更好的可移植性。
只要操作系统提供的系统调用接口相同,用户程序就可在不用修改的情况下,从一个系统迁移到另一个操作系统。
3)系统调用使得内核能更好的管理用户程序,增强了系统的稳定性。
因为系统调用是内核实现的,内核通过系统调用来控制开放什么功能及什么权限给用户程序。
这样可以避免用户程序不正确的使用硬件设备,从而破坏了其他程序。
4)系统调用有效的分离了用户程序和内核的开发。
用户程序只需关心系统调用API,通过这些API来开发自己的应用,不用关心API的具体实现。
内核则只要关心系统调用API的实现,而不必管它们是被如何调用的。
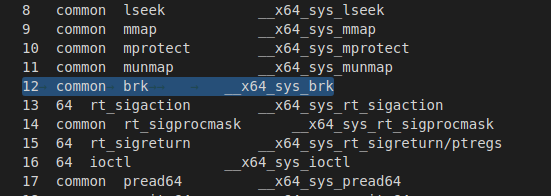
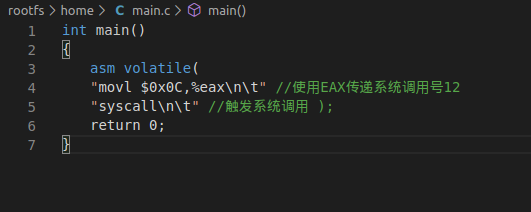
12号系统调用:
brk:
reference:brk() and sbrk() change the location of the program break, which defines the end of the process's data segment
(i.e., the program break is the first location after the end of the uninitialized data segment).
汇编调用:
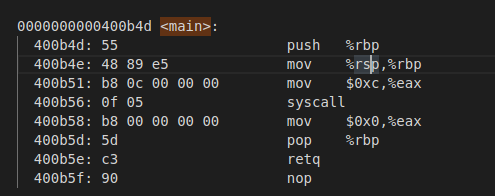
汇编结果:
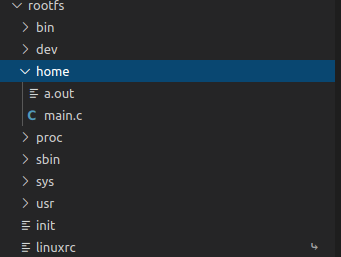
重新生成文件系统:
debug:


结果:
 1 (gdb) b __x64_sys_brk
 2 Breakpoint 1 at 0xffffffff81199a40: file mm/mmap.c, line 187.
 3 (gdb) c
 4 Continuing.
 5
 6 Breakpoint 1, __x64_sys_brk (regs=0xffffc900001b7f58) at mm/mmap.c:187
 7 187     SYSCALL_DEFINE1(brk, unsigned long, brk)
 8 (gdb) n
 9 do_syscall_64 (nr=18446612682188181624, regs=0xffffc900001b7f58) at arch/x86/entry/common.c:300
10 300             syscall_return_slowpath(regs);
11 (gdb) n
12 301     }
13 (gdb) n
14 entry_SYSCALL_64 () at arch/x86/entry/entry_64.S:184
15 184             movq    RCX(%rsp), %rcx
16 (gdb) n
17 185             movq    RIP(%rsp), %r11
18 (gdb) n
19 187             cmpq    %rcx, %r11      /* SYSRET requires RCX == RIP */
20 (gdb) n
21 188             jne     swapgs_restore_regs_and_return_to_usermode
22 (gdb) n
23 205             shl     $(64 - (__VIRTUAL_MASK_SHIFT+1)), %rcx
24 (gdb) n
25 206             sar     $(64 - (__VIRTUAL_MASK_SHIFT+1)), %rcx
26 (gdb) n
27 210             cmpq    %rcx, %r11
28 (gdb) n
29 211             jne     swapgs_restore_regs_and_return_to_usermode
30 (gdb) n
31 213             cmpq    $__USER_CS, CS(%rsp)            /* CS must match SYSRET */
32 (gdb) n
33 214             jne     swapgs_restore_regs_and_return_to_usermode
34 (gdb) n
35 216             movq    R11(%rsp), %r11
36 (gdb) n
37 217             cmpq    %r11, EFLAGS(%rsp)              /* R11 == RFLAGS */
38 (gdb) n
39 218             jne     swapgs_restore_regs_and_return_to_usermode
40 (gdb) n
41 238             testq   $(X86_EFLAGS_RF|X86_EFLAGS_TF), %r11
42 (gdb) n
43 239             jnz     swapgs_restore_regs_and_return_to_usermode
44 (gdb) n
45 243             cmpq    $__USER_DS, SS(%rsp)            /* SS must match SYSRET */
46 (gdb) n
47 244             jne     swapgs_restore_regs_and_return_to_usermode
48 (gdb) n
49 253             POP_REGS pop_rdi=0 skip_r11rcx=1
50 (gdb) n
51 entry_SYSCALL_64 () at arch/x86/entry/entry_64.S:259
52 259             movq    %rsp, %rdi
53 (gdb) n
54 260             movq    PER_CPU_VAR(cpu_tss_rw + TSS_sp0), %rsp
55 (gdb) n
56 entry_SYSCALL_64 () at arch/x86/entry/entry_64.S:262
57 262             pushq   RSP-RDI(%rdi)   /* RSP */
58 (gdb) n
59 entry_SYSCALL_64 () at arch/x86/entry/entry_64.S:263
60 263             pushq   (%rdi)          /* RDI */
61 (gdb) n
62 entry_SYSCALL_64 () at arch/x86/entry/entry_64.S:271
63 271             SWITCH_TO_USER_CR3_STACK scratch_reg=%rdi
64 (gdb) n
65 273             popq    %rdi
66 (gdb) n
67 entry_SYSCALL_64 () at arch/x86/entry/entry_64.S:274
68 274             popq    %rsp
69 (gdb) n
70 entry_SYSCALL_64 () at arch/x86/entry/entry_64.S:275
71 275             USERGS_SYSRET64
72 (gdb) n
73 0x0000000000475349 in ?? ()

