【OpenGL】“我叫MT”纯手工3D动画制作之2——建立模型
最近在家研习面经,温习基础,索性花些时间将本科期间完成的一些学习之作整理出来,分享之余顺便水点经验![]()
其实这个事情起源于一门“计算机图形与动画(Computer Graphics & Animation)”的外方课程,当初的外籍教师Tony教的很认真,对于这门课自己也投入了非常多的时间。言归正传,这里先介绍一些涉及的技术,熟悉的同学请跳过哈~
D.准备工作
需要的相关库有:
• QuickTime 7.7.1 for Windows (主要用于播放动画与配音)
• QuickTime SDK (开发包)
•OpenGL、 GLUT库 (基础引擎)
当然如果使用 Visual Studio 的话记得添加上面的文件目录与库路径,记得将其中的DLL加入环境变量或放入执行目录下。
相关文件:https://github.com/Blz-Galaxy/OpenGL_Animation_MT/tree/master/Lib%26Preparation
E.建立基础模型
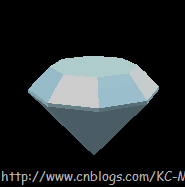
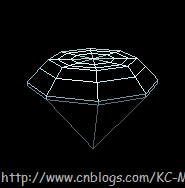
举几个最简单的例子,这是通过旋转生成的钻石:
这是钻石轮廓的描述文本(重复数据会获得更好的高光效果):
// =========================================================================================
// KXC354 - Computer Graphics & Animation, 2012
// Assignment 1 & 2
// 3D Engine Code
// =========================================================================================
//
// Edited by Evan
//
// diamondprofile.txt
//
// sweep profile for a diamond with the density of 8
//
//    radius        y-coordinate

    0.00001,    1.2

    //draw table-board
    0.5,        1.2
    0.5,        1.2        //duplicate for better lighting

    0.8,        1.2
    0.8,        1.2        //duplicate for better lighting

    1,            1.2
    1,            1.2        //duplicate to make sharp edge

    1.2,        1
    1.2,        1        //duplicate for better lighting


    //draw girdle thickness
    1.5,        0.68
    1.5,        0.68    //duplicate to make sharp edge

    1.5,        0.60
    1.5,        0.60    //duplicate to make sharp edge

    //draw pavilion
    0.00001,    -1
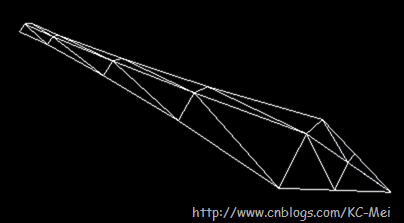
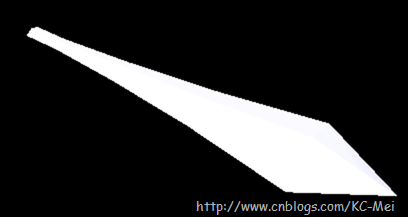
再举个拉伸体的例子,这是剑刃部分:
它由2个描述文本组成,一个是拉伸的截面形状(即一个平行四边形):
// =========================================================================================
// KXC354 - Computer Graphics & Animation, 2012
// Assignment 1 & 2
// 3D Engine Code
// =========================================================================================
//
// Edited by Evan
//
// quadprofile.txt
//
// a 2D profile for a quadrilateral extrusion (sword)
//
//    radius        y-coordinate

    0,    1    //duplicate to make sharp edge
    0,    1

    -1, 0    //duplicate to make sharp edge
    -1, 0

    0,    -1    //duplicate to make sharp edge
    0,    -1

    1,    0    //duplicate to make sharp edge
    1,    0
这是截面运动/缩放的路径(同样,重复数据会获得更好的高光效果):
// =========================================================================================
// KXC354 - Computer Graphics & Animation, 2012
// Assignment 1 & 2
// 3D Engine Code
// =========================================================================================
//
// Edited by Evan
//
// swordpath.txt


m -3
s .0001 .0001, p
p                    //duplicate for better lighting
m 0.5
s 3000 1500, p
m 0.5
s 2 2, p
p                    //duplicate for better lighting
m 1.4
s 0.58 0.58, p
m 1.2
s 0.58 0.58, p
m 1
s 0.58 0.58, p
p                    //duplicate for better lighting
m 0.5, p
p                    //duplicate for better lighting
s .0001 .0001, p
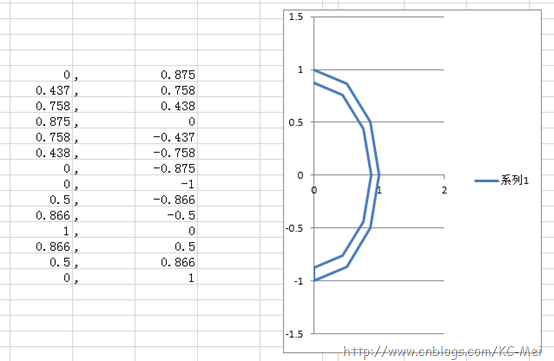
当初为了调整轮廓外形,连excel都用上了
F.建立组合模型
代码非常繁琐,主要调用了很多事先打好草稿并测量后记录在记事本里的关键点坐标(比如旋转体的半轮廓、拉伸体的轮廓与拉伸/缩放路径),这边就显示一小部分属性设置/仿射变换,大致就能明白当初的纯手工建模与调试的工作量了
composite1::composite1()
{
    setName("composite1");

    outface = new treasurebox();
    outface->setColour(0.706, 0.471, 0.216);
    outface->attachToParentAt(this, 0, 0, 0);

    insideface = new treasurebox();
    insideface->setColour(0.706, 0.471, 0.216);
    insideface->setScale(0.95);
    insideface->attachToParentAt(outface, 0, 0.01, 0);

    ……

    lid_frame3 = new extrusion("frameprofile.txt","framepath3.txt");
    lid_frame3->useSmoothShading();
    lid_frame3->setDeformation(0.9, 1, 1);
    lid_frame3->setRotation('y', 90, 'z', -10);
    lid_frame3->setColour(0.980, 0.957, 0.173);
    lid_frame3->attachToParentAt(lid, -0.3, 0, -1.5);

    milk = new sweep("milkprofile.txt", 20);
    milk->useSmoothShading();
    milk->setRotation('z', 90);
    milk->attachToParentAt(insideface, 0, -0.7, 0);

    for(int i=0; i<10; i++)
    {
        diamond[i]    = new sweep("diamondprofile.txt", 8);
        diamond[i]->useDiffuseShading();
        diamond[i]->setColour(0.73, 0.91, 0.98, 0.8);
        diamond[i]->setScale(0.1);
        diamond[i]->setRotation('x', 90);
        diamond[i]->attachToParentAt(insideface, i*0.3 - 1.35, 0.5, 1.2);
    }

    // put the shape onto the shapeVector so it gets draw messages
    gShapeVector.push_back(this);
}
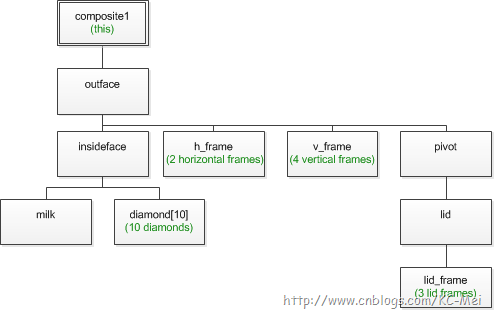
以上代码做了个比较傻的宝箱模型。各个部件分别是:
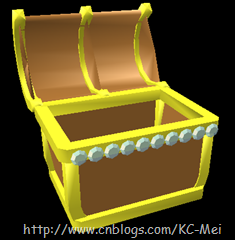
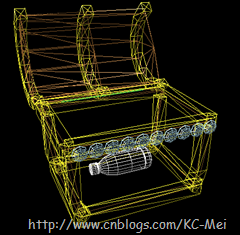
这是组合成的最后效果(不好意思,当初为了增加构件数量达到要求,偷偷在里面放了个瓶子
)
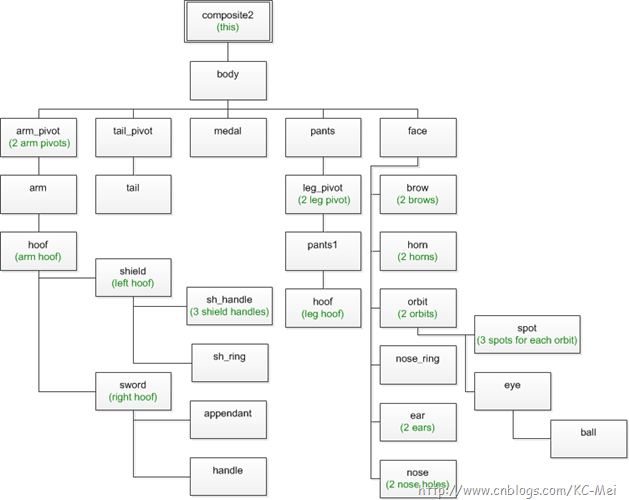
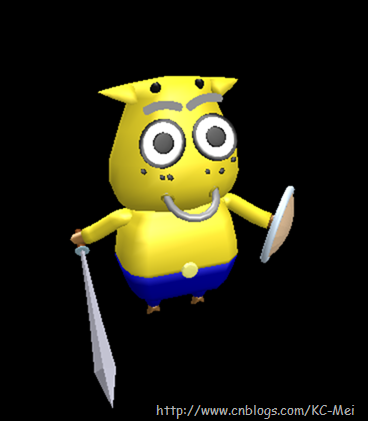
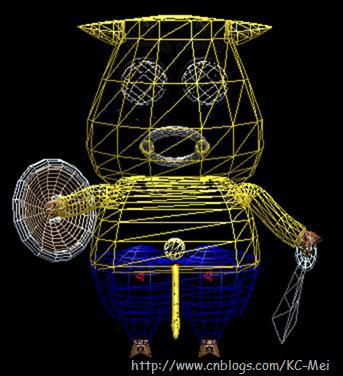
然后就是当年打了无数草稿的“MT”模型:
顺便解释一下:
当初因为要在不规则的头上贴“脸”,如果采用纹理贴图的话映射函数反而会特别麻烦,因此索性都用圆球压扁或者拉伸作为眼睛、眉毛,顺便做了个圆环模型,效果上也更加立体;
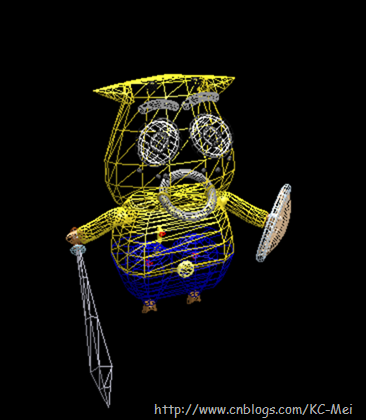
此外由于考虑后续动画设计,不得不再加入许多用于相对旋转的球状关节点(体内的红色就是其中部分关节,因为需要节约面片,球体密度很低看起来像三角体)。
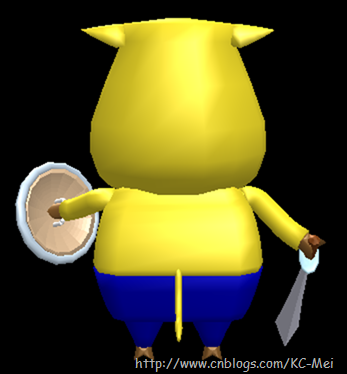
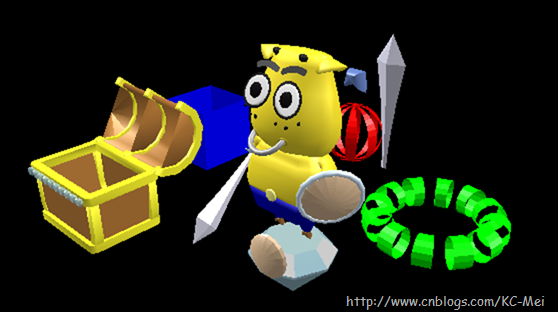
模型一览:
目前先整理到模型这块吧,后续动画部分将包括:
- 模型动作设计
- 视窗设置(镜头运动、跟随、震动等)
- 特效(迷雾、烟尘等粒子系统)
- 天空盒(世界背景)
- 地形制作(地势生成与爬坡运动等)
- 贴图(地面纹理贴图、广告牌:树贴图)
- 字幕设置
- 配乐
- ……
等有时间再做下整理哈![]()
相关链接
【OpenGL】“我叫MT”纯手工3D动画制作之1——基础介绍: http://www.cnblogs.com/KC-Mei/p/4666099.html
【OpenGL】“我叫MT”纯手工3D动画制作之2——建立模型: http://www.cnblogs.com/KC-Mei/p/4666110.html
【OpenGL】“我叫MT”纯手工3D动画制作之3——动画设计: (还在写~)
需要的同学可以从这边下载到引擎与我的项目:
Github项目文件:https://github.com/Blz-Galaxy/OpenGL_Animation_MT
(引擎交互的一些按键已经在 README.md 里注明,允许鼠标、键盘同时进行交互:按A键既可播放)
仅供学习参考,请勿用于其他目的,谢谢。
 最近在家研习面经,温习基础,索性花些时间将本科期间完成的一些学习之作整理出来,分享之余顺便水点经验。需要的同学可以从这边下载到引擎与我的项目,仅供学习参考,谢谢。
