
opencv4.5.0 +contrib编译流程
(默认已完成安装visual studio 2019与python)
1.下载opencv与opencv-contrib模块,国内镜像源:OpenCV/opencv_contrib国内快速下载 | 庐雪技术博客 (bzblog.online)
2.下载cmake-gui版本 安装
3.解压opencv-contrib与opencv到目标文件夹
4.打开cmake,将解压opencv文件夹作为source,新建buildfile 作为编译文件夹
5.出现错误: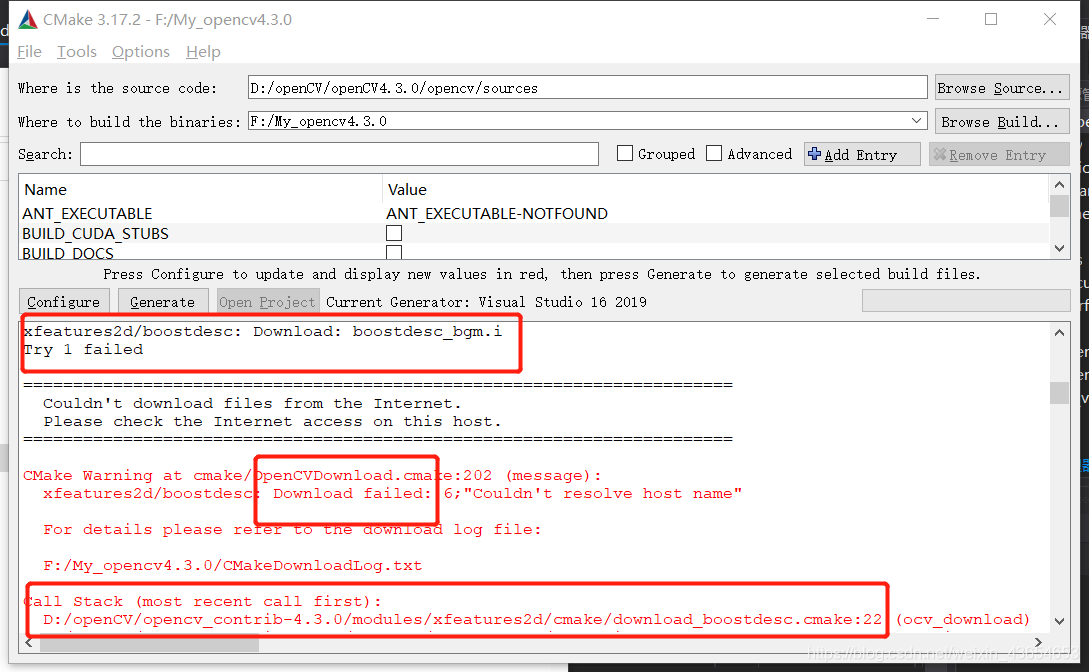
解决:
一、ippicv_2020_win_intel64_20191018_general.zip下载失败
进入opencv4.5.03rdparty\ippicv目录
将 ippicv.cmake 的https://raw.githubusercontent.com
修改为:https://raw.staticdn.net
二、opencv_videoio_ffmpeg_64.dll、opencv_videoio_ffmpeg.dll下载失败
进入opencv4.5.0/3rdparty\\ffmpeg目录
将 ffmpeg.cmake 的https://raw.githubusercontent.com
修改为:https://raw.staticdn.net
参考:https://blog.csdn.net/valley2013/article/details/106911688/
5.进行configure
6.编译opencv-contrib:将OPENCV-ENABLE-NONFREE使能勾选,在下一格opencv extra module path设置contrib modulle文件夹 再勾选BUILD-opencv-world
7.configure
8.
三、boostdesc_bgm.i相关文件下载失败
进入opencv_contrib-3.4.2\modules\xfeatures2d\cmake目录
将 download_boostdesc.cmake中的https://raw.githubusercontent.com
修改为:https://raw.staticdn.net
四、vgg_generated_120.i相关文件下载失败
进入opencv_contrib-3.4.2\modules\xfeatures2d\cmake目录
将 download_vgg.cmake中的https://raw.githubusercontent.com
修改为:https://raw.staticdn.net
五、face_landmark_model.dat下载失败
修改.\opencv_contrib-3.4.2\modules\face\CMakeLists.txt,
将https://raw.githubusercontent.com
修改为:https://raw.staticdn.net
可能有时候会失败,多configure几次(如果一直下不了就不用管了,后面步骤也能进行)
9.generate,将编译好的buildfile打开,找到install,打开opencv.sln(即open project)
10.直接在上方生成处点击生成解决方案
10.在CMakeTargets下面找到INSTALL,右键有仅用于项目->仅编译INSTALL ()
11.把刚生成的*\Binfile\install\x64\vc116\bin作为环境变量加进入(如果之前有OpenCV的就替换之前的,切记!)。
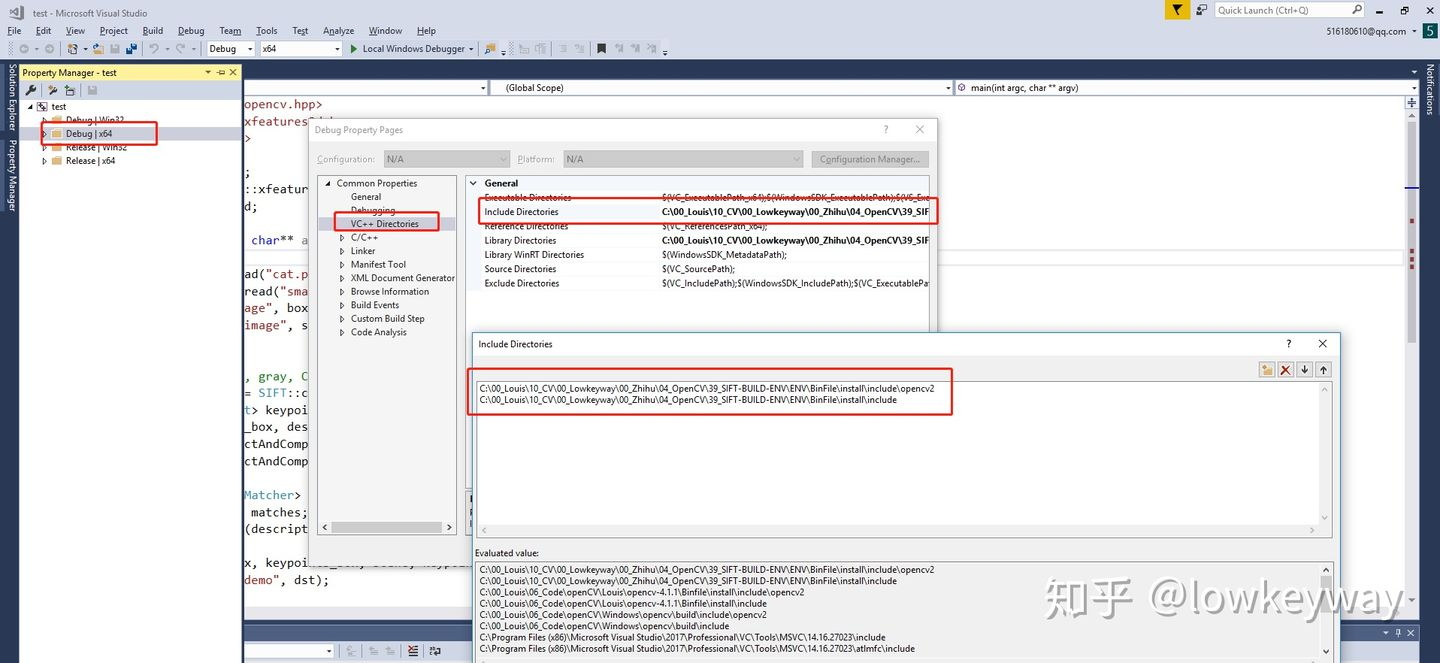
12.VS配置:创建一个空白的c艹文件,在属性管理器中右键单击debug x64 创建新的项目属性表,
a.增加编译头文件包含目录
b.增加编译库文件包含路径
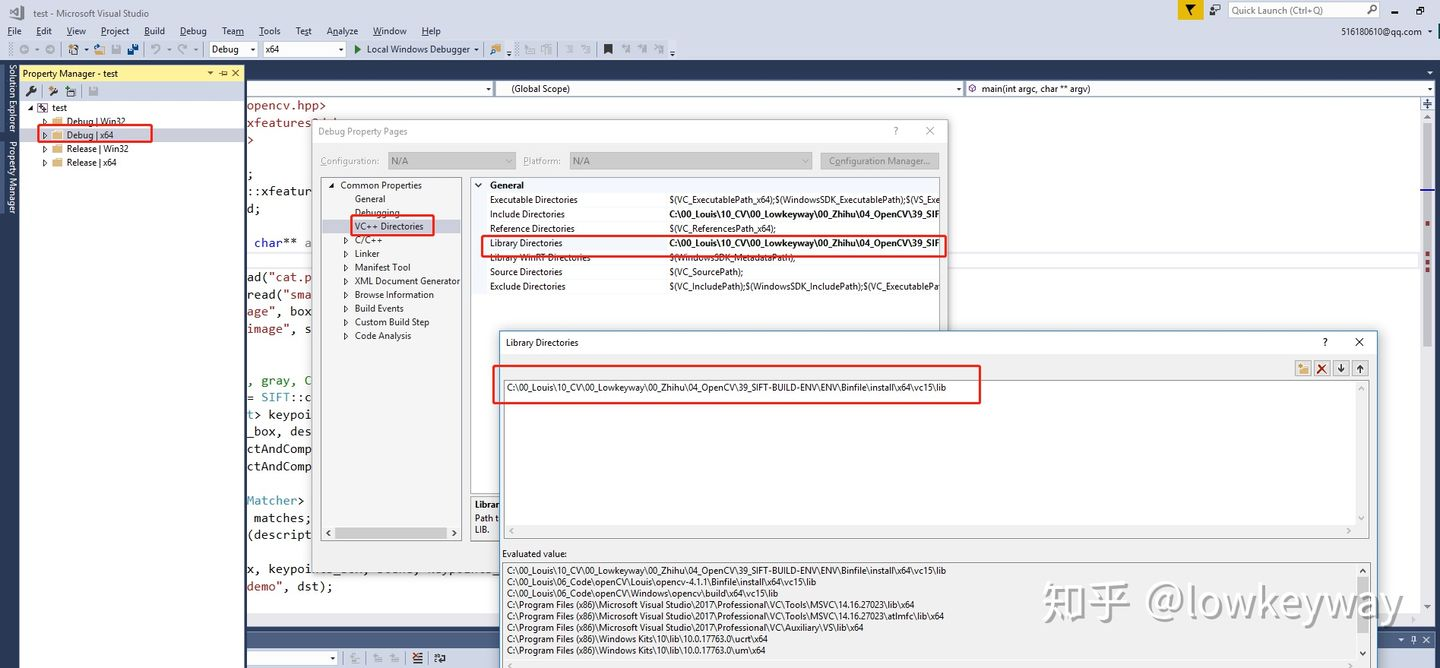
增加库链接,打开install路径,找到x64/vc16/lib,将里面的lib复制名字过来
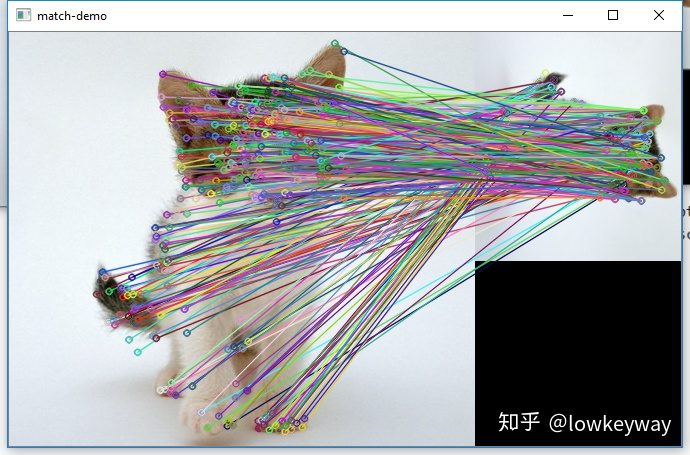
验证:
#include <opencv2/opencv.hpp>
#include <opencv2/xfeatures2d.hpp>
#include <iostream>

using namespace cv;
using namespace cv::xfeatures2d;
using namespace std;

int main(int argc, char** argv) {

    Mat test1 = imread("1.jpg");
    Mat atest1 = imread("2.jpg");
    if (test1.empty())
    {
        cout << "error!" << endl;
    }
    imshow("test1 image", test1);
    imshow("atest1 image", atest1);

    auto detector = SIFT::create();
    vector<KeyPoint> keypoints_test1, keypoints_atest1;
    Mat descriptor_test1, descriptor_atest1;
    detector->detectAndCompute(test1, Mat(), keypoints_test1, descriptor_test1);
    detector->detectAndCompute(atest1, Mat(), keypoints_atest1, descriptor_atest1);

    Ptr<FlannBasedMatcher> matcher = FlannBasedMatcher::create();
    vector<DMatch> matches;
    matcher->match(descriptor_test1, descriptor_atest1, matches);
    Mat dst;
    drawMatches(test1, keypoints_test1, atest1, keypoints_atest1, matches, dst);
    imshow("match-demo", dst);


    waitKey(0);
    return 0;
}
注意:1,2.jpg需要自己的图片路径
最终效果:
参考链接:(四十一)CMake+VS+opencv/opencv_contrib 环境配置 - 知乎 (zhihu.com)

 浙公网安备 33010602011771号