
scrapy入门学习初步探索之数据保存
在上一篇文章中,谈及了如何使用scrapy取获取网页数据,可参考Scrapy入门学习之初步探索。在此继续谈一下数据保存和一些settings.py的配置。
文中会继续上文的豆瓣读书小项目,并新增一个爬取简书所有用户信息的爬虫小项目,文章力求能够讲清学习时所遇到的坑,所以略显冗长。如若您没有耐心,就别往下翻了O(∩_∩)O~
环境申明:
Python3+Pycharm2017
所需第三方包:
scrapy,pymysql
数据库:
MySQL5.7
使用item-pipeline保存数据
学习爬虫主要是为了收集一些数据用于分析,而用的多的数据格式无非就是json,csv或是通过数据库MySQL,mongodb等。
在此,系统的记录相应的数据格式处理方式。
OK,这里你需要做的有:
- 在items.py中定义你需要的数据
- 在pipelines.py中定义你处理数据的方式
- 在settings.py中注册定义的pipeline
首先scrapy自带了相应模块用于处理数据,在item export中
- ‘CsvItemExporter’,
- ‘JsonItemExporter’
scrapy文档使用 Item Exporter
建议直接阅读源码
保存为csv数据
- 自定义保存
在Pipelines.py中定义item数据的处理方式,如下代码,定义了CsvPipeline类,并在settings.py中的ITEM_PIPELINES注册即可。
ITEM_PIPELINES = {
#’JianShu.pipelines.JianshuPipeline’: 300 ,
’ JianShu.pipelines.JsonEncodingPipeline’:1 ,#这里1是优先级
}
注意
启用一个 Item Pipeline 组件,
必须将它的类添加到 ITEM_PIPELINES 配置,分配给每个类的整型值,确定了他们运行的顺序,item 按数字从低到高的顺序,通过 pipeline,通常将这些数字定义在 0-1000 范围内。
class CsvPipeline(object):
    def __init__(self):
        self.csvf=open('db_Top250.csv','a+',encoding='utf-8',newline='')
        self.writer=csv.writer(self.csvf)#这里可以加入delimiter=','分隔符参数,默认为逗号
        self.writer.writerow(['书名','作者','国家','荐语','出版时间','出版社','评分','Star','参与短评人次','力荐','推荐','还行','较差','烂'])
        self.csvf.close()

    def process_item(self,item,spider):
        with open('db_Top250.csv','a+',encoding='utf-8',newline='')as f:
            writer=csv.writer(f)
            writer.writerow([item['title'],item['author'],item['country'],item['note'],item['publish_date'],item['press'],item['Score'],item['Star'],item['People_nums'],item['s5'],item['s4'],item['s3'],item['s2'],item['s1']])

        return item
注意事项:
- 打开文件时有个newline=’ ‘参数,避免写入数据后会空一行
encoding=’utf-8’,碰到了excel中打开csv中文无法正常显示的情况,如图。目前解决方法有:
用记事本、sublime或pycharm打开,可以正常显示。再以ANSI或utf8-bom编码保存,再次用excel打开正常显示

- 使用item export中的CsvItemExporter
一样要在settings.py中注册
导入from scrapy.contrib.exporter import CsvItemExporter
同样是在pipelines.py中
class CSVPipeline(object):

  def __init__(self):
    self.files = {}

  def from_crawler(cls, crawler):
    pipeline = cls()
    crawler.signals.connect(pipeline.spider_opened, signals.spider_opened)
    crawler.signals.connect(pipeline.spider_closed, signals.spider_closed)
    return pipeline

  def spider_opened(self, spider):
    file = open('%s_items.csv' % spider.name, 'w+b')
    self.files[spider] = file
    self.exporter = CsvItemExporter(file)
    #self.exporter.fields_to_export = [list with Names of fields to export - order is important]
    self.exporter.fields_to_export = ['title','author','country','note','publish_date','press','Score','Star','People_nums']
    #这里是序列化 item fields,排序很重要

    self.exporter.start_exporting()

  def spider_closed(self, spider):
    self.exporter.finish_exporting()
    file = self.files.pop(spider)
    file.close()

  def process_item(self, item, spider):
    self.exporter.export_item(item)
return item关于csv文件中空行的问题,我这里查了很久都没解决,file = open('%s_items.csv' % spider.name, 'w+b')添加newline会报错。总之还是我太菜啦(^_^。如果你有解决办法,不妨在文末留言,thx。
更多内容可以阅读
【2】Python Scrapy: How to get CSVItemExporter to write columns in a specific order

程序运行如图

自定义生成的csv

item export中的CsvItemExporter所生成的csv

这是不指定field顺序(测试时s5~s1没有写入item)
爬取简书用户信息
这里我们不再爬取豆瓣Top250了,因为我写文章时可能频繁爬取的缘故,总是封我。这里改用爬取简书用户信息为例,入口josonLe的关注页面,这就是我,大家可以关注一波,日后可能会写一些文在这里。
这里我们选取用户的关注列表为采集信息入口(因为用户的关注数往往大于粉丝数,毕竟又不是谁都是大V)
如图,简书用户信息是通过ajax动态加载的,下拉滑动条就能在开发者工具(F12,上一篇文中讲到了,上面有链接)中抓到包

看箭头所指

我们可以得出关注者的请求url为’https ://www.jianshu.com/users/1fdc2f8e1b37/following?page=2’,其中只有page参数发生了变化。再看箭头所指的publication页面count参数为10,猜测每页10条数据。所以page就是关注者数目除以10向上取整。
然后是获取用户信息的思路,如箭头所示。进入个人主页后,先获取关注页面,再获取关注列表中所有用户主页,重复即可。过程中获取相应信息(name、关注、粉丝、文章、字数、收获喜欢、个人简介。专题、文章等通过json数据返回,感觉获取也没用,就没有写)

这里我们先用刚刚所学的csv格式处理数据
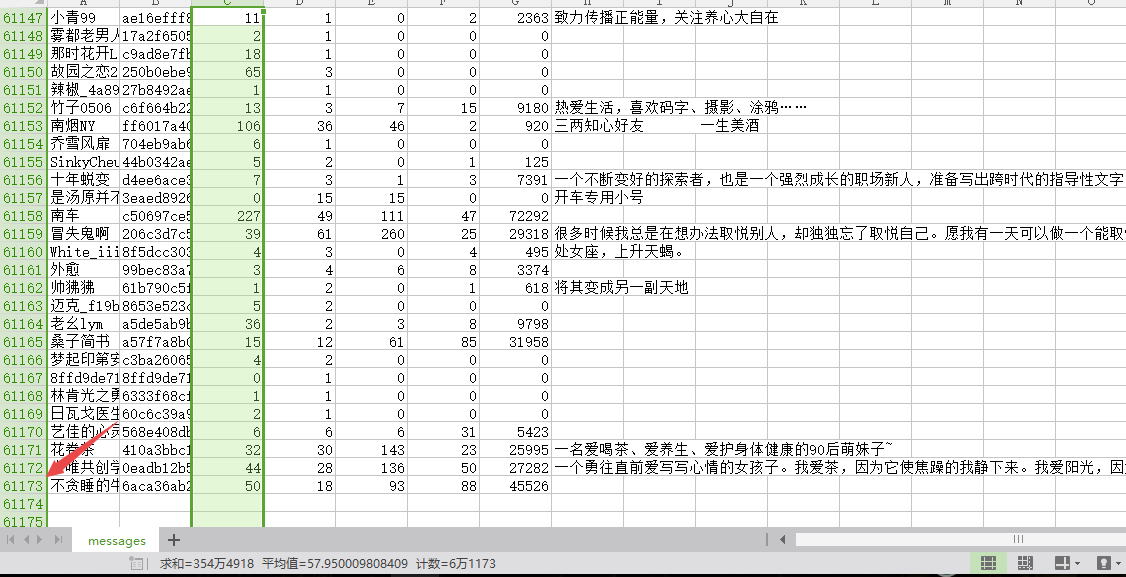
先看一下成果图,大概不到7小时,一共爬取了61173条数据
直接上代码吧,
spider
# -*- coding: utf-8 -*-
import scrapy
import math
from scrapy.http import Request
from JianShu.items import JianshuItem # 引入items重定义的item

class JianshuSpider(scrapy.Spider):
    name = 'jianshu'
    allowed_domains = ['www.jianshu.com']
    start_urls = ['https://www.jianshu.com/users/1fdc2f8e1b37/following']
    #个人页面
    up_urls='https://www.jianshu.com/users/{id}/following'
    #关注页面
    follow_urls='https://www.jianshu.com/users/{id}/following?page='
    id_set=set() #用于用户去重


    def parse(self, response):
        item=JianshuItem()

        try:
            item['name'] = response.xpath('//div[@class="main-top"]/div[@class="title"]/a/text()').extract_first('')
            up_id = response.xpath('//div[@class="main-top"]/div[@class="title"]/a/@href').extract_first('').split('/')[-1]
            self.id_set.add(up_id)
            item['id']=up_id
            print('开始解析{}'.format(item['name']))

            selector = response.xpath('//div[@class="main-top"]/div[@class="info"]/ul/li')
            # 关注的人
            num=int(selector[0].xpath('./div/a/p/text()').extract_first(''))
            item['following'] = num
            pages = math.ceil(num/10)#翻页pages,向上取整
            # 粉丝
            item['follower'] = int(selector[1].xpath('./div/a/p/text()').extract_first(''))
            item['articles'] = int(selector[2].xpath('./div/a/p/text()').extract_first(''))  # 文章
            item['words'] = int(selector[3].xpath('./div/p/text()').extract_first(''))  # 字数
            item['likes'] = int(selector[4].xpath('./div/p/text()').extract_first(''))  # 收获喜欢
            # 作者简介
            item['introduction'] = response.xpath('//div[@class="description"]/div/text()').extract_first('')

        except:
            pass
        else:
            yield item
            for i in range(1, int(pages) + 1):
                up_url = self.follow_urls.format(id=up_id) + str(pages)
                yield Request(url=up_url, callback=self.userlist_parse)
        pass
    def userlist_parse(self,response):
        urls=response.xpath('//div[@class="info"]/a[@class="name"]/@href').extract()
        #列表推导式,主要执行两步,一是获取每个关注者的url,而是url去重
        url_list=[[self.up_urls.format(id=url_id.split('/')[-1]),self.id_set.add(url_id.split('/')[-1])] for url_id in urls if url_id not in self.id_set]
        # self.id_set.add(id.split('/')[-1]) for id in urls
        for url in url_list:
            yield Request(url=url[0], callback=self.parse)
items.py
如同django中数据定义,通过scrapy.Field()定义数据
import scrapy
class JianshuItem(scrapy.Item):
    # define the fields for your item here like:
    # name = scrapy.Field()
    name=scrapy.Field()
    id=scrapy.Field()
    following=scrapy.Field()
    follower=scrapy.Field()
    likes=scrapy.Field()
    articles=scrapy.Field()
    words=scrapy.Field()
    introduction=scrapy.Field()
pipelines.py的编写
可以直接套用上面的模板,稍作修改即可
import csv
class CSVPipeline(object):
    def __init__(self):
        self.csvfile=open('JianShu_author_messages.csv','a+',encoding='utf-8',newline='')
        self.writer=csv.writer(self.csvfile)
        self.writer.writerow(('名','id','关注','粉丝','获得喜欢','文章','字数','个人简介'))
        self.csvfile.close()

    def process_item(self,item,spider):
        with open('JianShu_author_messages.csv','a+',encoding='utf-8',newline='')as f:
            writer=csv.writer(f)
            writer.writerow((item['name'],item['id'],item['following'],item['follower'],item['likes'],item['articles'],item['words'],item['introduction']))

        return item
反爬处理及settings配置
重写下载中间件middlewares.py,引入随机UA。具体内容可参考我上一篇文,顶部有链接。
# Obey robots.txt rules
# 不遵守robots协议
ROBOTSTXT_OBEY = False
# Configure maximum concurrent requests performed by Scrapy (default: 16)
# 增加并发,并发是指同时处理的request的数量,默认为32。增加多少取决于爬虫能占用多少CPU
CONCURRENT_REQUESTS = 100
#下载延迟,是在一定范围内随机的
DOWNLOAD_DELAY = 0.2
# Disable cookies (enabled by default)
#禁用cookies,能减少CPU使用率及Scrapy爬虫在内存中记录的踪迹,提高性能。
COOKIES_ENABLED = False
#禁止重试,有些网站响应慢,可能会超时,多次重试会较低爬取效率
RETRY_ENABLED = False
#设置下载超时,一些超时的请求放弃
DOWNLOAD_TIMEOUT = 30
#下载中间件注册
DOWNLOADER_MIDDLEWARES = {
   # 'JianShu.middlewares.MyCustomDownloaderMiddleware': 200,
    'JianShu.middlewares.RandomUserAgent':100,
}
UserAgentList=[
 ...这里参考上一篇文章
]
#管道文件相对应数据处理的配置,数字越小优先级越高
ITEM_PIPELINES = {
   # 'JianShu.pipelines.JianshuPipeline': 300,
   # 'JianShu.pipelines.CSVPipeline':200,
    'JianShu.pipelines.JsonEncodingPipeline':100,
}
保存为json数据
同样是用上文的简书作者信息为列,
- 自定义保存
在查了一些资料后,发现了一些可能会碰到的问题。如写入文件编码的问题等。
这里导入模块
import json #这不用多说,py自带的json数据处理包
import codecs #codecs打开文件可以避免一些中文编码问题
#我们定义JsonPipeline类
class JsonPipeline(object):
    #程序运行开始时,打开文件
    def __init__(self):
        #print('start writing in files...')
        self.file = codecs.open('.json', 'a+', encoding='utf-8')

    def process_item(self, item, spider):
        #print('writing...')
        line = json.dumps(dict(item), ensure_ascii=False) + "\n"
        self.file.write(line)
        return item #注意务必返回item,以供其他pipeline处理

    def spider_closed(self, spider):
        #print('ok,file is closed...')
        self.file.close()
注意事项:
- item要返回
ensure_ascii=False,这里不写成False,写入文件时会把unicode编码格式写入- 利用json.dumps()把数据转化为json格式时,要先变为字典
- 别忘了在settings.py中注册
- 使用exporter的JsonItemExporter
from scrapy.exporters import JsonItemExporter
class JsonExporterPipleline(object):
    #调用scrapy提供的json export导出json文件
    def __init__(self):
        self.file = open('jianshu_messsageexport.json', 'wb')
        self.exporter = JsonItemExporter(self.file, encoding="utf-8", ensure_ascii=False)
    # 打开文件,并实例化exporter
        self.exporter.start_exporting()
    # 导出文件

    def close_spider(self, spider):
        self.exporter.finish_exporting()
        self.file.close()
    #  文件关闭

    def process_item(self, item, spider):
        self.exporter.export_item(item)
        return item
成果图示,6个多小时57334条数据(和网速,内存,cpu有关)

保存MySQL数据库
我也是初步学习python链接数据库,所以在一番查阅资料后,发现主要有PyMySQL和MySQLdb两种用于链接MySQL数据库的第三方包,但是MySQLdb不再支持python3.5之后的,所以选择PyMySQL进行学习。
首先是安装PyMySQL,进入虚拟环境,执行pip insatll PyMySQL,当前版本为0.8.0(你也可以通过pycharm安装,或者不选用虚拟环境,如何使用虚拟环境,使用pycharm安装可看这里)
通过管理员权限开启数据库,net start mysql
编写代码前,先设计MySQL的数据表,这里我使用Navicat for Windows进行操作。这里与内容无关,不多作介绍。表如图示

这里我们通过可视化工具创建了一个名为jianshu的dbbase,创建了一张名为author_message的表。
这里不得不提醒,像name,introduction这种中文文本一定要保存为utf8编码(最初是以latin保存的,一直无法写入数据库,泪哭),还有就是每栏的长度一定要合适(最初没有做异常处理,超过了长度都不知道错在哪里)。还有一些问题,折腾了一晚上才整出来,无语。。。
这里我们先看代码,不考虑获取数据速度远大于存取速度所造成堵塞
#同步使用PyMySQL链接数据库
class MySQLPipeline(object):
    #初始化连接数据库
    def __init__(self):
    #密码,用户名,数据库改成你自己的
        self.connect=pymysql.connect(host='127.0.0.1',user='root',password='123456',db='jianshu',charset='utf8',use_unicode=True )
        self.cursor=self.connect.cursor()

    def process_item(self, item, spider):
        sql = 'insert into author_message(name,id,following,follower,likes,articles,words,introduction) values(%s,%s,%s,%s,%s,%s,%s,%s)'
        try:
            # execute执行sql语句
            self.cursor.execute(sql, (item['name'], item['id'], item['following'], item['follower'], item['likes'],item['articles'],item['words'],item['introduction']))
            #向数据库提交修改,不要漏了
            self.connect.commit()
            print('写入MySQL成功。。。')
        except Exception as e:
            #self.connect.rollback()#发生错误则回滚,可以不写
            print('insert error:',e)
    def close_spider(self):
self.connect.close()核心是你要知道数据库的插入语句INSERT INTO TABLE(。。。) VALUES(。。。)
比如说插入第一条信息name:josonle, id:1fdc2f8e1b37,following:11。。。
实际上就是使用execute调用命令行执行insert into author_message(name,id,following...) values('josonle','1fdc2f8e1b37','11'...)
所以sql语句可写成'insert into author_message(name,id,following...) values('%s','%s','%s'...)'%(item['name'],item['id'],item['following']...),但这样写是不安全的,如果这些字符中有sql的边界字符,例如 “,’,**等,会自动转义为sql禁止的符号,可能会造成安全问题。
If those strings have out-of-bounds characters like ’ or \ in, you’ve got an SQL injection leading to possible security compromise.
所以推荐使用self.cursor.execute(sql, (item['name'], item['id'], item['following']...)
成果如图

以上代码都可作为模板,稍作修改就可替换使用。
ok,差不多就这样吧,看以后想到了什么,在更新一下。

 浙公网安备 33010602011771号