Introduction
When writing an application you should consider localizing it. Especially when planning to roll it out in different coutries. The Blackberry OS supports this as a built in feature. You just have to use it. When localizing my first application it gave me a hard time since the Java IDE does some dark magic that I did not expect. Therefore I want to describe what I did and how it works.
At the end of the guide you will also get the chance to download the demo projects. This may give you the ability to play around a bit.
1. Empty project
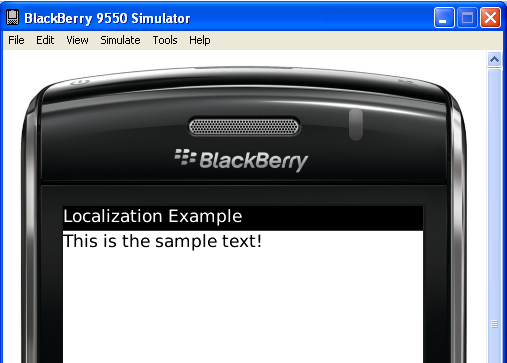
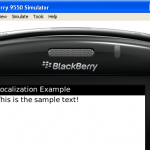
Let’s start with a simple application that actually does nothing but displaying some text in a simple LabelField. You can download the empty project at the end of this article.
As you can see, the texts are still hardcoded in string variables.
01 | public final class Localization extends MainScreen { |
03 | * Creates a new Localization object |
05 | public Localization() { |
06 | String textForTitle = "Localization Example"; |
07 | String textToDisplay = "This is the sample text!"; |
10 | setTitle(textForTitle); |
12 | add(new LabelField(textToDisplay)); |
2. Creating the resource files
When localizing a Blackberry application, you need at least two types of files.
- RRH: This is a header file which is occurs only once
- RRC: These contain the actual resource strings. This file occurs once per language or country/language combination
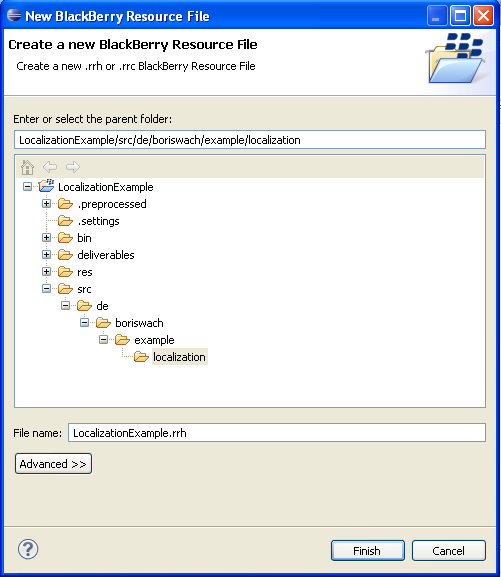
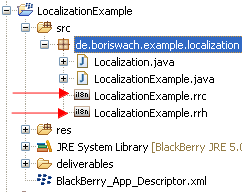
(1) In our example we create the header file first by using the Eclispe IDE by right-clicking your package and select New / BlackBerry Resource File. (2) Use your application name as file name with the extension “.rrh”. (3) The IDE will automatically create a second file with the same name but the extension “.rrc”. This is for the “fallback” translation. We will get to this later on.
(1) (2)
(2)  (3)
(3)
Now it’s time to create the files for the different languages. These need to have the same name but will require a suffix with either the language only or a combination of country and language. Some countries have multiple languages and some languages have variations in countries. E. g. German in Switzerland may be different than in Germany. Also in Switzerland you may have German, Italian or French! You need to create new files with the “.rrc” extension for each combination that you want to support. The more specific the name is, the more likely is it to be used. Imaging your application is running on a Blackberry which is set to German and in Switzerland. Here are some examples:
- LocalizationExample.rrc: This file is regarded as fall back. In case there is no translation for the device locale, this is used.
- LocalizationExample_de.rrc: In case the device locale is German, this file is used. Unless there is no more specific file with a country to it.
- LocalizationExample_de_ch.rrc: A resource file like this is the most specific one. A Swiss blackberry with German language will use this file. In case it doesn’t exist, it will fall back to the “German only” file. If even this does not exist, it will fall back to the file without any specific language to it.
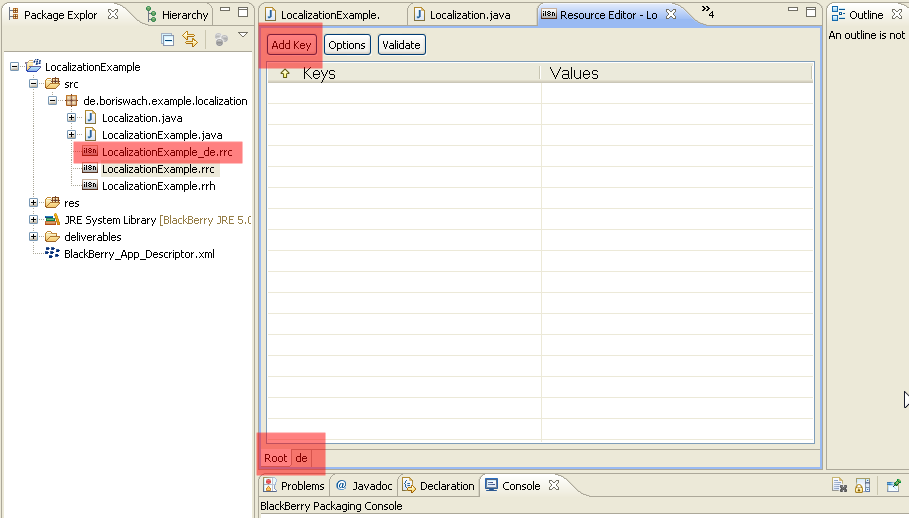
Let’s add another file to our project with the name LocalizationExample_de.rrc in order to have an additional language. This works just as the screenshots above describe. Just use the new file name. When double clicking it, you can maintain the translations. See the tab on the lower end of the view. This will allow you to change the language.
3. Maintaining the translations
Hit the “Add” key at the upper side of the view and enter a key which you will later on use in your code. This should be upper case and should not contain any special characters. The IDE automatically generates an interface with these keys. They will be referenced in the coding wherever you need to maintain the translation. Let’s add two keys:
- FIELD_WINDOWTITLE
- FIELD_LABELTEXT
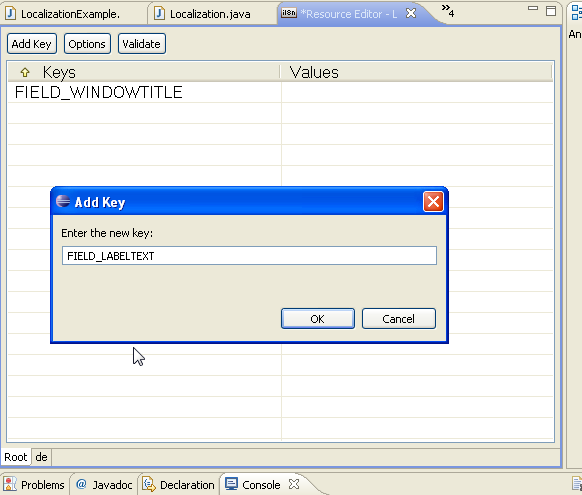
Afterwards we maintain the translation for both languages. When done the result should look like the following screenshot.
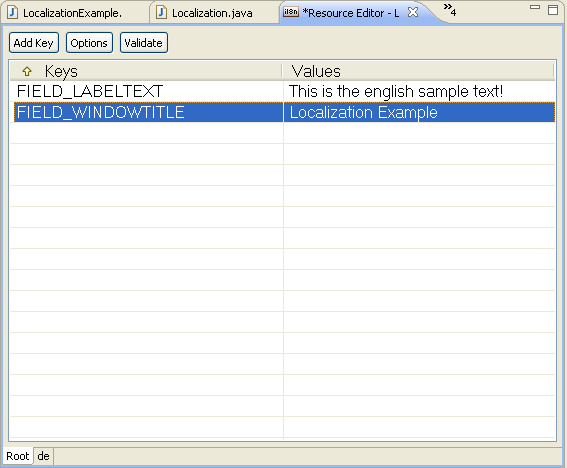
4. Using the translations
The IDE automatically creates an interface for you which contains the keys you maintain. The will be contained in a resource bundle. Within your coding you will need to do two things:
- implement the interface
- get the resource bundle for the device
The interface is named after your header file. So in our case the name is LocalizationExampleResource. After implementing it, you have access to the keys, the bundle name and bundle Id which you need in your code. For using the bundle you need to get a reference to it. See the example code below:
01 | public final class Localization extends MainScreen implements LocalizationExampleResource { |
03 | * Creates a new Localization object |
05 | public Localization() { |
06 | ResourceBundle _resources = ResourceBundle.getBundle(BUNDLE_ID, BUNDLE_NAME); |
07 | String textForTitle = _resources.getString(FIELD_WINDOWTITLE); |
08 | String textToDisplay = _resources.getString(FIELD_LABELTEXT); |
11 | setTitle(textForTitle); |
13 | add(new LabelField(textToDisplay)); |
5. Result
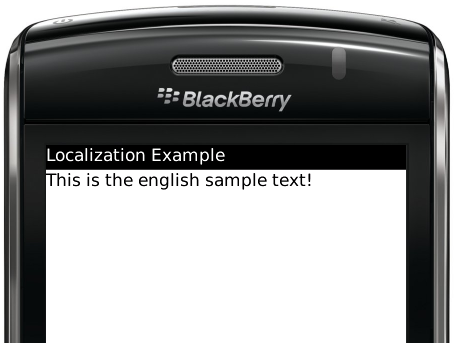
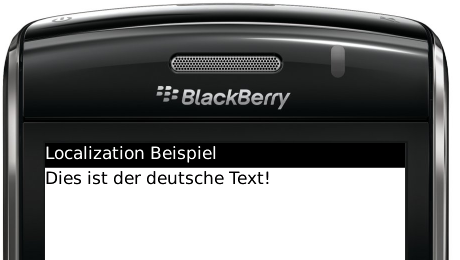
6. Downloads
Here you find the sources of this article:


 浙公网安备 33010602011771号