SNS网站中怎样获取MSN联系人信息
这个功能的关键点在于取得用户的已有联系人列表,并发送邀请函(一般都是电子邮件的形式),在这篇文章里,只涉及怎么样取得MSN中联系人信息,如果大家有兴趣,我会把怎么样取得Gmail、Yahoo等的联系人信息代码也都帖上来。
首先我想到的是参照已有网站的实现方式,如果开心网、校内网、FaceBook等。
开心网、校内网:
开心网和校内网的实现方式大致相同,都是输入用户名和密码,程序按照一定的数据格式POST到LIVE网站,获取Ticket,然后取得联系人的信息,以下是屏幕截图。
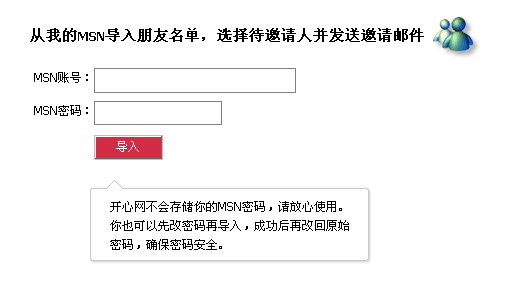
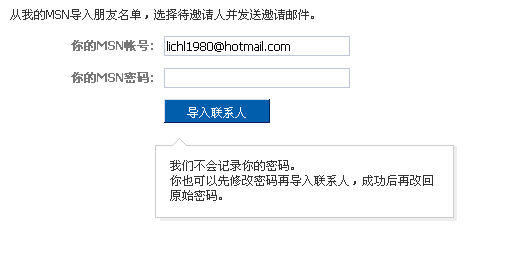
以上两个网站的共同点是都要求用户输入MSN的用户名和密码,这样有可能造成MSN帐户信息泄漏,虽然都说"不会记录或存储你的密码",但谁敢保证呢,即使真的不会存储,但用户会有一种抵触心理。
FaceBook的实现与以上两个网站截然不同,它不要求用户输入密码信息,这样用户就会觉得爽多了,请看下图,密码框并不要求用户填写(Enable=false)
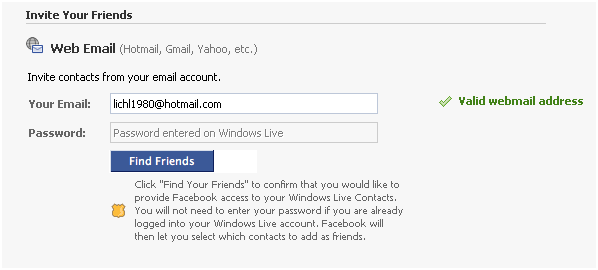
用户点击[Find Friends]后,会转向Live网站,这样用户就可以放心大胆的输入密码了。
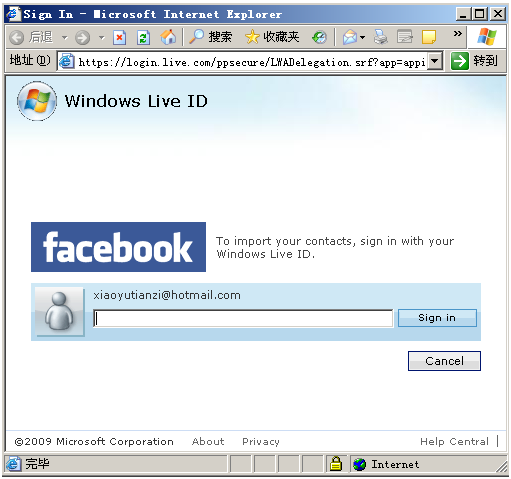
点击[Sign In]后,会自动跳转到FaceBook网站,显示用户联系人信息 ,如下图所示。
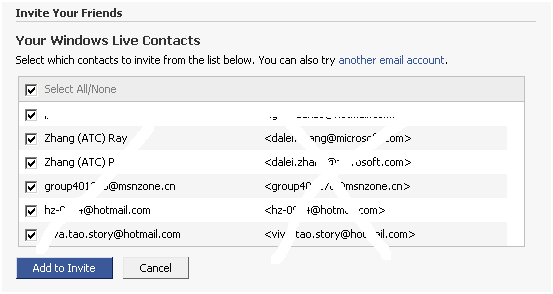
综合考虑,决定采用facebook的实现方式,MSDN上查找了一下,原来Microsoft发布了Window Live的一系列API,其中有一块是Contacts API,好了,那就开始写代码吧(paipaidi)?
第一步:
申请一个微软云计算的一个Project,访问https://lx.azure.microsoft.com/Cloud/Provisioning/Default.aspx,申请一个类型为Live Services的Project,
|
Application ID: |
0000000048011C34 |
|
Domain(s): |
|
|
Return URL: |
http://www.dpe.com/ |
|
Secret Key: |
nazgnMZRWbbgaleiDpvUhG69FKBb5L2v |
第二步:
下载 Windows Live ID Delegated Authentication SDK 1.2 DEMO,网址为:http://www.microsoft.com/downloads/details.aspx?FamilyId=A2466ABF-9629-42D8-B991-1D3FAF2FE872&displaylang=en,
其中有C#、Java、Perl、PHP、Python、Ruby、VB等多种版本任你选择。
第三步:
安装下载的文件到指定目录内,默认为C:\Program Files\Windows Live ID\DelAuth
第四步:
在IIS中新建一个虚拟目录,名称为DelAuth
第五步:
修改hosts文件, 你可以修改一下C:\WINDOWS\system32\drivers\etc中的hosts文件,把127.0.0.1映射到一个您刚才申请Project时填写的域名 www.dpe.com
第六步:
修改Sample1中的Web.Config文件,如下,用申请来的ApplicationID和Secret Key替换文件中相应的值,并根据你的主机及虚拟目录名称,把ReturnUrl改为http://www.dpe.com/delAuth/sample1/delauth-handler.aspx ,Policyurl的值改为http://www.dpe.com/delAuth/sample1/policy.html ,原始的web.Config文件如下:

第七步:
把Sample1中的Default.aspx设置为首页,按如下界面中的URL打开网址
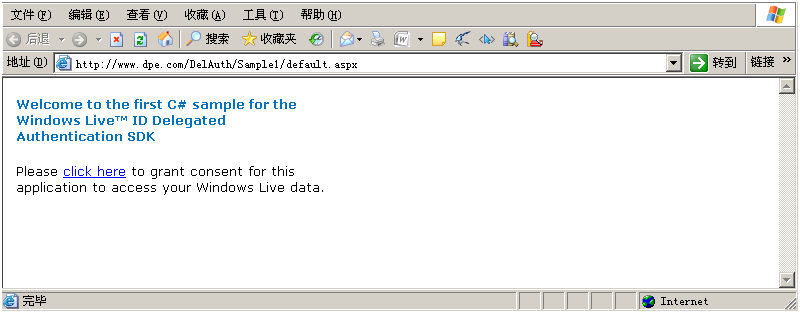
其中Click Here中的URL是动态构造的,如果有兴趣,相应的构造代码大家可以研究一下。
点击Click Here就转向Live网站进行登录,登录后自动返回到Web.Config中配置的returnUrl网址,用户登录后,我们可以通过代码取得
WindowsLiveLogin.ConsentToken的值,具体代码如下:
WindowsLiveLogin wll = new WindowsLiveLogin(true);
WindowsLiveLogin.ConsentToken token = wll.ProcessConsent(req.Form);
第八步:
取得MSN中的联系人信息
微软提供了允许我们通过REST方式访问contracts服务,需要具备以下两个参数:
The Delegated Authentication token (DAT),即WindowsLiveLogin.ConsentToken
The Location ID (lid),可以通过WindowsLiveLogin.ConsentToken获得
显然,我们前七步做的工作主要是获得以上的两个参数的值,用户登录后,在returnUrl页面中,我们可以写如下代码
public string GetContacts(WindowsLiveLogin.ConsentToken ct)
{
string lid = ct.LocationID;
string delegatedToken = ct.DelegationToken;
// Construct the request URI.
string uri = "https://livecontacts.services.live.com/@L@" + lid + "/rest/LiveContacts/Contacts/";
HttpWebRequest request = (HttpWebRequest)WebRequest.Create(uri);
request.UserAgent = "Windows Live Data Interactive SDK";
request.ContentType = "application/xml; charset=utf-8";
request.Method = "GET";
// Add the delegation token to a request header.
request.Headers.Add("Authorization", "DelegatedToken dt=\"" + delegatedToken + "\"");
//Issue the HTTP GET request to Windows Live Contacts.
HttpWebResponse response = (HttpWebResponse)request.GetResponse();
//The response body is an XML stream. Read the stream into an XmlDocument.
XmlDocument contacts = new XmlDocument();
contacts.LoadXml(new StreamReader(response.GetResponseStream()).ReadToEnd());
//Use the document. For example, display contacts.InnerXml.
return contacts.InnerXml;
//Close the response.
//response.Close();
}
我们可以针对返回的XML字符串进行分析,获取你需要的Contact格式,并加以利用。
附件中的代码包完整实现了这一功能,大家可以下载


