Using Power Automate to change security role

The Scenario
We will be adding a Security Role / Field Security Profile to users in CDS. For this demo, our scenario will be grabbing all the users from a Office365 group and assigning them a certain Security Role / Field Security Profile.
The source of the users can be from anywhere:
– MS Form
– SharePoint
– Array inside the Flow
– Excel Table
– AAD Group / Office365 Group
Prerequisites
We will be using the Common Data Service Current Environment connector. This means that our Flow, MUST be created inside a Solution.
You will need appropriate permissions to be able to assign Security Roles and Profiles to
Steps
INFORMATION:
This Flow will work the exact same to add Field Security Profiles instead of Security Roles. The only changes you have to make are in the List records – Get Security Role, and the Relate records – Security Role to User. The changes are listed in the captions of those images.
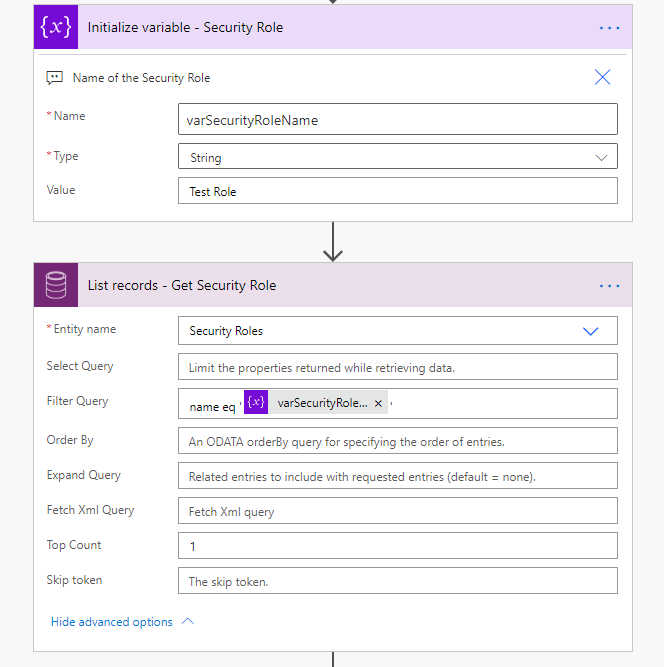
We use a Variable to store the name of the Security Role we want to add to the users.
Than use a List records action on the Entity Security Roles
In our Filter Query we will use:
name eq ‘ ‘
Since we are using a variable to store the name of the Security Role, we pass this into the Filter Query
Next, add a Compose action, to get the Odata URL. This URL is how we will add the Security Role to the User later on.

first(outputs('List_records_-_Get_Security_Role')?['body/value'])?['@odata.id'] |
To build the above expression follow these steps:
1) Inside the Compose action select Expression tab
2) Use the expression first()
3) Click back to Dynamic content tab
 We use first() to get the first value in the CDS List records action. This allows us to bypass the Apply to each loop that Flow creates for us
4) In the ( ) select the Dynamic content value from the List records action
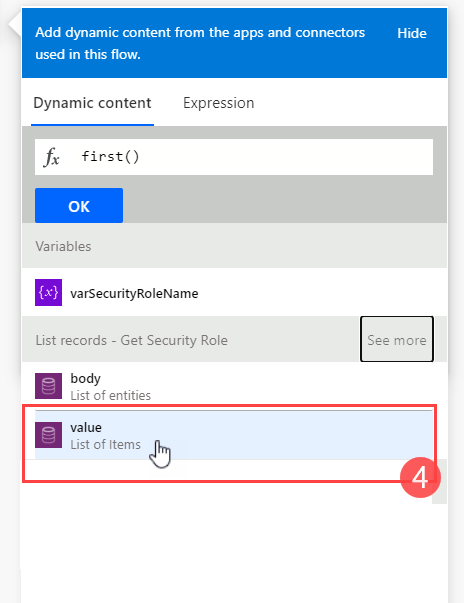 TIP: Make sure you see the fx logo in the text box, this indicates we are using an expression
5) At the end of the expression add:
?['@odata.id'] |
6) Click OK
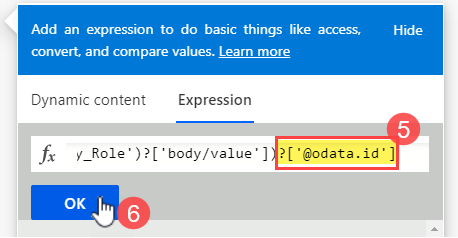
7) Confirm the expression saved correctly by hovering your mouse over the expression

Next, use any data source / connector that meets your needs to get the emails of your users that you want to add – In this example I am using Office365 List group members
Add an Apply to each loop – So we can loop through each email and assign the Security Role

Inside the Apply to each loop, add a List records action on the Users entity
Filter Query = internalemailaddress eq ‘ ‘
Add your dynamic content that has the email address for the user to add inside the ‘ ‘

Next, add a Compose action – to store the User ID (Unique ID)
We use the same technique as mentioned above, using first() and the field name
Add this to the end of your expression
|
1
|
?['systemuserid'] |
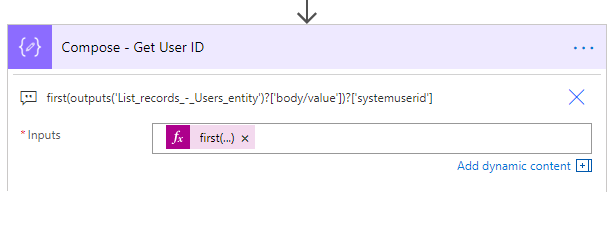 systemuserid = the field name in CDS that stores the Unique value for each user. This value is used as a lookup guid. So we can relate the records to this guid
Still inside the Loop:
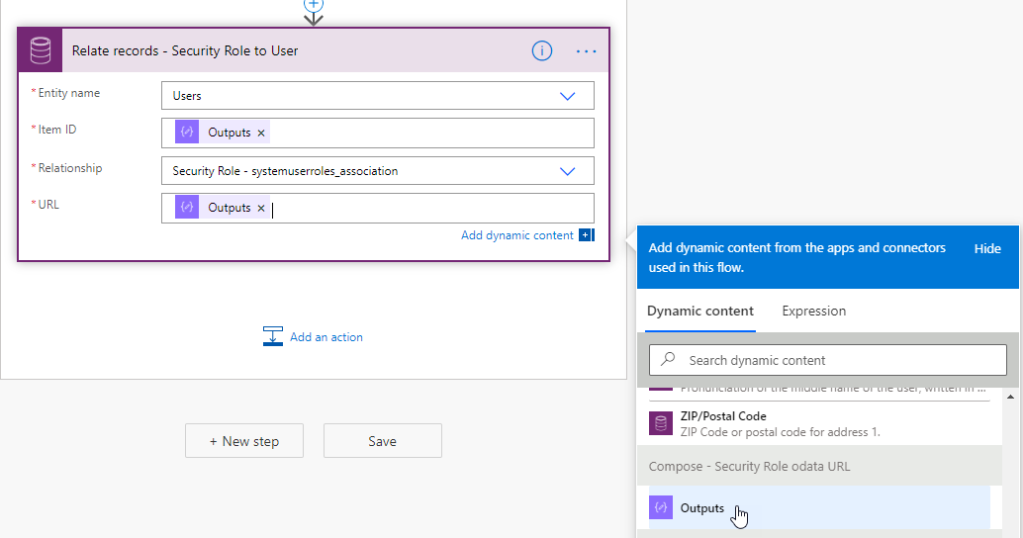
Add a Relate Records action.. This is one of the actions inside the Common Data Service Current Environment Connector.
Entity Name: Users
Item ID: The Compose – Get User ID Outputs
Relationship: Select ‘Security Role – systemuserroles_association’ from the drop-down
URL: The Compose – Security Role odata URL
 Field Security Profile = Change Relationship Dropdown to — Field Security Profile – systemuserprofiles_association
Your action should look like this:


 浙公网安备 33010602011771号