Diycode开源项目 TopicContentActivity分析
1.效果预览以及布局分析
1.1.实际效果预览
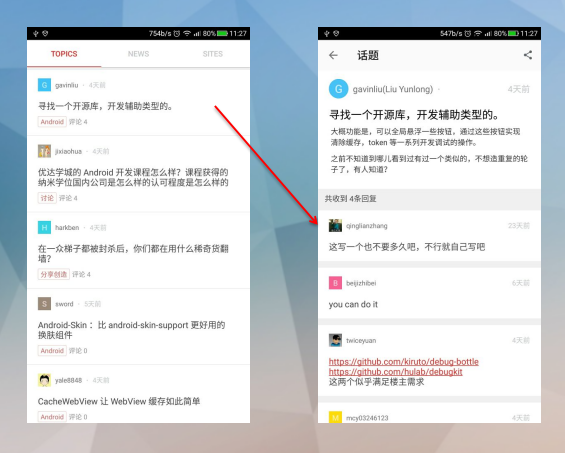
左侧话题列表的布局是通过TopicProvider来实现的,所以当初分析话题列表就没有看到布局。
这里的话题内容不是一个ListView,故要自己布局。
1.2.整体布局对应关系
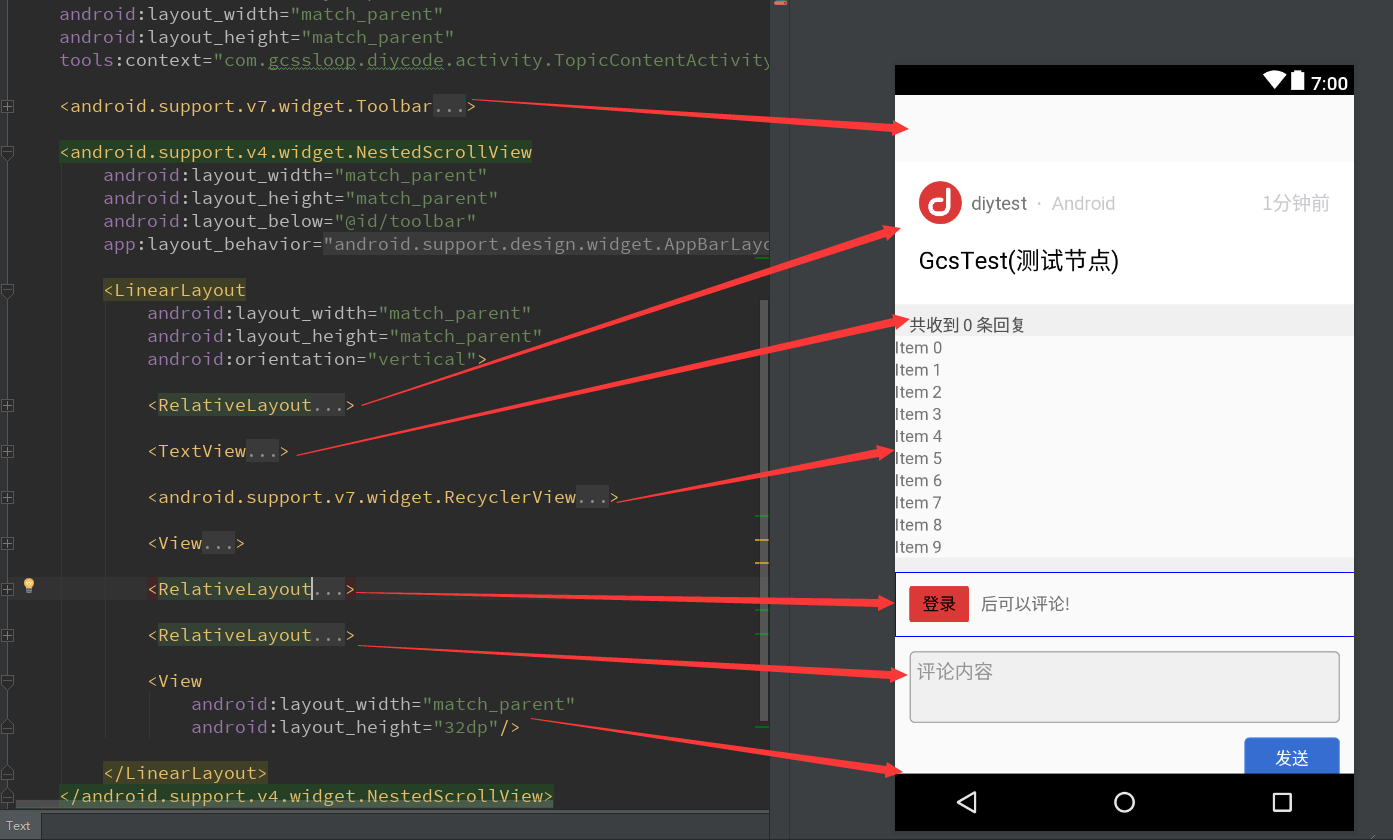
简单易懂的布局,首先用最外层的RelativeLayout,包裹了一个Toolbar和一个NestedScrollView
NestedScrollView包裹了一个LinearLayout
LinearLayout包裹了很多视图
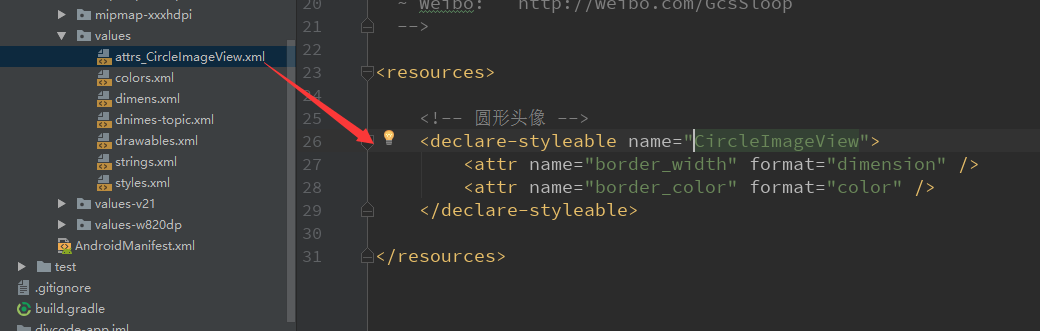
1.3.注意点,这里图标是自定义圆角边框==>CircleImageView

下面看看如何自定义圆角视图:


/*
 * Copyright 2017 GcsSloop
 *
 * Licensed under the Apache License, Version 2.0 (the "License");
 * you may not use this file except in compliance with the License.
 * You may obtain a copy of the License at
 *
 *    http://www.apache.org/licenses/LICENSE-2.0
 *
 * Unless required by applicable law or agreed to in writing, software
 * distributed under the License is distributed on an "AS IS" BASIS,
 * WITHOUT WARRANTIES OR CONDITIONS OF ANY KIND, either express or implied.
 * See the License for the specific language governing permissions and
 * limitations under the License.
 *
 * Last modified 2017-03-08 01:01:18
 *
 * GitHub:  https://github.com/GcsSloop
 * Website: http://www.gcssloop.com
 * Weibo:   http://weibo.com/GcsSloop
 */

package com.gcssloop.diycode.widget;

import android.content.Context;
import android.content.res.TypedArray;
import android.graphics.Bitmap;
import android.graphics.BitmapShader;
import android.graphics.Canvas;
import android.graphics.Color;
import android.graphics.Matrix;
import android.graphics.Paint;
import android.graphics.RectF;
import android.graphics.Shader;
import android.graphics.drawable.BitmapDrawable;
import android.graphics.drawable.ColorDrawable;
import android.graphics.drawable.Drawable;
import android.util.AttributeSet;
import android.widget.ImageView;

import com.gcssloop.diycode.R;

/**
 * 圆形图片
 */
public class CircleImageView extends ImageView {

    private static final ScaleType SCALE_TYPE = ScaleType.CENTER_CROP;

    private static final Bitmap.Config BITMAP_CONFIG = Bitmap.Config.ARGB_8888;
    private static final int COLORDRAWABLE_DIMENSION = 1;

    private static final int DEFAULT_BORDER_WIDTH = 0;
    private static final int DEFAULT_BORDER_COLOR = Color.BLACK;

    private final RectF mDrawableRect = new RectF();
    private final RectF mBorderRect = new RectF();

    private final Matrix mShaderMatrix = new Matrix();
    private final Paint mBitmapPaint = new Paint();
    private final Paint mBorderPaint = new Paint();

    private int mBorderColor = DEFAULT_BORDER_COLOR;
    private int mBorderWidth = DEFAULT_BORDER_WIDTH;

    private Bitmap mBitmap;
    private BitmapShader mBitmapShader;
    private int mBitmapWidth;
    private int mBitmapHeight;

    private float mDrawableRadius;
    private float mBorderRadius;

    private boolean mReady;
    private boolean mSetupPending;

    public CircleImageView(Context context) {
        super(context);
    }

    public CircleImageView(Context context, AttributeSet attrs) {
        this(context, attrs, 0);
    }

    public CircleImageView(Context context, AttributeSet attrs, int defStyle) {
        super(context, attrs, defStyle);
        super.setScaleType(SCALE_TYPE);

        TypedArray a = context.obtainStyledAttributes(attrs, R.styleable.CircleImageView, defStyle, 0);

        mBorderWidth = a.getDimensionPixelSize(R.styleable.CircleImageView_border_width, DEFAULT_BORDER_WIDTH);
        mBorderColor = a.getColor(R.styleable.CircleImageView_border_color, DEFAULT_BORDER_COLOR);

        a.recycle();

        mReady = true;

        if (mSetupPending) {
            setup();
            mSetupPending = false;
        }
    }

    @Override
    public ScaleType getScaleType() {
        return SCALE_TYPE;
    }

    @Override
    public void setScaleType(ScaleType scaleType) {
        if (scaleType != SCALE_TYPE) {
            throw new IllegalArgumentException(String.format("ScaleType %s not supported.", scaleType));
        }
    }

    @Override
    protected void onDraw(Canvas canvas) {
        if (getDrawable() == null) {
            return;
        }

        canvas.drawCircle(getWidth() / 2, getHeight() / 2, mDrawableRadius, mBitmapPaint);
        canvas.drawCircle(getWidth() / 2, getHeight() / 2, mBorderRadius, mBorderPaint);
    }

    @Override
    protected void onSizeChanged(int w, int h, int oldw, int oldh) {
        super.onSizeChanged(w, h, oldw, oldh);
        setup();
    }

    public int getBorderColor() {
        return mBorderColor;
    }

    public void setBorderColor(int borderColor) {
        if (borderColor == mBorderColor) {
            return;
        }

        mBorderColor = borderColor;
        mBorderPaint.setColor(mBorderColor);
        invalidate();
    }

    public int getBorderWidth() {
        return mBorderWidth;
    }

    public void setBorderWidth(int borderWidth) {
        if (borderWidth == mBorderWidth) {
            return;
        }

        mBorderWidth = borderWidth;
        setup();
    }

    @Override
    public void setImageBitmap(Bitmap bm) {
        super.setImageBitmap(bm);
        mBitmap = bm;
        setup();
    }

    @Override
    public void setImageDrawable(Drawable drawable) {
        super.setImageDrawable(drawable);
        mBitmap = getBitmapFromDrawable(drawable);
        setup();
    }

    @Override
    public void setImageResource(int resId) {
        super.setImageResource(resId);
        mBitmap = getBitmapFromDrawable(getDrawable());
        setup();
    }

    private Bitmap getBitmapFromDrawable(Drawable drawable) {
        if (drawable == null) {
            return null;
        }

        if (drawable instanceof BitmapDrawable) {
            return ((BitmapDrawable) drawable).getBitmap();
        }

        try {
            Bitmap bitmap;

            if (drawable instanceof ColorDrawable) {
                bitmap = Bitmap.createBitmap(COLORDRAWABLE_DIMENSION, COLORDRAWABLE_DIMENSION, BITMAP_CONFIG);
            } else {
                bitmap = Bitmap.createBitmap(drawable.getIntrinsicWidth(), drawable.getIntrinsicHeight(), BITMAP_CONFIG);
            }

            Canvas canvas = new Canvas(bitmap);
            drawable.setBounds(0, 0, canvas.getWidth(), canvas.getHeight());
            drawable.draw(canvas);
            return bitmap;
        } catch (OutOfMemoryError e) {
            return null;
        }
    }

    private void setup() {
        if (!mReady) {
            mSetupPending = true;
            return;
        }

        if (mBitmap == null) {
            return;
        }

        mBitmapShader = new BitmapShader(mBitmap, Shader.TileMode.CLAMP, Shader.TileMode.CLAMP);

        mBitmapPaint.setAntiAlias(true);
        mBitmapPaint.setShader(mBitmapShader);

        mBorderPaint.setStyle(Paint.Style.STROKE);
        mBorderPaint.setAntiAlias(true);
        mBorderPaint.setColor(mBorderColor);
        mBorderPaint.setStrokeWidth(mBorderWidth);

        mBitmapHeight = mBitmap.getHeight();
        mBitmapWidth = mBitmap.getWidth();

        mBorderRect.set(0, 0, getWidth(), getHeight());
        mBorderRadius = Math.min((mBorderRect.height() - mBorderWidth) / 2, (mBorderRect.width() - mBorderWidth) / 2);

        mDrawableRect.set(mBorderWidth, mBorderWidth, mBorderRect.width() - mBorderWidth, mBorderRect.height() - mBorderWidth);
        mDrawableRadius = Math.min(mDrawableRect.height() / 2, mDrawableRect.width() / 2);

        updateShaderMatrix();
        invalidate();
    }

    private void updateShaderMatrix() {
        float scale;
        float dx = 0;
        float dy = 0;

        mShaderMatrix.set(null);

        if (mBitmapWidth * mDrawableRect.height() > mDrawableRect.width() * mBitmapHeight) {
            scale = mDrawableRect.height() / mBitmapHeight;
            dx = (mDrawableRect.width() - mBitmapWidth * scale) * 0.5f;
        } else {
            scale = mDrawableRect.width() / mBitmapWidth;
            dy = (mDrawableRect.height() - mBitmapHeight * scale) * 0.5f;
        }

        mShaderMatrix.setScale(scale, scale);
        mShaderMatrix.postTranslate((int) (dx + 0.5f) + mBorderWidth, (int) (dy + 0.5f) + mBorderWidth);

        mBitmapShader.setLocalMatrix(mShaderMatrix);
    }

}
这里复写了3个构造函数,还有实现scaleType()+onDraw()+onSizeChanged+setImageBitmap。
需要自定义一个样式文件
2.分析TopicContentActivity部分函数
2.1.首先预览一下成员变量
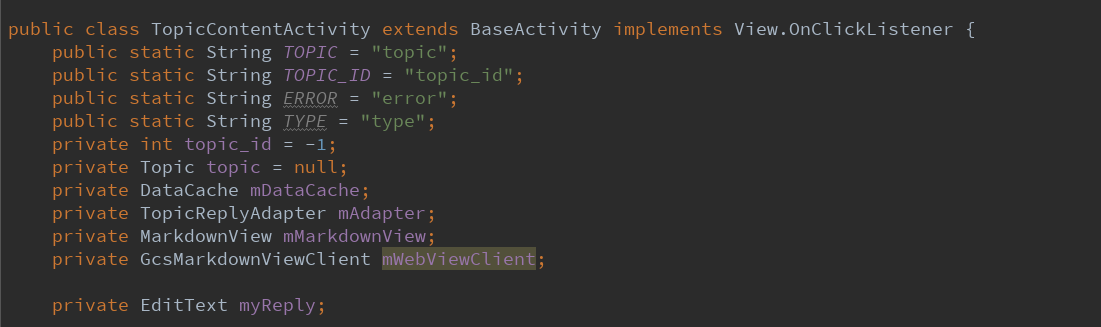
首先是几个临时字符串。
然后声明一个话题的唯一id,这个可以确定是哪个话题。
然后声明一个话题的类,这个类也是可以确定是哪个话题的。
然后是一个数据缓存类,用来处理记录回复以及话题详情的。
然后定义了一个话题回复的适配器,这个适配器用来显示整个回复列表的。
然后这里自定义了一个webView叫做MarkdownView,可能是为了方便点击图片跳转的吧。
然后这里自定义了一个webViewClient叫做GcsMarkdownViewClient,可能也是为了注入js函数监听的。
2.2.然后详细看一下TopicReplyAdapter这个适配器。
2.2.1.首先是源代码。
/*
 * Copyright 2017 GcsSloop
 *
 * Licensed under the Apache License, Version 2.0 (the "License");
 * you may not use this file except in compliance with the License.
 * You may obtain a copy of the License at
 *
 *    http://www.apache.org/licenses/LICENSE-2.0
 *
 * Unless required by applicable law or agreed to in writing, software
 * distributed under the License is distributed on an "AS IS" BASIS,
 * WITHOUT WARRANTIES OR CONDITIONS OF ANY KIND, either express or implied.
 * See the License for the specific language governing permissions and
 * limitations under the License.
 *
 * Last modified 2017-03-26 05:35:12
 *
 * GitHub:  https://github.com/GcsSloop
 * Website: http://www.gcssloop.com
 * Weibo:   http://weibo.com/GcsSloop
 */

package com.gcssloop.diycode.adapter;

import android.content.Context;
import android.content.Intent;
import android.support.annotation.NonNull;
import android.text.Html;
import android.view.View;
import android.widget.ImageView;
import android.widget.TextView;

import com.gcssloop.diycode.R;
import com.gcssloop.diycode.activity.UserActivity;
import com.gcssloop.diycode.base.glide.GlideImageGetter;
import com.gcssloop.diycode.utils.HtmlUtil;
import com.gcssloop.diycode.utils.ImageUtils;
import com.gcssloop.diycode_sdk.api.topic.bean.TopicReply;
import com.gcssloop.diycode_sdk.api.user.bean.User;
import com.gcssloop.diycode.utils.TimeUtil;
import com.gcssloop.recyclerview.adapter.base.RecyclerViewHolder;
import com.gcssloop.recyclerview.adapter.singletype.SingleTypeAdapter;

public class TopicReplyAdapter extends SingleTypeAdapter<TopicReply> {
    private Context mContext;

    public TopicReplyAdapter(@NonNull Context context) {
        super(context, R.layout.item_topic_reply);
        mContext = context;
    }

    /**
     * 在此处处理数据
     *
     * @param position 位置
     * @param holder   view holder
     * @param bean     数据
     */
    @Override public void convert(int position, RecyclerViewHolder holder, TopicReply bean) {
        final User user = bean.getUser();
        holder.setText(R.id.username, user.getLogin());
        holder.setText(R.id.time, TimeUtil.computePastTime(bean.getUpdated_at()));

        ImageView avatar = holder.get(R.id.avatar);
        ImageUtils.loadImage(mContext, user.getAvatar_url(), avatar);
        TextView content = holder.get(R.id.content);
        // TODO 评论区代码问题
        content.setText(Html.fromHtml(HtmlUtil.removeP(bean.getBody_html()), new GlideImageGetter(mContext, content), null));

        holder.setOnClickListener(new View.OnClickListener() {
            @Override
            public void onClick(View v) {
                Intent intent = new Intent(mContext, UserActivity.class);
                intent.putExtra(UserActivity.USER, user);
                mContext.startActivity(intent);
            }
        }, R.id.avatar, R.id.username);
    }
}
2.2.2.然后分析一下继承类和构造函数。

首先继承了一个SingleTypeAdapter<TopicReply>
这个类又是干什么的呢?
2.2.2.1.首先看一下源代码。
/*
 * Copyright 2017 GcsSloop
 *
 * Licensed under the Apache License, Version 2.0 (the "License");
 * you may not use this file except in compliance with the License.
 * You may obtain a copy of the License at
 *
 *    http://www.apache.org/licenses/LICENSE-2.0
 *
 * Unless required by applicable law or agreed to in writing, software
 * distributed under the License is distributed on an "AS IS" BASIS,
 * WITHOUT WARRANTIES OR CONDITIONS OF ANY KIND, either express or implied.
 * See the License for the specific language governing permissions and
 * limitations under the License.
 *
 * Last modified 2017-04-08 16:14:10
 *
 * GitHub: https://github.com/GcsSloop
 * WeiBo: http://weibo.com/GcsSloop
 * WebSite: http://www.gcssloop.com
 */

package com.gcssloop.recyclerview.adapter.singletype;

import android.content.Context;
import android.support.annotation.LayoutRes;
import android.support.annotation.NonNull;
import android.support.v7.widget.RecyclerView;
import android.view.LayoutInflater;
import android.view.View;
import android.view.ViewGroup;

import com.gcssloop.recyclerview.adapter.base.RecyclerViewHolder;

import java.util.ArrayList;
import java.util.List;

public abstract class SingleTypeAdapter<T> extends RecyclerView.Adapter<RecyclerViewHolder> {

    protected Context mContext;
    private LayoutInflater mInflater;
    private List<T> mDatas = new ArrayList<>();
    private int mLayoutId;

    public SingleTypeAdapter(@NonNull Context context, @LayoutRes int layoutId) {
        mInflater = LayoutInflater.from(context);
        mContext = context;
        mLayoutId = layoutId;
    }

    @Override
    public RecyclerViewHolder onCreateViewHolder(ViewGroup parent, int viewType) {
        View rootView = null;
        try {
            rootView = mInflater.inflate(mLayoutId, parent, false);
        } catch (Exception e) {
            e.printStackTrace();
        }
        return new RecyclerViewHolder(rootView);
    }

    @Override
    public void onBindViewHolder(RecyclerViewHolder holder, int position) {
        convert(position, holder, mDatas.get(position));
    }

    /**
     * 在此处处理数据
     *
     * @param position 位置
     * @param holder   view holder
     * @param bean     数据
     */
    public abstract void convert(int position, RecyclerViewHolder holder, T bean);

    @Override
    public int getItemCount() {
        return mDatas.size();
    }

    public void addDatas(List<T> datas) {
        this.mDatas.addAll(datas);
        notifyDataSetChanged();
    }

    public List<T> getDatas() {
        return mDatas;
    }

    public void clearDatas() {
        this.mDatas.clear();
        notifyDataSetChanged();
    }
}
2.2.2.2.然后分析成员变量。

首先声明一个Context
LayoutInflater用来动态加载界面
mDatas用来保存数据
mLayoutId是用来存放布局资源id
2.2.2.3.然后是构造函数

这里首先从context获取可以加载界面的LayoutInflater
然后获得context
然后从外部获取资源id
2.2.2.4.然后是Override一个函数onCreateViewHolder
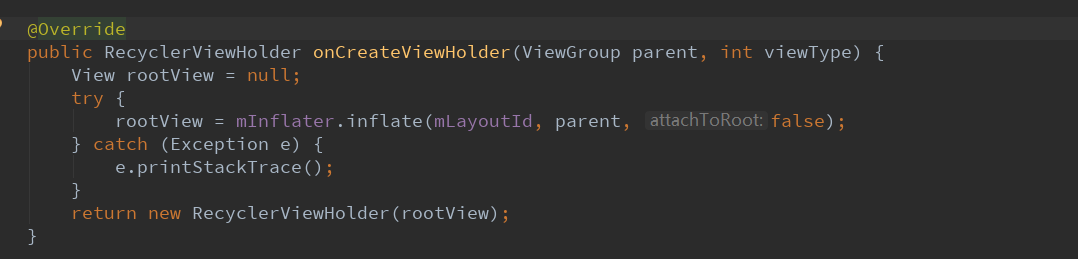
动态加载从构造函数中获取的资源id,返回一个自定义的布局持有者
2.2.2.5.SingleTypeAdapter中处理数据
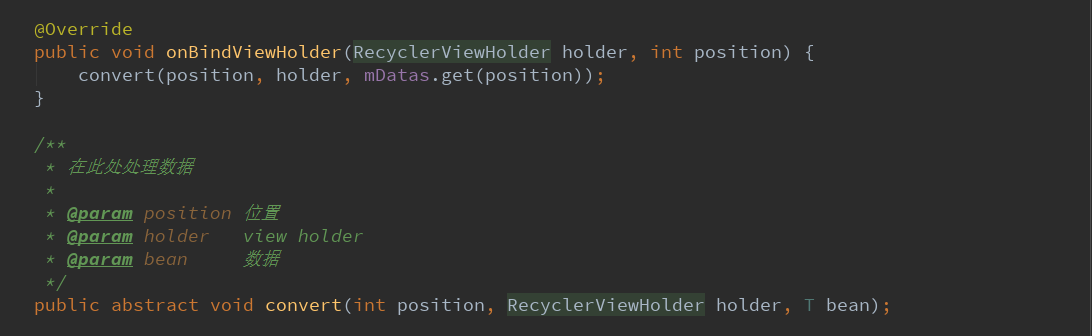
首先这是一个适配器,然后在Override的函数onBindViewHolder中处理数据
这里交给了一个抽象函数convert中处理,也就是在子类中具体实现抽象函数来处理数据
2.2.2.6.适配器中其他必要的函数
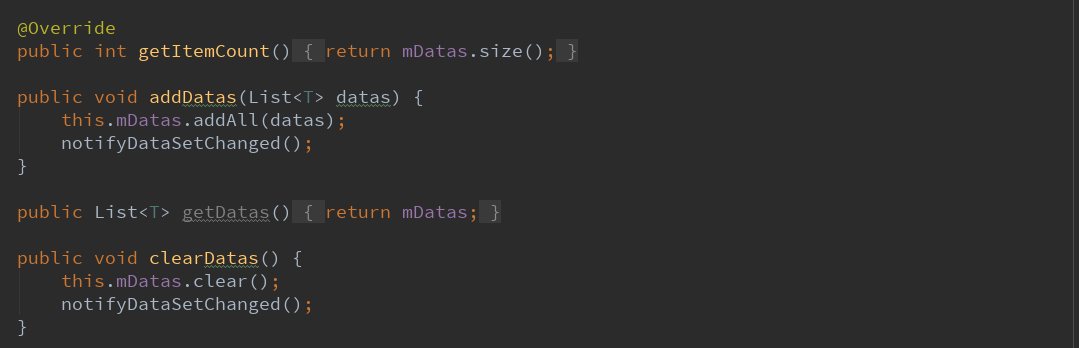
这里首先是适配器必须实现的getItemCount,返回数据条数。
然后是添加数据,然后是获取数据,然后是清理数据。
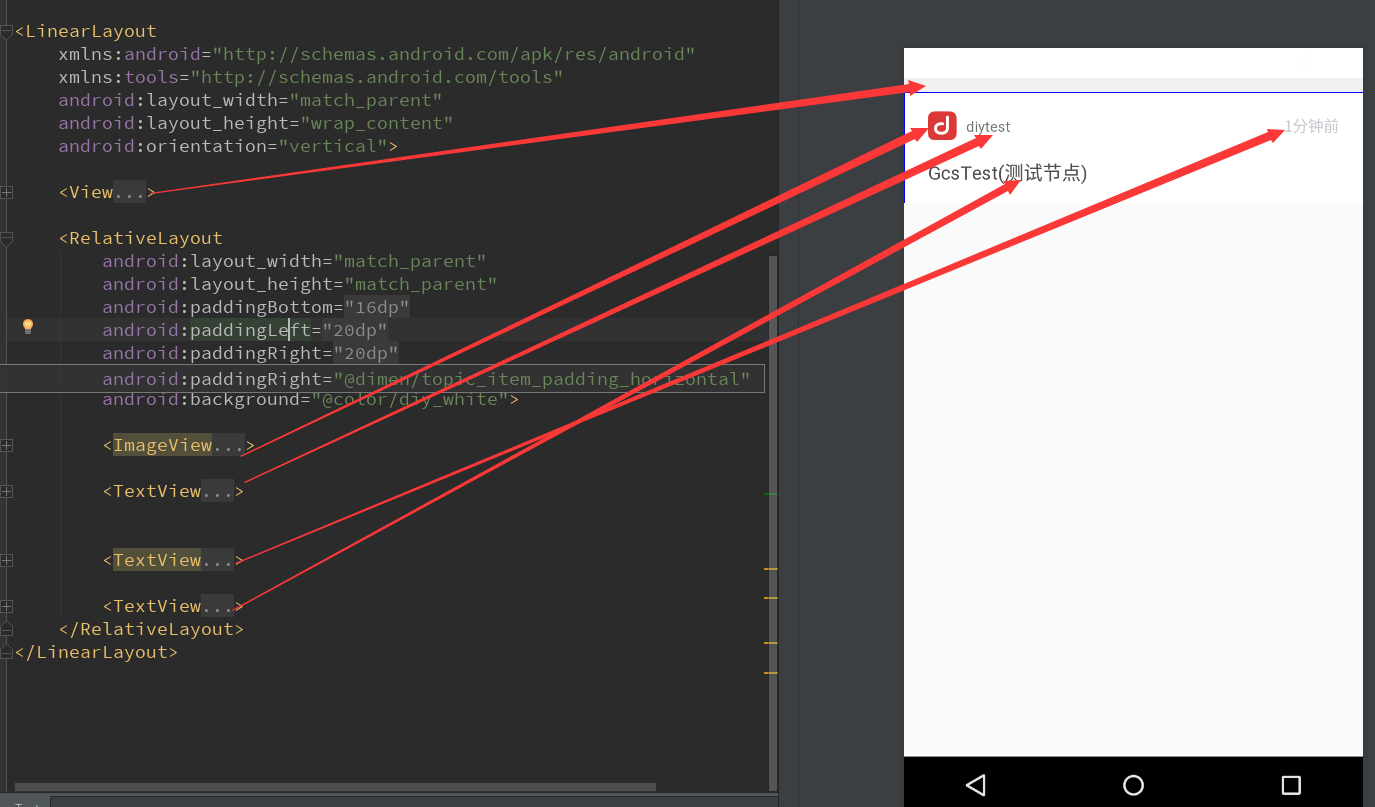
2.2.2.7.这个构造函数中加载了一个item_topic_reply布局。
这个布局就是回复中每一个回复的详细布局。
2.2.3.然后就是实现在SingleTypeAdapter定义的抽象函数了convert。
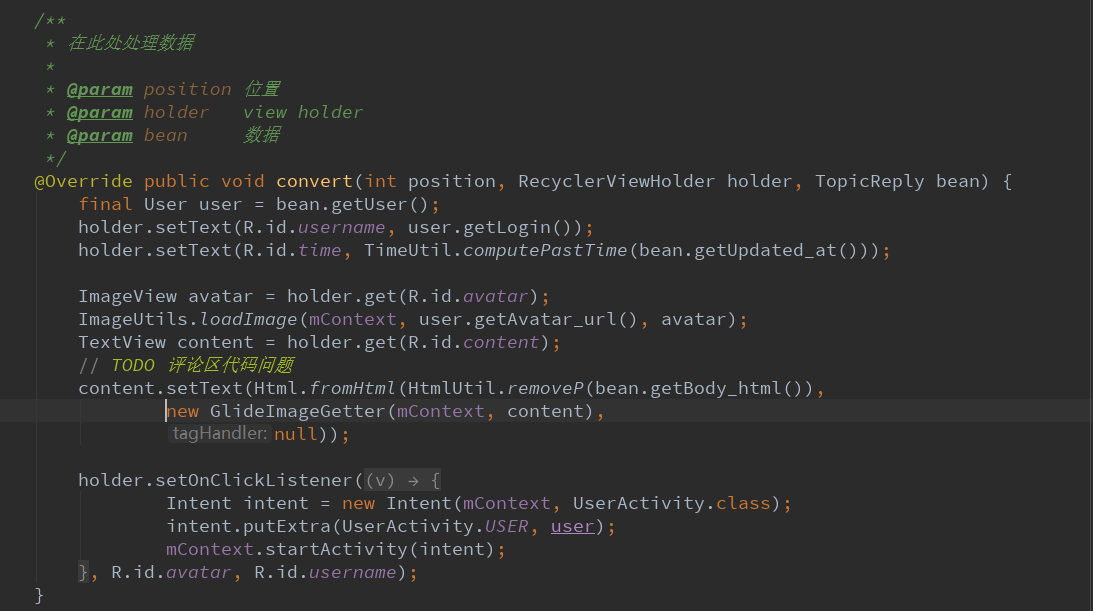
意义:就是将布局中的控件,附上了实际的数据。
可以看到,数据全部从一个TopicPeply的一个实例中获取,然后,通过holder的设置函数类设置
textView的文字,ImageView的图片。
图片加载方式是调用了一个通用类ImageUtils来loadImage实现。
评论区的文字是通过获取网页版的html,然后调用Html.fromHtml(HtmlUtil.removeP(...)这样
来设置的。注意点这里又一个GlideImageGetter类,自定义Html图片获取类,用Glide加载图片,
并且在textView中显示。
然后就是设置几个控件的监听器,用户点击了头像,用户名之后会跳转到用户Activity中。
2.3.回到TopicContentActivity中,接下来是创建实例的两个函数
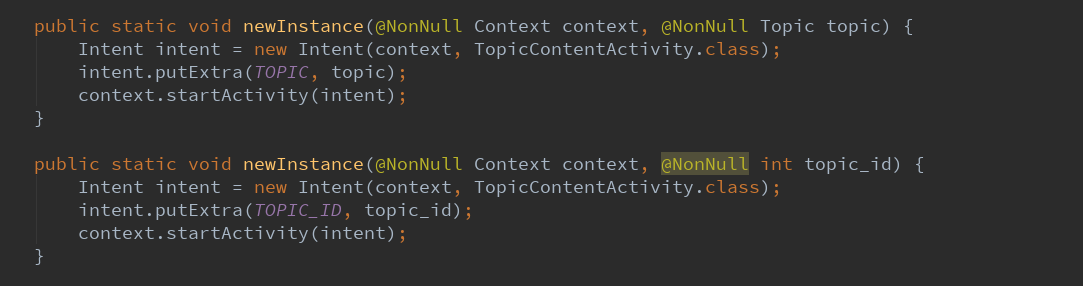
这里又两种方式可以跳转到话题详情这个活动
可以通过话题的类,也可以通过话题的唯一表示id
2.4.实现3个必须实现的抽象类。

首先是getLayoutId==>activity_topic_content.xml,这是整个话题详情页面,包括标题栏toolbar。
然后是initDatas==>从intent获取话题唯一标识id,和话题类
如果topic不为空且话题唯一id不小于0,则将话题类的id的数据赋给topic_id。即统一化。
然后是initViews==>这里要新建一个数据缓存类
然后初始化RecyclerView,用来显示话题回复列表的显示
然后初始化MarkdownView,用来显示webView的,且点击了WebView中的图片会跳转到ImageActivity。
最后是loadData==>初始化topic内从面板的数据。
下面会详细分析这三个函数的具体作用。
3.分析TopicContentActivity剩下的函数
3.1.首先是initRecyclerView(ViewHolder holder)

这个R.id.reply_list指的是这个东西
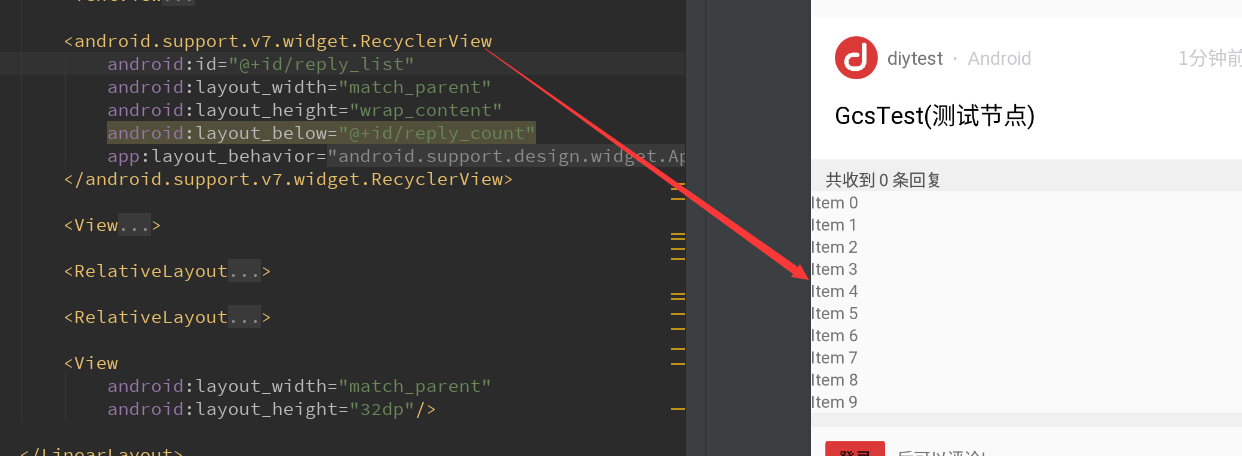
然后这里涉及到了一个RecyclerViewUtil
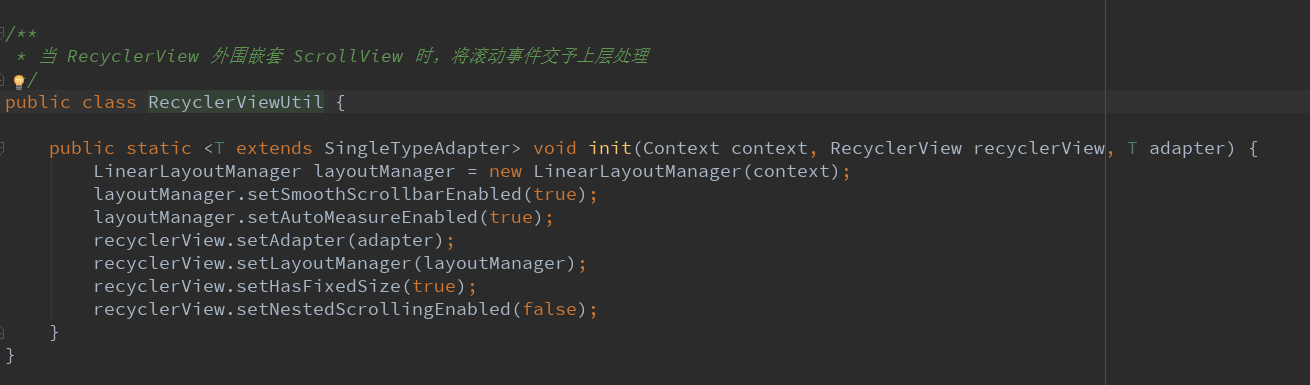
意义:当RecyclerView外围嵌套ScrollView时,将滚动事件交给上层处理。
3.2.然后是initMarkdownView
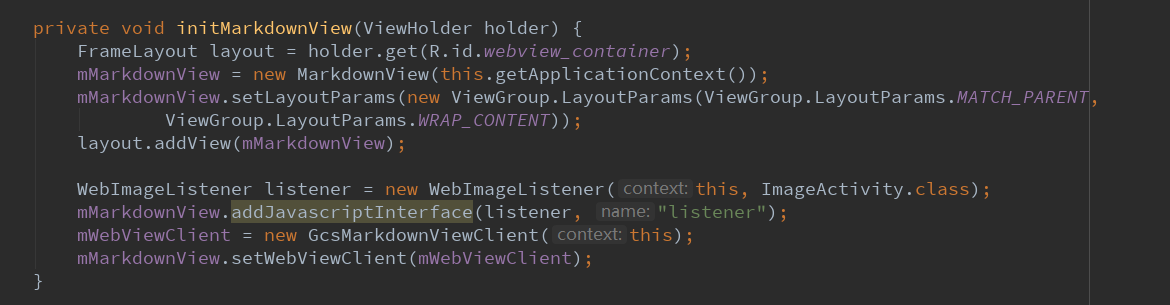
这里的R.id.webview_container指的是这个东西

意义:用来显示这个话题详情的,其实是FrameLayout布局,然后要用到自定义的webView。
然后这里new了一个自定义WebView。然后动态添加到FrameLayout中。
然后这里涉及到一个自定义监听器WebImageListener,点击其中的图片,跳转到ImageActivity中。
3.3.然后处理登录和非登录状态的显示
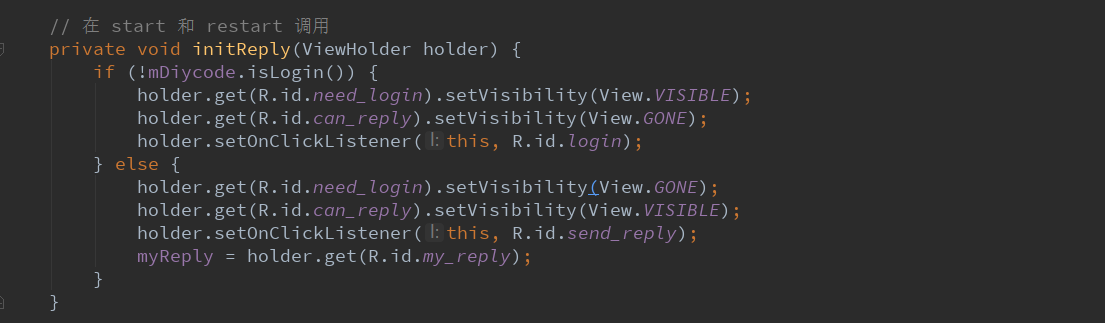
这里调用API查看用户是否登录,再决定显示什么,再设置监听器。
3.4.初始化topic内容面板的数据==>loadData()
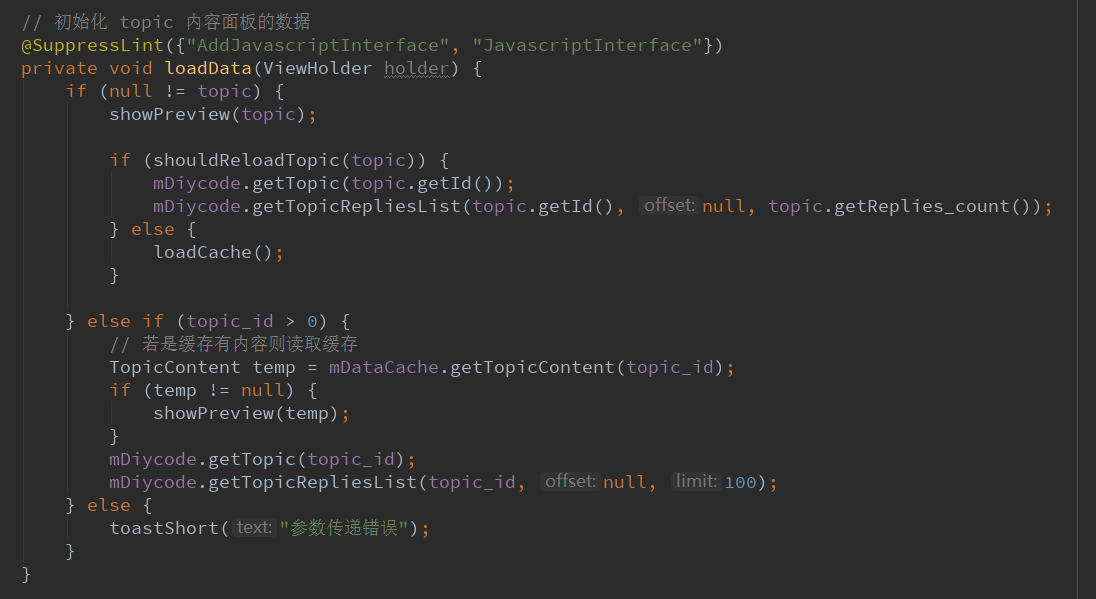
一开始不理解这个注解

估计这里的意思也是相近的,这里应该是告知编译器,此处要添加js方法。
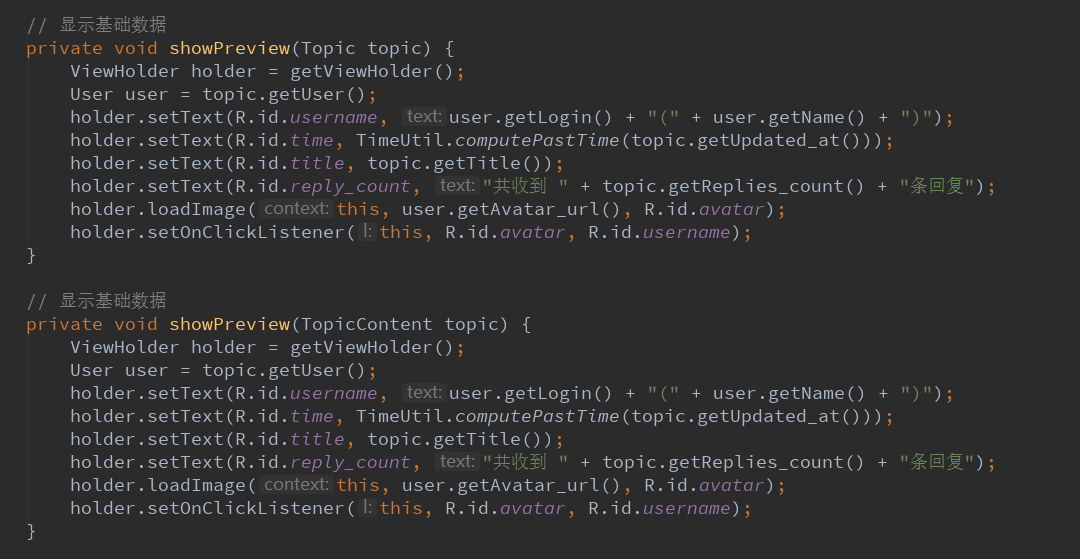
首先是showPreview(topic),这个函数怎么定义的?
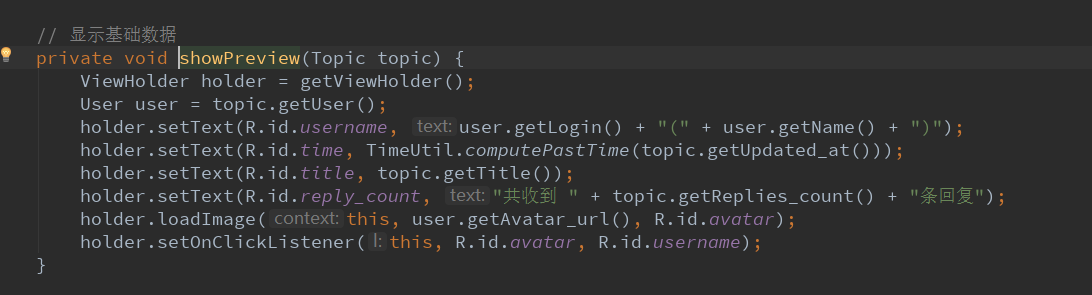
显示基础数据,包括用户名,时间,标题,回复的数量。
注意点:时间这里用了一个通用类TimeUtil类来完成相应的转换。
然后判断是否重新加载topic详情。
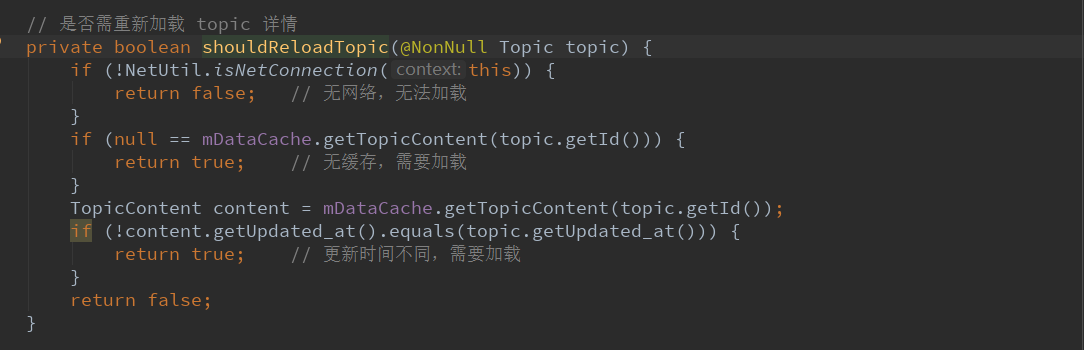
注意点:采用了一个NetUtil通用类判断有无网络。
然后如果没有缓存就需要加载
注意topic是存在intent中的数据,而如果别人已经更新了,那么这里也是需要重新加载的。
然后是loadCache==>加载缓存。
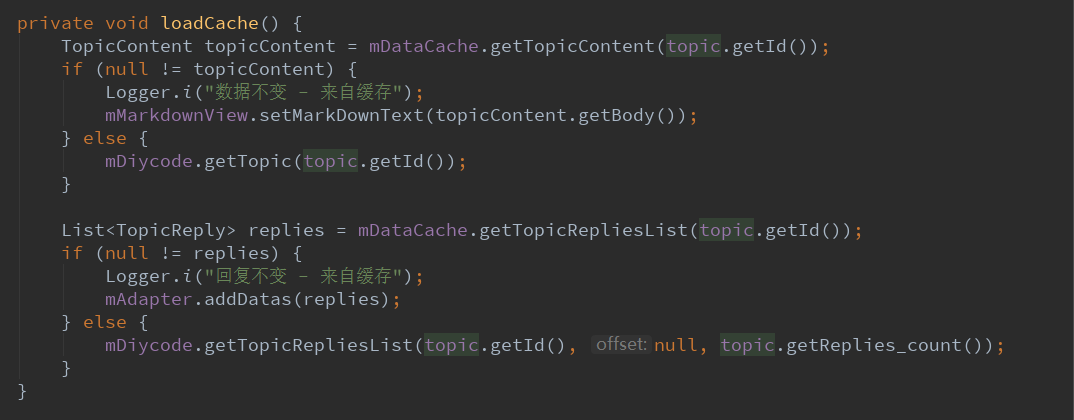
从缓存中得到数据放入webView中。
如果缓存中数据为null,则去请求API调用。
若是缓存有内容则读取缓存
3.5.显示基础数据==>参数有两种,一种Topic,一种TopicContent
3.6.显示全部数据

全部数据包括话题内容和回复数据。
3.7.请求话题详情的回调

请求成功后,显示所有数据,然后存入缓存。
3.8.请求话题回复的回调
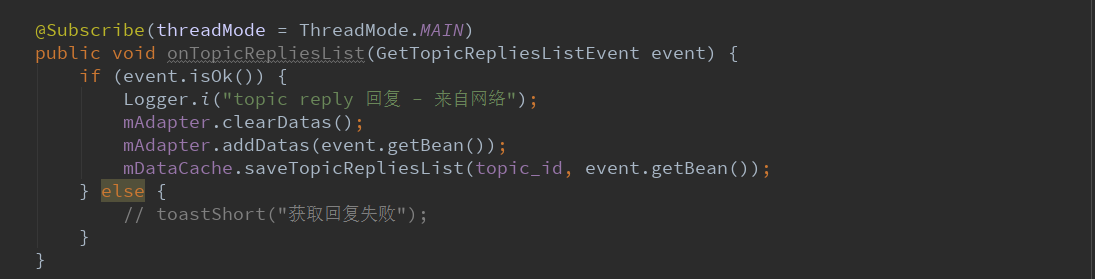
请求成功后,先清空所有数据,然后添加到适配器,然后存入缓存。
3.9.创建回复的回调
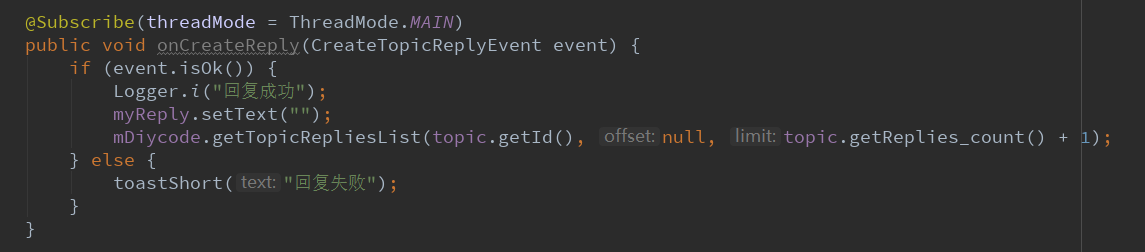
清空回复的编辑框,然后调用API,增长评论条数。
3.10.防止webView引起的内存泄漏

清空webView的资源,设置空的链接。
3.11.复写返回按钮

点击返回按钮,即退出这个活动。
3.12.活动的声明周期
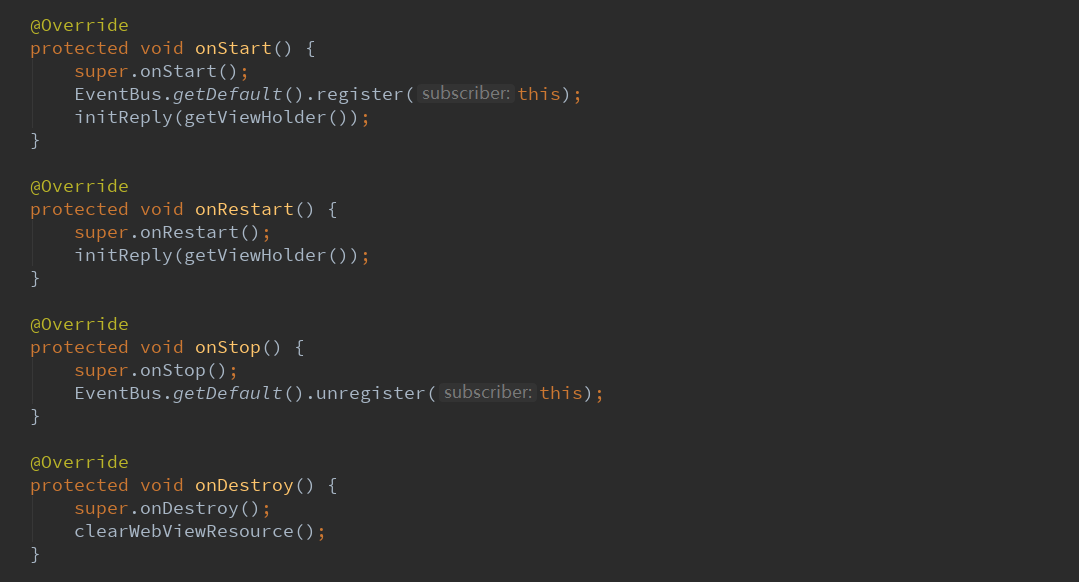
onStart中==>注册EventBus,初始化评论。
onRestart中==>初始化评论。
onStop中==>反注册EventBus。
onDestroy中==>清空webView资源,防止内存泄漏。
3.13.处理点击事件
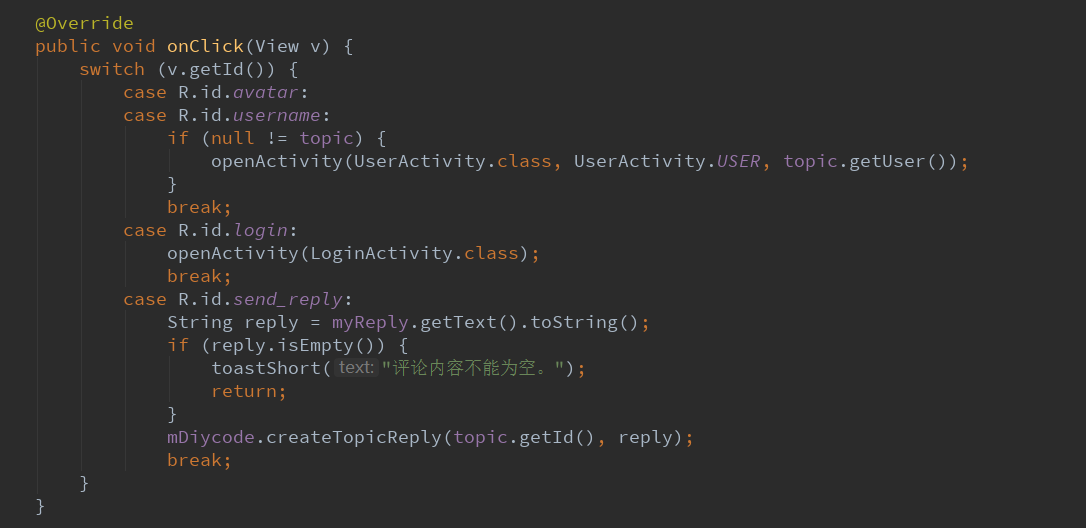
点击了头像、用户名==>跳转到用户活动页面
点击了登录==>跳转到登录界面
点击了评论==>先获取,再调用API来实现这个过程
3.14.创建菜单,分享点击事件


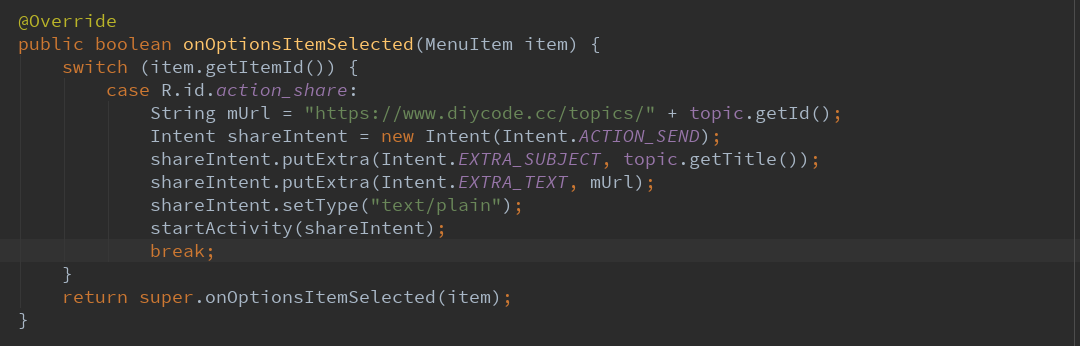
这里设置了intent的类型为:text/plain
这里利用了intent可以直接分享这个链接。
4.总结一下
4.1.话题内容这个类是我在目前看过最长的一个类,如果之前要是先分析这个类,估计是不懂得。现在来看这个类,就
相对于简单一些了。定义的变量有Topic的一个实例,一个暂存数据的作用。然后有一个DataCache,缓存数据。
然后一个TopicReplyAdapter,话题回复列表的适配器,自定义的,继承SingleTypeAdapter<TopicReply>,也
是自定义的,继承RecylerView.Adapter<RecylerViewHolder>,当然RecyleViewHolder也是自定义的,继承
RecyclerView.ViewHolder的,它是一个布局持有者,这就是最基本的。
4.2.这里的一个FrameLayout其实是一个用来加载一个webView的,首先在总布局中定义有这个东西,然后将一个动态
的webView,而且是自定义的webView==>MarkdownView。然后有一个自定义的webViewClient。两者结合
主要处理webView中的图片点击问题,可以获得所有图片,然后点击其中一个图片可以进入图片浏览页面。
4.3.然后有两个newInstance函数,一开始我以为是看错了,结果它就是有两个,可能就是为了方便外部调用吧,如果
可以得到某个话题的唯一id,那便可以确定这个话题,如果这个类都知道,那么岂不是更加快得到数据了嘛。
4.4.话题内容的的主体布局分为四大块,一个是标题栏,一个是内容用自定义的webView显示,一个是评论列表,一个
是评论内容,或者点击登录。所以采用一个NestedScrollView+LinearLayout即可完成。
4.5.初始化数据其实就是从intent中获取数据,外部函数调用newInstance会传入一些数据,比如话题的id什么的,然后
就可以在initDatas()中获取,所以这里我忽然明白为什么要在BaseActivity中定义这个函数了。因为实现活动跳转的
时候总是会有携带额外的一些数据的,所以这里不管有没有都在BaseActivity中定义即可。
4.6.初始化视图的时候,这里注意将标题栏的标题设置好,基本上每个页面都会有一个标题吧。然后注意缓存,新建一个
DataCache,每个项目基本都会涉及到吧。然后注意要加载评论列表和自定义WebView。
4.7.这里话题回复用到了一个TopicReplyAdapter,继承一个SingleTypeAdapter<TopicReply>,然后继承了一个
RecyclerView.Adapter<RecyclerViewHolder>类,作用就是定义话题回复列表,布局在TopicReplyAdapter中
定义为R.layout.item_topic_reply,所以RecyclerView.Adapter的作用就是定义最简单的适配器+抽象函数。
4.8.然后讨论一下初始化webView。这个函数的作用就是将new的自定义webView动态加载到FrameLayout中,然后
设置webView监听事件,即添加了一个自定义的Client和一个js接口。
4.9.然后是初始化topic内容面板中的数据,这里先判断从intent中获得的topic是否为null,如果不为null,就再次判断
是否需要重新加载,如果不需要就进入loadCache环节。loadCache作用就是从缓存中取出数据,然后将webView
中的数据显示出来。以及话题回复的内容添加到适配器中。
4.10.然后是显示基础数据,话题内容中要显示的东西有点多,它将webView和其他控件分开了,webView部分先不显
示,先将其他信息,比如用户名,用户头像显示出来。然后设置一些监听。
4.11.然后这里有3个EventBus的回调,一个是请求话题详细的回调==>请求完之后,展示所有。一个是话题列表的回
调==>请求完之后,适配器重新添加数据且存进缓存。第三个是创建一个回复==>请求之后,将编辑框清空,然
后在去请求服务器将评论的条数+1。
4.12.这里学会了如何防止webView引起的内存泄露,原来写webView不知道什么原因有时候就崩溃了,原来是
webView可能会导致内存泄露的问题,所以今后的webView注意都要在destroy中clear一下。这个函数就很
关键了。

 浙公网安备 33010602011771号