DiyCode开源项目 BaseActivity 分析
1.首先将这个项目的BaseActivity源码拷贝过来。


/*
* Copyright 2017 GcsSloop
*
* Licensed under the Apache License, Version 2.0 (the "License");
* you may not use this file except in compliance with the License.
* You may obtain a copy of the License at
*
* http://www.apache.org/licenses/LICENSE-2.0
*
* Unless required by applicable law or agreed to in writing, software
* distributed under the License is distributed on an "AS IS" BASIS,
* WITHOUT WARRANTIES OR CONDITIONS OF ANY KIND, either express or implied.
* See the License for the specific language governing permissions and
* limitations under the License.
*
* Last modified 2017-03-11 22:24:54
*
* GitHub: https://github.com/GcsSloop
* Website: http://www.gcssloop.com
* Weibo: http://weibo.com/GcsSloop
*/
package com.gcssloop.diycode.base.app;
import android.annotation.TargetApi;
import android.content.Context;
import android.content.Intent;
import android.os.Build;
import android.os.Bundle;
import android.support.annotation.LayoutRes;
import android.support.v7.app.ActionBar;
import android.support.v7.app.AppCompatActivity;
import android.support.v7.widget.Toolbar;
import android.text.TextUtils;
import android.view.MenuItem;
import android.view.View;
import android.widget.Toast;
import com.gcssloop.diycode.R;
import com.gcssloop.diycode.hackpatch.IMMLeaks;
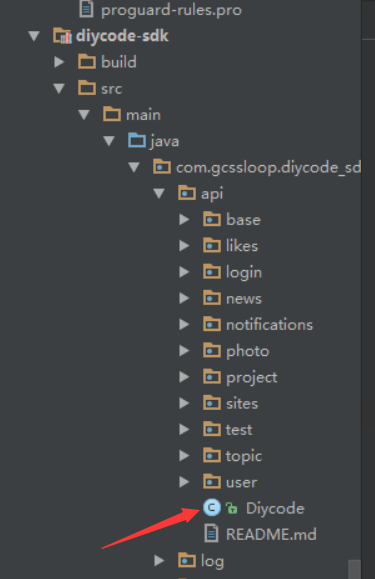
import com.gcssloop.diycode_sdk.api.Diycode;
import java.io.Serializable;
public abstract class BaseActivity extends AppCompatActivity {
protected Diycode mDiycode;//项目本身的api提供的一个调用类
protected ViewHolder mViewHolder;
private Toast mToast;
@TargetApi(Build.VERSION_CODES.KITKAT)
@Override
protected void onCreate(Bundle savedInstanceState) {
super.onCreate(savedInstanceState);
mDiycode = Diycode.getSingleInstance();
mViewHolder = new ViewHolder(getLayoutInflater(), null, getLayoutId());
setContentView(mViewHolder.getRootView());
IMMLeaks.fixFocusedViewLeak(this.getApplication()); // 修复 InputMethodManager 引发的内存泄漏
initActionBar(mViewHolder);
initDatas();
initViews(mViewHolder, mViewHolder.getRootView());
}
@LayoutRes
protected abstract int getLayoutId();
/**
* 初始化数据,调用位置在 initViews 之前
*/
protected void initDatas() {
}
/**
* 初始化 View, 调用位置在 initDatas 之后
*/
protected abstract void initViews(ViewHolder holder, View root);
// 初始化 ActiobBar
private void initActionBar(ViewHolder holder) {
Toolbar toolbar = holder.get(R.id.toolbar);
if (toolbar != null) {
setSupportActionBar(toolbar);
}
ActionBar actionBar = getSupportActionBar();
if (actionBar != null) {
actionBar.setDisplayHomeAsUpEnabled(true);
}
}
// 默认点击左上角是结束当前 Activity
@Override
public boolean onOptionsItemSelected(MenuItem item) {
switch (item.getItemId()) {
case android.R.id.home:
finish();
break;
}
return super.onOptionsItemSelected(item);
}
public ViewHolder getViewHolder() {
return mViewHolder;
}
/**
* 发出一个短Toast
*
* @param text 内容
*/
public void toastShort(String text) {
toast(text, Toast.LENGTH_SHORT);
}
/**
* 发出一个长toast提醒
*
* @param text 内容
*/
public void toastLong(String text) {
toast(text, Toast.LENGTH_LONG);
}
private void toast(final String text, final int duration) {
if (!TextUtils.isEmpty(text)) {
runOnUiThread(new Runnable() {
@Override
public void run() {
if (mToast == null) {
mToast = Toast.makeText(getApplicationContext(), text, duration);
} else {
mToast.setText(text);
mToast.setDuration(duration);
}
mToast.show();
}
});
}
}
protected void openActivity(Class<?> cls) {
openActivity(this, cls);
}
public static void openActivity(Context context, Class<?> cls) {
Intent intent = new Intent(context, cls);
context.startActivity(intent);
}
/**
* 打开 Activity 的同时传递一个数据
*/
protected <V extends Serializable> void openActivity(Class<?> cls, String key, V value) {
openActivity(this, cls, key, value);
}
/**
* 打开 Activity 的同时传递一个数据
*/
public <V extends Serializable> void openActivity(Context context, Class<?> cls, String key, V value) {
Intent intent = new Intent(context, cls);
intent.putExtra(key, value);
context.startActivity(intent);
}
}
2.Diycode是项目本身的api提供的一个调用类。放在module中,名字为:diycode-sdk,应该就是为了方便开发客户端提供的一个API了,里面又是一大坨,单单这个类就有一千行,很多逻辑函数,不过现在先不研究。
3.ViewHolder是什么东西呢?
==>其实就是性能优化,这里是自己创建的一个类。放在和BaseActivity同一级下,所以说这个东西应该和BaseActivity一样,经常使用,以前也只是看到别人用,就自己用一下,不懂得其中真正的含义。
网上搜了一篇文章:listview加载性能优化ViewHolder
这个项目的ViewHolder源码是这样的:
/*
 * Copyright 2017 GcsSloop
 *
 * Licensed under the Apache License, Version 2.0 (the "License");
 * you may not use this file except in compliance with the License.
 * You may obtain a copy of the License at
 *
 *    http://www.apache.org/licenses/LICENSE-2.0
 *
 * Unless required by applicable law or agreed to in writing, software
 * distributed under the License is distributed on an "AS IS" BASIS,
 * WITHOUT WARRANTIES OR CONDITIONS OF ANY KIND, either express or implied.
 * See the License for the specific language governing permissions and
 * limitations under the License.
 *
 * Last modified 2017-03-11 22:24:54
 *
 * GitHub:  https://github.com/GcsSloop
 * Website: http://www.gcssloop.com
 * Weibo:   http://weibo.com/GcsSloop
 */

package com.gcssloop.diycode.base.app;

import android.content.Context;
import android.support.annotation.NonNull;
import android.util.SparseArray;
import android.view.LayoutInflater;
import android.view.View;
import android.view.ViewGroup;
import android.widget.ImageView;
import android.widget.TextView;

import com.bumptech.glide.Glide;
import com.bumptech.glide.load.engine.DiskCacheStrategy;
import com.gcssloop.diycode_sdk.log.Logger;

public class ViewHolder {

    private SparseArray<View> mViews;
    private View mRootView;

    public ViewHolder(LayoutInflater inflater, ViewGroup parent, int layoutId) {
        this.mViews = new SparseArray<View>();
        mRootView = inflater.inflate(layoutId, parent, false);
    }

    /**
     * 通过View的id来获取子View
     *
     * @param resId view的id
     * @param <T>   泛型
     * @return 子View
     */
    public <T extends View> T get(int resId) {
        View view = mViews.get(resId);
        //如果该View没有缓存过,则查找View并缓存
        if (view == null) {
            view = mRootView.findViewById(resId);
            mViews.put(resId, view);
        }
        if (view == null){
            Logger.e("View == null");
        }
        return (T) view;
    }

    /**
     * 获取布局View
     *
     * @return 布局View
     */
    public View getRootView() {
        return mRootView;
    }

    /**
     * 设置文本
     *
     * @param res_id view 的 id
     * @param text   文本内容
     * @return 是否成功
     */
    public boolean setText(CharSequence text, @NonNull int res_id) {
        try {
            TextView textView = get(res_id);
            textView.setText(text);
            return true;
        } catch (Exception e) {
            return false;
        }
    }

    public boolean setText(@NonNull int res_id, CharSequence text) {
        return setText(text, res_id);
    }

    public void loadImage(Context context, String url, int res_id) {
        ImageView imageView = get(res_id);
        String url2 = url;
        if (url.contains("diycode"))
            url2 = url.replace("large_avatar", "avatar");
        Glide.with(context).load(url2).diskCacheStrategy(DiskCacheStrategy.SOURCE).into(imageView);
    }

    /**
     * 设置监听器
     *
     * @param l   监听器
     * @param ids view 的 id
     */
    public void setOnClickListener(View.OnClickListener l, int... ids) {
        if (ids == null) {
            return;
        }
        for (int id : ids) {
            get(id).setOnClickListener(l);
        }
    }
}
下面分析一下:
(1)有一个私有成员变量。private SparseArray<View> mViews;
类似一个容器,可以装一些视图,并且这个类方便使用,性能也很棒。
(2)然后是ViewHolder构造函数,参数分别为LayoutInflater inflater,ViewGroup parent,Int layoutId.现在仔细了解一下这几个参数吧。
①LayoutInflater是什么东西呢?==>主要就是将xml转换成一个View对象,动态创建布局。
inflate方法有三个参数,分别是resource==>布局的资源id,root==>填充的根视图,attachToRoot==>是否将载入的视图绑定到根视图。
②View与ViewGroup有什么区别?==>View是所有UI组件的基类,而ViewGroup是容纳这些组件的容器,其本身也是从View派生出来的。
③LayoutId其实就是自己项目中R.id.***,就是inflate中的布局的资源的id。
(3)通过view的id来获取子View
 /**
     * 通过View的id来获取子View
     *
     * @param resId view的id
     * @param <T>   泛型
     * @return 子View
     */
    public <T extends View> T get(int resId) {
        View view = mViews.get(resId);
        //如果该View没有缓存过,则查找View并缓存
        if (view == null) {
            view = mRootView.findViewById(resId);
            mViews.put(resId, view);
        }
        if (view == null){
            Logger.e("View == null");
        }
        return (T) view;
    }
①<T extends View>是一个类型,如何理解这个泛型呢?==>限制了返回的T类,必须是View的子类。
②这里用到了一个Logger,日志类,直接拷贝一下,这个东西也是为了方便调试的。基本上每个项目都会用到的。
/*
 * Copyright 2017 GcsSloop
 *
 * Licensed under the Apache License, Version 2.0 (the "License");
 * you may not use this file except in compliance with the License.
 * You may obtain a copy of the License at
 *
 *    http://www.apache.org/licenses/LICENSE-2.0
 *
 * Unless required by applicable law or agreed to in writing, software
 * distributed under the License is distributed on an "AS IS" BASIS,
 * WITHOUT WARRANTIES OR CONDITIONS OF ANY KIND, either express or implied.
 * See the License for the specific language governing permissions and
 * limitations under the License.
 *
 * Last modified 2017-03-10 00:33:05
 *
 * GitHub:  https://github.com/GcsSloop
 * Website: http://www.gcssloop.com
 * Weibo:   http://weibo.com/GcsSloop
 */

package com.gcssloop.diycode_sdk.log;

import android.support.annotation.NonNull;
import android.util.Log;

public class Logger {

    private static String DEFAULT_TAG = "GCS-LOG";

    private static Config mConfig;

    private Logger() {

    }

    public static Config init() {
        mConfig = new Config(DEFAULT_TAG);
        return mConfig;
    }

    public static Config init(@NonNull String tag) {
        mConfig = new Config(tag);
        return mConfig;
    }

    public static void v(String message) {
        log(Config.LEVEL_VERBOSE, mConfig.getTag(), message);
    }

    public static void d(String message) {
        log(Config.LEVEL_DEBUG, mConfig.getTag(), message);
    }

    public static void i(String message) {
        log(Config.LEVEL_INFO, mConfig.getTag(), message);
    }

    public static void w(String message) {
        log(Config.LEVEL_WARN, mConfig.getTag(), message);
    }

    public static void e(String message) {
        log(Config.LEVEL_ERROR, mConfig.getTag(), message);
    }

    public static void v(String tag, String message) {
        log(Config.LEVEL_VERBOSE, tag, message);
    }

    public static void d(String tag, String message) {
        log(Config.LEVEL_DEBUG, tag, message);
    }

    public static void i(String tag, String message) {
        log(Config.LEVEL_INFO, tag, message);
    }

    public static void w(String tag, String message) {
        log(Config.LEVEL_WARN, tag, message);
    }

    public static void e(String tag, String message) {
        log(Config.LEVEL_ERROR, tag, message);
    }

    private static void log(int level, String tag, String message) {
        if (mConfig.getLevel() == Config.LEVEL_NONE) {
            return;
        }

        if (level < mConfig.getLevel()) {
            return;
        }

        switch (level) {
            case Config.LEVEL_VERBOSE:
                Log.v(tag, message);
                break;
            case Config.LEVEL_DEBUG:
                Log.d(tag, message);
                break;
            case Config.LEVEL_INFO:
                Log.i(tag, message);
                break;
            case Config.LEVEL_WARN:
                Log.w(tag, message);
                break;
            case Config.LEVEL_ERROR:
                Log.e(tag, message);
                break;
        }

    }
}
Logger类中有定义一个Config类,这是在diycode_sdk里面的,先看看定义吧。
/*
 * Copyright 2017 GcsSloop
 *
 * Licensed under the Apache License, Version 2.0 (the "License");
 * you may not use this file except in compliance with the License.
 * You may obtain a copy of the License at
 *
 *    http://www.apache.org/licenses/LICENSE-2.0
 *
 * Unless required by applicable law or agreed to in writing, software
 * distributed under the License is distributed on an "AS IS" BASIS,
 * WITHOUT WARRANTIES OR CONDITIONS OF ANY KIND, either express or implied.
 * See the License for the specific language governing permissions and
 * limitations under the License.
 *
 * Last modified 2017-03-10 00:33:05
 *
 * GitHub:  https://github.com/GcsSloop
 * Website: http://www.gcssloop.com
 * Weibo:   http://weibo.com/GcsSloop
 */

package com.gcssloop.diycode_sdk.log;

import android.support.annotation.NonNull;

public class Config {

    public static final int LEVEL_NONE = 0;
    public static final int LEVEL_FULL = 1;

    public static final int LEVEL_VERBOSE = 2;
    public static final int LEVEL_DEBUG = 3;
    public static final int LEVEL_INFO = 4;
    public static final int LEVEL_WARN = 5;
    public static final int LEVEL_ERROR = 6;
    public static final int LEVEL_ASSERT = 7;

    private String tag;
    private int level;

    public Config(String tag) {
        this.tag = tag;
        level = LEVEL_FULL;
    }

    public Config setLevel(@NonNull int level){
        this.level = level;
        return this;
    }

    public int getLevel() {
        return level;
    }

    public String getTag() {
        return tag;
    }
}
感觉像一个Bean类,很简单的一个类,定义了7个静态整型常量,1,2,3,4,5,6,7,应该是日志的等级,分为7个模式吧。
(4)有注意到有些变量前面有@NonNull注解,不知道什么意思。==>指明一个参数,字段或者方法的返回值不可以为NULL。
(5)然后在ViewHolder中提供了setText给TextView。方式很简单,就是先通过id得到这个TextView,然后setText即可。
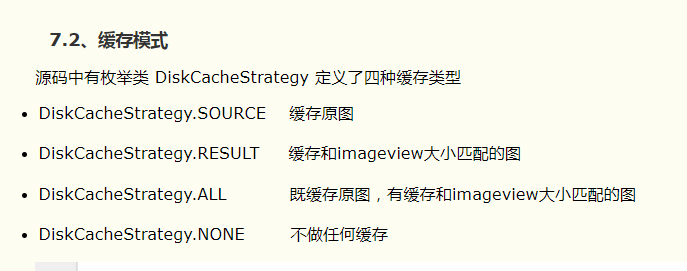
(6)然后在ViewHolder中提供了一个loadImage方法。比较复杂,贴一下源代码。
public void loadImage(Context context, String url, int res_id) {
        ImageView imageView = get(res_id);
        String url2 = url;
        if (url.contains("diycode"))
            url2 = url.replace("large_avatar", "avatar");
        Glide.with(context).load(url2).diskCacheStrategy(DiskCacheStrategy.SOURCE).into(imageView);
    }
①首先也是通过id得到这个imageView。
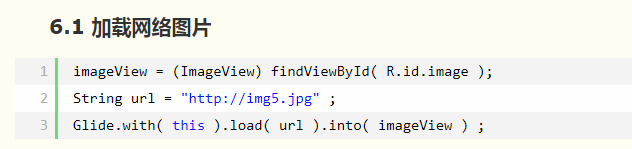
②这里有一个Glide类。不知道这个图片加载库怎么用?
(7)最后设置了一个监听器。两个参数:View.OnClickListener l,int... ids ==>省略号是什么意思?==>类似一个数组吧(而且事先不知道长度呢!)
4.@TargetApi(Build.VERSION_CODES.KITKAT)在onCreate的前面声明,这东西起什么作用呢? ==>使用高编译版本的代码,为了通用性兼容运行此代码的低版本平台,要求程序员做出区分对待的加载。
5.在BaseActivity中的onCreate函数中,通过Diycode的SDK中获取单例类。这里了解一下什么是单例模式。==>保证一个类仅有一个实例,并提供一个访问它的全局访问点。
6.这里谈一下onCreate函数中的setContentView(view);
==>默认Activity中放入我们的xml或者Java控件是通过setContentView方法来操作的,当调用了setContentView所有的控件就得到了显示。
7.如何解决InputMethodManager造成的内存泄漏问题?

8.onCreate函数中有一个初始化ActionBar,就是初始化标题栏的意思。
ToolBar代替Actionbar在AppCompatActivity的使用
这里解释一下:
(1)actionBar.setDisplayHomeAsUpEnabled(true)==>给左上角图标的左边加上一个返回的图标。对应 ActionBar.DISPLAY_HOME_AS_UP。
(2)actionBar.setDisplayShowHomeEnabled(true) //使左上角图标是否显示,如果设成false,则没有程序图标,仅仅就个标题,否则,显示应用程序图标,对应id为android.R.id.home,对应ActionBar.DISPLAY_SHOW_HOME
(3)actionBar.setDisplayShowCustomEnabled(true) // 使自定义的普通View能在title栏显示,即actionBar.setCustomView能起作用,对应ActionBar.DISPLAY_SHOW_CUSTOM
(4)actionBar.setDisplayShowTitleEnabled(true) //对应ActionBar.DISPLAY_SHOW_TITLE。
(5)其中setHomeButtonEnabled和setDisplayShowHomeEnabled共同起作用,如果setHomeButtonEnabled设成false,即使setDisplayShowHomeEnabled设成true,图标也不能点击。
9.在BaseActivity中有一个toast函数,采用了一个runOnUiThread(new Runnable(){里面复写一个run方法即可})
代码参考一下了:
private void toast(final String text, final int duration) {
        if (!TextUtils.isEmpty(text)) {
            runOnUiThread(new Runnable() {

                @Override
                public void run() {
                    if (mToast == null) {
                        mToast = Toast.makeText(getApplicationContext(), text, duration);
                    } else {
                        mToast.setText(text);
                        mToast.setDuration(duration);
                    }
                    mToast.show();
                }
            });
        }
    }
不了解runOnUiThread?==>runOnUiThread更新主线程。
10.打开一个活动,在BaseActivity中,定义一个方法,点击某个东西,跳转到另外一个活动。
 protected void openActivity(Class<?> cls) {
        openActivity(this, cls);
    }

    public static void openActivity(Context context, Class<?> cls) {
        Intent intent = new Intent(context, cls);
        context.startActivity(intent);
    }
11.打开一个活动的同时传递一个数据
 /**
     * 打开 Activity 的同时传递一个数据
     */
    protected <V extends Serializable> void openActivity(Class<?> cls, String key, V value) {
        openActivity(this, cls, key, value);
    }


    /**
     * 打开 Activity 的同时传递一个数据
     */
    public <V extends Serializable> void openActivity(Context context, Class<?> cls, String key, V value) {
        Intent intent = new Intent(context, cls);
        intent.putExtra(key, value);
        context.startActivity(intent);
    }
总结一下:
1.这个BaseActivity应该指的是大部分通用的一个活动,左上角是一个返回的图标,右上角自定义的一个导航栏。
2.然后这个BaseActivity提供了一个toast支持,支持长toast或者短toast,而且是采用runOnUiThread更新主线程的方式。所以不会阻塞的。
3.这个BaseActivity中有自定义ViewHolder,加强了性能。里面可以有TextView,ImageView,还可以设置监听器给每一个view。
4.这个BaseActivity存放了一个关键的类,Diycode可以方便地调用API,获取后端数据的关键。
5.有一个抽象函数initViews(ViewHolder,View root),那么在继承这个BaseActivity中就可以执行了。
6.最后定义了2个重载函数,作用就是可以跳转到另外一个活动,传数据或者不传数据。

 浙公网安备 33010602011771号