Windows VsCode配置OpenCV、Eigen
Windows平台下安装OpenCV与Eigen一般需要先进行编译,配置环境变量,再在VsCode里面进行文件配置。本文按照编译及环境配置-vscode文件配置进行。
编译及路径配置
MinGW
首先我们需要先mingw,用于gcc与g++的编译与调试。下滑页面,下载seh后缀文件,在系统盘根目录下进行安装。

解压后文件长这样:

随后在高级系统设置-环境变量中添加Path,字段为:
C:\mingw64\bin
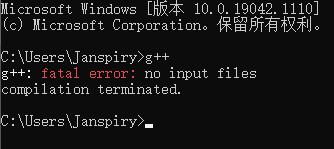
输入g++/gcc 验证是否配置成功:
CMake
下载安装cmake,用于编译。这个也最好解压到系统盘,我的安装路径长这样:

随后新建环境变量:
C:\Program Files\CMake\bin
命令行验证:

OpenCV
在官网下载opencv,安装时会解压出一堆文件,选择路径存储。我选择的文件夹:

在D:\opencv\build\x64新建一个文件夹MinGW,用于存放编译文件。
然后打开cmake-gui进行编译了,编译路径:

随后点击configure,选择MinGW作为编译器

然后c和c++的compiler 分别选择
C:\mingw64\bin\gcc.exe
C:\mingw64\bin\g++.exe
在点击generate,generate done之后,它会在预先设置的输出路径D:\opencv\build\x64\MinGW生成一系列的文件。
接下来我们需要编译opencv的Makefile并装载。具体的,在输出路径MinGW,打开管理员命令行,依次执行minGW32-make与minGW32-make install命令,得一个小时左右。
完成之后,我们配置相应的环境变量:
D:\opencv\build\x64\MinGW\bin
Eigen
下载解压Eigen,我在下载目录直接解压了:

同样的,进行Eigen的编译:

跟opencv流程一样,在Eigen目录下,使用管理员命令行执行minGW32-make与minGW32-make install。稍微不同的是,它会在系统的**Program Files (x86)**目录下自动生成文件,我们只需要把它配置到环境变量:
C:\Program Files (x86)\Eigen3\include
环境变量一览:

VsCode文件配置
VsCode需要配置三个脚本文件:
- launch.json(这个没什么特别的)
- Tasks.json
- c_cpp_properties.json(Ctrl+Shift+P, 输入C/C++,选择配置json)
脚本文件都存储在打开文件夹的.vscode下

具体的可参考我的配置,主要是为了引入头文件路径与编译时链接:
Task.json
{
    "tasks": [
        {
            "type": "cppbuild",
            "label": "C/C++: g++.exe 生成活动文件",
            "command": "C:\\mingw64\\bin\\g++.exe",
            "args": [
                "-g",
                "${file}",
                "-o",
                "${fileDirname}\\${fileBasenameNoExtension}.exe",
                "-L",
                "D:/opencv/build/x64/MinGW/install/x64/mingw/bin/lib*",
                "-I",
                "D:/opencv/build/x64/MinGW/install/include",
                "-I",
                "D:/opencv/build/x64/MinGW/install/include/opencv",
                "-I",
                "D:/opencv/build/x64/MinGW/install/include/opencv2",
                "-I",
                "C:/Program Files (x86)/Eigen3/include/eigen3",
                "-I",
                "C:/Program Files (x86)/Eigen3/include"

            ],
            "options": {
                "cwd": "C:\\mingw64\\bin"
            },
            "problemMatcher": [
                "$gcc"
            ],
            "group": {
                "kind": "build",
                "isDefault": true
            },
            "detail": "调试器生成的任务。"
        }
    ],
    "version": "2.0.0"
}
c_cpp_properties.json
{
    "configurations": [
        {
            "name": "Win32",
            "includePath": [
                "${workspaceFolder}/**",
                "D:/opencv/build/x64/MinGW/install/include",
                "D:/opencv/build/x64/MinGW/install/include/opencv",
                "D:/opencv/build/x64/MinGW/install/include/opencv2",
                "C:/Program Files (x86)/Eigen3/include",
                "C:/Program Files (x86)/Eigen3/include/eigen3"
            ],
            "defines": [
                "_DEBUG",
                "UNICODE",
                "_UNICODE"
            ],
            "compilerPath": "C:\\mingw64\\bin\\gcc.exe",
            "cStandard": "c11",
            "cppStandard": "c++17",
            "intelliSenseMode": "clang-x64",
            "configurationProvider": "ms-vscode.cmake-tools"
        }
    ],
    "version": 4
}
接下里,我们新建cpp,引入头文件就可以使用。
#include<iostream>
#include<opencv2/opencv.hpp>
#include<opencv2/highgui.hpp>
#include<Eigen/Dense>
using namespace std;
using namespace cv;
using namespace Eigen;
参考链接
【1】Windows下 VS Code搭建C++和opencv开发环境
【2】VS code配置C/C++、OpenCV(Windows)


【推荐】国内首个AI IDE,深度理解中文开发场景,立即下载体验Trae
【推荐】编程新体验,更懂你的AI,立即体验豆包MarsCode编程助手
【推荐】抖音旗下AI助手豆包,你的智能百科全书,全免费不限次数
【推荐】轻量又高性能的 SSH 工具 IShell:AI 加持,快人一步
· 分享一个免费、快速、无限量使用的满血 DeepSeek R1 模型,支持深度思考和联网搜索!
· 基于 Docker 搭建 FRP 内网穿透开源项目(很简单哒)
· ollama系列01:轻松3步本地部署deepseek,普通电脑可用
· 25岁的心里话
· 按钮权限的设计及实现