sqoop 常用命令
sqoop 常用命令
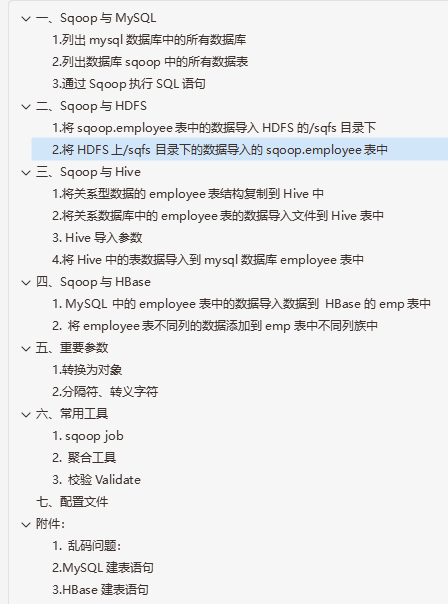
一、Sqoop与MySQL
1.列出mysql数据库中的所有数据库
sqoop list-databases -connect jdbc:mysql://192.168.1.10:3306 -username root -password root
注意:
以下URL写法,都可以
jdbc:mysql://192.168.1.10:3306/(推荐)
jdbc:mysql://192.168.1.10/
jdbc:mysql://192.168.1.10
jdbc:mysql://masters:3306/
jdbc:mysql://master/
jdbc:mysql://master
jdbc:mysql://localhost:3306/
jdbc:mysql://localhost/
jdbc:mysql:///
jdbc:mysql://
2.列出数据库sqoop中的所有数据表
sqoop list-tables -connect jdbc:mysql:///sqoop -username root -password root
3.通过Sqoop执行SQL语句
sqoop eval -connect jdbc:mysql:///sqoop -username root -password root -query "select * from employee where id=5"
可以快速地使用SQL语句对关系数据库进行操作,这可以使得在使用import这种工具进行数据导入的时候,可以预先了解相关的SQL语句是否正确,并能将结果显示在控制台。
二、Sqoop与HDFS
1.将sqoop.employee表中的数据导入HDFS的/sqfs目录下
sqoop import -connect jdbc:mysql://192.168.10.71:3306/t2 -username=root -password=root -table employee -m 1 -target-dir /output/1
mysql只认ip地址
叠加
- 追加模式
sqoop import -connect jdbc:mysql://192.168.10.71:3306/t2 -username root -password root -table employee -m 1 -target-dir /output/3 -incremental append -check-column id -last-value "5"
- 最后修改模式
sqoop import -connect jdbc:mysql://192.168.1.10:3306/sqoop -username root -password root -table employee -m 1 -target-dir /sqfs -incremental lastmodified -check-column lastmodified -last-value '2016/1/5 18:00:05'
SQL语句
sqoop import -connect jdbc:mysql://192.168.1.10:3306/sqoop -username root -password root -m 1 -query 'SELECT id,birthday from employee where $CONDITIONS' -target-dir /res
注:不能添加-table参数
sqoop import-all-tables -connect jdbc:mysql://192.168.1.10:3306/sqoop -username root -paseeword root -m 1
注:不能添加-target-dir参数
导出的默认路径是:/user/用户名/若干数据表名/数据文件和_SUCCESS
所有表都有主键时,可以设置-m的参数大于1,否则只能唯 1
2.将HDFS上/sqfs目录下的数据导入的sqoop.employee表中
sqoop export -connect "jdbc:mysql://192.168.11.51:3306/big1806?useUnicode=true&characterEncoding=utf-8" -username root -password root -table t2 -m 1 -export-dir /sqoop/mysql/t1
采用export插入数据的时候,如果数据已经存在了,插入会失败,如果我们使用-update-key,它会认为每个数据都是更新,比如我们使用下面这条语句:
sqoop export -table foo -update-key id -export-dir /path/to/data -connect …
UPDATE foo SET msg='this is a test', bar=42 WHERE id=0;
UPDATE foo SET msg='some more data', bar=100 WHERE id=1;
...
这样即使找不到它也不会报错
-update-mode allowinsert 如果存在就更新,不存在就插入
三、Sqoop与Hive
1.将关系型数据的employee表结构复制到Hive中
sqoop create-hive-table -connect jdbc:mysql://192.168.11.51:3306/big1806 -username root -password root -table t1 -hive-table sqoop.t1 -fields-terminated-by "\0001" -lines-terminated-by "\n"注:
-hive-table emp指定在Hive中创建的表名为emp(默认数据库default)
-hive-table sqoop.emp指定在Hive中的sqoop数据库下创建emp表
-fields-terminated-by "\0001" 是设置每列之间的分隔符,"\0001"是ASCII码中的1,是hive的默认行内分隔符,而sqoop的默认行内分隔符为","
-lines-terminated-by "\n" 设置的是每行之间的分隔符,此处为换行符,也是默认的分隔符;
2.将关系数据库中的employee表的数据导入文件到Hive表中
sqoop import -connect jdbc:mysql://192.168.1.10:3306/sqoop -username root -password root -table employee -hive-table sqoop.emp -m 1 -fields-terminated-by "\0001" -hive-import
注:
-fields-terminated-by "\0001" 需同创建Hive表时保持一致
-hive-import 指定是Hive导入数据
-split-by id employee中没有主键时,用于指定Mapper时的Key
追加1
sqoop import -append -connect jdbc:mysql://192.168.1.10:3306/sqoop -username root -password root -target-dir /user/hive/warehouse/sqoop.db/emp/ -fields-terminated-by "\0001" -query "select * from employee where \$CONDITIONS" -m 1
注:
可以添加-columns,-where参数,同时使用时-where参数会失效
追加2
sqoop import -append -connect jdbc:mysql://192.168.1.10:3306/sqoop -username root -password root -table employee -columns "id,name,birthday" -where "id=2" -m 1 -target-dir /user/hive/warehouse/sqoop.db/emp/ -fields-terminated-by "\0001"
注:
-target-dir /user/hive/warehouse/sqoop.db/emp 可用-hive-table sqoop.emp -hive-import替换,但是要去掉 -append 参数。
在导入大对象,比如BLOB和CLOB列时需要特殊处理,小于16MB的大对象可以和别的数据一起存储,超过这个值就存储在_lobs的子目录当中,它们采用的是为大对象做过优化的存储格式,最大能存储2^63字节的数据,我们可以用-inline-lob-limit参数来指定每个lob文件最大的限制是多少,如果设置为0,则大对象使用外部存储。
3. Hive导入参数
-hive-home <dir> 重写$HIVE_HOME
-hive-import 插入数据到hive当中,使用hive的默认分隔符
-hive-overwrite 重写插入
-create-hive-table 建表,如果表已经存在,该操作会报错!
-hive-table <table-name> 设置到hive当中的表名
-hive-drop-import-delims 导入到hive时删除 \n, \r, and \0001
-hive-delims-replacement 导入到hive时用自定义的字符替换掉 \n, \r, and \0001
-hive-partition-key hive分区的key
-hive-partition-value <v> hive分区的值
-map-column-hive <map> 类型匹配,sql类型对应到hive类型
hive空值处理
sqoop会自动把NULL转换为null处理,但是hive中默认是把\N来表示null,因为预先处理不会生效的,我们需要使用 -null-string 和 -null-non-string来处理空值 把\N转为\\N
例句:sqoop import ... -null-string '\\N' 或-null-non-string '\\N'
sqoop导入hive数据到MySql碰到hive表中列的值为null的情况:
在导入数据的过程中,如果碰到列值为null的情况,hive中为null的是以\N代替的,所以你在导入到MySql时,需要加上两个参数:--input-null-string '\\N' --input-null-non-string '\\N',多加一个'\',是为转义。如果你通过这个还不能解决字段为null的情况,还是报什么NumberFormalt异常的话,那就是比较另类的了,没有关系,我们还是要办法解决。
你应该注意到每次通过sqoop导入MySql的时,都会生成一个以MySql表命名的.java文件,然后打成JAR包,给sqoop提交给hadoop 的MR来解析Hive表中的数据。那我们可以根据报的错误,找到对应的行,改写该文件,编译,重新打包,sqoop可以通过 -jar-file ,--class-name 组合让我们指定运行自己的jar包中的某个class。来解析该hive表中的每行数据。脚本如下:一个完整的例子如下:
sqoop export --connect "jdbc:mysql://localhost/aaa?useUnicode=true&characterEncoding=utf-8"
--username aaa --password bbb --table table
--export-dir /hive/warehouse/table --input-fields-terminated-by '\t'
--input-null-string '\\N' --input-null-non-string '\\N'
--class-name com.chamago.sqoop.codegen.bi_weekly_sales_item
--jar-file /tmp/sqoop-chamago/bi_weekly_sales_item.jar
上面--jar-file 参数指定jar包的路径。--class-name 指定jar包中的class。
这样就可以解决所有解析异常了。
4.将Hive中的表数据导入到mysql数据库employee表中
sqoop export -connect "jdbc:mysql://192.168.11.51:3306/big1806?useUnicode=true&characterEncoding=utf-8" -username root -password root -table t3 -export-dir /user/hive/warehouse/sqoop.db/t1/ part-m-00000 -input-fields-terminated-by '\0001'注:
在进行导入之前,mysql中sqoop数据库中employee表必须已经提起创建好了。
jdbc:mysql://192.168.1.10:3306/sqoop中的IP地址改成localhost会报异常
指定/user/hive/warehouse/sqoop.db/emp/part-m-00000,只加载该文件
指定/user/hive/warehouse/sqoop.db/emp/,加载该目录下的所有文件
四、Sqoop与HBase
1. MySQL 中的employee表中的数据导入数据到 HBase的emp表中
sqoop import -connect jdbc:mysql://192.168.1.10:3306/sqoop -username root -password root -table employee -hbase-table emp -column-family 'per data' -hbase-row-key id -m 1
注:
-hbase-table emp 指定HBase的表emp
-column-family 'per data' 指定列族名per data
-hbase-create-table 该参数是用来创建HBase表的,但不太管用
2. 将employee表不同列的数据添加到emp表中不同列族中
- 先将employee表的name列中的数据到per data列族中
sqoop import -connect jdbc:mysql://192.168.1.10:3306/sqoop -username root -password root -table employee -hbase-table emp -column-family 'per data' -hbase-row-key id -m 1 -columns id,name
注:
-columns id,name 指定employee表中的id、name列
-hbase-row-key id 指定emp表中的行id
- 先将employee表的age、birthday列中的数据到pro data列族中
sqoop import -connect jdbc:mysql://192.168.1.10:3306/sqoop -username root -password root -table employee -hbase-table emp -column-family 'per data' -hbase-row-key id -m 1 -columns id,age,birthday
五、重要参数
1.转换为对象
-map-column-java <mapping> 将转换为java数据类型
-map-column-hive <mapping> 将转换为hive数据类型
2.分隔符、转义字符
例句:
Some string, with a comma.
Another "string with quotes"
导入命令:
$ sqoop import -fields-terminated-by , -escaped-by \\ -enclosed-by '\"' ...
处理结果:
"Some string, with a comma.","1","2","3"...
"Another \"string with quotes\"","4","5","6"...
导入命令:
$ sqoop import -optionally-enclosed-by '\"' (the rest as above)...
处理结果:
"Some string, with a comma.",1,2,3...
"Another \"string with quotes\"",4,5,6...
六、常用工具
1. sqoop job
保存常用的作业,以便下次快速调用
-create <job-id> 创建一个新的job
-delete <job-id> 删除job
-exec <job-id> 执行job
-show <job-id> 显示job的参数
-list 列出所有的job
- 创建job
sqoop job -create myjob - import -connect jdbc:mysql://example.com/db ... -table mytable
- 列出所有job
sqoop job -list
- 查看job
sqoop job -show myjob
- 执行job
sqoop job -exec myjob
- 重写参数
sqoop job -exec myjob -username someuser -P
2. 聚合工具
sqoop-metastore、sqoop-merge
合并两个目录
sqoop merge -new-data newer -onto older -target-dir merged -jar-file datatypes.jar -class-name Foo -merge-key id
3. 校验Validate
它用来比较源数据和目标数据的数量。
sqoop import --connect jdbc:mysql://db.foo.com/corp ... -table EMPLOYEES --validate
sqoop export --connect jdbc:mysql://db.example.com/foo --table bar -export-dir /results/bar_data --validate
注:
它有三个接口
Validator
Property: validator
Description: Driver for validation,
must implement org.apache.sqoop.validation.Validator
Supported values: The value has to be a fully qualified class name.
Default value: org.apache.sqoop.validation.RowCountValidator
Validation Threshold
Property: validation-threshold
Description: Drives the decision based on the validation meeting the
threshold or not. Must implement
org.apache.sqoop.validation.ValidationThreshold
Supported values: The value has to be a fully qualified class name.
Default value: org.apache.sqoop.validation.AbsoluteValidationThreshold
Validation Failure Handler
Property: validation-failurehandler
Description: Responsible for handling failures, must implement
org.apache.sqoop.validation.ValidationFailureHandler
Supported values: The value has to be a fully qualified class name.
Default value: org.apache.sqoop.validation.LogOnFailureHandler
例句:
sqoop import --connect jdbc:mysql://db.foo.com/corp --table EMPLOYEES
添加参数:
-validate -validator org.apache.sqoop.validation.RowCountValidator
或-validate -validation-threshold
或-validate -validation-failurehandler
七、配置文件
通过配置文件conf/sqoop-site.xml来配置常用参数
例:
<property>
<name>property.name</name>
<value>property.value</value>
</property>
如果不在这里面配置的话,就需要像这样写命令
sqoop import -D property.name=property.value ...
参数:sqoop.bigdecimal.format.string
作用:大decimal是否保存为string,如果保存为string就是 0.0000007,否则为1E7
参数:sqoop.hbase.add.row.key
作用:是否把作为rowkey的列也加到行数据当中,默认是false的
附件:
1. 乱码问题:
MySQL与HDFS相互导入,导出的乱码问题。
修改MySQL的编码格式,由Latin1改为UTF-8
vi /etc/my.cnf
添加如下内容:红色的这个 是适合老版mysql 入:mysql5.1.71
[mysqld]
default-character-set=utf8
character_set_server=utf8
init_connect='SET NAMES utf8'
[mysql]
default-character-set=utf8
[client]
default-character-set=utf8
重启MySQL服务,重建库、表;
2. MySQL建表语句
创建员工表1
create table employee(
id int primary key auto_increment,
name varchar(20),
birthday date
);
测试数据:
insert into employee values('','张三','2000-01-01');
insert into employee values('','李四','2001-01-01');
insert into employee values('','王五','2002-01-01');
insert into employee values('','张小三','2003-01-01');
insert into employee values('','李小四','2004-01-01');
insert into employee values('','王小五','2005-01-01');
insert into employee values('','张大三','2006-01-01');
insert into employee values('','李大四','2007-01-01');
insert into employee values('','王大五','2008-01-01');
insert into employee values('','王二麻子','2009-01-01');
insert into employee values('','wangermazi','2010-01-01');
创建员工表2
create table em(
id int,
name varchar(20),
birthday date
);
测试数据:
insert into employee values('0','张三','2000-01-01');
insert into employee values('1','李四','2001-01-01');
insert into employee values('2','王五','2002-01-01');
insert into employee values('3','张小三','2003-01-01');
insert into employee values('4','李小四','2004-01-01');
insert into employee values('5','王小五','2005-01-01');
insert into employee values('6','张大三','2006-01-01');
insert into employee values('7','李大四','2007-01-01');
insert into employee values('8','王大五','2008-01-01');
insert into employee values('9','王二麻子','2009-01-01');
insert into employee values('10','wangermazi','2009-01-01');
3. HBase建表语句
MySQL建表语句
create table employee(
id int,
name varchar(20),
age int,
birthday date
);
测试数据
insert into employee values('0','张三','18','2003-01-01');
insert into employee values('1','李四','18','2003-01-01');
insert into employee values('2','王五','18','2003-01-01');
insert into employee values('3','wangermazi','18','2003-01-01');
创表语句
create 'emp','per data','pro data'
删表语句
disable 'emp'
drop 'emp'
查询语句
scan ‘emp’

 浙公网安备 33010602011771号