小程序封装tab组件

在封装组件的时候,我们需要创建一个文件夹,用来专门管理我们封装的组件哈~;
这个文件夹的名字就是components;
然后右击这个文件夹;再次创建一个文件夹,就命名为你的组件名称(tab文件夹 也就是组件名);
(以上的步骤就是连续两次创建文件夹哈~)
然后右击,选择创建component;
这样就完成了组件的创建哈~
我们创建的组件在app.json中是不会记录我们创建的组件;
只会记录我们创建的页面

=====》tab切换组件的封装
wx:key="{{index}} 绑定标识  它的下标是从0开始的
{{currentIndex==index ? "active" : ""}}' bindtap='clickitem'   三目运算 为真 添加一个类active
data-index="{{index}}" 动态传递参数
================================================================================

<text>{{item}}</text>  目的是可以控制下划线
.active text{
  padding: 20rpx 20rpx;
  border-bottom: 6rpx solid pink;
}

let index = event.currentTarget.dataset.index;//拿到点击的下标

bind:itemclick="getleibuClick" 自定义事件

输出内部的数据
  getleibuClick(event){
    console.log(event)
  }
组件开始
<view class='tab-contrao'>
<block wx:for="{{titles}}" wx:key="{{index}}">
   <view class='tab-item {{currentIndex==index ? "active" : ""}}' bindtap='clickitem' data-index="{{index}}">
      <text>{{item}}</text>
   </view>
</block>
</view>


.tab-contrao{
  display: flex;
  height: 88rpx;
  line-height: 88rpx;
  background: orange;
  margin-top:20rpx;

}

.tab-item{
  flex: 1;
  text-align: center;
}

.active{
  color: red;
}

.active text{
  padding: 20rpx 20rpx;
  border-bottom: 6rpx solid pink;
}


properties: {
    titles:{
      type:Array,
      value:[],
    }
  },

  /**
   * 组件的初始数据
   */
  data: {
    currentIndex:0,
  },

  /**
   * 组件的方法列表
   */
  methods: {
    clickitem(event){
      let index = event.currentTarget.dataset.index;//拿到点击的下标
      this.setData({
        currentIndex: index// event.currentTarget.dataset.index 是传递过来index
      })

      // 通知外部  内部发生了什么事情
      // itemclick 事件名
      // index  点击的序号
      //  title: this.properties.titles[index]  内容
      this.triggerEvent("itemclick", { index: index, title: this.properties.titles[index] })
    },


  },
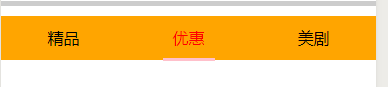
  <!-- tab -->
<aa  titles="{{['精品','优惠','美剧']}}" bind:itemclick="getleibuClick"/>

  getleibuClick(event){
    console.log(event)
  }
遇见问题,这是你成长的机会,如果你能够解决,这就是收获。
作者:晚来南风晚相识
出处:https://www.cnblogs.com/IwishIcould/

 本文版权归作者所有,欢迎转载,未经作者同意须保留此段声明,在文章页面明显位置给出原文连接
如果文中有什么错误,欢迎指出。以免更多的人被误导。
出处:https://www.cnblogs.com/IwishIcould/
想问问题,打赏了卑微的博主,求求你备注一下的扣扣或者微信;这样我好联系你;(っ•̀ω•́)っ✎⁾⁾!
如果觉得这篇文章对你有小小的帮助的话,记得在右下角点个“推荐”哦,或者关注博主,在此感谢!
万水千山总是情,打赏5毛买辣条行不行,所以如果你心情还比较高兴,也是可以扫码打赏博主(っ•̀ω•́)っ✎⁾⁾!
想问问题,打赏了卑微的博主,求求你备注一下的扣扣或者微信;这样我好联系你;(っ•̀ω•́)っ✎⁾⁾!

支付宝

微信
如果文中有什么错误,欢迎指出。以免更多的人被误导。


【推荐】国内首个AI IDE,深度理解中文开发场景,立即下载体验Trae
【推荐】编程新体验,更懂你的AI,立即体验豆包MarsCode编程助手
【推荐】抖音旗下AI助手豆包,你的智能百科全书,全免费不限次数
【推荐】轻量又高性能的 SSH 工具 IShell:AI 加持,快人一步
· 开发者必知的日志记录最佳实践
· SQL Server 2025 AI相关能力初探
· Linux系列:如何用 C#调用 C方法造成内存泄露
· AI与.NET技术实操系列(二):开始使用ML.NET
· 记一次.NET内存居高不下排查解决与启示
· 开源Multi-agent AI智能体框架aevatar.ai,欢迎大家贡献代码
· Manus重磅发布:全球首款通用AI代理技术深度解析与实战指南
· 被坑几百块钱后,我竟然真的恢复了删除的微信聊天记录!
· 没有Manus邀请码?试试免邀请码的MGX或者开源的OpenManus吧
· 园子的第一款AI主题卫衣上架——"HELLO! HOW CAN I ASSIST YOU TODAY