保姆级搭建springboot+web+mysql+hibernate+thymeleaf+druid项目
搭建springboot+web+mysql+hibernate+thymeleaf+druid项目
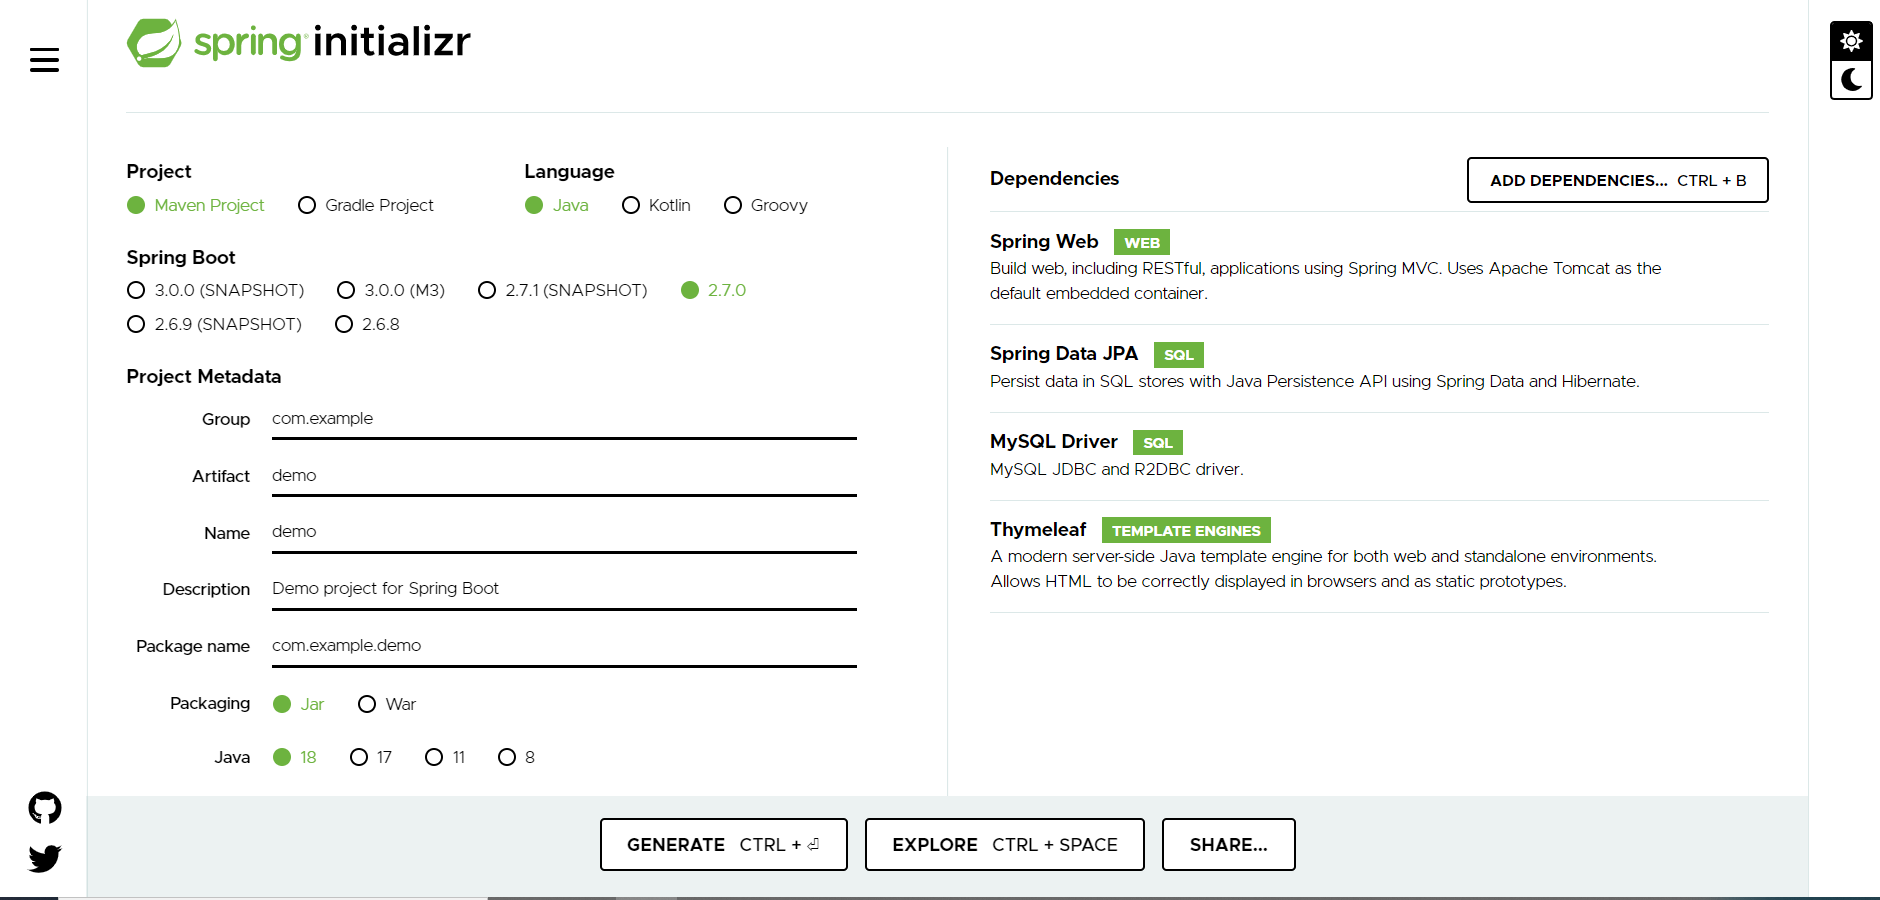
1.进入spring initializr:http://start.spring.io/
2.选择需要用到的配置:
3.下载后导入开发工具(我用的是eclipse)
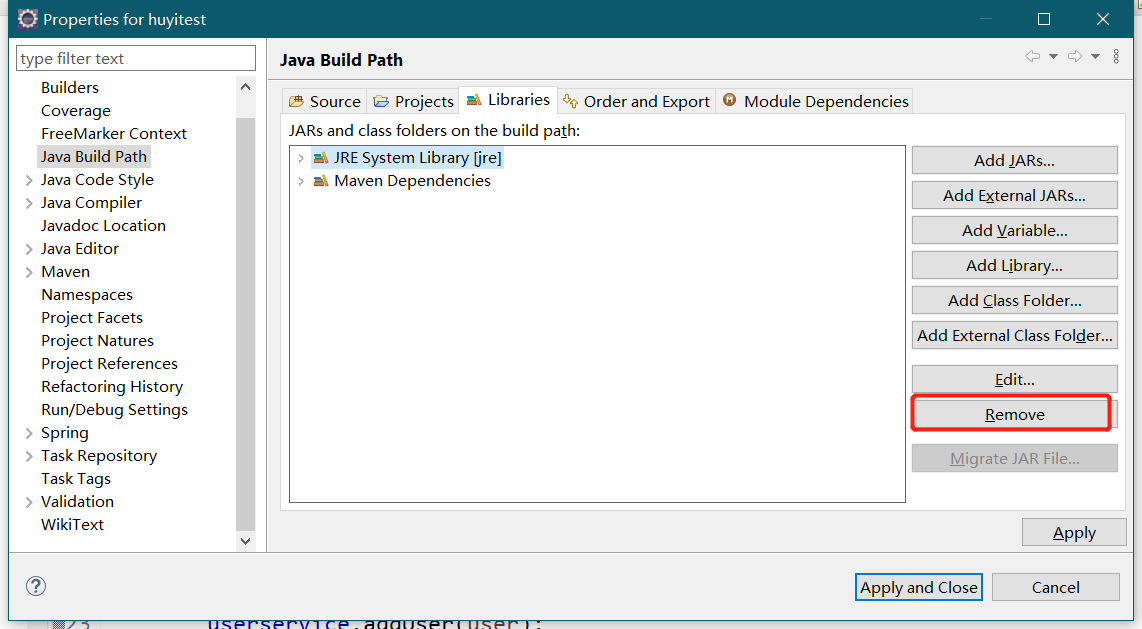
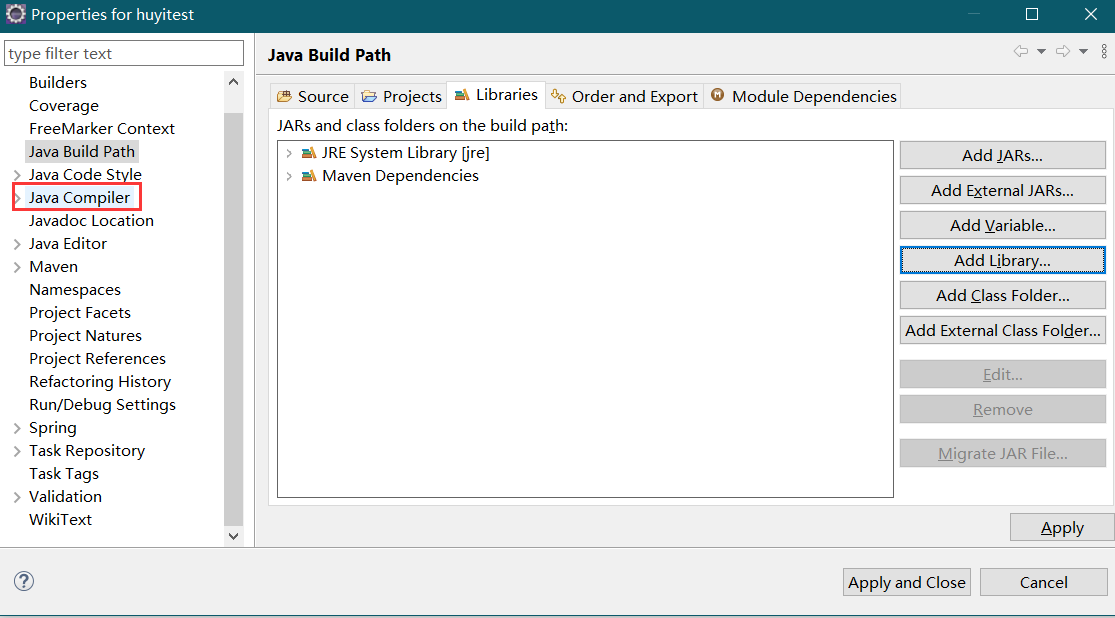
4.右击项目选择BuildPath-Configure Build Path

5.删除报错的JRE包
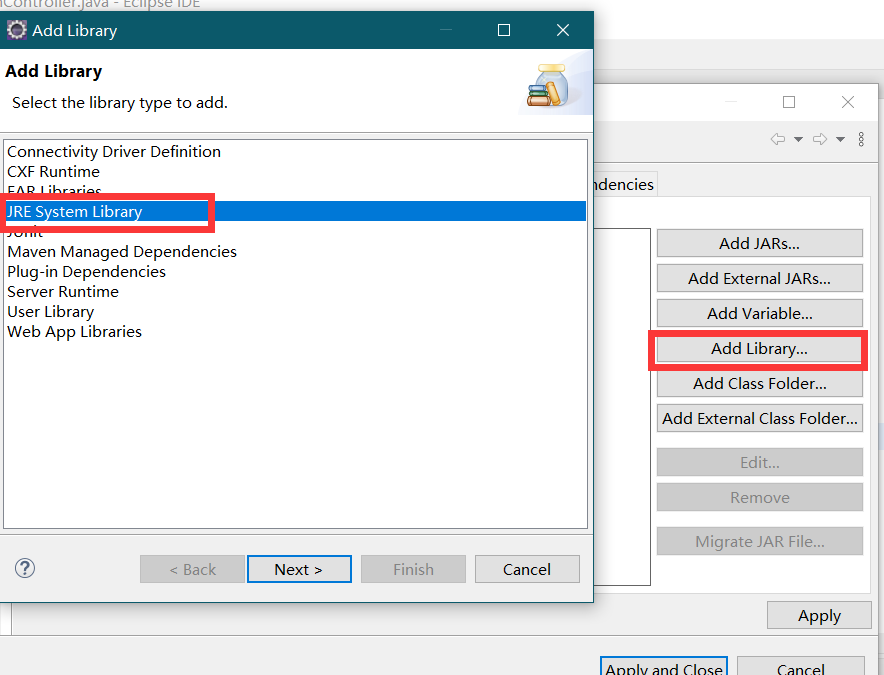
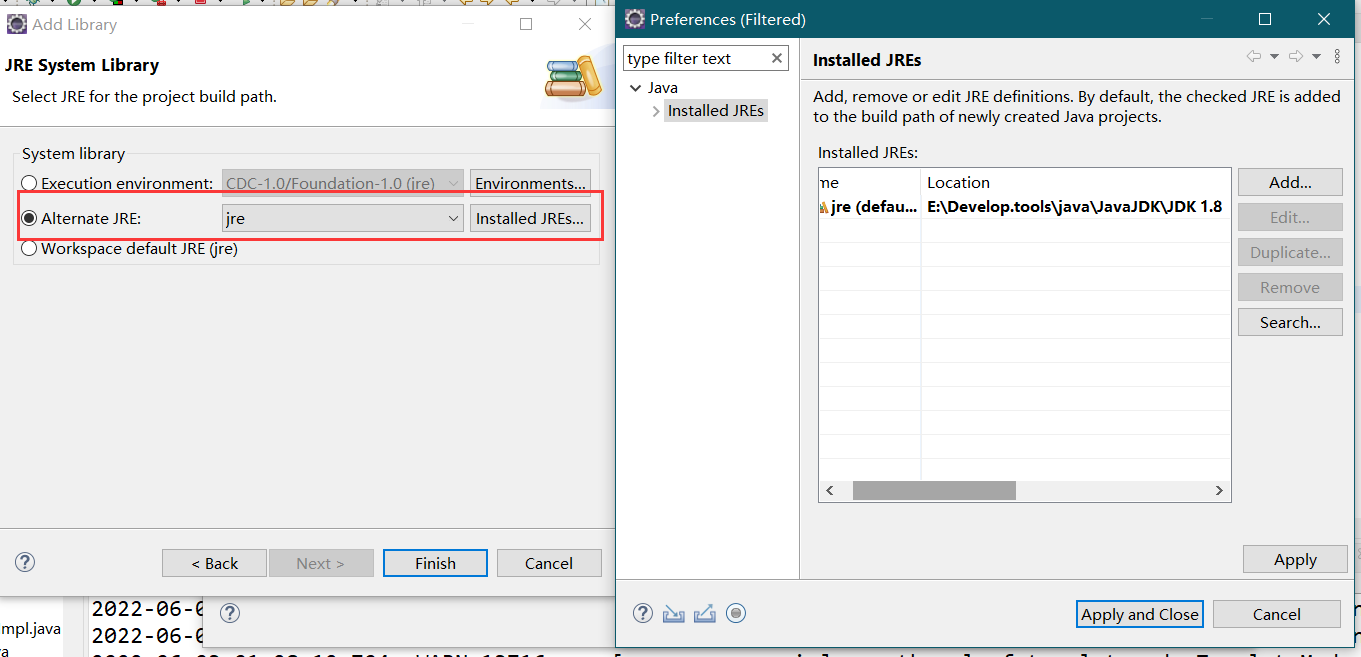
6.重新添加一个JRE包
7.在左侧选择:Java Compiler
8:将JDK选择自己对应的版本

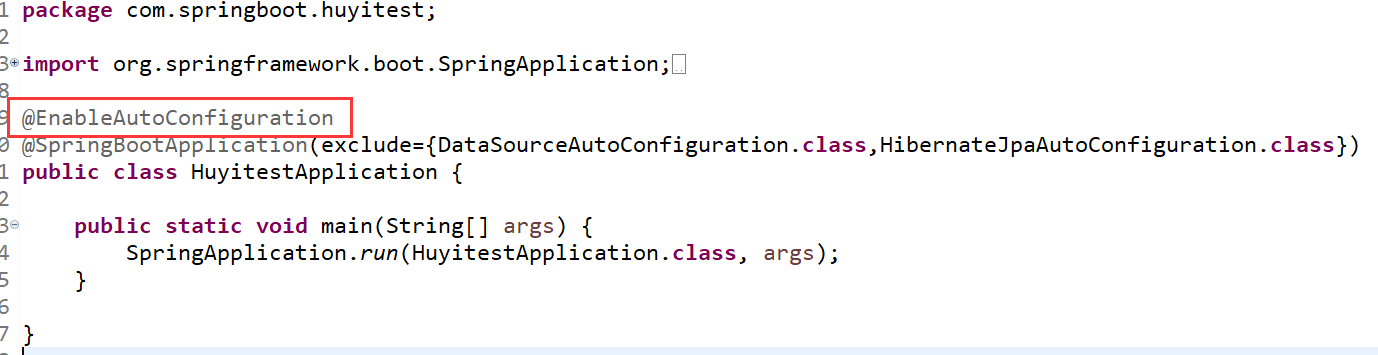
9:在启动类中的@SpringBootApplication后加入(exclude={DataSourceAutoConfiguration.class,HibernateJpaAutoConfiguration.class})

10:将application.properties改成application.yaml,在当中写以下配置(复制请把数据库账号密码、数据库表名改成自己的)
11.导入pom依赖(之前在spring initializr导入后还要添加2个依赖,我用的是druid数据连接池,processor是 一个注解处理器,在编译阶段干活的,一般在maven的声明都是 ,optional 为true )
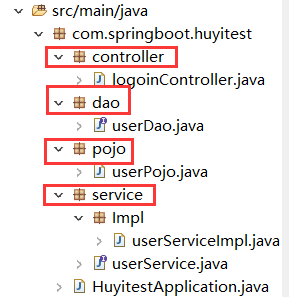
12.写controller、dao、pojo、service层
-
pojo
-
dao
-
service
-
serviceImpl
-
controller
13:在resources-templates下创建一个html页面
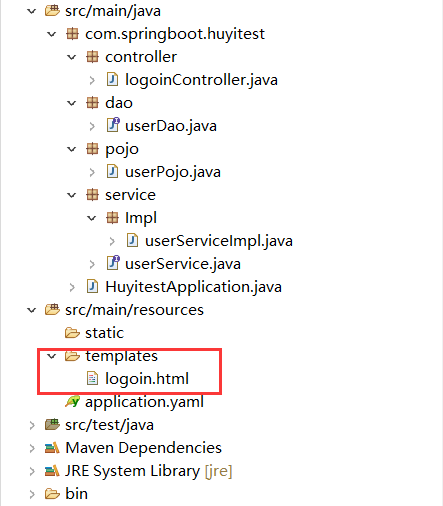
14.在 头中加入 lang="en" xmlns:th="http://www.thymeleaf.org",随便写一个thymeleaf测试
15.在启动类上加一个注解@EnableAutoConfiguration与yaml文件中的show-sql: true对应实现数据库自动创表
16.右键Run As-Spring Boot App运行项目,这个项目就搭建完啦!!!*
请各位大佬点个关注再走呗~~
__EOF__

本文链接:https://www.cnblogs.com/Huyi-1208/p/16339473.html
关于博主:评论和私信会在第一时间回复。或者直接私信我。
版权声明:本博客所有文章除特别声明外,均采用 BY-NC-SA 许可协议。转载请注明出处!
声援博主:如果您觉得文章对您有帮助,可以点击文章右下角【推荐】一下。您的鼓励是博主的最大动力!


【推荐】国内首个AI IDE,深度理解中文开发场景,立即下载体验Trae
【推荐】编程新体验,更懂你的AI,立即体验豆包MarsCode编程助手
【推荐】抖音旗下AI助手豆包,你的智能百科全书,全免费不限次数
【推荐】轻量又高性能的 SSH 工具 IShell:AI 加持,快人一步
· TypeScript + Deepseek 打造卜卦网站:技术与玄学的结合
· 阿里巴巴 QwQ-32B真的超越了 DeepSeek R-1吗?
· 【译】Visual Studio 中新的强大生产力特性
· 【设计模式】告别冗长if-else语句:使用策略模式优化代码结构
· 10年+ .NET Coder 心语 ── 封装的思维:从隐藏、稳定开始理解其本质意义