
SpringCloud全套学习分目录两万字笔记(图文步骤、示范项目、附带所有项目源码git可供克隆)
项目Git地址: spring-cloud-parent
SpringCloud全套学习分目录两万字笔记(图文步骤、示范项目、附带所有项目源码git可供克隆)
SpringCloud
初识Spring Cloud
什么是微服务
- "微服务”一词源于Martin Fowler的名为Microservices的博文,可以在他的官方博客上找到
http://martinfowler.com/articles/microservices.html - 微服务是系统架构上的一种设计风格,它的主旨是将一个原本独立的系统拆分成多个小型服务,这些小型服务都在各自独立的进程中运行,服务之间一般通过HTTP的RESTfuLAPI进行通信协作。
- 被拆分成的每一个小型服务都围绕着系统中的某一项或些耦合度较高的业务功能进行构建,并且每个服务都维护着白身的数据存储、业务开发自动化测试案例以及独立部署机制。

SpringCloud简介
-
spring cloud 是一系列框架的有序集合
-
spring cloud 并没有重复制造轮子,它只是将目前各家公司开发的比较成熟的、经得起实际考验的框架组合起来
-
通过Spring Boot 风格进行再封装屏蔽掉了复杂的配置和实现原理,最终给开发者留出了一套简单易懂、易部署和易维护的分布式系统开发工具包
-
它利用Spring Boot的开发便利性巧妙地简化了分布式系统基础设施的开发,如服务注册发现、配置中心、消息总线、负载均衡、断路器、数据监控等,都可以用Spring Boot的开发风格做到一键启动和部署。
-
Spring Cloud版本命名方式采用了伦敦地铁站的名称,同时根据字母表的顺序来对应版本时间顺序,比如:最早的Release版本: Angel,第二个Release版本: Brixton,然后是Camden、Dalston、Edgware,Finchley,Greenwich,Hoxton
-
spring cloud版本和springboot版本对应关系

Spring Cloud 与Dubbo对比

- Spring Cloud 与 Dubbo都是实现微服务有效的工具。
- Dubbo只是实现了服务治理,而Spring Cloud子项目分别覆盖了微服务架构下的众多部件。
- Dubbo使用RPC通讯协议,Spring Cloud使用RESTful完成通信,Dubbo效率略高于Spring Cloud。
小结
- 微服务就是将项目的各个模块拆分为可独立运行、部署、测试的架构设计风格。
- Spring公司将其他公司中微服务架构常用的组件整合起来,并使用SpringBoot简化其开发、配置。称为Spring Cloud
- Spring Cloud 与Dubbo都是实现微服务有效的工具。Dubbo性能更好,而Spring Cloud功能更全面。
服务治理
Eureka
- Eureka是 Netflix公司开源的一个服务注册与发现的组件。
- Eureka和其他Netflix公司的服务组件(例负载均衡、熔断器、网关等)一起,被Spring Cloud社区整合为Spring-Cloud-Netflix模块。
- Eureka包含两个组件: Eureka Server (注册中心)和Eureka Client(服务提供者、服务消费者)。
![在这里插入图片描述]()

搭建步骤
- 搭建Provider和Consumer服务。
- 使用RestTemplate完成远程调用。
- 搭建Eureka Server 服务。
- 改造Provider和Consumer称为Eureka Client。
- Consumer服务通过从Eureka Server中抓取Provider地址完成远程调用

搭建父项目
-
IDEA创建一个空的项目(Empty Project)SpringCloudDemo
-
点开Project,选择自己的SDK。我这里用的是1.8,Project Language Level也改成8,点击OK
![在这里插入图片描述]()
-
配置Maven
点击File->Setting->Maven,改好之后点击OK
我这里是自己安装的maven3.1,用的自己的配置(主要是设置了Mirros中心为阿里云)


<?xml version="1.0" encoding="UTF-8"?>

<settings xmlns="http://maven.apache.org/SETTINGS/1.0.0"
          xmlns:xsi="http://www.w3.org/2001/XMLSchema-instance"
          xsi:schemaLocation="http://maven.apache.org/SETTINGS/1.0.0 http://maven.apache.org/xsd/settings-1.0.0.xsd">

  <pluginGroups>
  </pluginGroups>

  <proxies>
  </proxies>

  <servers>
  </servers>

  <mirrors>
          <mirror>
            <id>alimaven</id>
            <mirrorOf>central</mirrorOf>
            <name>aliyun maven</name>
            <url>http://maven.aliyun.com/nexus/content/repositories/central/</url>
        </mirror>
        <mirror>
            <id>alimaven</id>
            <name>aliyun maven</name>
            <url>http://maven.aliyun.com/nexus/content/groups/public/</url>
            <mirrorOf>central</mirrorOf>
        </mirror>
        <!-- 中央仓库在中国的镜像 -->
        <mirror>
            <id>maven.net.cn</id>
            <name>oneof the central mirrors in china</name>
            <url>http://maven.net.cn/content/groups/public/</url>
            <mirrorOf>central</mirrorOf>
        </mirror>
  </mirrors>

  <profiles>
  </profiles>

</settings>
-
创建父工程 spring-cloud-parent
File->new->Module->Maven->next

创建后删除spring cloud parent下的src目录,保留pom.xml
搭建Provider和Consumer项目
- 右击spring cloud parent项目,选择new module新建一个模块eureka-provider


- 同样的方法创建消费方项目 eureka-consumer

-
给spring-cloud-parent父项目引入springboot2.1
先复制parent标签加入进去保存,再加入属性标签进去保存。而且开启maven auto import(你改动之后右下角会提示你)
<parent> <groupId>org.springframework.boot</groupId> <artifactId>spring-boot-starter-parent</artifactId> <version>2.1.0.RELEASE</version> <relativePath/> </parent> <properties> <project.build.sourceEncoding>UTF-8</project.build.sourceEncoding> <project.reporting.outputEncoding>UTF-8</project.reporting.outputEncoding> <java.version>1.8</java.version> </properties> -
给provider和consumer项目的依赖引入springboot-web
修改项目的pom.xml,加入下面的依赖保存
<dependencies> <dependency> <groupId>org.springframework.boot</groupId> <artifactId>spring-boot-starter-web</artifactId> </dependency> </dependencies> -
给provider创建启动类 com.fpa.provider.ProviderApp
package com.fpa.provider;

import org.springframework.boot.SpringApplication;
import org.springframework.boot.autoconfigure.SpringBootApplication;

@SpringBootApplication
public class ProviderApp {
    public static void main(String[] args) {
        SpringApplication.run(ProviderApp.class,args);
    }
}


-
创建商品类并生成构造方法、getter&setter(以后可以用lombok)@Data,这里不多引入
package com.fpa.provider.bean;

public class Goods {
    private int id;
    private String title;
    private double price;

    public Goods() {

    }

    public Goods(int id, String title, double price) {
        this.id = id;
        this.title = title;
        this.price = price;
    }

    public int getId() {
        return id;
    }

    public void setId(int id) {
        this.id = id;
    }

    public String getTitle() {
        return title;
    }

    public void setTitle(String title) {
        this.title = title;
    }

    public double getPrice() {
        return price;
    }

    public void setPrice(double price) {
        this.price = price;
    }
}

-
创建GoodsDao类
package com.fpa.provider.dao;

import com.fpa.provider.bean.Goods;
import org.springframework.stereotype.Repository;

@Repository
public class GoodsDao {

    public Goods findOne(int id){
        return new Goods(1,"华为手机",5999);
    }
}

-
创建service层
package com.fpa.provider.service;

import com.fpa.provider.bean.Goods;

public interface GoodsService {
    public Goods findOne(int id);
}

-
创建service实现类serviceImpl.GoodsServiceImpl
package com.fpa.provider.service.serviceImpl;

import com.fpa.provider.bean.Goods;
import com.fpa.provider.dao.GoodsDao;
import com.fpa.provider.service.GoodsService;
import org.springframework.beans.factory.annotation.Autowired;
import org.springframework.stereotype.Service;

@Service
public class GoodsServiceImpl implements GoodsService {
    @Autowired
    private GoodsDao goodsDao;

    @Override
    public Goods findOne(int id) {
        return goodsDao.findOne(id);
    }
}

-
创建controller.GoodsController
package com.fpa.provider.controller;import com.fpa.provider.bean.Goods;import com.fpa.provider.service.GoodsService;import org.springframework.beans.factory.annotation.Autowired;import org.springframework.web.bind.annotation.GetMapping;import org.springframework.web.bind.annotation.PathVariable;import org.springframework.web.bind.annotation.RequestMapping;import org.springframework.web.bind.annotation.RestController;@RestController@RequestMapping("/goods")public class GoodsController { @Autowired private GoodsService goodsService; @GetMapping("/{id}") public Goods findOne(@PathVariable("id") int id){ return goodsService.findOne(id); }}

-
创建provider项目的配置文件
右击provider项目下的resources文件夹,创建三个文件
- application.yml
spring: profiles: active: dev- application-dev.yml 用来开发环境使用的配置文件
server: port: 8000- application-prod.yml 用来生产环境使用的配置文件
server: port: 8000 -
启动provider并使用postman访问下这个接口看是否正常


接口正常

-
给consumer项目也创建启动类和一个接口,并复制bean实体类过去。
package com.fpa.consumer;import org.springframework.boot.SpringApplication;import org.springframework.boot.autoconfigure.SpringBootApplication;@SpringBootApplicationpublic class ConsumerApp { public static void main(String[] args) { SpringApplication.run(ConsumerApp.class,args); }}

```java
package com.fpa.consumer.controller;import com.fpa.consumer.bean.Goods;import org.springframework.web.bind.annotation.GetMapping;import org.springframework.web.bind.annotation.PathVariable;import org.springframework.web.bind.annotation.RequestMapping;import org.springframework.web.bind.annotation.RestController;@RestController@RequestMapping("/goods")public class OrderController {    @GetMapping("/findGoodsById/{id}")    public Goods findOne(@PathVariable("id") int id){        //需要远程调用provider项目提供的接口查询商品,这里先直接返回,等下改代码        return new Goods(2,"消费者",500);    }}
```

-
启动consumer项目并测试接口是否正常可用
启动方法相同,不再赘述。测试发现接口正常。


使用RestTemplate远程调用

-
在consumer项目中配置RestTemplate Bean
package com.fpa.consumer.config;import org.springframework.context.annotation.Bean;import org.springframework.context.annotation.Configuration;import org.springframework.web.client.RestTemplate;/** * 配置RestTemplate Bean */@Configurationpublic class RestTemplateConfig { @Bean public RestTemplate restTemplate(){ return new RestTemplate(); }}![在这里插入图片描述]()
-
修改consumer项目中的接口使用restTemplate进行远程restful调用,重启项目调用测试
package com.fpa.consumer.controller;import com.fpa.consumer.bean.Goods;import org.springframework.beans.factory.annotation.Autowired;import org.springframework.web.bind.annotation.GetMapping;import org.springframework.web.bind.annotation.PathVariable;import org.springframework.web.bind.annotation.RequestMapping;import org.springframework.web.bind.annotation.RestController;import org.springframework.web.client.RestTemplate;@RestController@RequestMapping("/goods")public class OrderController { @Autowired private RestTemplate restTemplate; @GetMapping("/findGoodsById/{id}") public Goods findOne(@PathVariable("id") int id){ /** * 1 配置 RestTemplate 的bean * 2 在需要的地方注入 restTemplate * 3 在接口内使用restTemplate进行远程调用 * restTemplate有提供一些方法,例如get post put delete等常用的,自己点开看 */ String url = "http://127.0.0.1:8000/goods/1"; Goods goods = this.restTemplate.getForObject(url,Goods.class); return goods; }}


搭建Eureka服务 eureka-server
-
创建eureka-server模块,和之前一样的创建。不演示了
-
给parent父项目pom.xml引入spring cloud
版本对应信息
https://start.spring.io/actuator/info
<!-- 配置--> <properties> <project.build.sourceEncoding>UTF-8</project.build.sourceEncoding> <project.reporting.outputEncoding>UTF-8</project.reporting.outputEncoding> <java.version>1.8</java.version><!-- spring cloud版本--> <spring-cloud.version>Greenwich.RELEASE</spring-cloud.version> </properties><!-- 引入spring cloud--> <dependencyManagement> <dependencies> <dependency> <groupId>org-springframework.cloud</groupId> <artifactId>spring-cloud-dependencies</artifactId> <version>${spring-cloud.version}</version> <type>pom</type> <scope>import</scope> </dependency> </dependencies> </dependencyManagement>

-
给eureka-server项目引入eureka-server依赖
<!-- eureka-server --> <dependency> <groupId>org.springframework.cloud</groupId> <artifactId>spring-cloud-starter-netflix-eureka-server</artifactId> <version>2.1.0.RELEASE</version> </dependency>

-
创建EurekaApp并加入@EnableEurekaServer注解
package com.fpa.eureka;import org.springframework.boot.SpringApplication;import org.springframework.boot.autoconfigure.SpringBootApplication;import org.springframework.cloud.netflix.eureka.server.EnableEurekaServer;@SpringBootApplication@EnableEurekaServerpublic class EurekaApp { public static void main(String[] args) { SpringApplication.run(EurekaApp.class,args); }} -
eureka配置文件
直接去复制provider项目下的三个配置文件,然后改掉dev和prod这两个,下面的放进去
server: port: 8761#eureka配置# eureka一共有4部分配置#1. dashboard : eureka的web控制台配置#2. server : eureka的服务端配置#3. client : eureka的客户端配置#4. instance : eureka的实例配置spring: application: # 这个应用的名字 name: eureka-server-appeureka: instance: hostname: localhost # 主机名 #appname: eureka-server #这个app的名字(注册自己的话就会显示这个名字作为实例的app名,如果写了spring应用名也可以,两个都写优先这个) client: service-url: defaultZone: http://${eureka.instance.hostname}:${server.port}/eureka # eureka服务端地址,将来客户端使用该地址和eureka进行通信# 为了进eureka的时候能看到注册上的服务,我还是注销掉了这两个,让他把自己注册上去# register-with-eureka: false # 是否将自己的路径 注册到eureka上。eureka server 不需要的,eureka provider client 需要# fetch-registry: false # 是否需要从eureka中抓取路径。eureka server 不需要的,eureka consumer client 需要 -
进入 http://localhost:8761查看eureka控制台
![在这里插入图片描述]()

provider使用eureka注册服务
-
加入 eureka-client依赖
<!-- eureka-client --><dependency> <groupId>org.springframework.cloud</groupId> <artifactId>spring-cloud-starter-netflix-eureka-client</artifactId></dependency> -
给启动类加上@EnableEurekaClient注解
package com.fpa.provider;import org.springframework.boot.SpringApplication;import org.springframework.boot.autoconfigure.SpringBootApplication;import org.springframework.cloud.netflix.eureka.EnableEurekaClient;@SpringBootApplication@EnableEurekaClientpublic class ProviderApp { public static void main(String[] args) { SpringApplication.run(ProviderApp.class,args); }} -
给provider加上应用名(直接改application.yml)
spring: profiles: active: dev application: name: provider-app
-
给provider修改配置
修改dev和prod
eureka: instance: hostname: localhost #自己的主机地址,非本地环路测试填自己IP client: service-url: defaultZone: http://localhost:8761/eureka #eureka服务器地址
- 启动provider即可看到已经注册上了

consumer使用eureka获得服务提供者地址并调用
加入 eureka-client依赖
<!-- eureka-client --><dependency> <groupId>org.springframework.cloud</groupId> <artifactId>spring-cloud-starter-netflix-eureka-client</artifactId></dependency>
给启动类加上@EnableEurekaClient和@EnableDiscoveryClient注解(新版本可以不写,本版本就是新版本,但我们还是写下)
package com.fpa.consumer;import org.springframework.boot.SpringApplication;import org.springframework.boot.autoconfigure.SpringBootApplication;import org.springframework.cloud.client.discovery.EnableDiscoveryClient;import org.springframework.cloud.netflix.eureka.EnableEurekaClient;@SpringBootApplication@EnableEurekaClient@EnableDiscoveryClientpublic class ConsumerApp { public static void main(String[] args) { SpringApplication.run(ConsumerApp.class,args); }}
- 给consumer加上应用名(直接改application.yml)
spring: profiles: active: dev application: name: consumer-app
-
去改造接口OrderController
注入discoveryClient,使用该bean根据服务ID获取节点,拼成url,使用restTemplate访问
package com.fpa.consumer.controller;import com.fpa.consumer.bean.Goods;import org.springframework.beans.factory.annotation.Autowired;import org.springframework.cloud.client.ServiceInstance;import org.springframework.cloud.client.discovery.DiscoveryClient;import org.springframework.web.bind.annotation.GetMapping;import org.springframework.web.bind.annotation.PathVariable;import org.springframework.web.bind.annotation.RequestMapping;import org.springframework.web.bind.annotation.RestController;import org.springframework.web.client.RestTemplate;import java.net.URI;import java.util.List;@RestController@RequestMapping("/goods")public class OrderController { @Autowired private RestTemplate restTemplate; @Autowired private DiscoveryClient discoveryClient; @GetMapping("/findGoodsById/{id}") public Goods findOne(@PathVariable("id") int id){ /** * 1 配置 RestTemplate 的bean * 2 在需要的地方注入 restTemplate * 3 在接口内使用restTemplate进行远程调用 * restTemplate有提供一些方法,例如get post put delete等常用的,自己点开看 */// String url = "http://127.0.0.1:8000/goods/1"; //serviceId就是那个服务的应用名,不区分大小写 List<ServiceInstance> instanceList = discoveryClient.getInstances("provider-app"); if (instanceList != null && instanceList.size() > 0){ ServiceInstance serviceInstance = instanceList.get(0);// String host = serviceInstance.getHost();// int port = serviceInstance.getPort(); URI uri = serviceInstance.getUri(); String url = uri + "/goods/1"; Goods goods = this.restTemplate.getForObject(url,Goods.class); return goods; } return null; }} -
启动consumer并测试

默认会把自己也注册上去,可以通过配置取消注册自己,前面提到了。

配置讲解
驼峰法和短杠法是都可以的,一般用短杠法
eureka: instance: hostname: localhost #主机名 ip-address: 127.0.0.1 prefer-ip-address: true #是否将自己的ip注册到eureka中,默认false 注册主机名ip-address:#设置当前实例p #instance-id: #修改instance-id 显示 lease-renewal-interval-in-seconds : 30 #每一次eureka client向 eureka server发送心跳的时间间隔 lease-expiration-duration-in-seconds : 90 #如果90秒内eureka server没有收到eureka client的心跳包,则剔除该服务 server: enable-self-preservation: false #是否开启自我保护,也就是当超过时间没有收到心跳的时候先不要移除,因为可能是网络波动造成的 开发的时候关闭,生产环境为了高可用打开 eviction-interval-timer-in-ms: 60000 #清理间隔 定期扫描看是不是挂了的,就剔除 默认是60*1000也就是1分钟 client: service-url: defaultZone: http://${eureka.instance.hostname}:${server.port}/eureka # eureka服务端地址,将来客户端使用该地址和eureka进行通信# register-with-eureka: false # 是否将自己的路径 注册到eureka上。eureka server 不需要的,eureka provider client 需要# fetch-registry: false # 是否需要从eureka中抓取路径。eureka server 不需要的,eureka consumer client 需要
Eureka高可用
之前的eureka服务只启动了一个,如果因为什么愿意挂了,那么没办法提供服务注册、发现功能了,因为需要做成高可用。启动若干个eureka-server

演示启动两个eureka-server
-
创建两个项目,分别为eureka-server1和eureka-server2
创建项目步骤和前面的一样,然后把pom.xml里的依赖、resources里的配置文件、启动类从之前的eureka-server项目复制过来,启动类一个叫Eureka1App一个叫Eureka2App,不演示了
-
重点:配置集群
第一个从8761端口启动,第二个从8762端口启动,互相配置server-url为对方的,然后应用名用同一个就可以了
8761的
application.yml
spring: profiles: active: dev application: name: eureka-server-app
application-dev.yml
server: port: 8761eureka: instance: hostname: localhost #主机名 ip-address: 127.0.0.1 server:# enable-self-preservation: false #是否开启自我保护,也就是当超过时间没有收到心跳的时候先不要移除,因为可能是网络波动造成的 开发的时候关闭,生产环境为了高可用打开 eviction-interval-timer-in-ms: 60000 #清理间隔 定期扫描看是不是挂了的,就剔除 默认是60*1000也就是1分钟 client: service-url: defaultZone: http://localhost:8762/eureka # eureka服务端地址,将来客户端使用该地址和eureka进行通信
8762的
application.yml
spring: profiles: active: dev application: name: eureka-server-app
application-dev.yml
server: port: 8762eureka: instance: hostname: localhost #主机名 ip-address: 127.0.0.1 server:# enable-self-preservation: false #是否开启自我保护,也就是当超过时间没有收到心跳的时候先不要移除,因为可能是网络波动造成的 开发的时候关闭,生产环境为了高可用打开 eviction-interval-timer-in-ms: 60000 #清理间隔 定期扫描看是不是挂了的,就剔除 默认是60*1000也就是1分钟 client: service-url: defaultZone: http://localhost:8761/eureka # eureka服务端地址,将来客户端使用该地址和eureka进行通信
两个都启动

- 修改服务提供方、消费方eureka配置,把这两个节点都配上去,并重启provider和consumer,测试接口正常

测试下接口是不是正常,接口正常

Consul
基本介绍
- Consul是由HashiCorp基于Go语言开发的,支持多数据中心,分布式高可用的服务发布和注册服务软件。用于实现分布式系统的服务发现与配置。
- 使用起来也较为简单。具有天然可移植性(支持Linux、windows和Mac OSX);安装包仅包含一个可执行文件,方便部署。
- 官网地址: https://www.consul.io
- 去官网下载
运行Consul服务
前往consul.exe目录下打开shell(我这里windows我用的git bash)启动consul
./consul agent -dev

打开consul控制台查看
在浏览器输入,回车
localhost:8500

创建之前的consumer和provider项目(可以复制下类和配置)
删除两个项目之前的eureka配置和依赖、相关代码
- 修改pom依赖
<dependencies> <!--spring boot web--> <dependency> <groupId>org.springframework.boot</groupId> <artifactId>spring-boot-starter-web</artifactId> </dependency> <!-- consul--> <dependency> <groupId>org.springframework.cloud</groupId> <artifactId>spring-cloud-starter-consul-discovery</artifactId> </dependency><!-- actuator健康检查--> <dependency> <groupId>org.springframework.boot</groupId> <artifactId>spring-boot-starter-actuator</artifactId> </dependency> </dependencies>
- 修改provider配置文件
server: port: 8000spring: cloud: consul: discovery: service-name: ${spring.application.name} #要注册上的服务名 prefer-ip-address: true # 使用ip地址 host: localhost #服务主机 port: 8500 #服务端口
- 启动项目,可以看到我们的服务已经注册上去了

- consumer也一样的改掉依赖、配置启动后,可以在控制台看到三个服务全部上线了

- consumer的代码(其实就是之前eureka的代码一模一样,都是支持springcloud所以不需要改)
package com.fpa.consumer.controller;import com.fpa.consumer.bean.Goods;import org.springframework.beans.factory.annotation.Autowired;import org.springframework.cloud.client.ServiceInstance;import org.springframework.cloud.client.discovery.DiscoveryClient;import org.springframework.web.bind.annotation.GetMapping;import org.springframework.web.bind.annotation.PathVariable;import org.springframework.web.bind.annotation.RequestMapping;import org.springframework.web.bind.annotation.RestController;import org.springframework.web.client.RestTemplate;import java.net.URI;import java.util.List;@RestController@RequestMapping("/goods")public class OrderController { @Autowired private RestTemplate restTemplate; @Autowired private DiscoveryClient discoveryClient; @GetMapping("/findGoodsById/{id}") public Goods findOne(@PathVariable("id") int id){ /** * 1 配置 RestTemplate 的bean * 2 在需要的地方注入 restTemplate * 3 在接口内使用restTemplate进行远程调用 * restTemplate有提供一些方法,例如get post put delete等常用的,自己点开看 */// String url = "http://127.0.0.1:8000/goods/1"; //serviceId就是那个服务的应用名,不区分大小写 List<ServiceInstance> instanceList = discoveryClient.getInstances("provider-app"); if (instanceList != null && instanceList.size() > 0){ ServiceInstance serviceInstance = instanceList.get(0);// String host = serviceInstance.getHost();// int port = serviceInstance.getPort(); URI uri = serviceInstance.getUri(); String url = uri + "/goods/1"; Goods goods = this.restTemplate.getForObject(url,Goods.class); return goods; } return null; }}
- 测试接口正常

consul也是可以搭建集群的,只不过课程中没有演示,搭建集群的过程是采用的单独启动加join模式,可以自行百度使用,很简单的
Nacos(配置中心和服务治理)
-
Nacos (Dynamic Naming andConfiguration Service)是阿里巴巴2018年7月开源的项目。
-
它专注于服务发现和配置管理领域致力于帮助您发现、配置和管理微服务。
-
Nacos支持几乎所有主流类型的“服务”的发现、配置和管理。
-
—句话概括就是Nacos = Spring Cloud徒册中心+ Spring Cloud配置中心。
-
官网: https://nacos.io/
-
下载地址: https://github.com/alibaba/nacos/releases
-
下载的是最新的2.0.3版本,跟着视频一顿操作搞报错了,视频是1.x版本,那就自己写吧
单点启动和使用
- 在github release里下载2.0.3版本解压后进入config目录将application.properties文件中的下面内容解除注释并将数据库的账号密码修改为你的(url要注意!新版mysql要加时区,旧版不用,推荐你直接按我这样配,有问题再加入时区)
spring.datasource.platform=mysqldb.url.0=jdbc:mysql://127.0.0.1:3306/nacos?characterEncoding=utf8db.user.0=rootdb.password.0=root
- 修改bin目录下的startup.cmd,将MODE从clustter集群模式改为standalone独立模式
set MODE="standalone"
-
在本地mysql数据库中建立nacos数据库,并将config目录下的schema.sql,nacos-mysql.sql在nacos数据库中执行(如果某个执行不成功,不管了,我这边反正schema.sql执行不成功)
-
上面三个操作做完之前进入bin执行startup.cmd启动
-
进入控制台查看(账号密码都是nacos)
http://localhost:8848/nacos

-
像前面一样的复制一个provider和一个consumer,都加上依赖
<!-- nacos 服务发现--> <dependency> <groupId>org.springframework.cloud</groupId> <artifactId>spring-cloud-starter-alibaba-nacos-discovery</artifactId> <version>0.2.2.RELEASE</version> </dependency> <!-- nacos客户端--> <dependency> <groupId>com.alibaba.nacos</groupId> <artifactId>nacos-client</artifactId> <version>1.1.0</version> </dependency> -
在provider的springboot启动类上加上注解@EnableDiscoveryClient(新版springcloud是可以不加的,但是我们还是加上)
-
修改provider配置,把nacos服务器地址配置上去,修改application-dev.yml
server: port: 8000spring: cloud: nacos: discovery: server-addr: 127.0.0.1:8848 -
修改provider的dao里返回的数据,在title后面加一个nacos
-
启动provider,前往控制台查看是否注册上了

-
修改consumer配置,也跟provider一样的把nacos服务器地址配置上
-
启动consumer,使用postman测试接口是不是能正常服务发现


集群搭建和使用
其实就是以cluster模式启动,并配好集群的其他节点就行了。java程序那边把每个节点的ip都写上去,随便看个博客就会了,我就不赘述了。
客户端负载均衡
Ribbon

-
创建eureka-ribbon-consumer、eureka-ribbon-server、eureka-ribbon-provider1、eureka-ribbon-provider2 这四个模块,第一个是消费者,第二个是eureka服务器,第三个和第四个是两个服务提供者,方法和前面的一样。然后内容和之前的consumer、server、provider是差不多的,就换了个模块名字而已。
复制main文件夹和pom.xml里的依赖过去
-
将provider2的端口从8000改为8001,免得和provider1重复了端口号,并将server-url中8762的那个删除只保留8761的
-
启动eureka服务器
-
修改consumer的restTemplate配置加入注解@LoadBalanced
由于eureka和ribbon都是netflix公司的,因此eureka内置了ribbon所以不需要加依赖了。
package com.fpa.consumer.config;import org.springframework.cloud.client.loadbalancer.LoadBalanced;import org.springframework.context.annotation.Bean;import org.springframework.context.annotation.Configuration;import org.springframework.web.client.RestTemplate;/** * 配置RestTemplate Bean */@Configurationpublic class RestTemplateConfig { @Bean @LoadBalanced public RestTemplate restTemplate(){ return new RestTemplate(); }} -
修改consumer的接口
之前我们是通过服务发现获取服务的实例地址来拼接url,现在我们用负载均衡之后直接把host:port那部分地址改为这个服务的名字即可
package com.fpa.consumer.controller;import com.fpa.consumer.bean.Goods;import org.springframework.beans.factory.annotation.Autowired;import org.springframework.cloud.client.ServiceInstance;import org.springframework.cloud.client.discovery.DiscoveryClient;import org.springframework.web.bind.annotation.GetMapping;import org.springframework.web.bind.annotation.PathVariable;import org.springframework.web.bind.annotation.RequestMapping;import org.springframework.web.bind.annotation.RestController;import org.springframework.web.client.RestTemplate;import java.net.URI;import java.util.List;@RestController@RequestMapping("/goods")public class OrderController { @Autowired private RestTemplate restTemplate; @Autowired private DiscoveryClient discoveryClient; @GetMapping("/findGoodsById/{id}") public Goods findOne(@PathVariable("id") int id){ /** * 1 配置 RestTemplate 的bean * 2 在需要的地方注入 restTemplate * 3 在接口内使用restTemplate进行远程调用 * restTemplate有提供一些方法,例如get post put delete等常用的,自己点开看 */// String url = "http://127.0.0.1:8000/goods/1"; //serviceId就是那个服务的应用名,不区分大小写 String url = "http://provider-app/goods/1"; Goods goods = this.restTemplate.getForObject(url,Goods.class); return goods; }} -
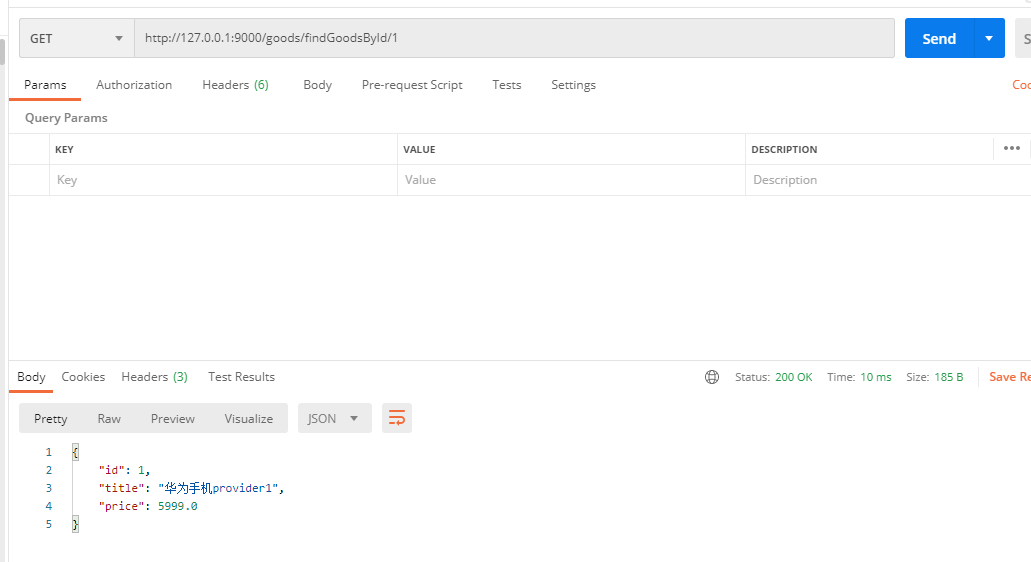
修改provider1的返回手机标题为"华为手机provider1",修改provider2的返回手机标题为"华为手机provider2",这样我们不断访问的时候就能验证这个负载均衡
-
启动两个服务提供者provider1和provider2
-
启动消费者consumer
-
查看eureka控制台,所有服务实例均已经上线了

-
测试多次访问这个接口看负载均衡效果
-
第一次访问,是provider1处理的
![在这里插入图片描述]()
-
第二次访问,是provider2处理的,证明负载均衡有效了
![在这里插入图片描述]()
-
-
七种负载均衡策略
- 随机: RandomRule
- 轮询:RoundRobinRule
- 最小并发:BestAvailableRule
- 过滤:AvailabilityFilteringRule
- 响应时间: WeightedResponseTimeRule
- 轮询重试: RetryRule
- 性能可用性:ZoneAvoidanceRule
-
注解方式选用负载均衡策略设置上去
-
创建类RibbonRuleConfig.class
package com.fpa.consumer.config;import com.netflix.loadbalancer.IRule;import com.netflix.loadbalancer.RandomRule;import org.springframework.context.annotation.Bean;import org.springframework.context.annotation.Configuration;/** * ribbon负载均衡配置 */@Configurationpublic class RibbonRuleConfig { @Bean public IRule myRule(){ //随机策略 return new RandomRule(); }} -
前往consumer启动类添加注解
@RibbonClient(name = “provider-app”,configuration = RibbonRuleConfig.class)
name 是服务的应用名称
configuration是rule的配置类
package com.fpa.consumer;import com.fpa.consumer.config.RibbonRuleConfig;import org.springframework.boot.SpringApplication;import org.springframework.boot.autoconfigure.SpringBootApplication;import org.springframework.cloud.client.discovery.EnableDiscoveryClient;import org.springframework.cloud.netflix.eureka.EnableEurekaClient;import org.springframework.cloud.netflix.ribbon.RibbonClient;@SpringBootApplication@EnableEurekaClient@EnableDiscoveryClient@RibbonClient(name = "provider-app",configuration = RibbonRuleConfig.class)public class ConsumerApp { public static void main(String[] args) { SpringApplication.run(ConsumerApp.class,args); }}
-
-
启动eureka的server、两个provider、consumer,然后使用postman测试接口,可以发现现在是随机的返回了1或者2号provider的数据


-
yml配置方式选用负载均衡策略设置上去
-
注释掉之前的上面那个注解方式的配置
package com.fpa.consumer;import com.fpa.consumer.config.RibbonRuleConfig;import org.springframework.boot.SpringApplication;import org.springframework.boot.autoconfigure.SpringBootApplication;import org.springframework.cloud.client.discovery.EnableDiscoveryClient;import org.springframework.cloud.netflix.eureka.EnableEurekaClient;import org.springframework.cloud.netflix.ribbon.RibbonClient;@SpringBootApplication@EnableEurekaClient@EnableDiscoveryClient//测试yml配置负载均衡策略时注释掉这句话//@RibbonClient(name = "provider-app",configuration = RibbonRuleConfig.class)public class ConsumerApp { public static void main(String[] args) { SpringApplication.run(ConsumerApp.class,args); }} -
修改consumer的配置文件application-dev.yml
server: port: 9000eureka: instance: hostname: localhost client: service-url: defaultZone: http://localhost:8761/eureka #eureka服务器地址#配置的方式设置Ribbon的负载1均衡策略provider-app: #设置的服务提供方的应用名称 ribbon: NFloadBalancerRuleClassName: com.netflix.loadbalancer.RandomRule #策略类 -
重新启动的consumer,使用postman测试发现负载均衡配置正常生效
-
Feign声明式服务调用
Feign介绍
- Feign是一个声明式的REST客户端,它用了基于接口的注解方式,很方便实现客户端配置。
- Feign最初由Netflix公司提供,但不支持SpringMVC注解,后由SpringCloud 对其封装,支持了SpringMVC注解,让使用者更易于接受。

Feign使用步骤
- 在消费端引入open-feign
- 依赖编写Feign调用接口
- 在启动类添加@EnableFeignClients注解,开启Feign功能
- 测试调用
-
启动一个之前的Eureka-Server,端口8761的。
-
创建两个模块,一个是feign-consumer一个是feign-provider,分别复制之前的consumer和provider代码,要修改配置,把server-rul里8762那个eureka服务器删除
-
启动provider
-
在consumer项目引入openfeign依赖
<!-- feign --><dependency> <groupId>org.springframework.cloud</groupId> <artifactId>spring-cloud-starter-openfeign</artifactId></dependency> -
在consumer启动类上加@EnableFeignClients注解
package com.fpa.consumer;import org.springframework.boot.SpringApplication;import org.springframework.boot.autoconfigure.SpringBootApplication;import org.springframework.cloud.client.discovery.EnableDiscoveryClient;import org.springframework.cloud.netflix.eureka.EnableEurekaClient;import org.springframework.cloud.openfeign.EnableFeignClients;@SpringBootApplication@EnableEurekaClient@EnableDiscoveryClient@EnableFeignClientspublic class ConsumerApp { public static void main(String[] args) { SpringApplication.run(ConsumerApp.class,args); }} -
创建接口来声明要调用的接口
@FeignClient(value = “provider-app”)这个value是传的被调用的服务应用名
下面定义的这个接口其实就跟服务提供者定义的接口差不多,只有getmapping参数那补了/goods的uri前缀
@GetMapping("/goods/{id}")public Goods findOne(@PathVariable("id") int id);//服务提供者原来的@GetMapping("/{id}")public Goods findOne(@PathVariable("id") int id){ return goodsService.findOne(id);}完整代码
package com.fpa.consumer.interfaces;import com.fpa.consumer.bean.Goods;import org.springframework.cloud.openfeign.FeignClient;import org.springframework.web.bind.annotation.GetMapping;import org.springframework.web.bind.annotation.PathVariable;@FeignClient(value = "provider-app")public interface GoodsFeignClient { @GetMapping("/goods/{id}") public Goods findOne(@PathVariable("id") int id);} -
改造之前consumer提供的接口
package com.fpa.consumer.controller;import com.fpa.consumer.bean.Goods;import com.fpa.consumer.interfaces.GoodsFeignClient;import org.springframework.beans.factory.annotation.Autowired;import org.springframework.web.bind.annotation.GetMapping;import org.springframework.web.bind.annotation.PathVariable;import org.springframework.web.bind.annotation.RequestMapping;import org.springframework.web.bind.annotation.RestController;@RestController@RequestMapping("/goods")public class OrderController { /** * 注入我们刚才写的那个goods feign client接口(idea爆红也没关系) */ @Autowired private GoodsFeignClient goodsFeignClient; @GetMapping("/findGoodsById/{id}") public Goods findOne(@PathVariable("id") int id) { Goods goods = goodsFeignClient.findOne(id); return goods; }}
- 启动consumer,使用postman测试接口成功

Feign超时配置
Feign底层依赖于Ribbon实现负载均衡和远程调用。Ribbon默认1秒超时
- 将provider接口中加入sleep睡眠两秒再返回
package com.fpa.provider.controller;import com.fpa.provider.bean.Goods;import com.fpa.provider.service.GoodsService;import org.springframework.beans.factory.annotation.Autowired;import org.springframework.web.bind.annotation.GetMapping;import org.springframework.web.bind.annotation.PathVariable;import org.springframework.web.bind.annotation.RequestMapping;import org.springframework.web.bind.annotation.RestController;@RestController@RequestMapping("/goods")public class GoodsController { @Autowired private GoodsService goodsService; @GetMapping("/{id}") public Goods findOne(@PathVariable("id") int id){ try { Thread.sleep(2000); }catch (Exception e){} return goodsService.findOne(id); }}
-
再次调用接口,consumer那边报错了,读取超时
java.net.SocketTimeoutException: Read timed out

-
前往consumer项目的application统一配置ribbon超时时间
spring: profiles: active: dev application: name: consumer-app#设置Ribbon的超时时间ribbon: connectTimeout: 1000 #连接超时时间默认1s ReadTimeout: 3000 #逻辑处理的超时时间默认1s -
重新启动consumer并使用postman测试接口,等待了2秒后返回了结果


Feign日志记录
-
Feign只能记录debug级别的日志信息。
logging: level: com.fpa: debug -
定义Feign日志级别Bean
@BeanLogger.Level feignLoggerLevel() { return Logger.Level.FULL;} -
启用该Bean:
@Feignclient(configuration = xxxConfig.class) -
修改consumer的配置文件application.yml
spring: profiles: active: dev application: name: consumer-app#设置Ribbon的超时时间ribbon: connectTimeout: 1000 #连接超时时间默认1s ReadTimeout: 3000 #逻辑处理的超时时间默认1s# 配置feign日志级别,只允许debuglogging: level: com.fpa: debug
-
创建FeignLogConfig配置类
package com.fpa.consumer.config;import feign.Logger;import org.springframework.context.annotation.Bean;import org.springframework.context.annotation.Configuration;/** * 配置Feign日志 */@Configurationpublic class FeignLogConfig { @Bean public Logger.Level level(){ return Logger.Level.FULL; }} -
前往GoodsFeignClient开启日志记录
@FeignClient(value = “provider-app”,configuration = FeignLogConfig.class)
package com.fpa.consumer.interfaces;import com.fpa.consumer.bean.Goods;import com.fpa.consumer.config.FeignLogConfig;import org.springframework.cloud.openfeign.FeignClient;import org.springframework.web.bind.annotation.GetMapping;import org.springframework.web.bind.annotation.PathVariable;@FeignClient(value = "provider-app",configuration = FeignLogConfig.class)public interface GoodsFeignClient { @GetMapping("/goods/{id}") public Goods findOne(@PathVariable("id") int id);} -
重启consumer使用postman访问接口看控制台
2021-08-07 15:23:15.752 DEBUG 4676 --- [nio-9000-exec-1] c.f.c.interfaces.GoodsFeignClient : [GoodsFeignClient#findOne] <--- HTTP/1.1 200 (2199ms)2021-08-07 15:23:15.752 DEBUG 4676 --- [nio-9000-exec-1] c.f.c.interfaces.GoodsFeignClient : [GoodsFeignClient#findOne] content-type: application/json;charset=UTF-82021-08-07 15:23:15.752 DEBUG 4676 --- [nio-9000-exec-1] c.f.c.interfaces.GoodsFeignClient : [GoodsFeignClient#findOne] date: Sat, 07 Aug 2021 07:23:15 GMT2021-08-07 15:23:15.752 DEBUG 4676 --- [nio-9000-exec-1] c.f.c.interfaces.GoodsFeignClient : [GoodsFeignClient#findOne] transfer-encoding: chunked2021-08-07 15:23:15.752 DEBUG 4676 --- [nio-9000-exec-1] c.f.c.interfaces.GoodsFeignClient : [GoodsFeignClient#findOne] 2021-08-07 15:23:15.753 DEBUG 4676 --- [nio-9000-exec-1] c.f.c.interfaces.GoodsFeignClient : [GoodsFeignClient#findOne] {"id":1,"title":"华为手机","price":5999.0}2021-08-07 15:23:15.753 DEBUG 4676 --- [nio-9000-exec-1] c.f.c.interfaces.GoodsFeignClient : [GoodsFeignClient#findOne] <--- END HTTP (46-byte body)

Hystrix熔断器
-
Hystix是Netflix开源的一个延迟和容错库,用于隔离访问远程服务、第三方库,防止出现级联失败(雪崩)
-
雪崩:一个服务失败,导致整条链路的服务都失败的情形。
-
Hystrix主要功能
-
隔离
1.线程池隔离2.信号量隔离
-
降级:异常,超时
-
熔断
-
限流
-

Hystrix降级-服务提供方
- 在服务提供方,引入hystrix依赖
- 定义降级方法
- 使用@HystrixCommand注解配置降级方法
- 在启动类上开启Hystrix功能:@EnableCircuitBreaker
-
启动一个之前的eureka-server跑在8761端口
-
创建hystrix-consumer和hystrix-provider模块,分别把前面Feign的consumer和provider的main文件夹以及pom.xml里的依赖复制到对应的模块去
-
给provider加入hystrix的依赖
<?xml version="1.0" encoding="UTF-8"?><project xmlns="http://maven.apache.org/POM/4.0.0" xmlns:xsi="http://www.w3.org/2001/XMLSchema-instance" xsi:schemaLocation="http://maven.apache.org/POM/4.0.0 http://maven.apache.org/xsd/maven-4.0.0.xsd"> <parent> <artifactId>spring-cloud-parent</artifactId> <groupId>com.fpa</groupId> <version>1.0-SNAPSHOT</version> </parent> <modelVersion>4.0.0</modelVersion> <artifactId>hystrix-provider</artifactId> <dependencies> <!--spring boot web--> <dependency> <groupId>org.springframework.boot</groupId> <artifactId>spring-boot-starter-web</artifactId> </dependency> <!-- eureka-client --> <dependency> <groupId>org.springframework.cloud</groupId> <artifactId>spring-cloud-starter-netflix-eureka-client</artifactId> </dependency> <!-- hystrix --> <dependency> <groupId>org.springframework.cloud</groupId> <artifactId>spring-cloud-starter-netflix-hystrix</artifactId> </dependency> </dependencies></project> -
给provider模块的启动类加入注解@EnableCircuitBreaker
package com.fpa.provider;import org.springframework.boot.SpringApplication;import org.springframework.boot.autoconfigure.SpringBootApplication;import org.springframework.cloud.client.circuitbreaker.EnableCircuitBreaker;import org.springframework.cloud.netflix.eureka.EnableEurekaClient;@SpringBootApplication@EnableEurekaClient@EnableCircuitBreaker//开启hystrix熔断器public class ProviderApp { public static void main(String[] args) { SpringApplication.run(ProviderApp.class,args); }} -
给之前的接口增加一个降级后的方法
package com.fpa.provider.controller;import com.fpa.provider.bean.Goods;import com.fpa.provider.service.GoodsService;import com.netflix.hystrix.contrib.javanica.annotation.HystrixCommand;import org.springframework.beans.factory.annotation.Autowired;import org.springframework.web.bind.annotation.GetMapping;import org.springframework.web.bind.annotation.PathVariable;import org.springframework.web.bind.annotation.RequestMapping;import org.springframework.web.bind.annotation.RestController;@RestController@RequestMapping("/goods")public class GoodsController { @Autowired private GoodsService goodsService; @GetMapping("/{id}") @HystrixCommand(fallbackMethod = "findOne_fallback")//指定降级后执行的方法名字 public Goods findOne(@PathVariable("id") int id){ return goodsService.findOne(id); } /** * 上面的方法一旦降级后就执行这个方法的逻辑 * @param id * @return */ public Goods findOne_fallback(int id){ Goods goods = new Goods(); goods.setTitle("服务降级了呀"); return goods; }} -
启动provider,调用后发现正常返回了数据,不摆图了
-
给接口里加一个异常进去,测一下一但发生异常之后的变化
package com.fpa.provider.controller;import com.fpa.provider.bean.Goods;import com.fpa.provider.service.GoodsService;import com.netflix.hystrix.contrib.javanica.annotation.HystrixCommand;import org.springframework.beans.factory.annotation.Autowired;import org.springframework.web.bind.annotation.GetMapping;import org.springframework.web.bind.annotation.PathVariable;import org.springframework.web.bind.annotation.RequestMapping;import org.springframework.web.bind.annotation.RestController;@RestController@RequestMapping("/goods")public class GoodsController { @Autowired private GoodsService goodsService; @GetMapping("/{id}") @HystrixCommand(fallbackMethod = "findOne_fallback")//指定降级后执行的方法名字 public Goods findOne(@PathVariable("id") int id){ //故意制造一个异常出来 int a = 1/0; return goodsService.findOne(id); } /** * 上面的方法一旦降级后就执行这个方法的逻辑 * @param id * @return */ public Goods findOne_fallback(int id){ Goods goods = new Goods(); goods.setTitle("服务降级了呀"); return goods; }} -
重启provider看效果,调用了指定的降级后的方法

-
故意制造一个超时,然后重启provider并测试接口
package com.fpa.provider.controller;import com.fpa.provider.bean.Goods;import com.fpa.provider.service.GoodsService;import com.netflix.hystrix.contrib.javanica.annotation.HystrixCommand;import org.springframework.beans.factory.annotation.Autowired;import org.springframework.web.bind.annotation.GetMapping;import org.springframework.web.bind.annotation.PathVariable;import org.springframework.web.bind.annotation.RequestMapping;import org.springframework.web.bind.annotation.RestController;@RestController@RequestMapping("/goods")public class GoodsController { @Autowired private GoodsService goodsService; @GetMapping("/{id}") @HystrixCommand(fallbackMethod = "findOne_fallback")//指定降级后执行的方法名字 public Goods findOne(@PathVariable("id") int id){ //故意制造一个异常出来// int a = 1/0; //故意制造一个超时,因为hystrix默认也是1秒超时 try { Thread.sleep(2000); }catch (Exception e){} return goodsService.findOne(id); } /** * 上面的方法一旦降级后就执行这个方法的逻辑 * @param id * @return */ public Goods findOne_fallback(int id){ Goods goods = new Goods(); goods.setTitle("服务降级了呀"); return goods; }}

进入了1秒的等待后发现超时则返回了降级后方法给的结果

-
有的接口可能查询的数据量多,超过了1秒,那我们就修改降级配置时间
commandProperties属性
@HystrixCommand(fallbackMethod = "findOne_fallback",commandProperties = {@HystrixProperty(name = "execution.isolation.thread.timeoutInMilliseconds",value = "3000")})package com.fpa.provider.controller;import com.fpa.provider.bean.Goods;import com.fpa.provider.service.GoodsService;import com.netflix.hystrix.contrib.javanica.annotation.HystrixCommand;import com.netflix.hystrix.contrib.javanica.annotation.HystrixProperty;import org.springframework.beans.factory.annotation.Autowired;import org.springframework.web.bind.annotation.GetMapping;import org.springframework.web.bind.annotation.PathVariable;import org.springframework.web.bind.annotation.RequestMapping;import org.springframework.web.bind.annotation.RestController;@RestController@RequestMapping("/goods")public class GoodsController { @Autowired private GoodsService goodsService; @GetMapping("/{id}") @HystrixCommand(fallbackMethod = "findOne_fallback",commandProperties = {@HystrixProperty(name = "execution.isolation.thread.timeoutInMilliseconds",value = "3000")})//指定降级后执行的方法名字 public Goods findOne(@PathVariable("id") int id){ //故意制造一个异常出来// int a = 1/0; //故意制造一个超时,因为hystrix默认也是1秒超时 try { Thread.sleep(2000); }catch (Exception e){} return goodsService.findOne(id); } /** * 上面的方法一旦降级后就执行这个方法的逻辑 * @param id * @return */ public Goods findOne_fallback(int id){ Goods goods = new Goods(); goods.setTitle("服务降级了呀"); return goods; }} -
再去测试的时候发现等了2秒后返回了正常的数据
Hystrix降级-服务消费方
- feign组件已经集成了hystrix组件。
- 定义feign调用接口实现类,复写方法,即降级方法
- 在@FeignClient注解中使用fallback属性设置降级处理类。
- 配置开启feign.hystrix.enabled = true
-
创建GoodsFeignClient接口的实现类
package com.fpa.consumer.interfaces.fallbackImpl;import com.fpa.consumer.bean.Goods;import com.fpa.consumer.interfaces.GoodsFeignClient;import org.springframework.stereotype.Component;/** * 服务消费方的降级实现 */@Componentpublic class GoodsFeignClientFallback implements GoodsFeignClient { @Override public Goods findOne(int id) { Goods goods = new Goods(); goods.setTitle("服务消费方降级"); return goods; }} -
给接口配置上fallback
fallback = GoodsFeignClientFallback.class
package com.fpa.consumer.interfaces;import com.fpa.consumer.bean.Goods;import com.fpa.consumer.config.FeignLogConfig;import com.fpa.consumer.interfaces.fallbackImpl.GoodsFeignClientFallback;import org.springframework.cloud.openfeign.FeignClient;import org.springframework.web.bind.annotation.GetMapping;import org.springframework.web.bind.annotation.PathVariable;@FeignClient(value = "provider-app",configuration = FeignLogConfig.class,fallback = GoodsFeignClientFallback.class)public interface GoodsFeignClient { @GetMapping("/goods/{id}") public Goods findOne(@PathVariable("id") int id);} -
将consumer项目配置里的ribbon读取超时时间从3秒设置到1秒
spring: profiles: active: dev application: name: consumer-app#设置Ribbon的超时时间ribbon: connectTimeout: 1000 #连接超时时间默认1s ReadTimeout: 1000 #逻辑处理的超时时间默认1slogging: level: com.fpa: debug -
给consumer项目的配置里加入启用hystrix熔断器
spring: profiles: active: dev application: name: consumer-app#设置Ribbon的超时时间ribbon: connectTimeout: 1000 #连接超时时间默认1s ReadTimeout: 1000 #逻辑处理的超时时间默认1slogging: level: com.fpa: debug# 开启服务消费方 hystrix熔断器feign: hystrix: enabled: true -
启动consumer,由于之前provider是2秒后才返回数据的,而consumer这边默认还是1秒钟超时,因此会触发consumer的服务降级

Hystrix熔断机制
熔断机制介绍
-
Hystrix熔断机制,用于监控微服务调用情况,当失败的情况达到预定的阈值(5秒失败20次),会打开断路器,拒绝所有请求,直到服务恢复正常为止。
失败次数达到一定阈值之后,比如5秒20次,那么开启熔断器,拒绝所有请求,全部走直接走fallback了,5秒后尝试放进来一部分请求,如果请求成功次数达到阈值则关闭熔断器,如果请求还是失败的,那继续开5秒熔断器,如此循环直到恢复。

熔断机制测试
-
测试熔断器,修改provider的接口,id为1给他报异常,其他的正常返回
package com.fpa.provider.controller;import com.fpa.provider.bean.Goods;import com.fpa.provider.service.GoodsService;import com.netflix.hystrix.contrib.javanica.annotation.HystrixCommand;import com.netflix.hystrix.contrib.javanica.annotation.HystrixProperty;import org.springframework.beans.factory.annotation.Autowired;import org.springframework.web.bind.annotation.GetMapping;import org.springframework.web.bind.annotation.PathVariable;import org.springframework.web.bind.annotation.RequestMapping;import org.springframework.web.bind.annotation.RestController;@RestController@RequestMapping("/goods")public class GoodsController { @Autowired private GoodsService goodsService; @GetMapping("/{id}") @HystrixCommand(fallbackMethod = "findOne_fallback",commandProperties = {@HystrixProperty(name = "execution.isolation.thread.timeoutInMilliseconds",value = "3000")})//指定降级后执行的方法名字 public Goods findOne(@PathVariable("id") int id){ //故意制造一个异常出来// int a = 1/0; //故意制造一个超时,因为hystrix默认也是1秒超时 /*try { Thread.sleep(2000); }catch (Exception e){}*/ //熔断器测试 if (id == 1){ int a = 1/0; } return goodsService.findOne(id); } /** * 上面的方法一旦降级后就执行这个方法的逻辑 * @param id * @return */ public Goods findOne_fallback(int id){ Goods goods = new Goods(); goods.setTitle("服务降级了呀"); return goods; }} -
重启provider后我们去浏览器看id为1的结果和id为2的结果
为1的返回了降级的结果,为2的正常返回,现在我们疯狂刷新1的那个页面,触发熔断器,然后访问1和2发现都返回了降级的结果,而5秒之后再访问,发现又恢复了,1的还是返回降级,2则返回正常的结果
刚开始访问的:


疯狂刷新1的30次之后再访问1的和2的


过5秒之后再访问1和2


自定义熔断参数
package com.fpa.provider.controller;

import com.fpa.provider.bean.Goods;
import com.fpa.provider.service.GoodsService;
import com.netflix.hystrix.contrib.javanica.annotation.HystrixCommand;
import com.netflix.hystrix.contrib.javanica.annotation.HystrixProperty;
import org.springframework.beans.factory.annotation.Autowired;
import org.springframework.web.bind.annotation.GetMapping;
import org.springframework.web.bind.annotation.PathVariable;
import org.springframework.web.bind.annotation.RequestMapping;
import org.springframework.web.bind.annotation.RestController;

@RestController
@RequestMapping("/goods")
public class GoodsController {
    @Autowired
    private GoodsService goodsService;

    @GetMapping("/{id}")
    @HystrixCommand(fallbackMethod = "findOne_fallback", commandProperties = {
            @HystrixProperty(name = "execution.isolation.thread.timeoutInMilliseconds", value = "3000"),//超时时间
            @HystrixProperty(name = "circuitBreaker.sleepWindowInMilliseconds", value = "5000"),//监控时间黑认5000毫秒
            @HystrixProperty(name = "circuitBreaker.requestVolumeThreshold", value = "20"),//失败次数。默认20次
            @HystrixProperty(name = "circuitBreaker.errorThresholdPercentage", value = "50")//失败率默认50%
    })//指定降级后执行的方法名字
    public Goods findOne(@PathVariable("id") int id) {
        //故意制造一个异常出来
//        int a = 1/0;
        //故意制造一个超时,因为hystrix默认也是1秒超时
        /*try {
            Thread.sleep(2000);
        }catch (Exception e){}*/


        //熔断器测试
        if (id == 1) {
            int a = 1 / 0;
        }
        return goodsService.findOne(id);
    }

    /**
     * 上面的方法一旦降级后就执行这个方法的逻辑
     *
     * @param id
     * @return
     */
    public Goods findOne_fallback(int id) {
        Goods goods = new Goods();
        goods.setTitle("服务降级了呀");
        return goods;
    }
}
Hystrix熔断监控
Hystrix熔断监控介绍
- Hystrix提供了Hystrix-dashboard功能,用于时监控微服务运行状态。
- 但是Hystrix-dashboard只能监控一个微服务。
- Netflix还提供了Turbine,进行聚合监控。

turbine示意图

Turbine聚合监控
搭建监控模块
创建hystrix-monitor模块,使用Turbine聚合监控多个Hystrix dashboard功能
-
创建hystrix-monitor模块,修改pom.xml
<?xml version="1.0" encoding="UTF-8"?><project xmlns="http://maven.apache.org/POM/4.0.0" xmlns:xsi="http://www.w3.org/2001/XMLSchema-instance" xsi:schemaLocation="http://maven.apache.org/POM/4.0.0 http://maven.apache.org/xsd/maven-4.0.0.xsd"> <parent> <artifactId>spring-cloud-parent</artifactId> <groupId>com.fpa</groupId> <version>1.0-SNAPSHOT</version> </parent> <modelVersion>4.0.0</modelVersion> <artifactId>hystrix-monitor</artifactId> <properties> <project.build.sourceEncoding>UTF-8</project.build.sourceEncoding> <project.reporting.outputEncoding>UTF-8</project.reporting.outputEncoding> <java.version>1.8</java.version> </properties> <dependencies> <!-- hystrix-dashboard --> <dependency> <groupId>org.springframework.cloud</groupId> <artifactId>spring-cloud-starter-netflix-hystrix-dashboard</artifactId> </dependency> <!-- netflix-turbine --> <dependency> <groupId>org.springframework.cloud</groupId> <artifactId>spring-cloud-starter-netflix-turbine</artifactId> </dependency> <!-- actuator --> <dependency> <groupId>org.springframework.boot</groupId> <artifactId>spring-boot-starter-actuator</artifactId> </dependency> <!-- netflix-eureka-client --> <dependency> <groupId>org.springframework.cloud</groupId> <artifactId>spring-cloud-starter-netflix-eureka-client</artifactId> </dependency> <!-- springboot test --> <dependency> <groupId>org.springframework.boot</groupId> <artifactId>spring-boot-starter-test</artifactId> <scope>test</scope> </dependency> </dependencies> <build> <plugins> <plugin> <groupId>org.springframework.boot</groupId> <artifactId>spring-boot-maven-plugin</artifactId> </plugin> </plugins> </build></project> -
创建启动类
package com.fpa.monitor;import org.springframework.boot.SpringApplication;import org.springframework.boot.autoconfigure.SpringBootApplication;import org.springframework.cloud.netflix.eureka.EnableEurekaClient;import org.springframework.cloud.netflix.hystrix.dashboard.EnableHystrixDashboard;import org.springframework.cloud.netflix.turbine.EnableTurbine;@SpringBootApplication@EnableEurekaClient //启用 eureka@EnableTurbine //开启 turbine聚合功能@EnableHystrixDashboard //开启hystrix dashboard仪表盘public class HystrixMonitor { public static void main(String[] args) { SpringApplication.run(HystrixMonitor.class,args); }} -
修改配置文件
application.yml
spring: profiles: active: dev application: name: hystrix-monitorapplication-dev.yml
server: port: 8769turbine: combine-host-port: true # 配置需要被监控的服务名称列表 app-config: provider-app,consumer-app cluster-name-expression: "'default'" aggregator: cluster-config: default #instanceUrl Suffix: /actuator/hystrix.streameureka: client: service-url: defaultZone: http://localhost:8761/eureka #eureka服务器地址
修改被监控模块
-
consumer和provider都引入依赖
<!-- hystrix --><dependency> <groupId>org.springframework.cloud</groupId> <artifactId>spring-cloud-starter-netflix-hystrix</artifactId></dependency><!-- hystrix-dashboard --><dependency> <groupId>org.springframework.cloud</groupId> <artifactId>spring-cloud-starter-netflix-hystrix-dashboard</artifactId></dependency><!-- actuator --><dependency> <groupId>org.springframework.boot</groupId> <artifactId>spring-boot-starter-actuator</artifactId></dependency> -
配置Bean和加入注解@EnableHystrixDashboard
package com.fpa.provider;import com.netflix.hystrix.contrib.metrics.eventstream.HystrixMetricsStreamServlet;import org.springframework.boot.SpringApplication;import org.springframework.boot.autoconfigure.SpringBootApplication;import org.springframework.boot.web.servlet.ServletRegistrationBean;import org.springframework.cloud.client.circuitbreaker.EnableCircuitBreaker;import org.springframework.cloud.netflix.eureka.EnableEurekaClient;import org.springframework.cloud.netflix.hystrix.dashboard.EnableHystrixDashboard;import org.springframework.context.annotation.Bean;@SpringBootApplication@EnableEurekaClient@EnableCircuitBreaker//开启hystrix熔断器@EnableHystrixDashboard //启用Hystrix Dashboard注解public class ProviderApp { public static void main(String[] args) { SpringApplication.run(ProviderApp.class,args); } /** * Hystrix 聚合监控所需要配置的Bean * @return */ @Bean public ServletRegistrationBean getServlet() { HystrixMetricsStreamServlet streamServlet = new HystrixMetricsStreamServlet(); ServletRegistrationBean registrationBean = new ServletRegistrationBean(streamServlet); registrationBean.setLoadOnStartup(1); registrationBean.addUrlMappings("/actuator/hystrix.stream"); registrationBean.setName("HystrixMetricsStreamServlet"); return registrationBean; }}package com.fpa.consumer; import com.netflix.hystrix.contrib.metrics.eventstream.HystrixMetricsStreamServlet; import org.springframework.boot.SpringApplication; import org.springframework.boot.autoconfigure.SpringBootApplication; import org.springframework.boot.web.servlet.ServletRegistrationBean; import org.springframework.cloud.client.circuitbreaker.EnableCircuitBreaker; import org.springframework.cloud.client.discovery.EnableDiscoveryClient; import org.springframework.cloud.netflix.eureka.EnableEurekaClient; import org.springframework.cloud.netflix.hystrix.dashboard.EnableHystrixDashboard; import org.springframework.cloud.openfeign.EnableFeignClients; import org.springframework.context.annotation.Bean; @SpringBootApplication @EnableEurekaClient @EnableDiscoveryClient @EnableFeignClients//开启feign功能 @EnableHystrixDashboard //启用Hystrix Dashboard注解 public class ConsumerApp { public static void main(String[] args) { SpringApplication.run(ConsumerApp.class, args); } /** * Hystrix 聚合监控所需要配置的Bean * @return */ @Bean public ServletRegistrationBean getServlet() { HystrixMetricsStreamServlet streamServlet = new HystrixMetricsStreamServlet(); ServletRegistrationBean registrationBean = new ServletRegistrationBean(streamServlet); registrationBean.setLoadOnStartup(1); registrationBean.addUrlMappings("/actuator/hystrix.stream"); registrationBean.setName("HystrixMetricsStreamServlet"); return registrationBean; } }
启动测试
-
启动eureka-server跑在8761端口
-
启动hystrix-provider、hystrix-consumer、hystrix-monitor
-
访问http://localhost:8769/hystrix
-
输入 某个服务的http://localhost:8000/actuator/hystrix.stream进入看的就是这个服务的监控
-
输入http://localhost:8769/turbine.stream看的就是所有服务的监控情况(记住聚合这个的url没有actuator前缀!!!!)


circuit Cloused意思是熔断器是关闭的,另外其他的颜色就代表着不同的请求,在右上角

Gateway服务网关
网关概述
-
网关旨在为微服务架构提供一种简单而有效的统一的API路由管理方式。
-
在微服务架构中,不同的微服务可以有不同的网络地址,各个微服务之间通过互相调用完成用户请求,客户端可能通过调用N个微服务的接口完成一个用户请求。
-
存在的问题
客户端多次请求不同的微服务,增加客户端的复杂性认证复杂
每个服务都要进行认证
http请求不同服务次数增加,性能不高
-
-
网关就是系统的入口,封装了应用程序的内部结构,为客户端提供统一服务,一些与业务本身功能无关的公共逻辑可以在这里实现,诸如认证、鉴权、监控、缓存、负载均衡、流量管控、路由转发等
网关静态路由
- 搭建网关模块
- 引入依赖:starter-gateway
- 编写启动类
- 编写配置文件启动测试
- 启动测试
-
准备eureka服务器模块:eureka-server-gateway,服务提供方gateway-provider,服务消费方gateway-consumer,网关服务模块api-gateway-server
-
eureka和provider,consumer全部从前面的hystrix部分里拿过来改改用,把应用名改下,然后consumer里的feign配置的接口也需要改动下服务提供方的名字,其他的基本上没啥好改的,然后启动eureka,provider,consumer并测试接口是否符合预期
-
给api-gateway-server项目增加配置文件并配置网关
application.yml
spring:
  profiles:
    active: dev
  application:
    name: api-gateway-server
application-dev.yml
server:
  port: 80


spring:
  cloud:
    # 网关配置
    gateway:
      # 路由配置
      routes: # 集合
        # id 唯一标识,默认是UUID
        # uri 转发路径
        # predicates 匹配条件
        - id: gateway-provider
          uri: http://localhost:8000/
          predicates:
            - Path=/goods/**
application-prod.yml
server: port: 80 spring: cloud: # 网关配置 gateway: # 路由配置 routes: # 集合 # id 唯一标识,默认是UUID # uri 转发路径 # predicates 匹配条件 - id: gateway-provider uri: http://localhost:8000/ predicates: - Path=/goods/** -
给api-gateway-server项目增加启动类
package com.fpa.gateway; import org.springframework.boot.SpringApplication; import org.springframework.boot.autoconfigure.SpringBootApplication; import org.springframework.cloud.netflix.eureka.EnableEurekaClient; @SpringBootApplication @EnableEurekaClient public class GatewayServerApp { public static void main(String[] args) { SpringApplication.run(GatewayServerApp.class,args); } } -
启动网关gateway项目,访问http://localhost/goods/2正常出了数据证明网关起作用了转发过去了

网关动态路由
前面的如果微服务换了端口或者ip则需要重新修改网关的配置并重启,很麻烦,我们需要的是微服务那边随他怎么去换ip和端口,我们网关也能正常工作,而ip和端口eureka这个服务注册的地方是知道的,那么我们要将eureka和gateway结合使用。
-
修改api-gateway-server的配置
application-dev.yml
server: port: 80 spring: cloud: # 网关配置 gateway: # 路由配置 routes: # 集合 # id 唯一标识,默认是UUID # uri 转发路径 # predicates 匹配条件 - id: gateway-provider # 静态路由uri # uri: http://localhost:8000/ # 动态路由,根据服务名从eureka获取地址 uri: lb://gateway-provider predicates: - Path=/goods/** eureka: instance: hostname: localhost client: service-url: defaultZone: http://localhost:8761/eureka #eureka服务器地址 -
重启gateway项目,再次访问http://localhost/goods/2可以发现仍然可以正常获取数据,证明生效
-
测试下多个provider,我们创建一个和gateway-provider一样的模块命名为gateway-provider2,修改端口为8002,修改返回的数据中title为“华为手机gateway2”,并启动,也一起注册到eureka上。多次访问http://localhost/goods/2可以发现会依次轮询返回下面这两个,证明负载均衡也生效了。
{"id":1,"title":"华为手机gateway2","price":5999.0}{"id":1,"title":"华为手机gateway","price":5999.0}

微服务名称配置
上面的动态路由是直接转发的,以后服务多了,可能存在前缀相同冲突。那么我们希望前面能够以不同的微服务名称进行区分,因此我们可以进行微服务名称配置。
      discovery:
        locator:
          enabled: true # 设置路径前可以添加微服务的名字以区分
          lower-case-service-id: true # 由于eureka默认都是大写的字母,因此我们打开允许服务名小写的开关
- 修改gateway项目,完整配置
server:
  port: 80


spring:
  cloud:
    # 网关配置
    gateway:
      # 路由配置
      routes: # 集合
        # id 唯一标识,默认是UUID
        # uri 转发路径
        # predicates 匹配条件
        - id: gateway-provider
          # 静态路由uri
          # uri: http://localhost:8000/
          # 动态路由,根据服务名从eureka获取地址
          uri: lb://gateway-provider
          predicates:
            - Path=/goods/**
      discovery:
        locator:
          enabled: true # 设置路径前可以添加微服务的名字以区分
          lower-case-service-id: true # 由于eureka默认都是大写的字母,因此我们打开允许服务名小写的开关
eureka:
  instance:
    hostname: localhost
  client:
    service-url:
      defaultZone: http://localhost:8761/eureka #eureka服务器地址
- 重启gateway项目,访问http://localhost/gateway-provider/goods/2和http://localhost/goods/2,我们发现两个都是可以访问的,当然我们推荐第一种带服务名访问,更好区分。


Gateway过滤器
-
Gateway支持过滤器功能,对请求或响应进行拦截,完成一些通用操作。
-
Gateway提供两种过滤器方式:“pre”和“post”
-
pre过滤器,在转发之前执行,可以做参数校验、权限校验、流量监控、日志输出、协议转换等。
-
post过滤器,在响应之前执行,可以做响应内容、响应头的修改,日志的输出,流量监控等。
-
Gateway还提供了两种类型过滤器
- GatewayFilter:局部过滤器,针对单个路由
- GlobalFilter :全局过滤器,针对所有路由

Gateway局部过滤器
内置的过滤器工厂
| 过滤器工厂 | 作用 | 参数 |
|---|---|---|
| AddRequestHeader | 为原始请求添加Header | Header的名称及值 |
| AddRequestParameter | 为原始请求添加请求参数 | 参数名称及值 |
| AddResponseHeader | 为原始响应添加Header | Header的名称及值 |
| DedupeResponseHeader | 剔除响应头中重复的值 | 需要去重的Header名称及去重策略 |
| Hystrix | 为路由引入Hystrix的断路器保护 HystrixCommand的名称 | |
| FallbackHeaders | 为fallbackUri的请求头中添加具体的异常信息 | Header的名称 |
| PrefixPath | 为原始请求路径添加前缀 | 前缀路径 |
| PreserveHostHeader | 为请求添加一个preserveHostHeader=true的属性,路由过滤器会检查该属性以决定是否要发送原始的Host | 无 |
| RequestRateLimiter | 用于对请求限流,限流算法为令牌桶 | keyResolver、rateLimiter、statusCode、denyEmptyKey、emptyKeyStatus |
| RedirectTo | 将原始请求重定向到指定的URL | http状态码及重定向的url |
| RemoveHopByHopHeadersFilter | 为原始请求删除IETF组织规定的一系列Header | 默认就会启用,可以通过配置指定仅删除哪些Header |
| RemoveRequestHeader | 为原始请求删除某个Header | Header名称 |
| RemoveResponseHeader | 为原始响应删除某个Header | Header名称 |
| RewritePath | 重写原始的请求路径 | 原始路径正则表达式以及重写后路径的正则表达式 |
| RewriteResponseHeader | 重写原始响应中的某个Header | Header名称,值的正则表达式,重写后的值 |
| SaveSession | 在转发请求之前,强制执行WebSession::save操作 | 无 |
| secureHeaders | 为原始响应添加一系列起安全作用的响应头 | 无,支持修改这些安全响应头的值 |
| SetPath | 修改原始的请求路径 | 修改后的路径 |
| SetResponseHeader | 修改原始响应中某个Header的值 | Header名称,修改后的值 |
| SetStatus | 修改原始响应的状态码 | HTTP 状态码,可以是数字,也可以是字符串 |
| StripPrefix | 用于截断原始请求的路径 | 使用数字表示要截断的路径的数量 |
| Retry | 针对不同的响应进行重试 | retries、statuses、methods、series |
| RequestSize | 设置允许接收最大请求包的大小。如果请求包大小超过设置的值,则返回 413 Payload Too Large | 请求包大小,单位为字节,默认值为5M |
| ModifyRequestBody | 在转发请求之前修改原始请求体内容 | 修改后的请求体内容 |
| ModifyResponseBody | 修改原始响应体的内容 | 修改后的响应体内容 |
| Default | 为所有路由添加过滤器 | 过滤器工厂名称及值 |
内置过滤器使用演示
-
修改gateway项目配置文件
加一个参数过滤器上去增加一个参数username=zhangsan
          filters:
            - AddRequestParameters=username,zhangsan
完整的
server: port: 80 spring: cloud: # 网关配置 gateway: # 路由配置 routes: # 集合 # id 唯一标识,默认是UUID # uri 转发路径 # predicates 匹配条件 - id: gateway-provider # 静态路由uri # uri: http://localhost:8000/ # 动态路由,根据服务名从eureka获取地址 uri: lb://gateway-provider predicates: - Path=/goods/** filters: - AddRequestParameters=username,zhangsan discovery: locator: enabled: true # 设置路径前可以添加微服务的名字以区分 lower-case-service-id: true # 由于eureka默认都是大写的字母,因此我们打开允许服务名小写的开关 eureka: instance: hostname: localhost client: service-url: defaultZone: http://localhost:8761/eureka #eureka服务器地址 -
给接口添加一个参数username,并打印出来
package com.fpa.provider.controller; import com.fpa.provider.bean.Goods; import com.fpa.provider.service.GoodsService; import com.netflix.hystrix.contrib.javanica.annotation.HystrixCommand; import com.netflix.hystrix.contrib.javanica.annotation.HystrixProperty; import org.springframework.beans.factory.annotation.Autowired; import org.springframework.web.bind.annotation.GetMapping; import org.springframework.web.bind.annotation.PathVariable; import org.springframework.web.bind.annotation.RequestMapping; import org.springframework.web.bind.annotation.RestController; @RestController @RequestMapping("/goods") public class GoodsController { @Autowired private GoodsService goodsService; @GetMapping("/{id}") @HystrixCommand(fallbackMethod = "findOne_fallback", commandProperties = { @HystrixProperty(name = "execution.isolation.thread.timeoutInMilliseconds", value = "3000"),//超时时间 @HystrixProperty(name = "circuitBreaker.sleepWindowInMilliseconds", value = "5000"),//监控时间黑认5000毫秒 @HystrixProperty(name = "circuitBreaker.requestVolumeThreshold", value = "20"),//失败次数。默认20次 @HystrixProperty(name = "circuitBreaker.errorThresholdPercentage", value = "50")//失败率默认50% })//指定降级后执行的方法名字 public Goods findOne(@PathVariable("id") int id,String username) { //故意制造一个异常出来 // int a = 1/0; //故意制造一个超时,因为hystrix默认也是1秒超时 /*try { Thread.sleep(2000); }catch (Exception e){}*/ System.out.println(username); //熔断器测试 if (id == 1) { int a = 1 / 0; } return goodsService.findOne(id); } /** * 上面的方法一旦降级后就执行这个方法的逻辑 * * @param id * @return */ public Goods findOne_fallback(int id,String username) { Goods goods = new Goods(); goods.setTitle("服务降级了呀"); System.out.println(username); return goods; } } -
访问http://localhost/gateway-provider/goods/2
![在这里插入图片描述]()


Gateway全局过滤
- GlobalFilter全局过滤器,不需要在配置文件中配置,系统初始化时加载,并作用在每个路由上。
- Spring Cloud Gateway核心的功能也是通过内置的全局过滤器来完成。
- 自定义全局过滤器步骤:
- 定义类实现GlobalFilter和Ordered接口
- 复写方法
- 完成逻辑处理

-
在api-gateway-server中建立一个类MyGlobalFilter实现GlobalFilter接口和Ordered接口
package com.fpa.gateway.filter; import org.springframework.cloud.gateway.filter.GatewayFilterChain; import org.springframework.cloud.gateway.filter.GlobalFilter; import org.springframework.core.Ordered; import org.springframework.stereotype.Component; import org.springframework.web.server.ServerWebExchange; import reactor.core.publisher.Mono; @Component public class MyGlobalFilter implements GlobalFilter, Ordered { @Override public Mono<Void> filter(ServerWebExchange exchange, GatewayFilterChain chain) { System.out.println("自定义全局过滤器执行了~"); return chain.filter(exchange);//放行,继续执行过滤器链 } /** * 数值越小越线制性 * @return */ @Override public int getOrder() { return 0; } } -
重启gateway项目,访问http://localhost/gateway-provider/goods/2测试

Config配置中心
Config配置中心介绍
- Spring Cloud Config解决了在分布式场景下多环境配置文件的管理和维护。
- 好处:
- 集中管理配置文件
- 不同环境不同配置,动态化的配置更新
- 配置信息改变时,不需要重启即可更新配置信息到服务

Config快速入门
- 使用gitee创建远程仓库,上传配置文件
- 搭建config server模块
- 导入config-server依赖
- 编写配置,设置gitee远程仓库地址
- 测试访问远程配置文件
-
在gitee里创建一个名为spring-cloud-config的公开仓库,在本地克隆这个项目,在里面新建一个config-dev.yml配置文件,内容为
association: freeprogramming association -
添加到git管理并commit提交并push推送到gitee上
-
新建config-server模块,引入依赖
<?xml version="1.0" encoding="UTF-8"?> <project xmlns="http://maven.apache.org/POM/4.0.0" xmlns:xsi="http://www.w3.org/2001/XMLSchema-instance" xsi:schemaLocation="http://maven.apache.org/POM/4.0.0 http://maven.apache.org/xsd/maven-4.0.0.xsd"> <parent> <artifactId>spring-cloud-parent</artifactId> <groupId>com.fpa</groupId> <version>1.0-SNAPSHOT</version> </parent> <modelVersion>4.0.0</modelVersion> <artifactId>config-server</artifactId> <dependencies> <!-- spring cloud config--> <dependency> <groupId>org.springframework.cloud</groupId> <artifactId>spring-cloud-config-server</artifactId> </dependency> </dependencies> </project> -
创建启动类com.fpa.config.ConfigServerApp
package com.fpa.config; import org.springframework.boot.SpringApplication; import org.springframework.boot.autoconfigure.SpringBootApplication; import org.springframework.cloud.config.server.EnableConfigServer; @SpringBootApplication @EnableConfigServer //启用config server配置功能 public class ConfigServerApp { public static void main(String[] args) { SpringApplication.run(ConfigServerApp.class,args); } } -
复制一份配置文件,修改
application.yml
spring:
  profiles:
    active: dev
  application:
    name: config-server
  cloud:
    # spring cloud config配置
    config:
      server:
        # git的远程仓库地址
        git:
          uri: https://gitee.com/HumorChen/spring-cloud-config.git
      label: master # 分支配置
application-dev.yml
server:
  port: 8888
application-prod.yml
server: port: 8888 -
启动项目并访问http://localhost:8888/master/config-dev.yml,证明config-server模块已经能正确读取到配置文件了

Config客户端使用配置启动
- 导入starter-config 依赖
- 配置config server 地址,读取配置文件名称等信息
- 获取配置值
- 启动测试
-
创建 config-provider项目,从histrix复制依赖以及main文件夹过来,加入starter-config依赖
<?xml version="1.0" encoding="UTF-8"?> <project xmlns="http://maven.apache.org/POM/4.0.0" xmlns:xsi="http://www.w3.org/2001/XMLSchema-instance" xsi:schemaLocation="http://maven.apache.org/POM/4.0.0 http://maven.apache.org/xsd/maven-4.0.0.xsd"> <parent> <artifactId>spring-cloud-parent</artifactId> <groupId>com.fpa</groupId> <version>1.0-SNAPSHOT</version> </parent> <modelVersion>4.0.0</modelVersion> <artifactId>config-provider</artifactId> <dependencies> <!--spring boot web--> <dependency> <groupId>org.springframework.boot</groupId> <artifactId>spring-boot-starter-web</artifactId> </dependency> <!-- eureka-client --> <dependency> <groupId>org.springframework.cloud</groupId> <artifactId>spring-cloud-starter-netflix-eureka-client</artifactId> </dependency> <!-- hystrix --> <dependency> <groupId>org.springframework.cloud</groupId> <artifactId>spring-cloud-starter-netflix-hystrix</artifactId> </dependency> <!-- hystrix-dashboard --> <dependency> <groupId>org.springframework.cloud</groupId> <artifactId>spring-cloud-starter-netflix-hystrix-dashboard</artifactId> </dependency> <!-- actuator --> <dependency> <groupId>org.springframework.boot</groupId> <artifactId>spring-boot-starter-actuator</artifactId> </dependency> <!-- config --> <dependency> <groupId>org.springframework.cloud</groupId> <artifactId>spring-cloud-starter-config</artifactId> </dependency> </dependencies> </project> -
删除之前的application的三个yml配置文件新建一个bootstrap.yml配置文件
spring: profiles: active: dev application: name: provider-app --- # 开发环境 # 配置config-server地址 # 配置获得配置文件的名称等信息 spring: profiles: dev cloud: config: # 配置config server 地址 uri: http://localhost:8888 #配置文件的名称 name: config label: master # 分支名 profile: dev # profile指定后会拼接成 config-dev.yml server: port: 8000 eureka: instance: hostname: localhost client: service-url: defaultZone: http://localhost:8761/eureka #eureka服务器地址 --- # 生产环境 # 配置config-server地址 # 配置获得配置文件的名称等信息 spring: profiles: prod cloud: config: # 配置config server 地址 uri: http://localhost:8888 #配置文件的名称 name: config label: master # 分支名 profile: dev # profile指定后会拼接成 config-dev.yml server: port: 8000 eureka: instance: hostname: localhost client: service-url: defaultZone: http://localhost:8761/eureka #eureka服务器地址 -
修改controller,注入配置并返回
package com.fpa.provider.controller; import com.fpa.provider.bean.Goods; import com.fpa.provider.service.GoodsService; import com.netflix.hystrix.contrib.javanica.annotation.HystrixCommand; import com.netflix.hystrix.contrib.javanica.annotation.HystrixProperty; import org.springframework.beans.factory.annotation.Autowired; import org.springframework.beans.factory.annotation.Value; import org.springframework.web.bind.annotation.GetMapping; import org.springframework.web.bind.annotation.PathVariable; import org.springframework.web.bind.annotation.RequestMapping; import org.springframework.web.bind.annotation.RestController; @RestController @RequestMapping("/goods") public class GoodsController { @Autowired private GoodsService goodsService; @Value("${association}") private String association; @GetMapping("/{id}") @HystrixCommand(fallbackMethod = "findOne_fallback", commandProperties = { @HystrixProperty(name = "execution.isolation.thread.timeoutInMilliseconds", value = "3000"),//超时时间 @HystrixProperty(name = "circuitBreaker.sleepWindowInMilliseconds", value = "5000"),//监控时间黑认5000毫秒 @HystrixProperty(name = "circuitBreaker.requestVolumeThreshold", value = "20"),//失败次数。默认20次 @HystrixProperty(name = "circuitBreaker.errorThresholdPercentage", value = "50")//失败率默认50% })//指定降级后执行的方法名字 public Goods findOne(@PathVariable("id") int id) { //故意制造一个异常出来 // int a = 1/0; //故意制造一个超时,因为hystrix默认也是1秒超时 /*try { Thread.sleep(2000); }catch (Exception e){}*/ //熔断器测试 if (id == 1) { int a = 1 / 0; } Goods goods = goodsService.findOne(id); goods.setTitle(association); return goods; } /** * 上面的方法一旦降级后就执行这个方法的逻辑 * * @param id * @return */ public Goods findOne_fallback(int id) { Goods goods = new Goods(); goods.setTitle("服务降级了呀"); return goods; } } -
启动eureka-server放到8761端口,再启动config-provider项目,测试接口


配置加载正常
Config配置热刷新功能
- 在config客户端引入actuator依赖
- 获取配置信息类上,添加@RefreshScope注解
- 添加配置
management.endpoints.web.exposure.include: refresh - 使用curl工具发送post请求
curl -X POST http://localhost:8000/actuator/refresh
-
需要actuator依赖
<!-- actuator --> <dependency> <groupId>org.springframework.boot</groupId> <artifactId>spring-boot-starter-actuator</artifactId> </dependency> -
给需要刷新的地方加上注解@RefreshScope
package com.fpa.provider.controller; import com.fpa.provider.bean.Goods; import com.fpa.provider.service.GoodsService; import com.netflix.hystrix.contrib.javanica.annotation.HystrixCommand; import com.netflix.hystrix.contrib.javanica.annotation.HystrixProperty; import org.springframework.beans.factory.annotation.Autowired; import org.springframework.beans.factory.annotation.Value; import org.springframework.cloud.context.config.annotation.RefreshScope; import org.springframework.web.bind.annotation.GetMapping; import org.springframework.web.bind.annotation.PathVariable; import org.springframework.web.bind.annotation.RequestMapping; import org.springframework.web.bind.annotation.RestController; @RestController @RequestMapping("/goods") @RefreshScope // 开启刷新功能 public class GoodsController { @Autowired private GoodsService goodsService; @Value("${association}") private String association; @GetMapping("/{id}") @HystrixCommand(fallbackMethod = "findOne_fallback", commandProperties = { @HystrixProperty(name = "execution.isolation.thread.timeoutInMilliseconds", value = "3000"),//超时时间 @HystrixProperty(name = "circuitBreaker.sleepWindowInMilliseconds", value = "5000"),//监控时间黑认5000毫秒 @HystrixProperty(name = "circuitBreaker.requestVolumeThreshold", value = "20"),//失败次数。默认20次 @HystrixProperty(name = "circuitBreaker.errorThresholdPercentage", value = "50")//失败率默认50% })//指定降级后执行的方法名字 public Goods findOne(@PathVariable("id") int id) { //故意制造一个异常出来 // int a = 1/0; //故意制造一个超时,因为hystrix默认也是1秒超时 /*try { Thread.sleep(2000); }catch (Exception e){}*/ //熔断器测试 if (id == 1) { int a = 1 / 0; } Goods goods = goodsService.findOne(id); goods.setTitle(association); return goods; } /** * 上面的方法一旦降级后就执行这个方法的逻辑 * * @param id * @return */ public Goods findOne_fallback(int id) { Goods goods = new Goods(); goods.setTitle("服务降级了呀"); return goods; } } -
修改配置加入下面的
management: endpoints: web: exposure: include: ['health','info','refresh'] -
启动项目,查看接口返回的,修改gitee上的配置,再次查看接口返回的没有变,查看config-server的变了,然后发个post请求到http://localhost:8000/actuator/refresh就可以刷新接口的了。

Config Server注册到eureka
-
加入eureka依赖
<?xml version="1.0" encoding="UTF-8"?> <project xmlns="http://maven.apache.org/POM/4.0.0" xmlns:xsi="http://www.w3.org/2001/XMLSchema-instance" xsi:schemaLocation="http://maven.apache.org/POM/4.0.0 http://maven.apache.org/xsd/maven-4.0.0.xsd"> <parent> <artifactId>spring-cloud-parent</artifactId> <groupId>com.fpa</groupId> <version>1.0-SNAPSHOT</version> </parent> <modelVersion>4.0.0</modelVersion> <artifactId>config-server</artifactId> <dependencies> <!-- eureka-client --> <dependency> <groupId>org.springframework.cloud</groupId> <artifactId>spring-cloud-starter-netflix-eureka-client</artifactId> </dependency> <!-- spring cloud config--> <dependency> <groupId>org.springframework.cloud</groupId> <artifactId>spring-cloud-config-server</artifactId> </dependency> </dependencies> </project> -
修改配置
server: port: 8888 eureka: instance: hostname: localhost client: service-url: defaultZone: http://localhost:8761/eureka #eureka服务器地址 -
给启动类加上注解@EnableEurekaClient
package com.fpa.config; import org.springframework.boot.SpringApplication; import org.springframework.boot.autoconfigure.SpringBootApplication; import org.springframework.cloud.config.server.EnableConfigServer; import org.springframework.cloud.netflix.eureka.EnableEurekaClient; @SpringBootApplication @EnableConfigServer //启用config server配置功能 @EnableEurekaClient //启用eureka客户端 public class ConfigServerApp { public static void main(String[] args) { SpringApplication.run(ConfigServerApp.class,args); } } -
重启config-server,已经注册上了

- 重启provider即可
Bus消息总线
Spring Cloud Bus 是用轻量的消息中间件将分布式的节点连接起来,可以用于广播配置文件的更改或者服务的监控管理。关键的思想就是,消息总线可以为微服务做监控,也可以实现应用程序之间相通信。
Spring Cloud Bus 可选的消息中间件包括RabbitMQ和Kafka。
这里我们使用rabbitmq来传递,不会rabbitmq看我这个博客https://blog.csdn.net/HumorChen99/article/details/120622849

创建一个模块bus-provider,从config-provider项目里复制pom.xml里的所有依赖,加入bus依赖,重新导入依赖,复制java目录,重命名启动类为BusProviderApp,复制bootstrap.yml,修改应用名为bus-provider-app
pom.xml
<?xml version="1.0" encoding="UTF-8"?>
<project xmlns:xsi="http://www.w3.org/2001/XMLSchema-instance"
         xmlns="http://maven.apache.org/POM/4.0.0"
         xsi:schemaLocation="http://maven.apache.org/POM/4.0.0 http://maven.apache.org/xsd/maven-4.0.0.xsd">
    <parent>
        <artifactId>spring-cloud-parent</artifactId>
        <groupId>com.fpa</groupId>
        <version>1.0-SNAPSHOT</version>
    </parent>
    <modelVersion>4.0.0</modelVersion>

    <artifactId>config-provider</artifactId>

    <dependencies>

        <!--spring boot web-->
        <dependency>
            <groupId>org.springframework.boot</groupId>
            <artifactId>spring-boot-starter-web</artifactId>
        </dependency>
        <!-- eureka-client -->
        <dependency>
            <groupId>org.springframework.cloud</groupId>
            <artifactId>spring-cloud-starter-netflix-eureka-client</artifactId>
        </dependency>
        <!-- hystrix -->
        <dependency>
            <groupId>org.springframework.cloud</groupId>
            <artifactId>spring-cloud-starter-netflix-hystrix</artifactId>
        </dependency>
        <!-- hystrix-dashboard -->
        <dependency>
            <groupId>org.springframework.cloud</groupId>
            <artifactId>spring-cloud-starter-netflix-hystrix-dashboard</artifactId>
        </dependency>
        <!-- actuator -->
        <dependency>
            <groupId>org.springframework.boot</groupId>
            <artifactId>spring-boot-starter-actuator</artifactId>
        </dependency>
        <!-- config -->
        <dependency>
            <groupId>org.springframework.cloud</groupId>
            <artifactId>spring-cloud-starter-config</artifactId>
        </dependency>
        <!-- bus -->
        <dependency>
            <groupId>org.springframework.cloud</groupId>
            <artifactId>spring-cloud-starter-bus-amqp</artifactId>
        </dependency>
    </dependencies>

</project>
给之前的config-server项目添加bus和actuator依赖
<?xml version="1.0" encoding="UTF-8"?>
<project xmlns:xsi="http://www.w3.org/2001/XMLSchema-instance"
         xmlns="http://maven.apache.org/POM/4.0.0"
         xsi:schemaLocation="http://maven.apache.org/POM/4.0.0 http://maven.apache.org/xsd/maven-4.0.0.xsd">
    <parent>
        <artifactId>spring-cloud-parent</artifactId>
        <groupId>com.fpa</groupId>
        <version>1.0-SNAPSHOT</version>
    </parent>
    <modelVersion>4.0.0</modelVersion>

    <artifactId>config-server</artifactId>

    <dependencies>
        <!-- eureka-client -->
        <dependency>
            <groupId>org.springframework.cloud</groupId>
            <artifactId>spring-cloud-starter-netflix-eureka-client</artifactId>
        </dependency>
        <!--        spring cloud config-->
        <dependency>
            <groupId>org.springframework.cloud</groupId>
            <artifactId>spring-cloud-config-server</artifactId>
        </dependency>
        <!-- actuator -->
        <dependency>
            <groupId>org.springframework.boot</groupId>
            <artifactId>spring-boot-starter-actuator</artifactId>
        </dependency>
        <!-- bus -->
        <dependency>
            <groupId>org.springframework.cloud</groupId>
            <artifactId>spring-cloud-starter-bus-amqp</artifactId>
        </dependency>
    </dependencies>
</project>
修改config-server项目配置,配置上rabbitmq和bus暴露的端点
spring:
  profiles:
    active: dev
  application:
    name: config-server
  cloud:
    # spring cloud config配置
    config:

      server:
        # git的远程仓库地址
        git:
          uri: https://gitee.com/HumorChen/spring-cloud-config.git
      label: master # 分支配置
  # bus 学习的时候要配置rabbitmq
  rabbitmq:
    host: 192.168.0.105
    port: 5672
    username: admin
    password: admin
    virtual-host: /
# 暴露bus的刷新点
management:
  server:
    port: 8888
  endpoints:
    web:
      exposure:
        include: 'bus-refresh'
给bus-provider项目的配置也加上rabbitmq的配置
bootstrap.yml
spring:
  profiles:
    active: dev
  application:
    name: bus-provider-app
logging:
  level:
    org.springframework.cloud.bus: debug

# bus的配置项
management:
  endpoints:
    web:
      exposure:
        include: 'bus-refresh'
---
# 开发环境
# 配置config-server地址
# 配置获得配置文件的名称等信息
spring:
  profiles: dev
  cloud:
    config:
      # 配置config server 地址
      # 改为使用注册中心获取地址
      #      uri: http://localhost:8888
      #配置文件的名称
      name: config
      label: master # 分支名
      profile: dev # profile指定后会拼接成 config-dev.yml
      # 启用通过注册中心获取
      discovery:
        enabled: true
        service-id: config-server # 服务的应用名
  rabbitmq:
    host: 192.168.0.105
    port: 5672
    username: admin
    password: admin
    virtual-host: /
server:
  port: 8000

eureka:
  instance:
    hostname: localhost
  client:
    service-url:
      defaultZone: http://localhost:8761/eureka #eureka服务器地址

---
# 生产环境
# 配置config-server地址
# 配置获得配置文件的名称等信息
spring:
  profiles: prd
  cloud:
    config:
      # 配置config server 地址
      # 改为使用注册中心获取地址
      #      uri: http://localhost:8888
      #配置文件的名称
      name: config
      label: master # 分支名
      profile: prd # profile指定后会拼接成 config-dev.yml
      # 启用通过注册中心获取
      discovery:
        enabled: true
        service-id: config-server # 服务的应用名
  rabbitmq:
    host: 192.168.0.105
    port: 5672
    username: admin
    password: admin
    virtual-host: /
server:
  port: 8000
eureka:
  instance:
    hostname: localhost
  client:
    service-url:
      defaultZone: http://localhost:8761/eureka #eureka服务器地址
启动eureka注册中心,启动config-server配置中心,启动bus-provider项目,测试goods接口是否正常,正常后去git修改配置,然后去config-server可以看到配置修改了,但是去goods接口发现数据没有变,我们向config-server/actuator/bus-refresh发送一个POST请求来刷新配置,没有报错,没有返回任何数据,去接口看配置已经被成功刷新了。

Stream消息驱动
- Spring Cloud Stream是一个构建消息驱动微服务应用的框架。
- Stream解决了开发人员无感知的使用消息中间件的问题,因为Stream对消息中间件的进一步封装,可以做到代码层面对中间件的无感知,甚至于动态的切换中间件,使得微服务开发的高度解耦,服务可以关注更多自己的业务流程。

Spring Cloud Stream构建的应用程序与消息中间件之间是通过绑定器Binder相关联的。绑定器对于应用程序而言起到了隔离作用,它使得不同消息中间件的实现细节对应用程序来说是透明的。

消息生产者
创建一个maven模块springcloud-stream-producer,父项目还是之前的spring-cloud-parent

pom.xml
<?xml version="1.0" encoding="UTF-8"?>
<project xmlns="http://maven.apache.org/POM/4.0.0"
         xmlns:xsi="http://www.w3.org/2001/XMLSchema-instance"
         xsi:schemaLocation="http://maven.apache.org/POM/4.0.0 http://maven.apache.org/xsd/maven-4.0.0.xsd">
    <parent>
        <artifactId>spring-cloud-parent</artifactId>
        <groupId>com.fpa</groupId>
        <version>1.0-SNAPSHOT</version>
    </parent>
    <modelVersion>4.0.0</modelVersion>

    <artifactId>springcloud-stream-producer</artifactId>

    <dependencies>
        <!--spring boot web-->
        <dependency>
            <groupId>org.springframework.boot</groupId>
            <artifactId>spring-boot-starter-web</artifactId>
        </dependency>
        <!--spring cloud stream-->
        <dependency>
            <groupId>org.springframework.cloud</groupId>
            <artifactId>spring-cloud-starter-stream-rabbit</artifactId>
        </dependency>
    </dependencies>
</project>
application.yml
server:
  port: 8000
spring:
  cloud:
    stream:
      # 定义绑定器,绑定到哪个消息中间件上
      binders:
        # 定义的一个名叫my_binder的绑定器
        springcloud_stream_producer_binder:
          # 类型为rabbitmq
          type: rabbit
          # 环境参数
          environment:
            # 环境参数的详情
            spring:
              rabbitmq:
                username: admin
                password: admin
                virtual-host: /
                host: 192.168.0.105
                port: 5672
      bindings:
        output:
          binder: springcloud_stream_producer_binder
          destination: springcloud_stream_producer_exchange
MessageProducer.java
package com.fpa.stream.producer;

import org.springframework.beans.factory.annotation.Autowired;
import org.springframework.cloud.stream.annotation.EnableBinding;
import org.springframework.cloud.stream.messaging.Source;
import org.springframework.messaging.Message;
import org.springframework.messaging.MessageChannel;
import org.springframework.messaging.support.MessageBuilder;
import org.springframework.stereotype.Component;

/**
 * @Author:humorchen
 * @Date 2021/10/9 11:26
 */
@Component
@EnableBinding(Source.class)
public class MessageProducer {

    @Autowired
    private MessageChannel output;

    public void send(String msg){
        Message<String> message = MessageBuilder.withPayload(msg).build();
        output.send(message);
        System.out.println("消息发送成功");
    }
}
ProducerController.java
package com.fpa.stream.controller;

import com.fpa.stream.producer.MessageProducer;
import org.springframework.beans.factory.annotation.Autowired;
import org.springframework.beans.factory.annotation.Qualifier;
import org.springframework.web.bind.annotation.RequestMapping;
import org.springframework.web.bind.annotation.RestController;

import javax.annotation.Resource;

/**
 * @Author:humorchen
 * @Date 2021/10/9 12:28
 */
@RestController
public class ProducerController {
    @Autowired
    private MessageProducer messageProducer;

    @RequestMapping("/send")
    public String send(){
        String msg = "hello,springcloud stream";
        messageProducer.send(msg);
        return "发送成功";
    }
}
ProducerApplication.java
package com.fpa.stream;

import org.springframework.boot.SpringApplication;
import org.springframework.boot.autoconfigure.SpringBootApplication;

/**
 * @Author:humorchen
 * @Date 2021/10/9 11:00
 */
@SpringBootApplication
public class ProducerApplication {
    public static void main(String[] args) {
        SpringApplication.run(ProducerApplication.class,args);
    }
}
启动项目,访问http://localhost:8000/send显示发送成功,我们去rabbitmq控制台可以看到有消息发出到了springcloud_stream_producer_exchange这个交换机

消息消费者
跟上面差不多,创建一个springcloud-stream-consumer项目
pom.xml
<?xml version="1.0" encoding="UTF-8"?>
<project xmlns="http://maven.apache.org/POM/4.0.0"
         xmlns:xsi="http://www.w3.org/2001/XMLSchema-instance"
         xsi:schemaLocation="http://maven.apache.org/POM/4.0.0 http://maven.apache.org/xsd/maven-4.0.0.xsd">
    <parent>
        <artifactId>spring-cloud-parent</artifactId>
        <groupId>com.fpa</groupId>
        <version>1.0-SNAPSHOT</version>
    </parent>
    <modelVersion>4.0.0</modelVersion>

    <artifactId>springcloud-stream-consumer</artifactId>

    <dependencies>
        <!--spring boot web-->
        <dependency>
            <groupId>org.springframework.boot</groupId>
            <artifactId>spring-boot-starter-web</artifactId>
        </dependency>
        <!--spring cloud stream-->
        <dependency>
            <groupId>org.springframework.cloud</groupId>
            <artifactId>spring-cloud-starter-stream-rabbit</artifactId>
        </dependency>
    </dependencies>
</project>
application.yml
server:
  port: 8001
spring:
  cloud:
    stream:
      # 定义绑定器,绑定到哪个消息中间件上
      binders:
        # 定义的一个名叫my_binder的绑定器
        springcloud_stream_producer_binder:
          # 类型为rabbitmq
          type: rabbit
          # 环境参数
          environment:
            # 环境参数的详情
            spring:
              rabbitmq:
                username: admin
                password: admin
                virtual-host: /
                host: 192.168.0.105
                port: 5672
      bindings:
        # 绑定的是输入流Input
        input:
          binder: springcloud_stream_producer_binder
          destination: springcloud_stream_producer_exchange
ConsumerApplication.java
package com.fpa.consumer;

import org.springframework.boot.SpringApplication;
import org.springframework.boot.autoconfigure.SpringBootApplication;

/**
 * @Author:humorchen
 * @Date 2021/10/9 13:13
 */
@SpringBootApplication
public class ConsumerApplication {
    public static void main(String[] args) {
        SpringApplication.run(ConsumerApplication.class,args);
    }
}
ProducerBinderMessageListener.java
package com.fpa.consumer.listener;

import org.springframework.cloud.stream.annotation.EnableBinding;
import org.springframework.cloud.stream.annotation.StreamListener;
import org.springframework.cloud.stream.messaging.Sink;
import org.springframework.messaging.Message;
import org.springframework.stereotype.Component;

import java.util.Map;
import java.util.Set;

/**
 * @Author:humorchen
 * @Date 2021/10/9 21:40
 */
@Component
@EnableBinding({Sink.class})
public class ProducerBinderMessageListener {

    @StreamListener(Sink.INPUT)
    public void receive(Message message){
        System.out.println("【payload】");
        System.out.println(message.getPayload());
        System.out.println("【headers】");
        Set<Map.Entry<String, Object>> entries = message.getHeaders().entrySet();
        for (Map.Entry<String,Object> entry : entries){
            System.out.println(entry.getKey()+" = "+entry.getValue());
        }
    }
}
启动该项目,然后去生产者那边访问下接口,再来看控制台发现消息已经消费到了。


Sleuth+Zipkin链路追踪
Spring Cloud Sleuth其实是一个工具,它在整个分布式系统中能跟踪一个用户请求的过程,捕获这些跟踪数据,就能构建微服务的整个调用链的视图,这是调试和监控微服务的关键工具。
- 耗时分析
- 可视化错误
- 链路优化
Zipkin是Twitter的一个开源项目,它致力于收集服务的定时数据,以解决微服务架构中的延迟问题,包括数据的收集、存储、查找和展现。

Zipkin安装
官方地址是:https://zipkin.io/pages/quickstart
docker地址是:https://hub.docker.com/r/openzipkin/zipkin
这里我直接从docker拉取的一个
 # 拉取镜像
 docker pull openzipkin/zipkin
 # 创建容器实例
docker run -d -p 9411:9411 --name zipkin --restart=always openzipkin/zipkin
随后访问zipkin控制台http://192.168.0.105:9411/ ,Zipkin搭建成功。

Zipkin监控链路
创建provider consumer项目来被监控,第一个是provider,创建一个项目名为sleuth-zipkin-provider的项目,然后去bus-provider项目复制java类,把启动类名字改成SleuthProviderApp,然后复制application.yml,复制pom.xml里的所有依赖。启动该项目,去访问接口测试接口是不是还能正常用,测试正常。
整个步骤还是挺简单的
-
引入zipkin starter
-
增加sleuth和zipkin配置
-
完成调用,前往控制台查看链路
添加一个zipkin的依赖来给这个provider项目加入zipkin的能力(zipkin starter自带了sleuth依赖)
<?xml version="1.0" encoding="UTF-8"?>
<project xmlns="http://maven.apache.org/POM/4.0.0"
         xmlns:xsi="http://www.w3.org/2001/XMLSchema-instance"
         xsi:schemaLocation="http://maven.apache.org/POM/4.0.0 http://maven.apache.org/xsd/maven-4.0.0.xsd">
    <parent>
        <artifactId>spring-cloud-parent</artifactId>
        <groupId>com.fpa</groupId>
        <version>1.0-SNAPSHOT</version>
    </parent>
    <modelVersion>4.0.0</modelVersion>

    <artifactId>sleuth-zipkin-provider</artifactId>
    <dependencies>
        <!--spring boot web-->
        <dependency>
            <groupId>org.springframework.boot</groupId>
            <artifactId>spring-boot-starter-web</artifactId>
        </dependency>
        <!-- eureka-client -->
        <dependency>
            <groupId>org.springframework.cloud</groupId>
            <artifactId>spring-cloud-starter-netflix-eureka-client</artifactId>
        </dependency>
        <!-- hystrix -->
        <dependency>
            <groupId>org.springframework.cloud</groupId>
            <artifactId>spring-cloud-starter-netflix-hystrix</artifactId>
        </dependency>
        <!-- hystrix-dashboard -->
        <dependency>
            <groupId>org.springframework.cloud</groupId>
            <artifactId>spring-cloud-starter-netflix-hystrix-dashboard</artifactId>
        </dependency>
        <!-- actuator -->
        <dependency>
            <groupId>org.springframework.boot</groupId>
            <artifactId>spring-boot-starter-actuator</artifactId>
        </dependency>
        <!-- config -->
        <dependency>
            <groupId>org.springframework.cloud</groupId>
            <artifactId>spring-cloud-starter-config</artifactId>
        </dependency>
        <!-- sleuth zipkin -->
        <dependency>
            <groupId>org.springframework.cloud</groupId>
            <artifactId>spring-cloud-starter-zipkin</artifactId>
        </dependency>
        <!-- bus -->
        <dependency>
            <groupId>org.springframework.cloud</groupId>
            <artifactId>spring-cloud-starter-bus-amqp</artifactId>
        </dependency>
    </dependencies>

</project>
application.yml
spring:
  profiles:
    active: dev
  application:
    name: sleuth-zipkin-provider-app
logging:
  level:
    org.springframework.cloud.bus: debug

# bus的配置项
management:
  endpoints:
    web:
      exposure:
        include: 'bus-refresh'
---
# 开发环境
# 配置config-server地址
# 配置获得配置文件的名称等信息
spring:
  profiles: dev
  cloud:
    config:
      # 配置config server 地址
      # 改为使用注册中心获取地址
      #      uri: http://localhost:8888
      #配置文件的名称
      name: config
      label: master # 分支名
      profile: dev # profile指定后会拼接成 config-dev.yml
      # 启用通过注册中心获取
      discovery:
        enabled: true
        service-id: config-server # 服务的应用名
  rabbitmq:
    host: 192.168.0.105
    port: 5672
    username: admin
    password: admin
    virtual-host: /
  zipkin:
    base-url: http://192.168.0.105:9411/ # 设置zipkin的服务路径
    sender:
      # 可选发送器 web rabbit kafka
      type: web
    # 关闭服务发现
    discovery-client-enabled: false
  sleuth:
    sampler:
      probability: 1 # 1代表100%,0.1代表 10%可能性,我们这里测试采用1
    web:
      client:
        enabled: true


server:
  port: 8000

eureka:
  instance:
    hostname: localhost
  client:
    service-url:
      defaultZone: http://localhost:8761/eureka #eureka服务器地址

---
# 生产环境
# 配置config-server地址
# 配置获得配置文件的名称等信息
spring:
  profiles: prd
  cloud:
    config:
      # 配置config server 地址
      # 改为使用注册中心获取地址
      #      uri: http://localhost:8888
      #配置文件的名称
      name: config
      label: master # 分支名
      profile: prd # profile指定后会拼接成 config-dev.yml
      # 启用通过注册中心获取
      discovery:
        enabled: true
        service-id: config-server # 服务的应用名
  rabbitmq:
    host: 192.168.0.105
    port: 5672
    username: admin
    password: admin
    virtual-host: /


server:
  port: 8000
eureka:
  instance:
    hostname: localhost
  client:
    service-url:
      defaultZone: http://localhost:8761/eureka #eureka服务器地址
启动eureka注册中心,启动config-server配置中心(由于复制来的yml里都配置了这两个我们就启动所需要的这两个组件)
启动项目后测试了

现在我们来创建consumer项目,让consumer来调用provider。创建sleuth-zipkin-consumer项目
pom.xml,依赖直接复制上面项目的,再加入一个因为要restful远程调用微服务所需要的openfeign依赖
<?xml version="1.0" encoding="UTF-8"?>
<project xmlns="http://maven.apache.org/POM/4.0.0"
         xmlns:xsi="http://www.w3.org/2001/XMLSchema-instance"
         xsi:schemaLocation="http://maven.apache.org/POM/4.0.0 http://maven.apache.org/xsd/maven-4.0.0.xsd">
    <parent>
        <artifactId>spring-cloud-parent</artifactId>
        <groupId>com.fpa</groupId>
        <version>1.0-SNAPSHOT</version>
    </parent>
    <modelVersion>4.0.0</modelVersion>

    <artifactId>sleuth-zipkin-consumer</artifactId>


    <dependencies>
        <!--spring boot web-->
        <dependency>
            <groupId>org.springframework.boot</groupId>
            <artifactId>spring-boot-starter-web</artifactId>
        </dependency>
        <!-- eureka-client -->
        <dependency>
            <groupId>org.springframework.cloud</groupId>
            <artifactId>spring-cloud-starter-netflix-eureka-client</artifactId>
        </dependency>
        <!-- hystrix -->
        <dependency>
            <groupId>org.springframework.cloud</groupId>
            <artifactId>spring-cloud-starter-netflix-hystrix</artifactId>
        </dependency>
        <!-- hystrix-dashboard -->
        <dependency>
            <groupId>org.springframework.cloud</groupId>
            <artifactId>spring-cloud-starter-netflix-hystrix-dashboard</artifactId>
        </dependency>
        <!-- actuator -->
        <dependency>
            <groupId>org.springframework.boot</groupId>
            <artifactId>spring-boot-starter-actuator</artifactId>
        </dependency>
        <!-- config -->
        <dependency>
            <groupId>org.springframework.cloud</groupId>
            <artifactId>spring-cloud-starter-config</artifactId>
        </dependency>
        <!-- sleuth zipkin -->
        <dependency>
            <groupId>org.springframework.cloud</groupId>
            <artifactId>spring-cloud-starter-zipkin</artifactId>
        </dependency>
        <!-- bus -->
        <dependency>
            <groupId>org.springframework.cloud</groupId>
            <artifactId>spring-cloud-starter-bus-amqp</artifactId>
        </dependency>
        <!-- feign -->
        <dependency>
            <groupId>org.springframework.cloud</groupId>
            <artifactId>spring-cloud-starter-openfeign</artifactId>
        </dependency>
    </dependencies>
</project>
给启动类改个名字叫SleuthConsumerApp
由于应用名变化了,在eureka注册的服务名字也变了,因此我们还需要修改我们用OpenFeign时定义的FeignClient接口,把@FeignClient注解里填的服务名改掉
package com.fpa.consumer.interfaces;

import com.fpa.consumer.bean.Goods;
import com.fpa.consumer.config.FeignLogConfig;
import com.fpa.consumer.interfaces.fallbackImpl.GoodsFeignClientFallback;
import org.springframework.cloud.openfeign.FeignClient;
import org.springframework.web.bind.annotation.GetMapping;
import org.springframework.web.bind.annotation.PathVariable;

@FeignClient(value = "sleuth-zipkin-provider-app", configuration = FeignLogConfig.class, fallback = GoodsFeignClientFallback.class)
public interface GoodsFeignClient {

    @GetMapping("/goods/{id}")
    public Goods findOne(@PathVariable("id") int id);

}
另外由于复制的yml,我们需要修改应用名和端口
spring:
  profiles:
    active: dev
  application:
    name: sleuth-zipkin-consumer-app
logging:
  level:
    org.springframework.cloud.bus: debug

# bus的配置项
management:
  endpoints:
    web:
      exposure:
        include: 'bus-refresh'
---
# 开发环境
# 配置config-server地址
# 配置获得配置文件的名称等信息
spring:
  profiles: dev
  cloud:
    config:
      # 配置config server 地址
      # 改为使用注册中心获取地址
      #      uri: http://localhost:8888
      #配置文件的名称
      name: config
      label: master # 分支名
      profile: dev # profile指定后会拼接成 config-dev.yml
      # 启用通过注册中心获取
      discovery:
        enabled: true
        service-id: config-server # 服务的应用名
  rabbitmq:
    host: 192.168.0.105
    port: 5672
    username: admin
    password: admin
    virtual-host: /
  zipkin:
    base-url: http://192.168.0.105:9411/ # 设置zipkin的服务路径
    sender:
      # 可选发送器 web rabbit kafka
      type: web
    # 关闭服务发现
    discovery-client-enabled: false
  sleuth:
    sampler:
      probability: 1 # 1代表100%,0.1代表 10%可能性,我们这里测试采用1
    web:
      client:
        enabled: true

server:
  port: 8001

eureka:
  instance:
    hostname: localhost
  client:
    service-url:
      defaultZone: http://localhost:8761/eureka #eureka服务器地址

---
# 生产环境
# 配置config-server地址
# 配置获得配置文件的名称等信息
spring:
  profiles: prd
  cloud:
    config:
      # 配置config server 地址
      # 改为使用注册中心获取地址
      #      uri: http://localhost:8888
      #配置文件的名称
      name: config
      label: master # 分支名
      profile: prd # profile指定后会拼接成 config-dev.yml
      # 启用通过注册中心获取
      discovery:
        enabled: true
        service-id: config-server # 服务的应用名
  rabbitmq:
    host: 192.168.0.105
    port: 5672
    username: admin
    password: admin
    virtual-host: /

server:
  port: 8000
eureka:
  instance:
    hostname: localhost
  client:
    service-url:
      defaultZone: http://localhost:8761/eureka #eureka服务器地址
我们访问消费者的接口http://localhost:8001/goods/findGoodsById/2 也能正确显示出返回的数据,证明我们目前的consumer成功调用了provider返回了数据。
我们前往zipkin控制台查询链路,我们可以看到第一次访问的时候由于服务发现、OpenFeign等组件初始化耗费掉了七百毫秒,但是第二次再访问的时候整个只用了12毫秒。

我们点开第二条记录的show可以发现,整个请求12毫秒,接口提供者provider那边耗费掉了9毫秒的样子,这样我们即可对一次请求整个链路做一个分析,看是哪个服务慢。

也可以点开显示全部ANNOTATIONS,显示详细的信息

本笔记作者humorchen,博客https://blog.csdn.net/HumorChen99
本地写的csdn导入时可能存在导入问题,末尾不对劲,如果发现那里缺了不对请评论,我修正
本文来自博客园,作者:HumorChen99,转载请注明原文链接:https://www.cnblogs.com/HumorChen/p/18039409

 浙公网安备 33010602011771号