Android - 学习 Fragment
 学习 Fragment 的概念、创建 Fragment、使用 FragmentManager、使用 FragmentTransaction。基于以上基础,实现一个 TabBar,一个是通过 FragmentManager 和 FragmentTransaction 来替换视图上的 fragment,另一个是通过 ViewPager2 来实现 TabBar。
Fragment 概念
把 Activity 中的一段 UI 和逻辑封装到一个 Fragment 中,实现可拔插,减少对 Activity 代码的侵入。
Fragment 定义和管理自己的布局,具有自己的生命周期,并且可以处理自己的输入事件。Fragment 不能独立存在,而是必须由 Activity 或另一个 Fragment 托管。
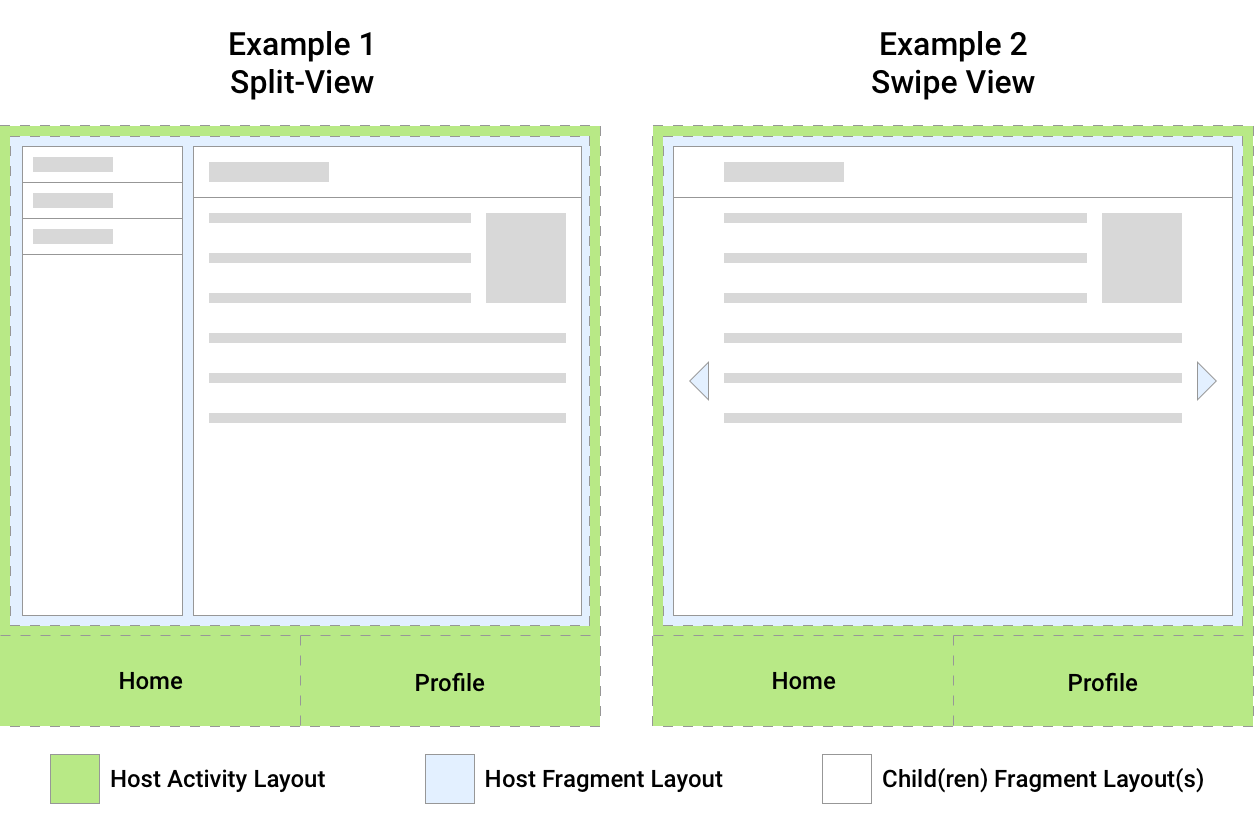
图中 Example1,一共有三个 Fragment,蓝色的 Fragment 嵌套了两个子 Fragment。Example2 是一个 swipe 视图,蓝色的 Fragment 有两个以上的 Fragment。
Fragment 应该管理它自己的界面所需的逻辑,避免让一个 Fragment 依赖于另一个 Fragment 或从一个 Fragment 操控另一个 Fragment。
- 模块:可以在同一 Activity 或多个 Activity 中使用同一 Fragment;或者把一个 Activity 划分为多个 Fragment 进行布局。
- 嵌套:Fragment 可以作为另一个 Fragment 的父级。
创建 Fragment
FragmentContainerView
创建一个 Fragment XML 视图 fragment_index.xml:
<?xml version="1.0" encoding="utf-8"?>
<FrameLayout xmlns:android="http://schemas.android.com/apk/res/android"
  android:layout_width="match_parent"
  android:layout_height="match_parent">

  <TextView
    android:layout_width="match_parent"
    android:layout_height="wrap_content"
    android:text="Index Fragment"
    android:textSize="30sp" />

</FrameLayout>
创建一个 Fragment 实现类,IndexFragment:
class IndexFragment : Fragment(R.layout.fragment_index) {
}
在 activity_main.xml 添加一个 FragmentContainerView:
<?xml version="1.0" encoding="utf-8"?>
<androidx.constraintlayout.widget.ConstraintLayout xmlns:android="http://schemas.android.com/apk/res/android"
  xmlns:app="http://schemas.android.com/apk/res-auto"
  xmlns:tools="http://schemas.android.com/tools"
  android:layout_width="match_parent"
  android:layout_height="match_parent"
  android:background="#FFC107"
  tools:context=".MainActivity">

  <androidx.fragment.app.FragmentContainerView
    android:id="@+id/fragment_container_view"
    android:name="com.example.chap04.IndexFragment"
    android:layout_width="match_parent"
    android:layout_height="200dp"
    android:layout_marginBottom="531dp"
    android:background="#009688"
    app:layout_constraintBottom_toBottomOf="parent"
    app:layout_constraintEnd_toEndOf="parent"
    app:layout_constraintStart_toStartOf="parent"
    app:layout_constraintTop_toTopOf="parent" />

</androidx.constraintlayout.widget.ConstraintLayout>
属性 name 添加 IndexFragment,启动 Activity 时会把 fragment_index.xml 视图插入到 FragmentContainerView 中。
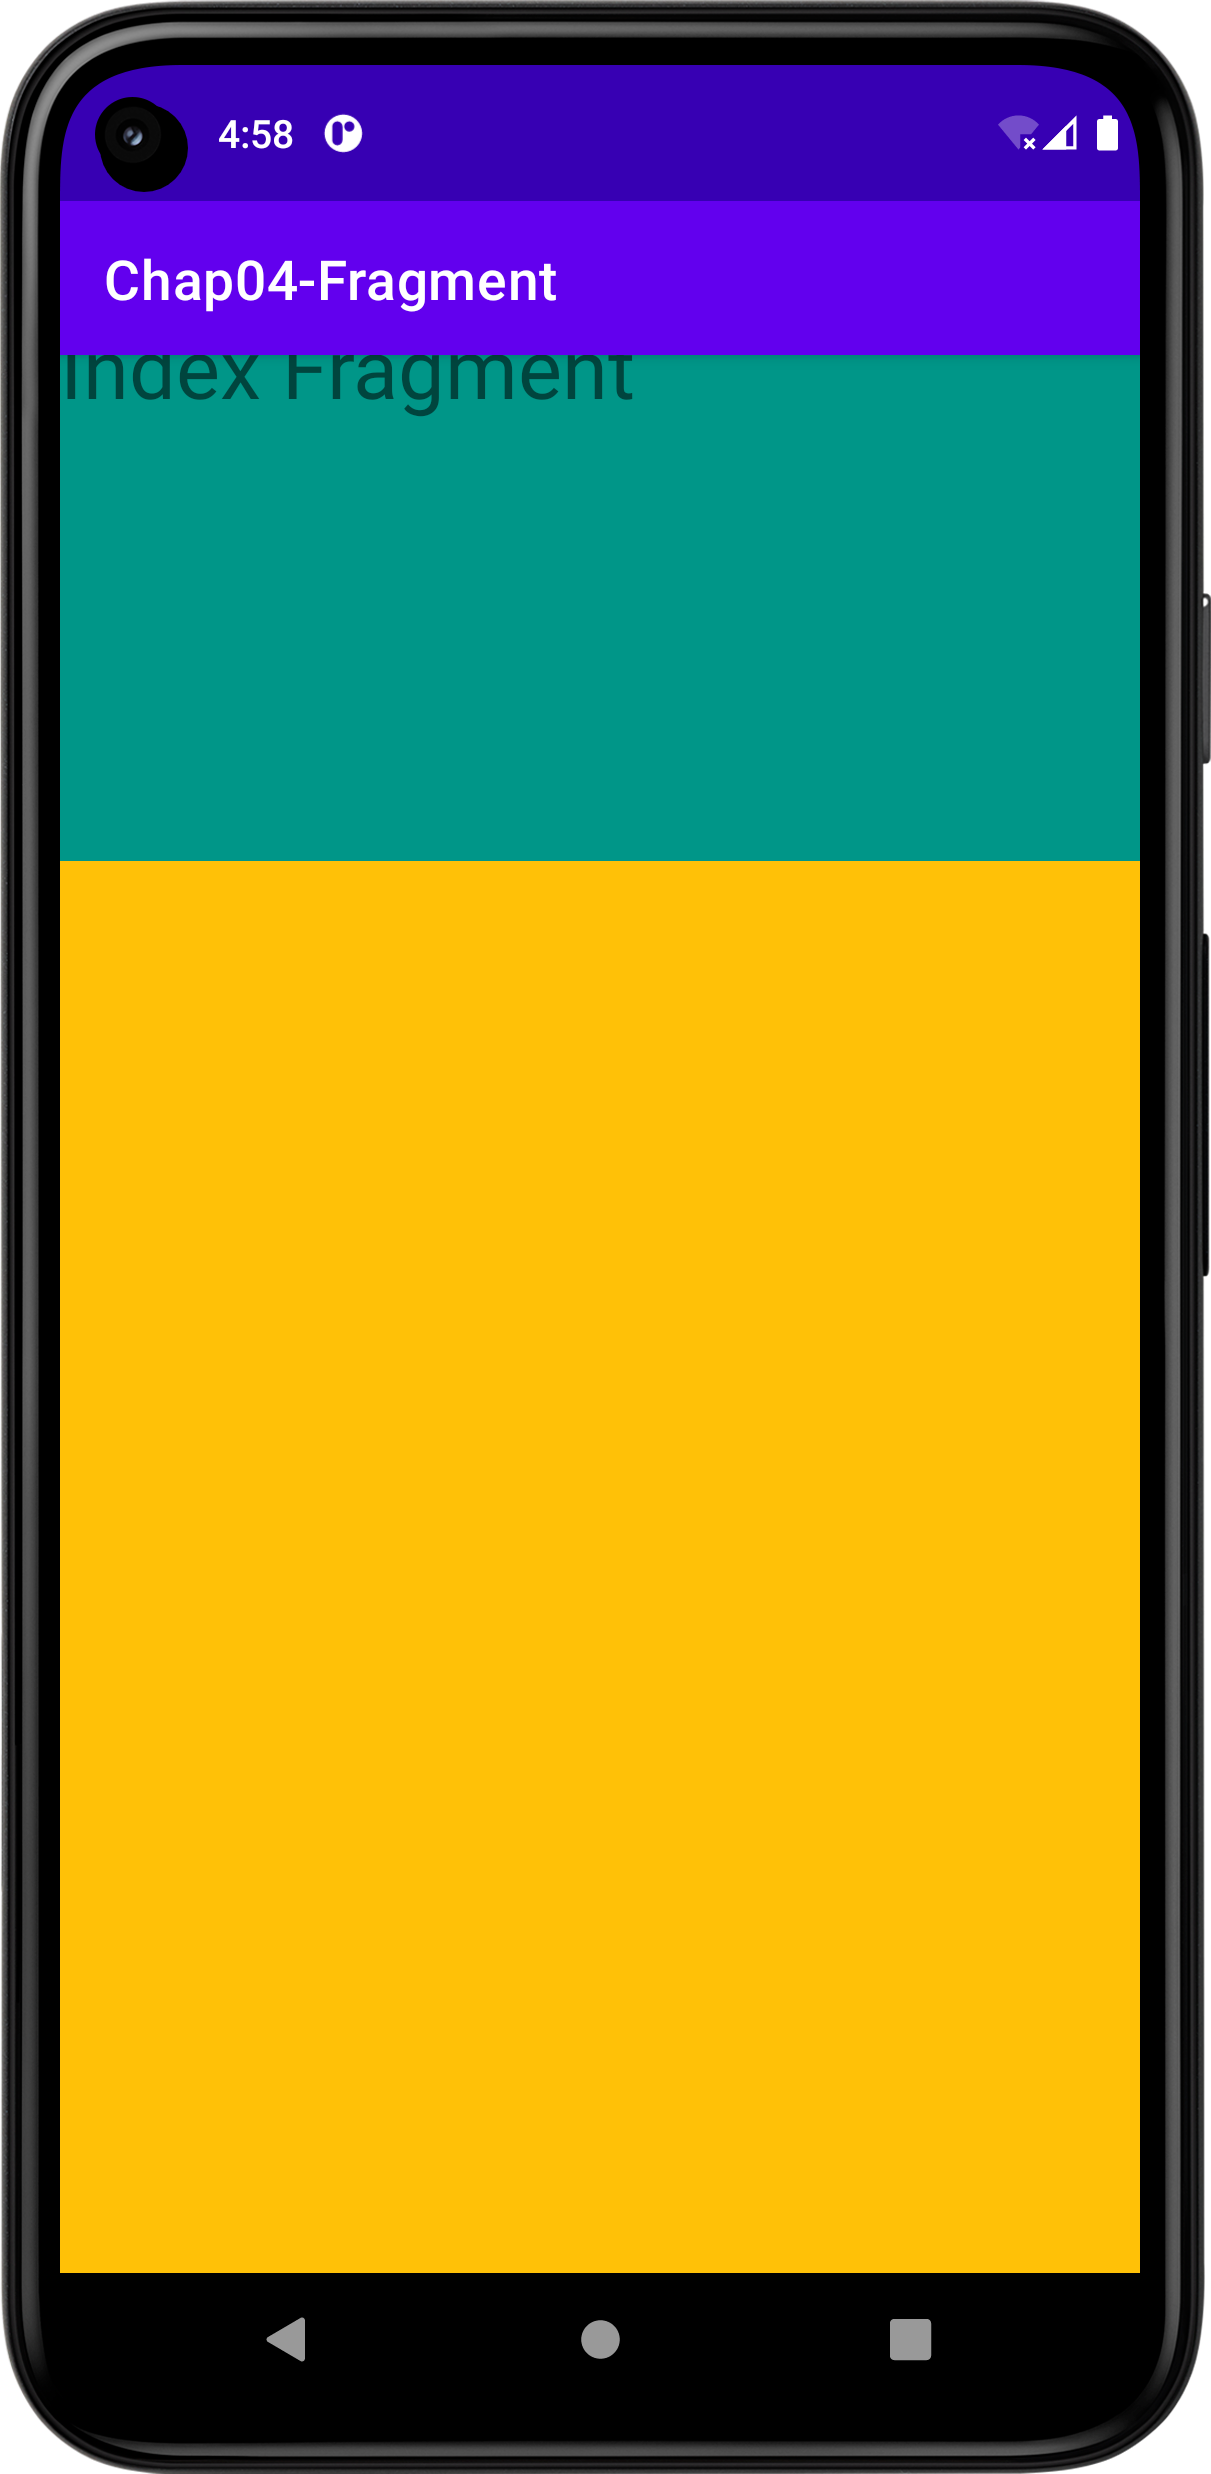
通过上图得知,绿色区域是 IndexFragment,橙色区域是 Activity,我们通过 Fragment 实现了划分 Activity 布局的管理,接下来将通过 Kotlin 代码实现对 Fragment 的替换、删除、增加操作,进一步了解 Fragment。
FragmentManager
FragmentManager 可以替换、删除、增加 Fragment。在 activity_main.xml 中,删除 FragmentContainerView 的 name 属性,而是通过 FragmentManager 把 Fragment 的视图插入到 Activity 中:
<?xml version="1.0" encoding="utf-8"?>
<androidx.constraintlayout.widget.ConstraintLayout xmlns:android="http://schemas.android.com/apk/res/android"
  xmlns:app="http://schemas.android.com/apk/res-auto"
  xmlns:tools="http://schemas.android.com/tools"
  android:layout_width="match_parent"
  android:layout_height="match_parent"
  android:background="#FFC107"
  tools:context=".MainActivity">

  <androidx.fragment.app.FragmentContainerView
    android:id="@+id/fragment_container_view"
    android:layout_width="match_parent"
    android:layout_height="200dp"
    android:layout_marginBottom="531dp"
    android:background="#009688"
    app:layout_constraintBottom_toBottomOf="parent"
    app:layout_constraintEnd_toEndOf="parent"
    app:layout_constraintStart_toStartOf="parent"
    app:layout_constraintTop_toTopOf="parent" />

</androidx.constraintlayout.widget.ConstraintLayout>
你需要获取 FragmentManager,并调用 beginTransaction() 得到 FragmentTransaction。调用 add() 添加 Fragment 到指定 View 中,这里是资源 ID 为 fragment_container_view 的 View(也就是 FragmentContainerView)。最后,调用 commit() 提交 FragmentTransaction。
class MainActivity : AppCompatActivity(R.layout.activity_main) {

  override fun onCreate(savedInstanceState: Bundle?) {
    super.onCreate(savedInstanceState)

    supportFragmentManager
      .beginTransaction()
      .setReorderingAllowed(true)
      .add(R.id.fragment_container_view, IndexFragment(), null)
      .commit()
  }

}
当 FragmentManager 执行 FragmentTransaction 时,特别是堆栈上运行并运行动画和转换时(Fragment 切换其他 Fragment 时执行的动画效果),应该总是使用 setReorderingAllowed(true)。调用这个方法可确保如果同时执行多个 FragmentTransaction 时,任何一个 Fragment 都不会经历生命周期更改或执行其动画或转换。了解更多关于 setReorderingAllowed 的信息,请看官方文档的 Fragment Transaction。简而言之,调用这个函数可以提升性能,避免过多更改堆栈上其他 Fragment 的生命周期。
Bundle 传递数据
Fragment 可以接收从 Activity 传递过来的 Bundle 类型数据。在 add() 方法被调用时传入参数,Fragment 通过 requireArguments() 就可以获取到。
MainActivity.kt:
class MainActivity : AppCompatActivity(R.layout.activity_main) {

  override fun onCreate(savedInstanceState: Bundle?) {
    super.onCreate(savedInstanceState)

    if (savedInstanceState == null) {
      val bundle = Bundle()
      bundle.putInt("param", 20);
      supportFragmentManager
        .beginTransaction()
        .setReorderingAllowed(true)
        .add(R.id.fragment_container_view, IndexFragment().javaClass, bundle, null)
        .commit()
    }
  }

}
IndexFragment.kt:
class IndexFragment : Fragment(R.layout.fragment_index) {

  override fun onViewCreated(view: View, savedInstanceState: Bundle?) {
    val int = requireArguments().getInt("param")
    Log.d("Test", int.toString())
  }

}
接下来对if (savedInstanceState == null)进行一个解释。直接通过现象来观察一个问题:
1️⃣去掉这一个判断,来看看会发生什么:

我切换了黑夜/白昼模式,Logcat 中就打印了多次,说明我们的 onCreate 函数多次被调用,同时也多次重复添加 Fragment。
2️⃣加上这一个判断,再来看看会发生什么:
屏幕反转、屏幕黑夜/白昼模式切换都会触发onCreate(),而 savedInstanceState 能记录 Activity 的变化,当 Activity 初始时它才是 null。所以要加上一个判断,Activity 第一次创建时才增加 Fragment 到视图中,避免重复添加 Fragment。
实现 TabBar
前面已经简单地了解了 FragmentManager 和 FragmentTransaction。现在通过 Tabbar 案例来实现 Fragment 的切换。
activity_main.xml
<?xml version="1.0" encoding="utf-8"?>
<androidx.constraintlayout.widget.ConstraintLayout xmlns:android="http://schemas.android.com/apk/res/android"
  xmlns:app="http://schemas.android.com/apk/res-auto"
  xmlns:tools="http://schemas.android.com/tools"
  android:layout_width="match_parent"
  android:layout_height="match_parent"
  tools:context=".MainActivity">

  <androidx.fragment.app.FragmentContainerView
    android:id="@+id/fragment_container_view"
    android:name="com.example.chap04.IndexFragment"
    android:layout_width="match_parent"
    android:layout_height="0dp"
    app:layout_constraintBottom_toTopOf="@+id/tabbar"
    app:layout_constraintEnd_toEndOf="parent"
    app:layout_constraintStart_toStartOf="parent"
    app:layout_constraintTop_toTopOf="parent" />

  <LinearLayout
    android:id="@+id/tabbar"
    android:layout_width="0dp"
    android:layout_height="50dp"
    android:gravity="center_horizontal|center_vertical"
    android:orientation="horizontal"
    app:layout_constraintBottom_toBottomOf="parent"
    app:layout_constraintEnd_toEndOf="parent"
    app:layout_constraintStart_toStartOf="parent">

    <TextView
      android:id="@+id/nav_index"
      android:layout_width="wrap_content"
      android:layout_height="match_parent"
      android:layout_weight="1"
      android:gravity="center"
      android:text="首页" />

    <TextView
      android:id="@+id/nav_dynamic"
      android:layout_width="wrap_content"
      android:layout_height="match_parent"
      android:layout_weight="1"
      android:gravity="center"
      android:text="动态" />

    <TextView
      android:id="@+id/nav_person"
      android:layout_width="wrap_content"
      android:layout_height="match_parent"
      android:layout_weight="1"
      android:gravity="center"
      android:text="我的" />
  </LinearLayout>

</androidx.constraintlayout.widget.ConstraintLayout>
MainActivity.kt
class MainActivity : AppCompatActivity(R.layout.activity_main) {

  override fun onCreate(savedInstanceState: Bundle?) {
    super.onCreate(savedInstanceState)

    if (savedInstanceState == null) {
      findViewById<TextView>(R.id.nav_index).setOnClickListener {
        supportFragmentManager
          .beginTransaction()
          .setReorderingAllowed(true)
          .replace(R.id.fragment_container_view, IndexFragment().javaClass, null)
          .commit()
      }

      findViewById<TextView>(R.id.nav_dynamic).setOnClickListener {
        supportFragmentManager
          .beginTransaction()
          .setReorderingAllowed(true)
          .replace(R.id.fragment_container_view, DynamicFragment().javaClass, null)
          .commit()
      }

      findViewById<TextView>(R.id.nav_person).setOnClickListener {
        supportFragmentManager
          .beginTransaction()
          .setReorderingAllowed(true)
          .replace(R.id.fragment_container_view, PersonFragment().javaClass, null)
          .commit()
      }
    }

  }

}
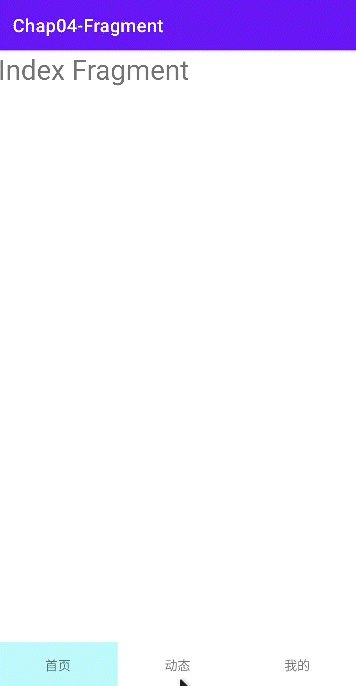
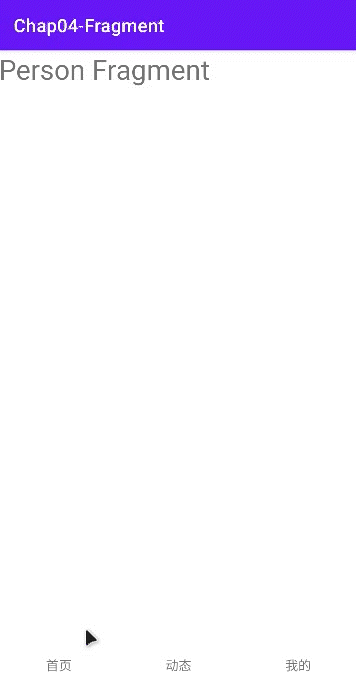
实现效果
这种 TabBar 的切换方式是通过 FragmentManager 和 FragmentTransaction 替换视图中的 FragmentContainerView,还有一种是不借助这两个类实现页面切换,通过 ViewPager2 来实现页面,而且也是实现页面滑动的最简单方式。
借助 ViewPager2 实现 TabBar
activity_main.xml
<?xml version="1.0" encoding="utf-8"?>
<androidx.constraintlayout.widget.ConstraintLayout xmlns:android="http://schemas.android.com/apk/res/android"
  xmlns:app="http://schemas.android.com/apk/res-auto"
  xmlns:tools="http://schemas.android.com/tools"
  android:layout_width="match_parent"
  android:layout_height="match_parent"
  tools:context=".MainActivity">

  <androidx.viewpager2.widget.ViewPager2
    android:id="@+id/view_pager2"
    android:layout_width="match_parent"
    android:layout_height="0dp"
    app:layout_constraintBottom_toTopOf="@+id/tabbar"
    app:layout_constraintEnd_toEndOf="parent"
    app:layout_constraintStart_toStartOf="parent"
    app:layout_constraintTop_toTopOf="parent" />

  <LinearLayout
    android:id="@+id/tabbar"
    android:layout_width="0dp"
    android:layout_height="50dp"
    android:gravity="center_horizontal|center_vertical"
    android:orientation="horizontal"
    app:layout_constraintBottom_toBottomOf="parent"
    app:layout_constraintEnd_toEndOf="parent"
    app:layout_constraintStart_toStartOf="parent">

    <TextView
      android:id="@+id/nav_index"
      android:layout_width="wrap_content"
      android:layout_height="match_parent"
      android:layout_weight="1"
      android:gravity="center"
      android:text="首页" />

    <TextView
      android:id="@+id/nav_dynamic"
      android:layout_width="wrap_content"
      android:layout_height="match_parent"
      android:layout_weight="1"
      android:gravity="center"
      android:text="动态" />

    <TextView
      android:id="@+id/nav_person"
      android:layout_width="wrap_content"
      android:layout_height="match_parent"
      android:layout_weight="1"
      android:gravity="center"
      android:text="我的" />
  </LinearLayout>

</androidx.constraintlayout.widget.ConstraintLayout>
页面和上面的没多大区别,只是把 FragmentContainerView 替换成了 ViewPager2。
ViewPager2Adapter.kt
class ViewPage2Adapter(fragmentActivity: FragmentActivity, fragments: List<Fragment>) : FragmentStateAdapter(fragmentActivity) {

  private var fragments: List<Fragment>

  init {
    this.fragments = fragments
  }

  override fun getItemCount(): Int {
    return fragments.size
  }

  override fun createFragment(position: Int): Fragment {
    return fragments[position]
  }

}
MainActivity.kt
class MainActivity : AppCompatActivity(R.layout.activity_main) {

  override fun onCreate(savedInstanceState: Bundle?) {
    super.onCreate(savedInstanceState)

    if (savedInstanceState == null) {
      val pager = findViewById<ViewPager2>(R.id.view_pager2)
      val navBars = listOf<TextView>(findViewById(R.id.nav_index), findViewById(R.id.nav_dynamic), findViewById(R.id.nav_person))
      val fragments = listOf(IndexFragment(), DynamicFragment(), PersonFragment())
      pager.adapter = ViewPage2Adapter(this, fragments)

      var lastPosition = 0
      pager.registerOnPageChangeCallback(object : ViewPager2.OnPageChangeCallback() {
        override fun onPageSelected(currPosition: Int) {
          navBars[lastPosition].setBackgroundResource(R.color.white)
          navBars[currPosition].setBackgroundResource(R.color.nav_selected)
          lastPosition = currPosition
        }
      })

      navBars[0].setOnClickListener {
        pager.currentItem = 0
      }

      navBars[1].setOnClickListener {
        pager.currentItem = 1
      }

      navBars[2].setOnClickListener {
        pager.currentItem = 2
      }
    }
  }

}
切换 ViewPager2 的项时也需要改变底部导航栏的背景颜色,所以需要给 ViewPager2 注册一个监听器(registerOnPageChangeCallback),动态地得到 position,从而实现鼠标滑动时也改变底部导航栏对应的背景颜色。
实现效果