Chrome 扩展如何获取响应体
一种常见也比较实用的方式是用 xhr:
function getData(url,callback){
	// 创建对象
	var httpRequest = new XMLHttpRequest();
	// 设置请求参数,true 设置为异步
	httpRequest.open('GET', url, true);
	// 设置为包含 cookie
	httpRequest.withCredentials = true;
	httpRequest.onreadystatechange = function () {
		// 获得响应且响应 OK
		if (httpRequest.readyState==4 && httpRequest.status==200){
			// 获取到 json 字符串
			let data = httpRequest.responseText;
			callback(data);
		}
	};
	// 发送请求
	httpRequest.send();
}
传入 url 调用上面的函数则可在回调函数中得到响应体(json)。
用这种方法的前提是你要知道目标 url。
另一种不那么常用,也不那么好用的方式是:
将下面这个函数放到 background.js 中。
function getResponse(){
	var currentTab;
	var version = "1.0";
	chrome.tabs.query( //get current Tab
		{
			currentWindow: true,
			active: true
		},
		function(tabArray) {
			currentTab = tabArray[0];
			chrome.debugger.attach({ //debug at current tab
				tabId: currentTab.id
			}, version, onAttach.bind(null, currentTab.id));
		}
	)


	function onAttach(tabId) {
		chrome.debugger.sendCommand({ //first enable the Network
			tabId: tabId
		}, "Network.enable");
		chrome.debugger.onEvent.addListener(function(debuggeeId, message, params){
				if (currentTab.id != debuggeeId.tabId) {
					alert("currentTab.id != debuggeeId.tabId")
					return;
				}

				if (message == "Network.responseReceived") {
					chrome.debugger.sendCommand({
						tabId: debuggeeId.tabId
					}, "Network.getResponseBody", {
						"requestId": params.requestId
					}, function(response) {
						console.log("****************")
						console.log(JSON.stringify(response))
					});
				}
		});
	}
}
让 popup.js 调用函数就可以将响应体打印到背景页的控制台上:
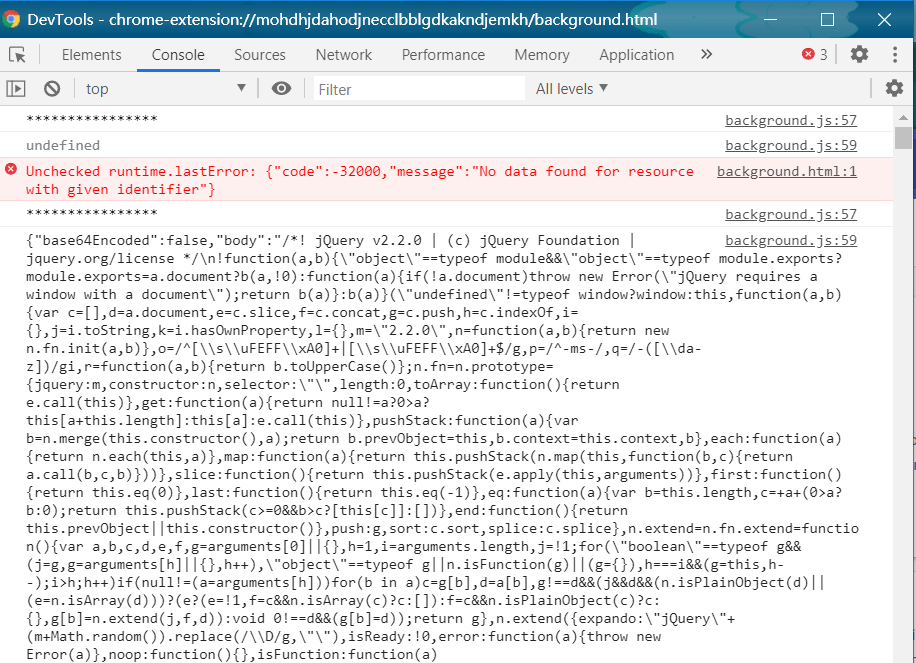 |
这种方式最终会在浏览器上部弹出一个提示窗口,比较难看,似乎有能够去除的方法,但没有深究,想去除可以的话可以查看 Chrome 扩展开发者文档中的 devtool API,里面应该提供了关闭提示的方法。
